|
|
Post by lars on Feb 23, 2020 16:39:58 GMT
And they’ve disappeared again:-( ?!?
|
|
|
|
Post by lars on Feb 23, 2020 9:48:14 GMT
And they're back!
|
|
|
|
Post by lars on Feb 22, 2020 13:26:07 GMT
Thanks, Keith I did a check and found out that images were still on Dave’s website, but all threads containing Dave’s pictures on this site seem to lack them. It may be a temporary problem with the image host? |
|
|
|
Post by lars on Feb 22, 2020 11:52:43 GMT
Oops! All images seem to have disappeared? At least, they are not visible in my browser right now.
|
|
|
|
Post by lars on Feb 20, 2020 22:03:33 GMT
Most of the time since the last update has been spent by making a mould for the body and a new radius dish for the top. Here are some shots from the making of the radius dish. It has a radius of about 7.5 m or 25'. 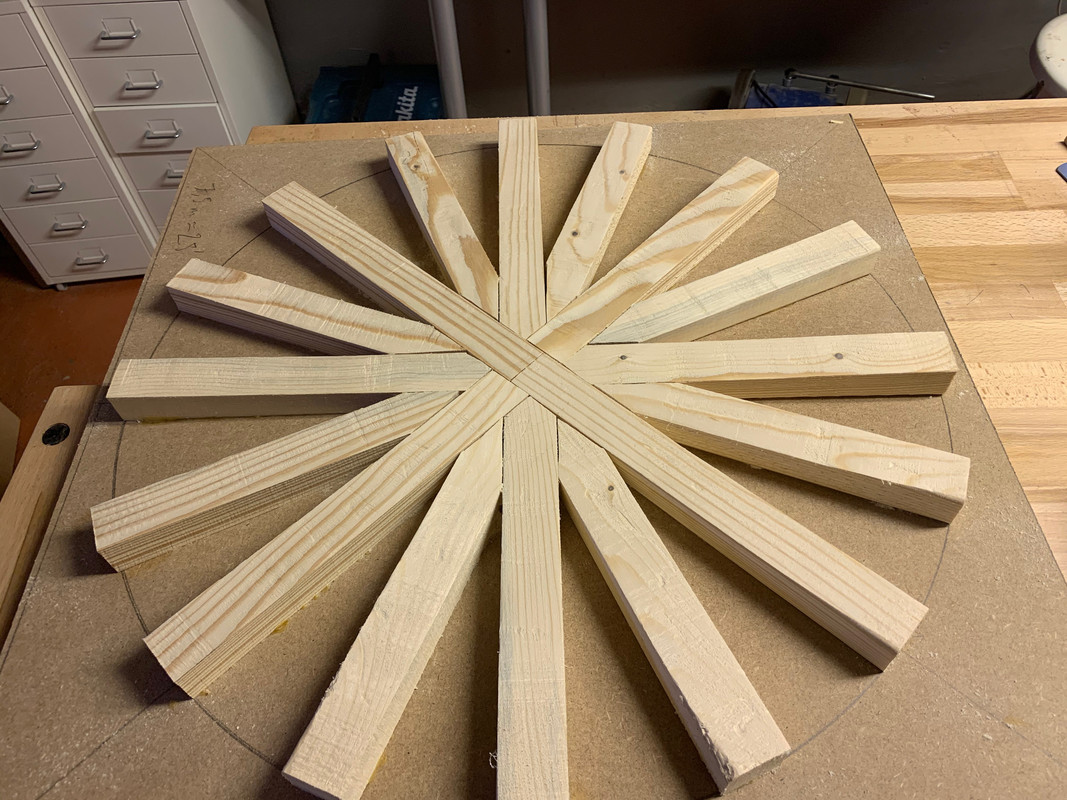 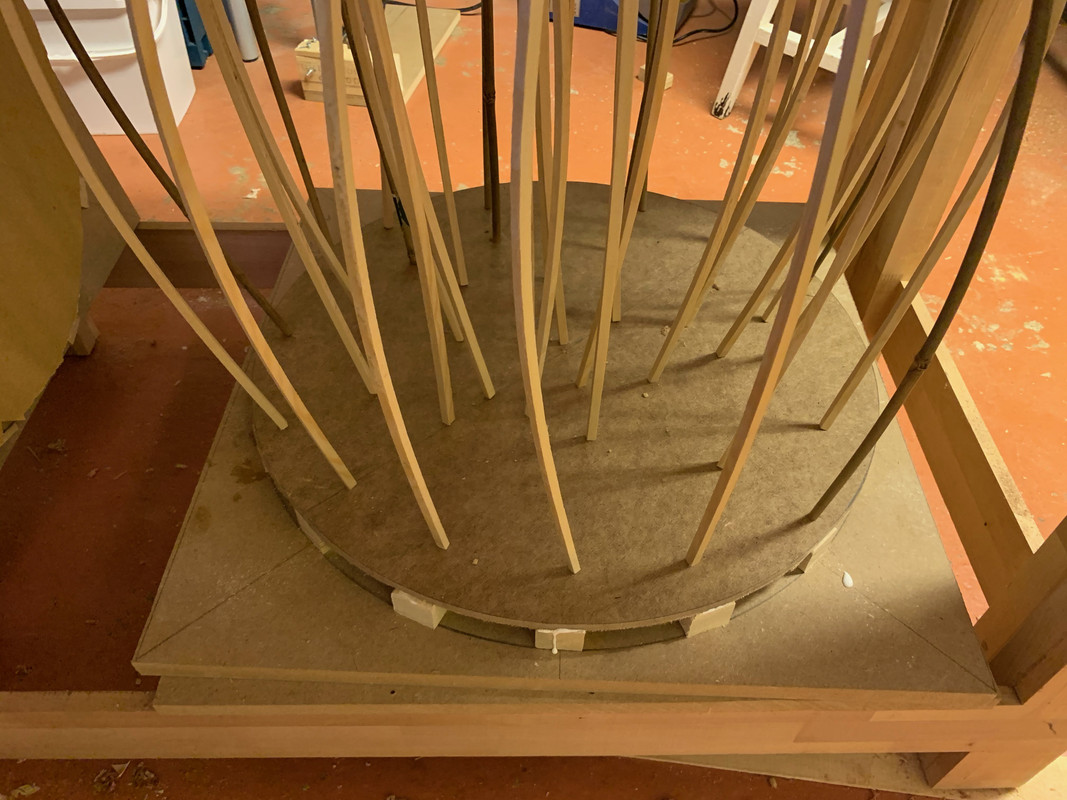 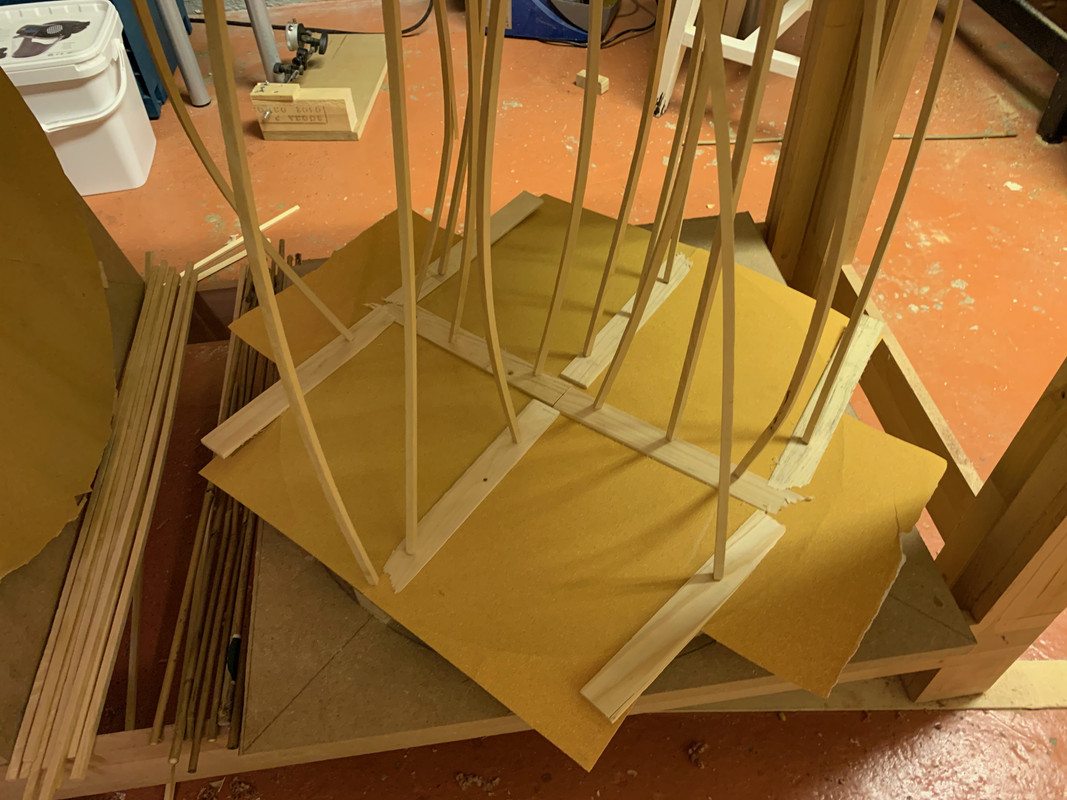 The back plate and the sides were thicknessed with hand planes, the same way as the top. The back was a bliss to plane but the sides were truly pains in the *rse. Too much interlocking wood grain, so there were tear-outs no matter which direction I worked in. A home made high angle plane helped a little with the tear-out, but just a little. 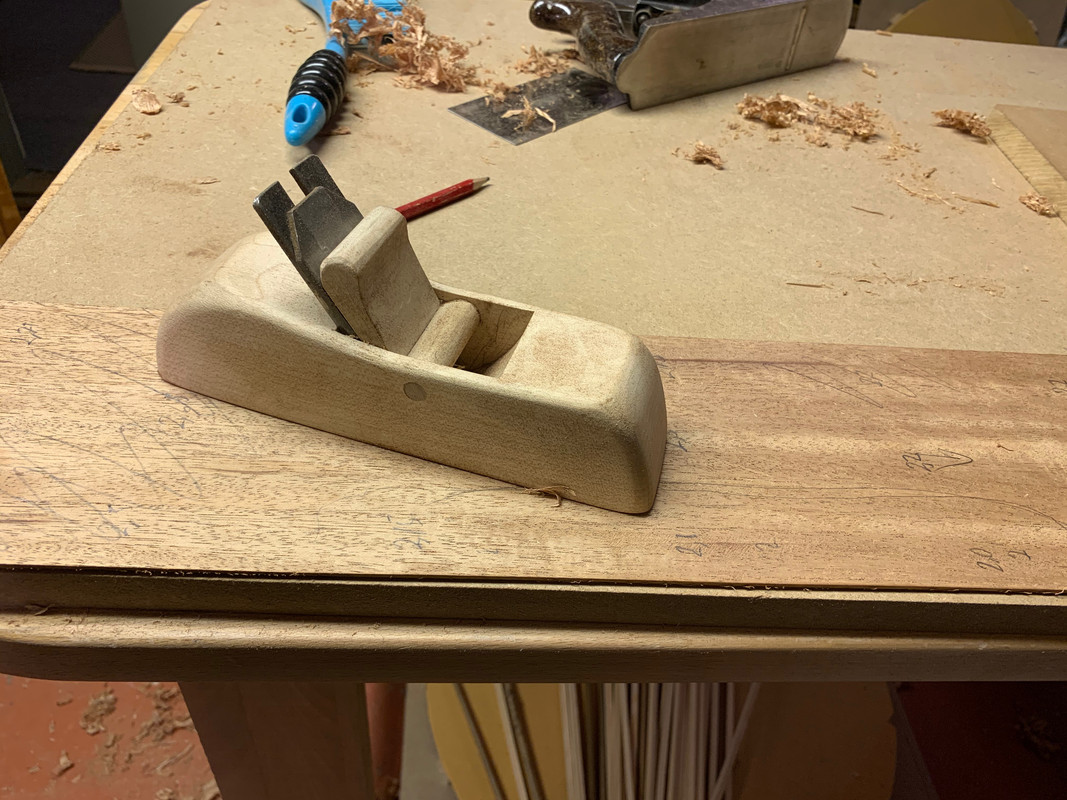 The last thinning was done with a scraper, which dealed with most of the tear-outs. Here are the top and back plates:  The next step was to make the rosette and sound hole. The rosette is made of an African mahogany called Sipu. ![]() 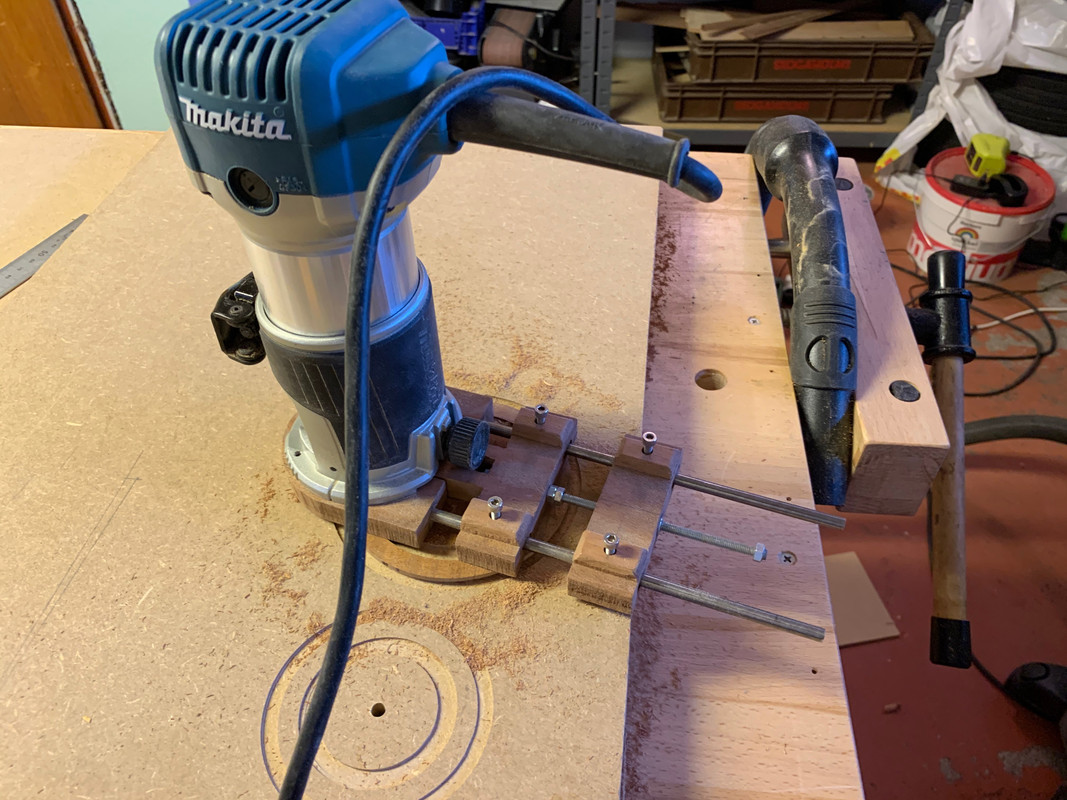 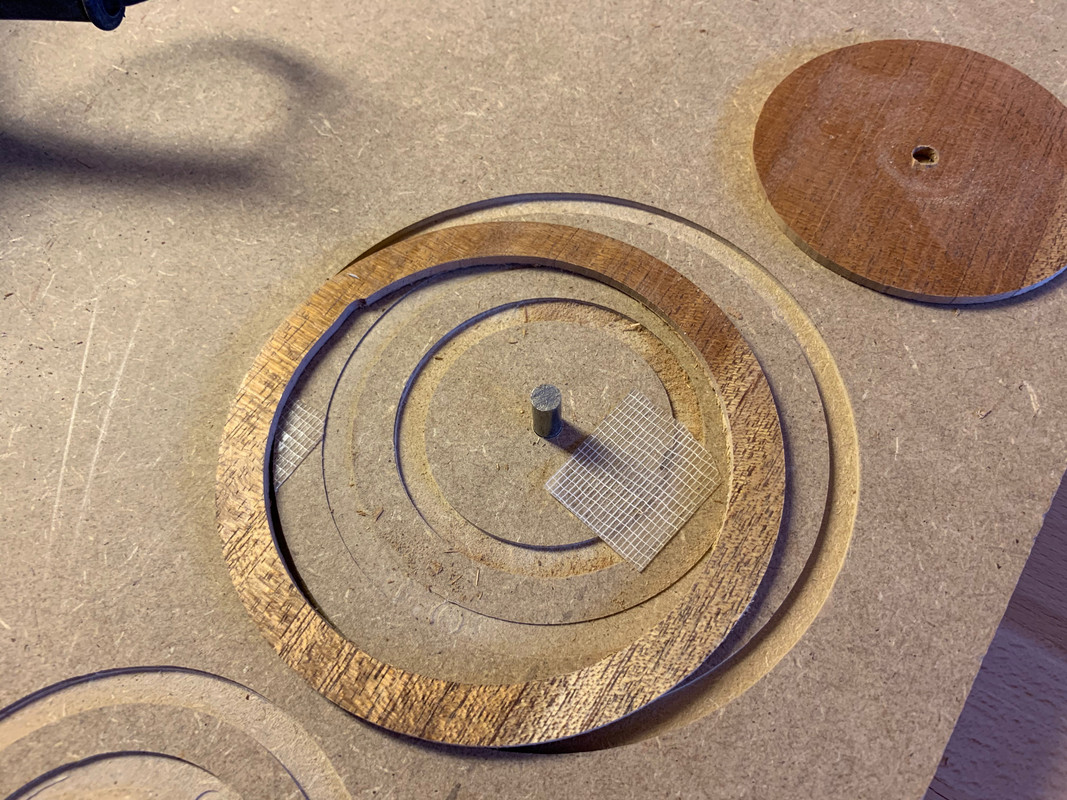 The channel for the rosette is routed in the top: 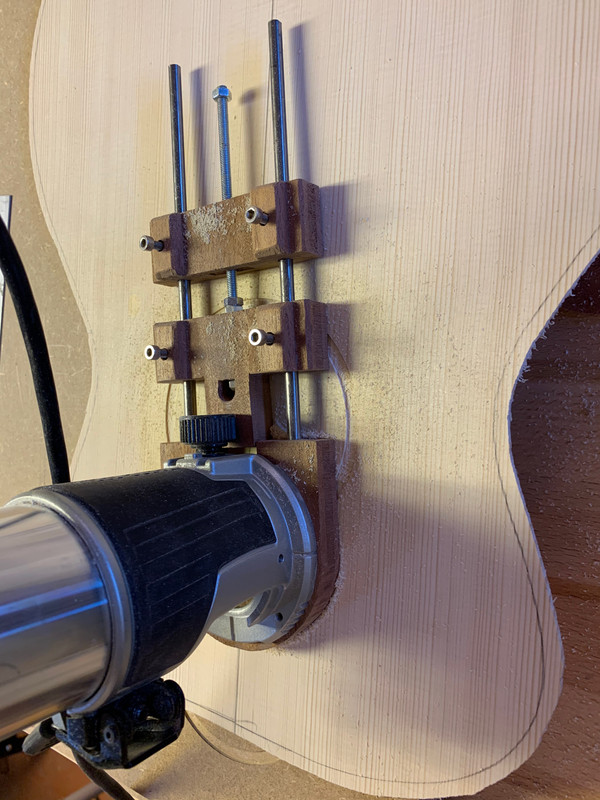 And the rosette is glued with a thin black purfling strip (a strip of black dyed maple veneer). 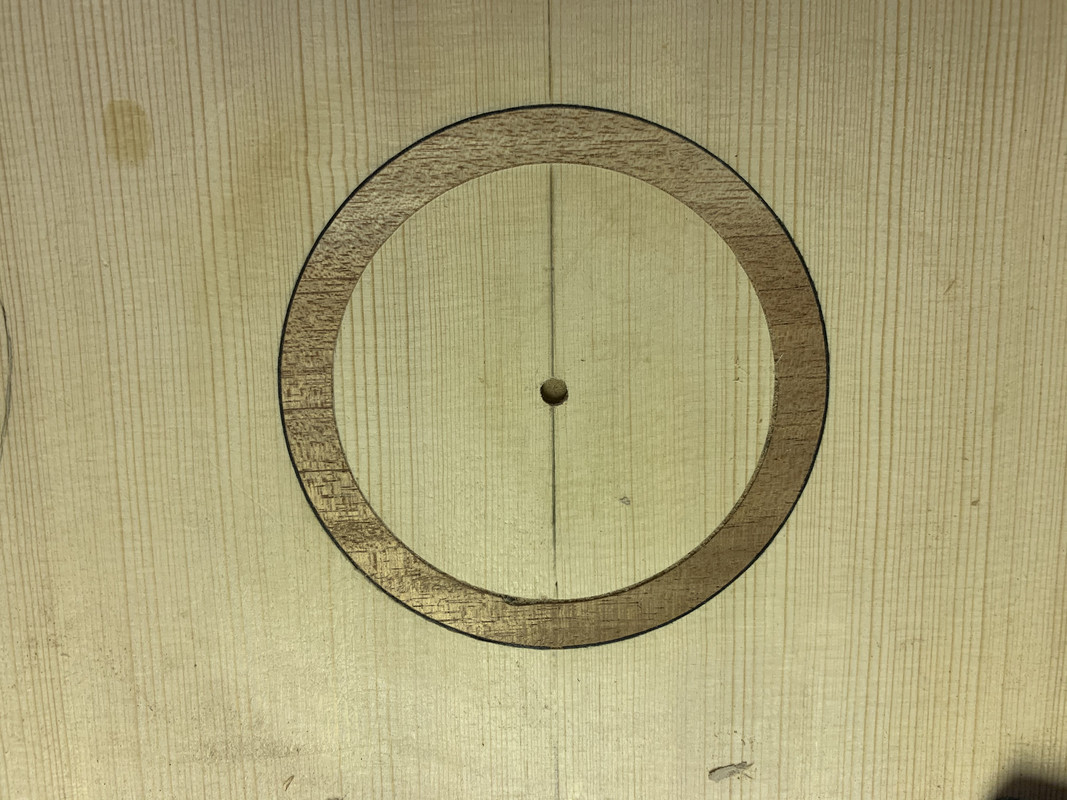 The cross grain back plate of European spruce is glued:  The sound hole is cut with the router: 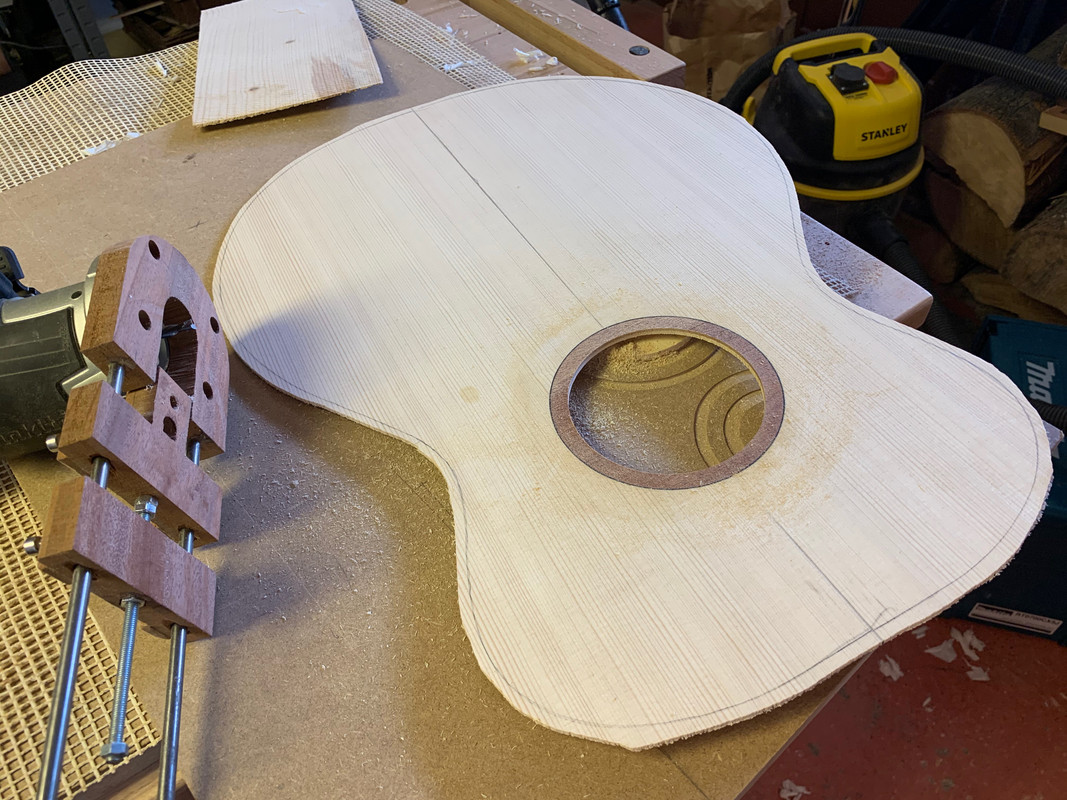 A strip of birch is bent on the hot pipe to bind the sound hole. The finished sound hole looks like this: 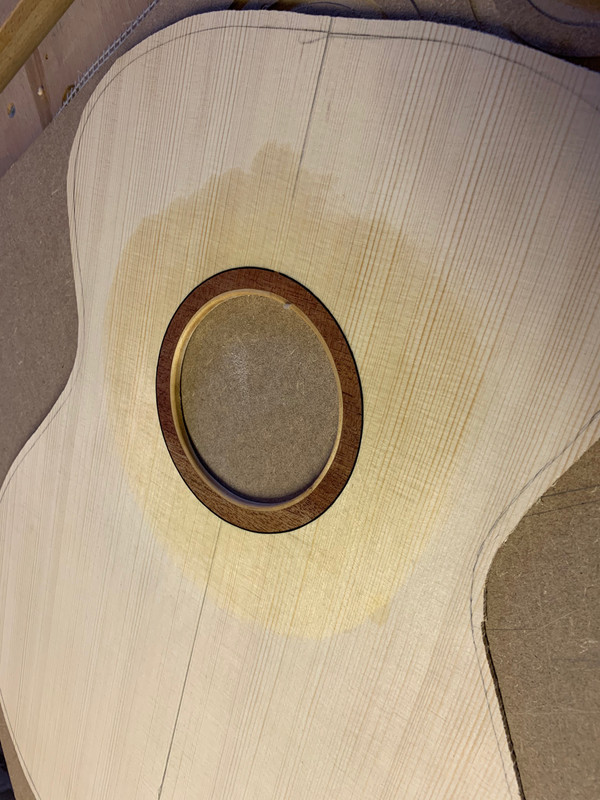 And this is what the top looks like now: 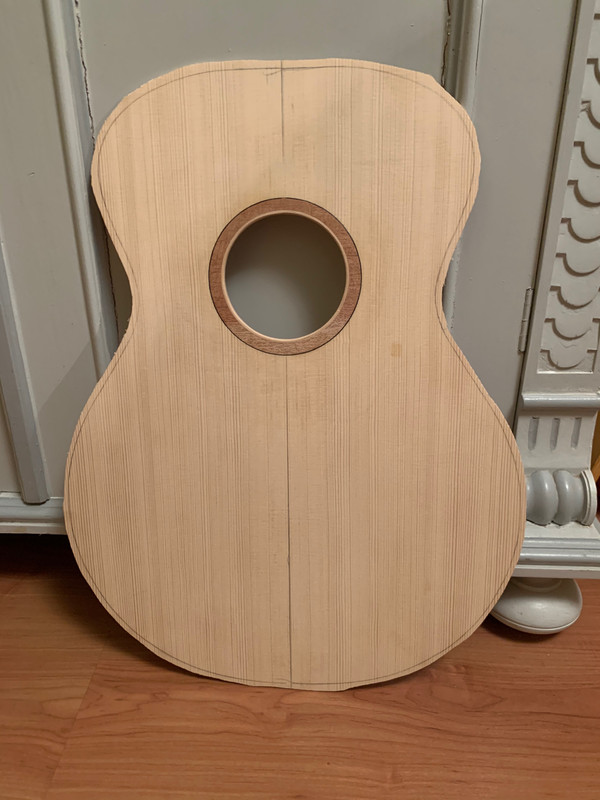 |
|
|
|
Post by lars on Feb 13, 2020 4:01:34 GMT
I'm sorry to hear about your troubles, Colin. And thank you very much for sharing! I really hope it will turn out well. Hrmm... I'm sorry to hear about your troubles, FRANCIS. I don't know how that became Colin? I'm sorry! |
|
|
|
Post by lars on Feb 12, 2020 20:27:44 GMT
The Osmo ExperienceSo I'll describe a little about the finishing work... ...The way to go, I think, is the method that Francis describes in his thread "A parlour for me er, I mean for Andrew" and that was originally developed by luthier Kevin Aram. The difference lies mainly in the preparation of the wood surface where you apply the micro-mesh pads (all the way up to 12 000 grit) to the wood BEFORE applying any oil. I believe this makes a greater difference than if you choose Liberon, Osmo or Tru oil. In my next project I'll try to apply that method, but I'm not certain which oil I'll use. I don't have access to the article by Kevin Aram that Francis refer to, but I've found a pdf by Stewart Adamson, that I think describes the same method and I'll follow those instructions. Hi Lars, I've been struggling with the Liberon Finishing Oil on WR Cedar on Andrews guitar. I did some tests on offcuts from the same WRC board as the soundboard but I'm finding the Liberon to be very patchy. I've applied 7 coats at present but it's still not right. I took the WRC down to 6000 micro mesh in it's bare state. Then applied the LFO with a soft lint free cotton cloth folded to form a pad. Initially in a circular motion rubbing all the time whilst the oil soaked in and began to dry on the surface. Then applied a second coat wiping in line with the grain and left to dry overnight. Once dry I cut back with 0000 steel wool but that (to me) seemed to be the start of the problems. The steel wool was new (also a Liberon product), It came wrapped in square cardboard tube and I uncurled a length of the steel wool (circa 15 cm), wound that into a pad and rubbed with the grain to cut back the finish. I wiped and hovered the surface to get rid of the wool fragments and applied a further coat of LFO, left 24hrs and cut back again and applied a third coat. That's when the patchiness became evident. My initial thought was that I'd applied either an uneven coat of LFO or that I'd applied un even pressure with the steel wool when cutting back and that I'd unwittingly cut right through the finish and opened the WRC's bare timber again. So. Tried again with extra care adding two further coats. No joy. At this point I contacted Colin who kindly gave me his take on LFO application. The major difference being the application of shellac prior to starting to apply oil. At this point I'm about to cut back the oil I have applied and try to start again this time sealing with one or two coats of French polish/shellac... I'm sorry to hear about your troubles, Colin. And thank you very much for sharing! I really hope it will turn out well. |
|
|
|
Post by lars on Feb 12, 2020 20:22:36 GMT
Very interesting account, thanks lars . Before applying any finish, I always sand with 500 silicon carbide, raising the grain with water at least twice. Then I find a final buff with 0000 steel wool helps take any dust out of the grain. You need to vacuum the whole instrument to ensure that there isn’t any strand of steel wool caught in the grain. Also when I use Tru-oil, between coats I use Mirka Abralon Finishing pads; they are better than wool as you can keep the surface flat. Cheers Gary Thanks a lot for sharing, Gary. It's much appreciated! |
|
|
|
Post by lars on Feb 10, 2020 16:18:32 GMT
Good luck with your first guitar- look forward to watching this evolve Cheers Gary Thanks, Gary! I'd love to hear your comments as the build evolves. And I can surely need advice along the way from experienced luthiers like you. |
|
|
|
Post by lars on Feb 9, 2020 17:58:08 GMT
The first stepsFirst some of the bits and pieces I will use for this build:  As I mentioned in the previous post I'm not sure if I'll use the ebony fretboard and bridge blanks shown here. I'm actually more inclined to use Laburnum, but have to machine those pieces first. The stick in the middle is for bracing. It's a stick you use to position house foundations and roads during construction work. But some of those sticks where made of extremely tight grained spruce and "quarter sawn", so I bought quite a few. The tuners are open gear Gotoh. I have yet to build a mould for the body and a radius dish for the top radius. But I couldn't help beginning with the top - just to give me a feeling that I'm building a guitar. The wood is bought as B-graded European Spruce. I bought a 10-pack of B-graded tops at Madinter with low expectations. It turned out that many of the pieces were more than alright. None of them were suited for a Dreadnought or Jumbo, but I'll get quite a few good tops for mandolins and other CBOM-s. And two or three tops that are suited for smaller guitars. Like this one. I don't have access to a thickness sander so I hand plane all boards. After initial planing of both sides I glued the two halves with "wedge and rope". As this is my first large instrument I had to make new wedges. Unfortunately the rope was very elastic, so I had to support with extra wedges and clamps: 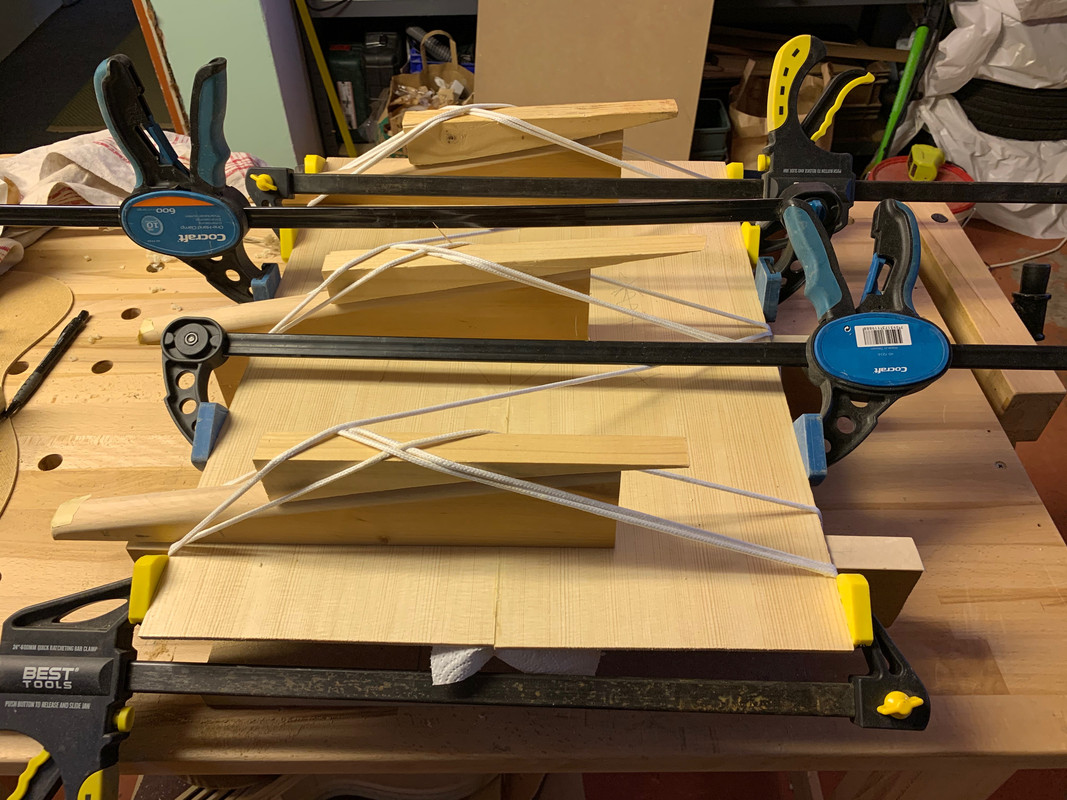 After that I planed first one side and than the other. After some planing I measured the thickness at various parts of the top: 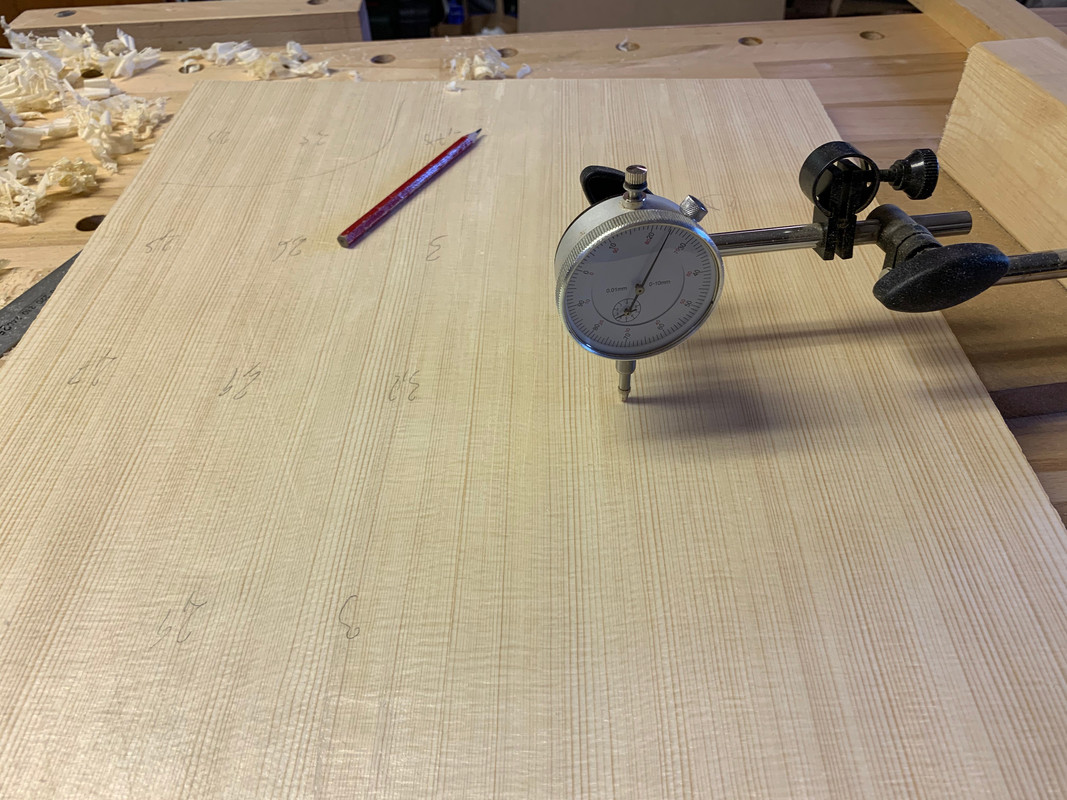 And did it again and again: 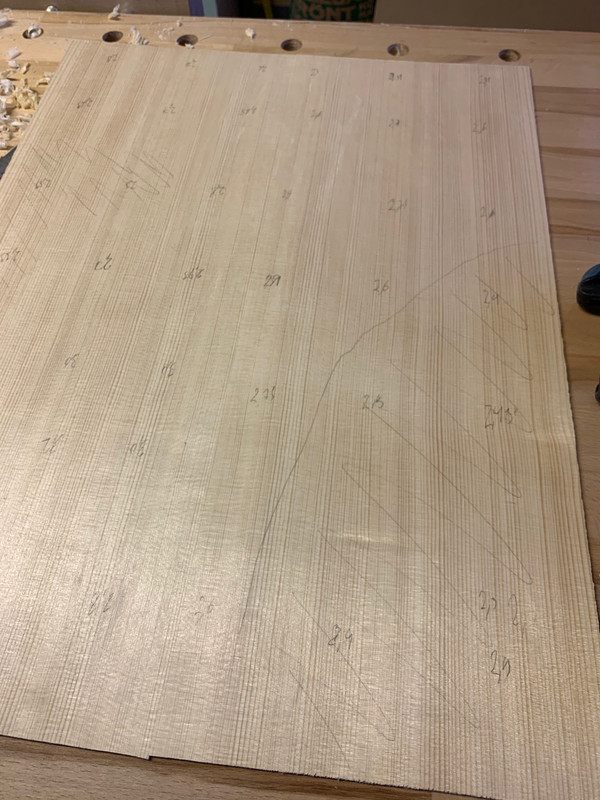 I aimed for 2.5 mm, but before I knew it I was down to 2.4 on many spots. With some sanding I probably ended at a thickness of 2.3. My idea is to have a relatively thin top paired with relatively stiff bracing, but this was a bit thinner than I planned for. And here is the top plate: 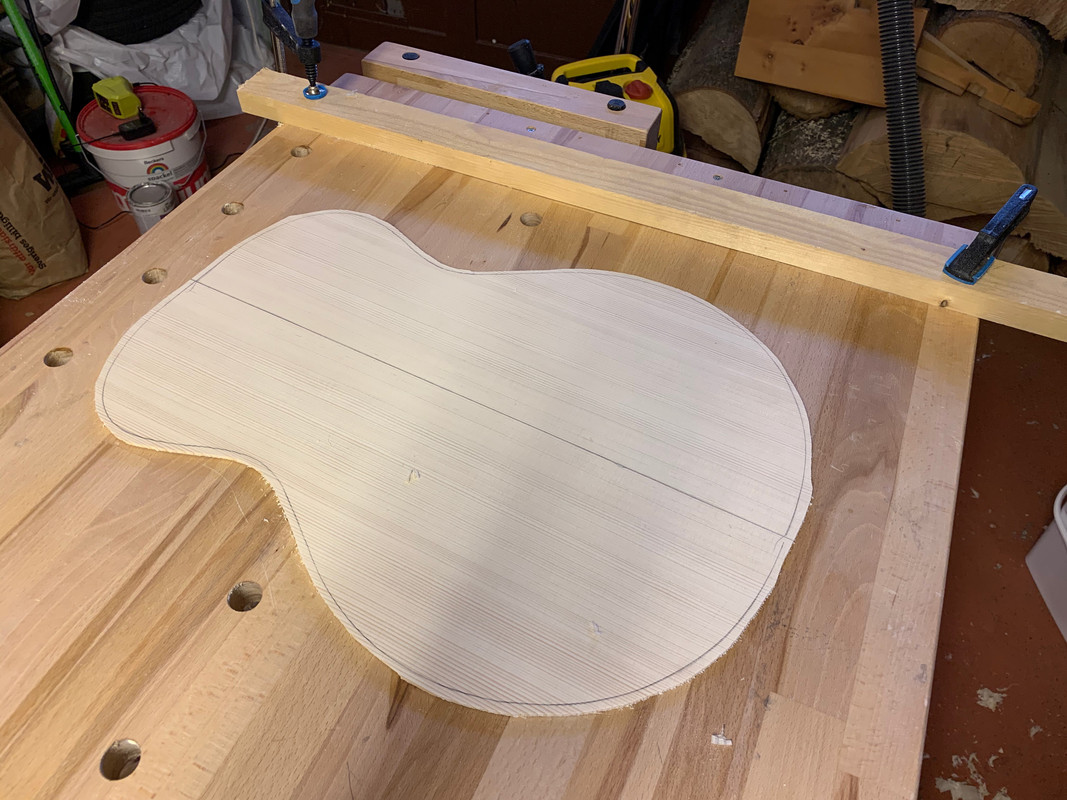
|
|
|
|
Post by lars on Feb 9, 2020 17:32:27 GMT
Now that I've finished the two mandolins, it's time to go on with the next project. Although I've built thirteen stringed instruments so far (one mountain dulcimer and twelve instruments from the mandolin family), I've never ever built a guitar. So it's about time! I've got two different guitar models in the pipeline but I'll begin with one. First out is a Grand Concert or 00 sized guitar which will be followed by a larger guitar, about the size and shape of a Grand Auditorium but with some similarities to a Small Jumbo. The two guitars will share many features and be similar in design. Here is the outline and bracing pattern: 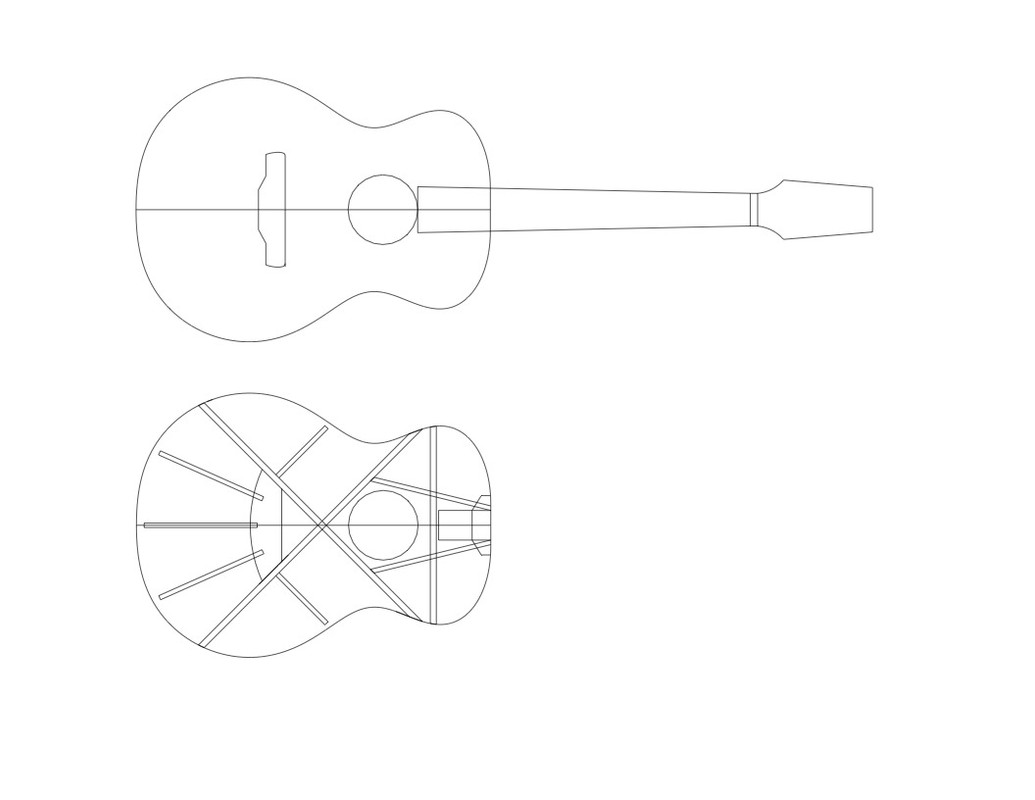 It's kind of funny - I've spent so much time thinking about design and construction and the end result looks like - a rather ordinary guitar! Anyway - here are some of the thoughts behind: The traditional guitar body shape was first made for instruments with necks meeting bodies at twelfth fret. Later 14 fret became more or less standard and as a result, the bridges were put forward closer to the sound hole (though Martin preferred to shorten their bodies). It's a lot of talk among luthiers about "the sweet spot" where the ultimate position for the bridge should be. Many believes that this sweet spot is at the center of the lower bout. My approach is not to move the bridge backward, but instead move the center of the lower bout forward. So the lower half of the lower bout is rounder than usual which put the widest part a bit forward. That also means that the waist is put forward and the upper bout is slightly smaller. Otherwise are the dimensions very close to an ordinary 00-guitar. The lower bout is about 36 cm wide. I've also spent lots of time investigating different bracing patterns. The conventional bracing with two diagonal "sound bars" doesn't make sense for me. Many modern luthiers utilizes hybrid bracings, where X-/lattice and X-/fanbracing seems to be the most common. After a lot of thinking forth and back I've decided to use the latter. I've taken more than one look at Edwinson guitars (like Franglais have done) but I've landed in a slightly simpler design, more like PRS guitars. Other than that, I've decided to stay with the principles I've learnt in the previous builds. I'll keep things simple (but hopefully elegant) and focus on things that are structurally important. So there will be bindings, but no purflings, the rosette will be simple and designed to strengthen the sound hole. I'll stay with carbon fibre rods in the body and a floating fretboard with support from a neck extension, etc. Whith other words - Dave White will continue to be an inspiration. Specifications: Top - European Spruce Back, Sides and Neck - African Mahogany (Khaya) Fretboard and Bridge - not yet decided, either Ebony or Laburnum Bindings - Birch Linings - either Cedrela reversed kerfed linings or laminated Birch Scale length - 632 mm (24.9" Martin short scale) Many details are yet to be decided... ps/This will be a slow build. I hope to be ready before summer, but who knows... |
|
|
|
Post by lars on Feb 9, 2020 14:06:34 GMT
The Osmo Experience
So I'll describe a little about the finishing work. As I said in a previous post, I planned to use Liberon finishing oil, as in my previous projects, but the oil had dried in the can. So I decided to use Osmo Hard wax oil instead. I think it's the same oil that is sold as PolyX in the UK.
First of all - the Osmo oil is a lot thicker than the Liberon oil. You're supposed to brush a lot of the oil with a brush or a special sponge, let it soak for a while and than white off the excess. I didn't do it that way. First of all I sealed the wood with two layers of schellack. Than I applied the oil with a lint free cotton cloth and immediately tried to wipe off the excess. Nevertheless it only took me 4 layers before it seemed like the finish was this enough. That's less than with the Liberon oil and due to the thickness. I let it dry 10 - 24 hours between the layers and used 0000 steel wool between every layer. After the forth layer the oil was glossy. After a few days I attempted to polish the oil with Micro-Mesh pads. Unfortunately I started with the coarser pads, and soon I had sanded through most of the finish. I'm glad I only tried on one of the necks, as I had to go through the process of applying oil once again. After a few days of hardening, I started with the Micro-Mesh pads again, but this time I only used the three finest pads 8000, 10000, 12000 grit). The end result was astonishingly similar to the lLiberon oil. The surface was satin, not glossy, but very tactile to look at and hold. So over all I'm quite content with the result compared to my earlier experiences with Liberon oil.
But that doesn't mean I'm altogether content and happy. On the contrary, I've never been fully satisfied with the result of my oil finishes (although I've improved from instrument to instrument)'. The way to go, I think, is the method that Francis describes in his thread "A parlour for me er, I mean for Andrew" and that was originally developed by luthier Kevin Aram. The difference lies mainly in the preparation of the wood surface where you apply the micro-mesh pads (all the way up to 12 000 grit) to the wood BEFORE applying any oil. I believe this makes a greater difference than if you choose Liberon, Osmo or Tru oil. In my next project I'll try to apply that method, but I'm not certain which oil I'll use. I don't have access to the article by Kevin Aram that Francis refer to, but I've found a pdf by Stewart Adamson, that I think describes the same method and I'll follow those instructions.
|
|
|
|
Post by lars on Feb 9, 2020 13:22:04 GMT
Both mandolins look marvellous...I love the natural , understated look . Did you make the tailpieces yourself?  Thank you very much, Andrew! I aimed for a more glossy appearance than it eventually became. But to tell the truth, I too prefer the “natural, understated look”. And it feels lovely to touch. It’s a tactile experience to hold and play an instrument with a thin oil finish! But no, I didn’t make those tail pieces. They are the cheapest possible from Touchstone Tonewoods. 3.25 £ each I think. Usually I make my own tail pieces but not this time Cheers! Lars |
|
|
|
Post by lars on Feb 6, 2020 17:21:56 GMT
I agree, they look gorgeous! Thank you Wanderer. I’m glad you like them! |
|
|
|
Post by lars on Feb 6, 2020 15:17:02 GMT
Very elegant looking instruments! Keith Thank you Keith! |
|