|
|
Post by lars on Mar 24, 2020 20:07:15 GMT
Lars, I recommend shaping the back edge before bending, so you can more easily establish the taper. I'll do that! Thumbsup |
|
|
|
Post by lars on Mar 24, 2020 19:49:31 GMT
Nice work Lars. I've used Colin's method for side templates for a few instruments. Works perfectly. The advantage of shaping the sides before bending them is it often gives you an offcut wide enough to use for bindings on the same, or another, instrument.
Thank you, Dave! Nice to hear that you have good experiences of Colin's method. I'll use it for the next build. I'm looking forward to see more of your builds. Everything I've seen so far have been very impressing. /Lars |
|
|
|
Post by lars on Mar 24, 2020 19:46:34 GMT
Hi Colin! I'm glad you're enjoying it. I'll definitely try your method in my next build. At least to make the paper template. I'll decide later whether I'll preshape the sides or shape them after bending. I think that I at least want to keep the top edge flat while gluing the sides with the blocks. I understand why it has become a standard method. It really simplify things. Thanks! /Lars |
|
|
|
Post by lars on Mar 22, 2020 19:59:42 GMT
Assembling the bodyNotches was cut in the rim to inlet the top and back braces. That is - some of the top braces. The fan and finger braces were not notched into the sides and the lower legs of the x-braces were only about 1-2 mm thick where they were inlet. Before I glue on the top I write some info and put my signature to the inside: 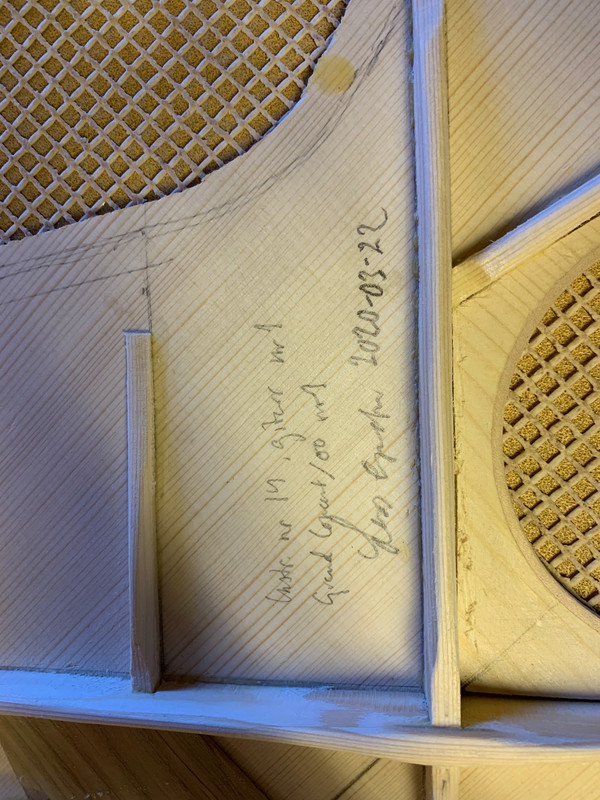 And here the top is glued to the rim: 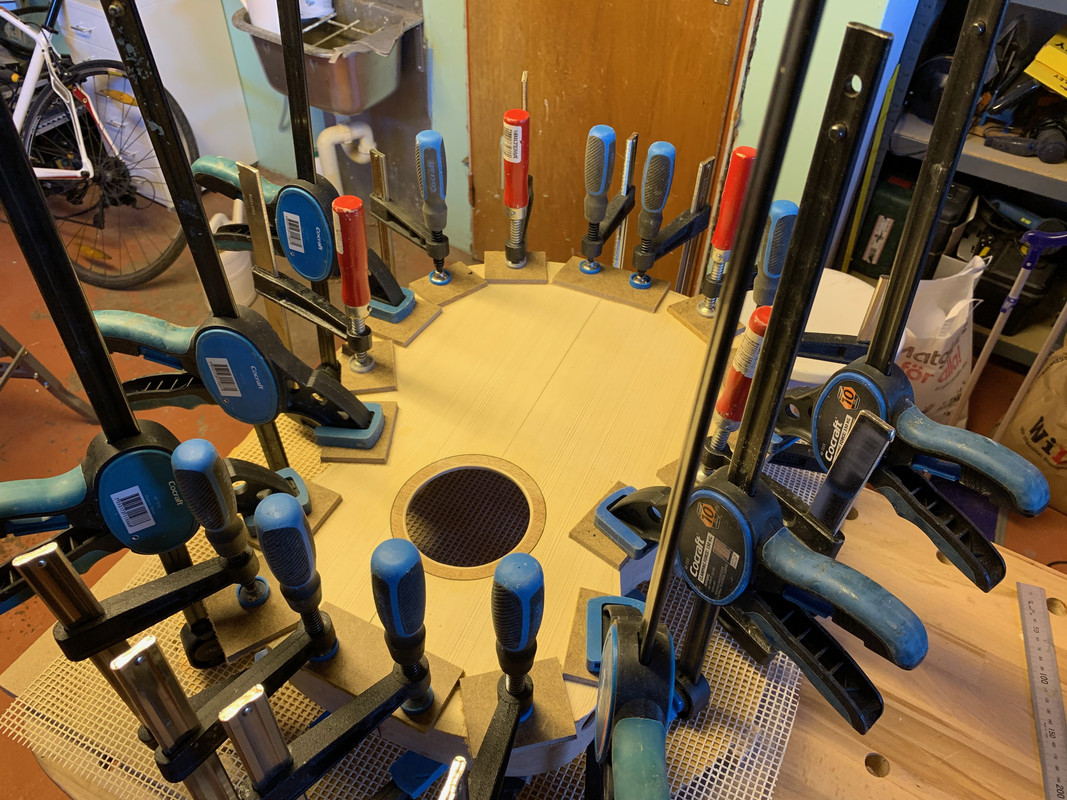 And here is a last view of the inside (after the top is glued but before the back): 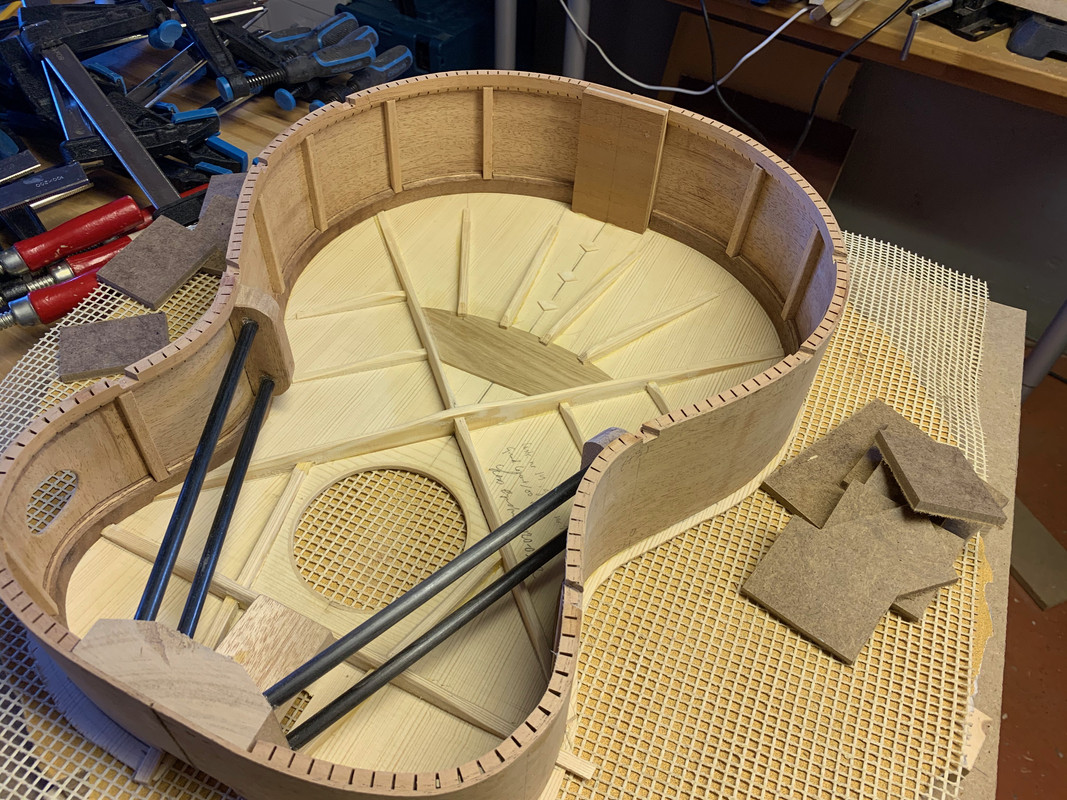 And then it's time to add the back: 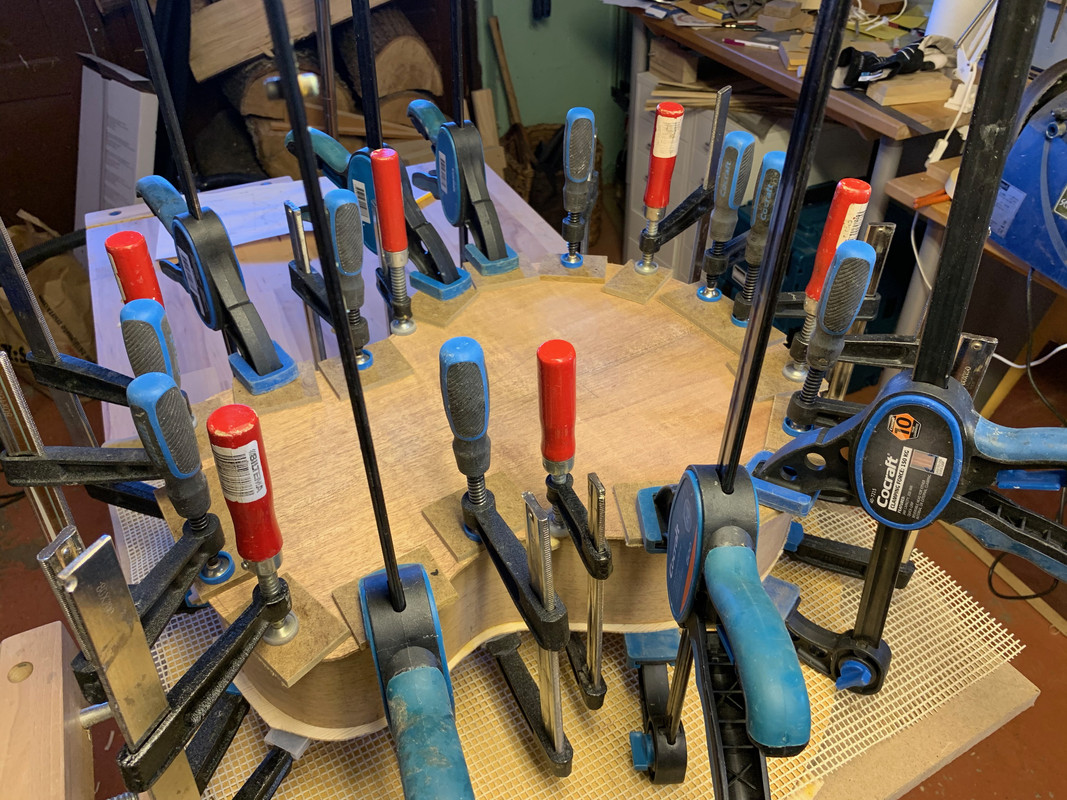 And after some trimming I've got an assembled body! 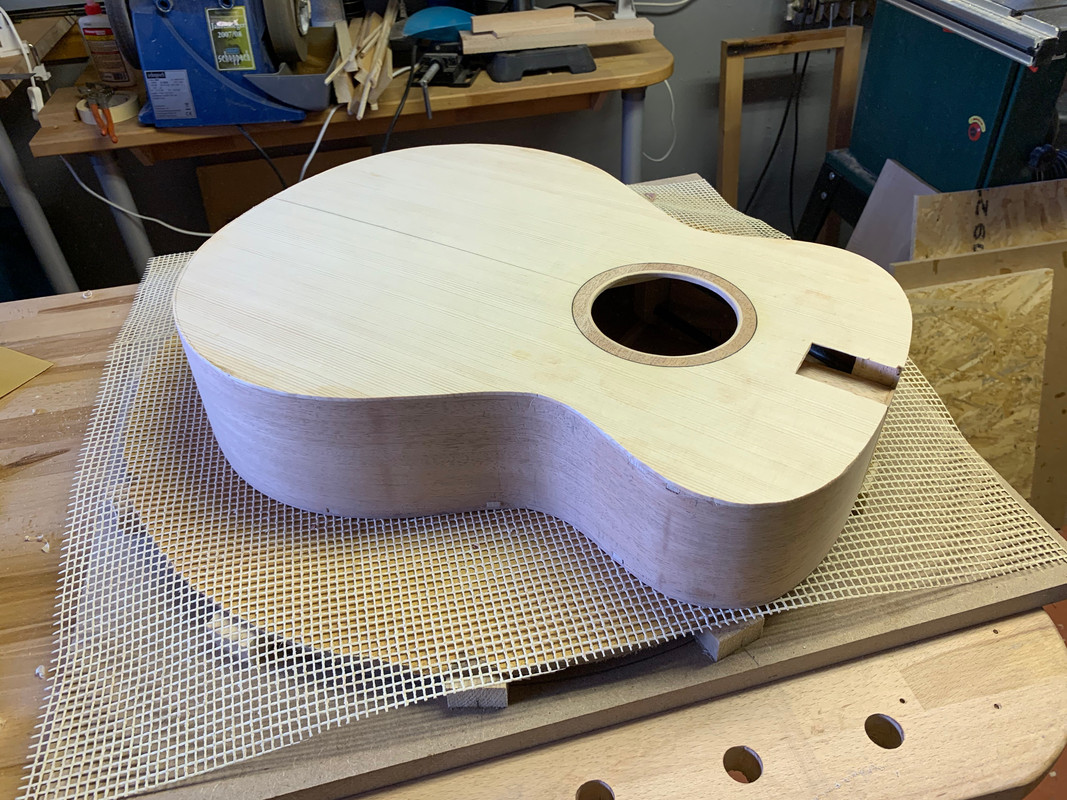 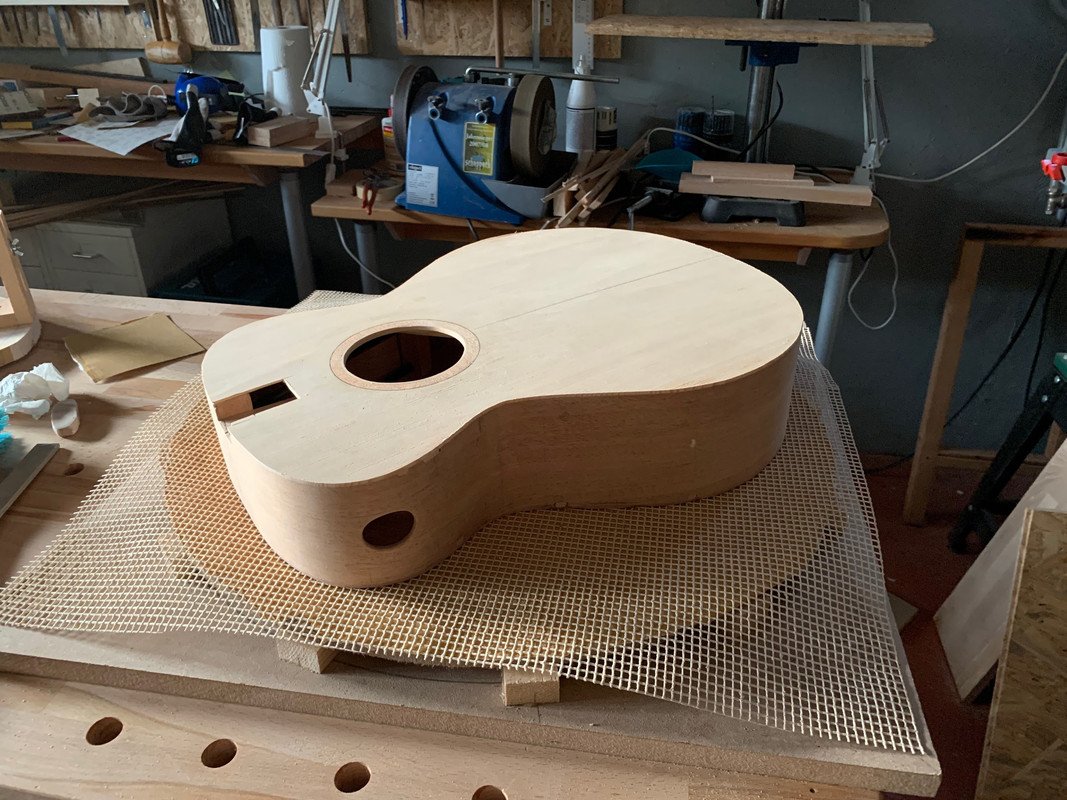 And it feels like I've passed a milestone today!
|
|
|
|
Post by lars on Mar 22, 2020 19:49:30 GMT
Bracing the back
First I glued the spruce back strip . 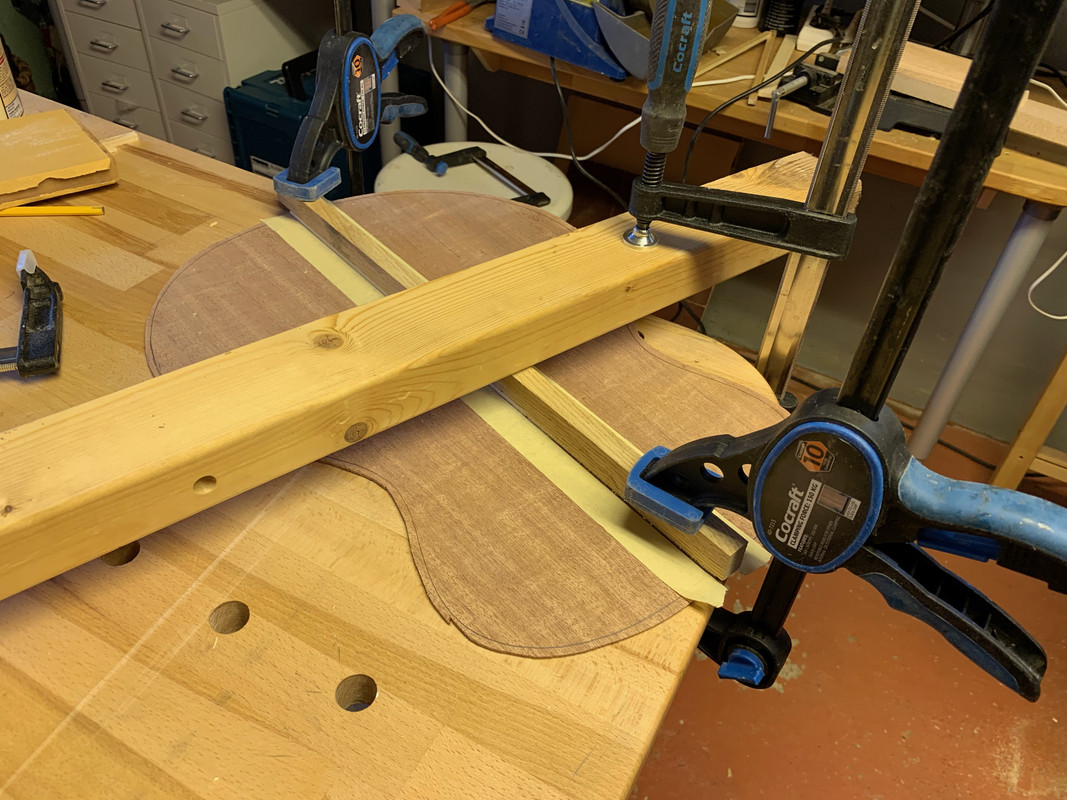 I went for a traditional ladder bracing. 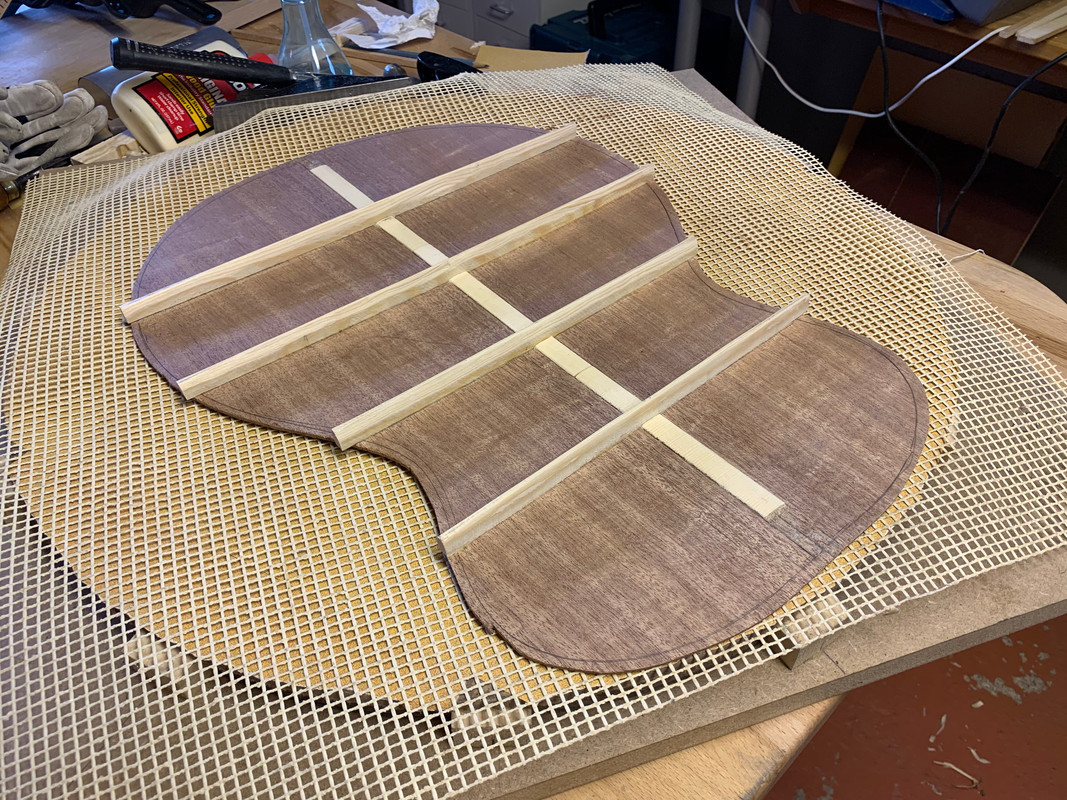 And here I'm in the process of shaping and "tuning" them: 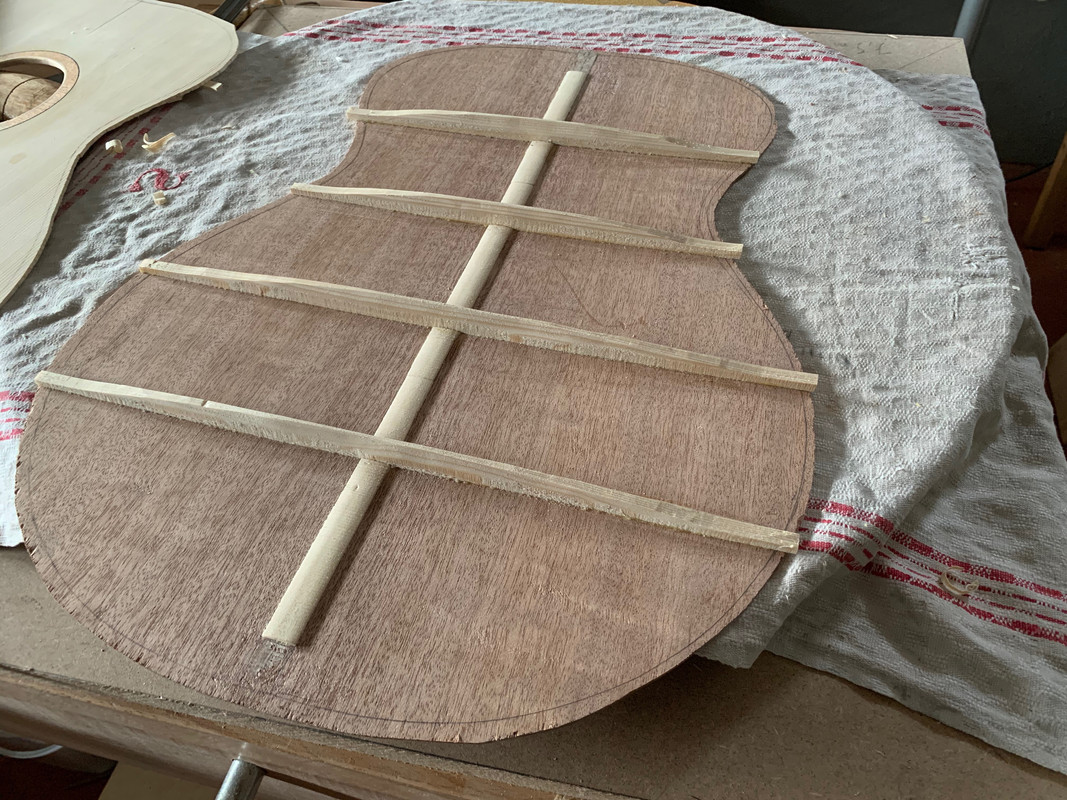
|
|
|
|
Post by lars on Mar 22, 2020 19:42:47 GMT
Bracing the topAll braces were cut in the band saw and their profiles were shaped/sanded in the radius dish. First I glued on the x-braces: 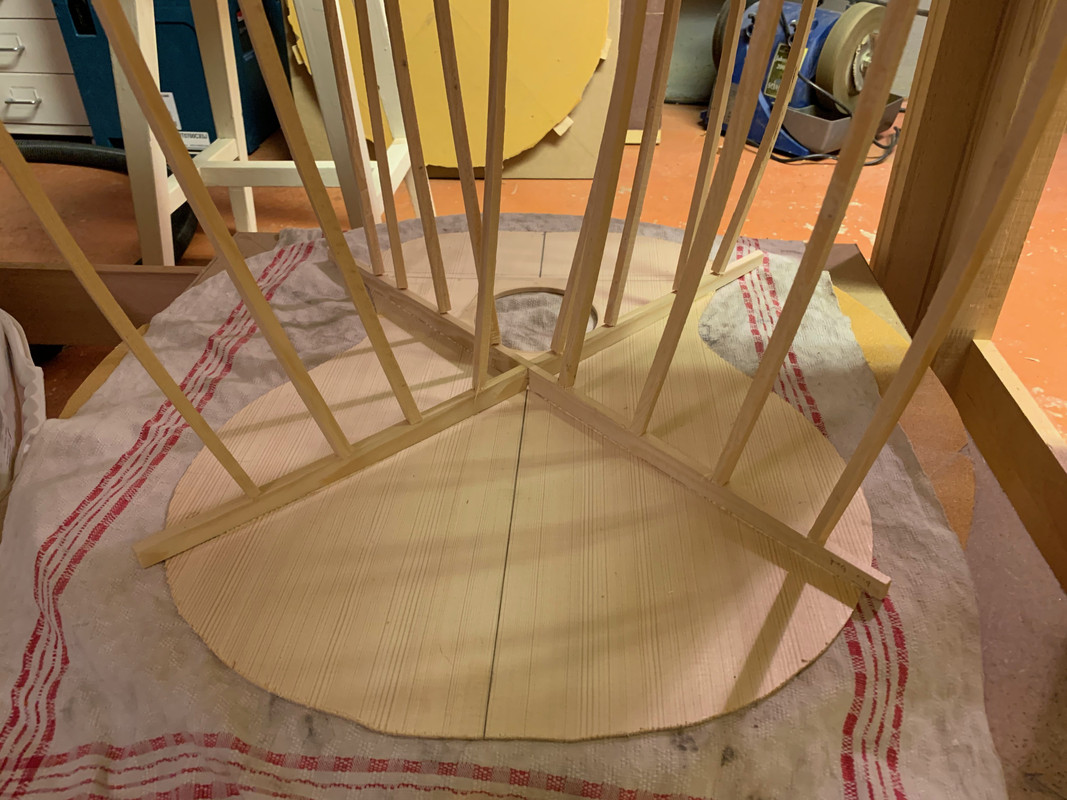 And the laburnum bridge plate was added: 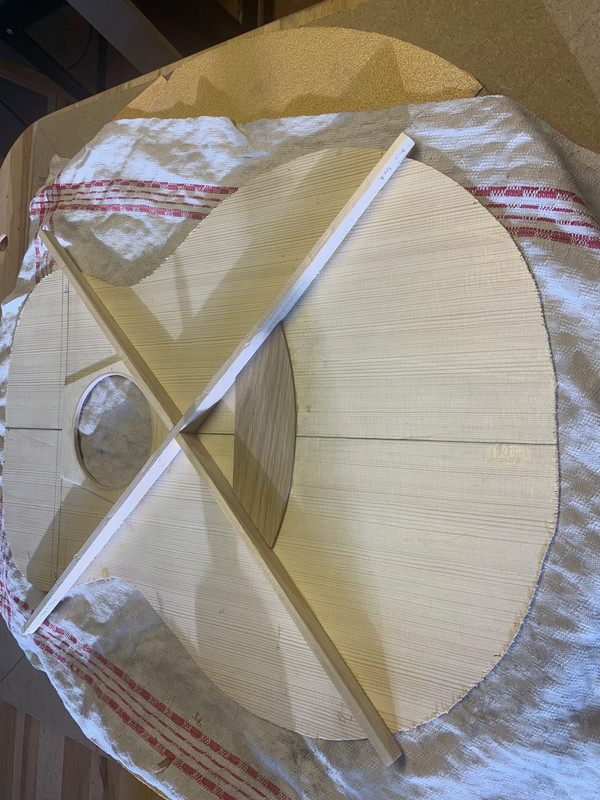 And then the fan braces. In my original plan I had just three of these, but due to the thin top plate I decided to go for four fan braces: 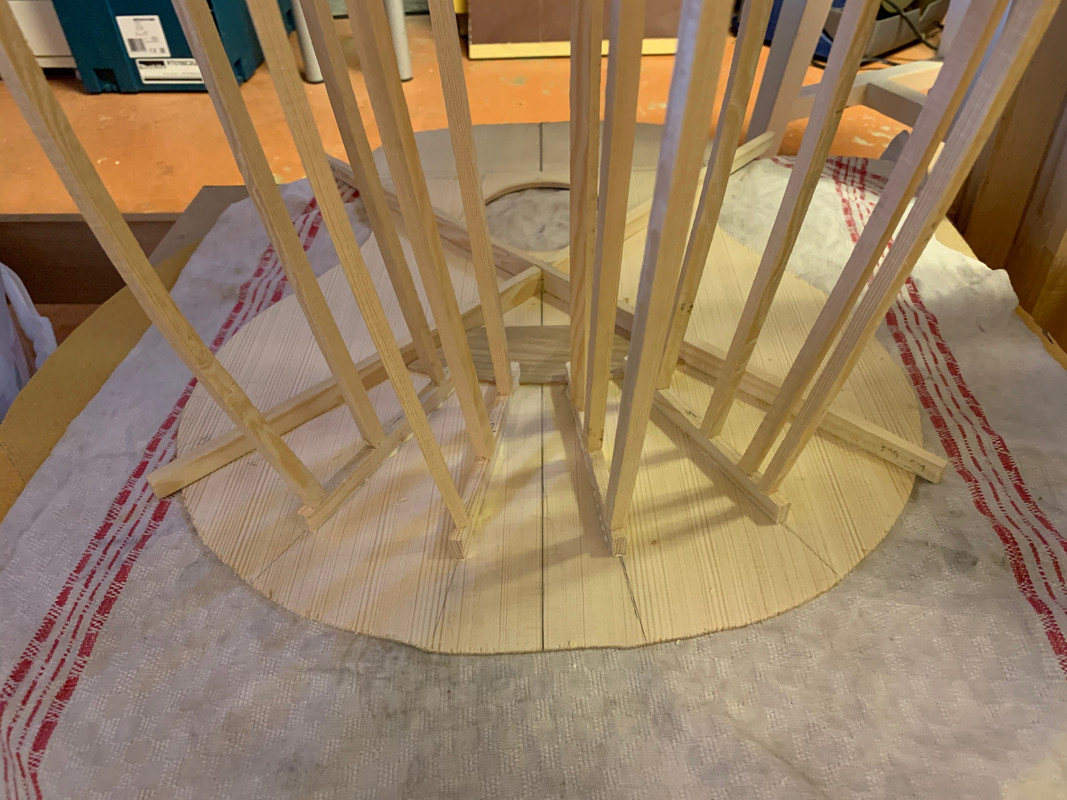 And then the A-braces: 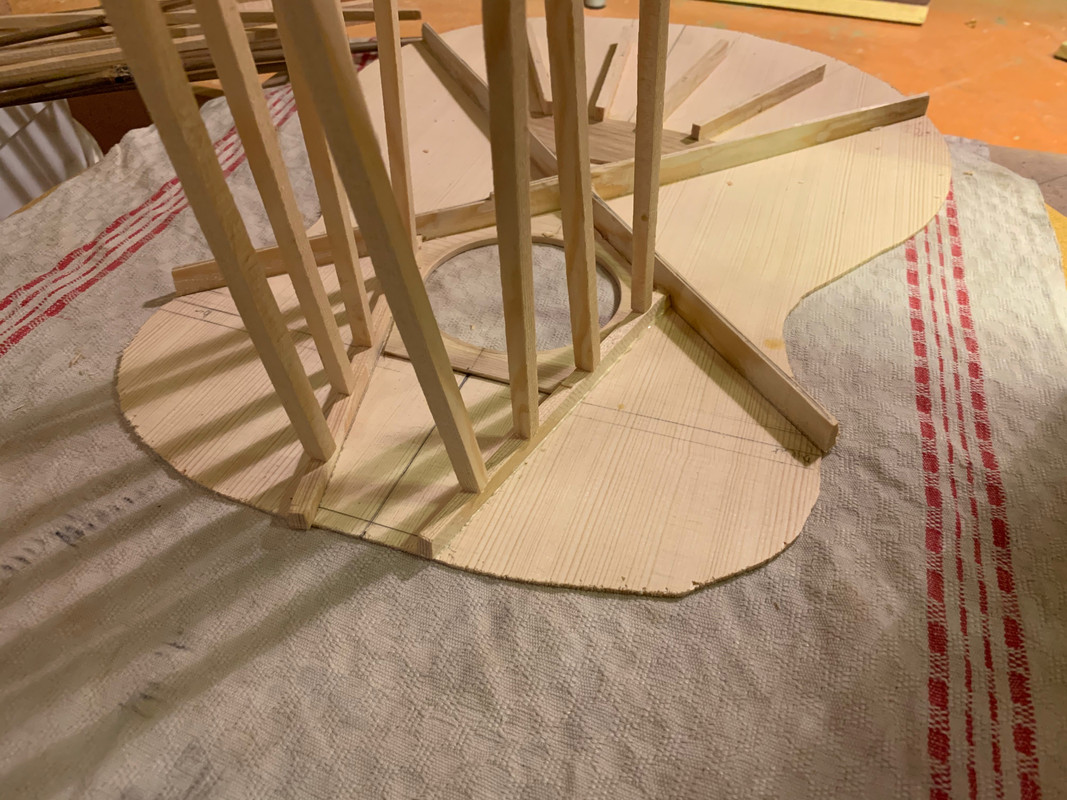 And lastly the UTB (upper traverse brace) and finger braces. I added two finger braces on each side, instead of just one, for increased stability: 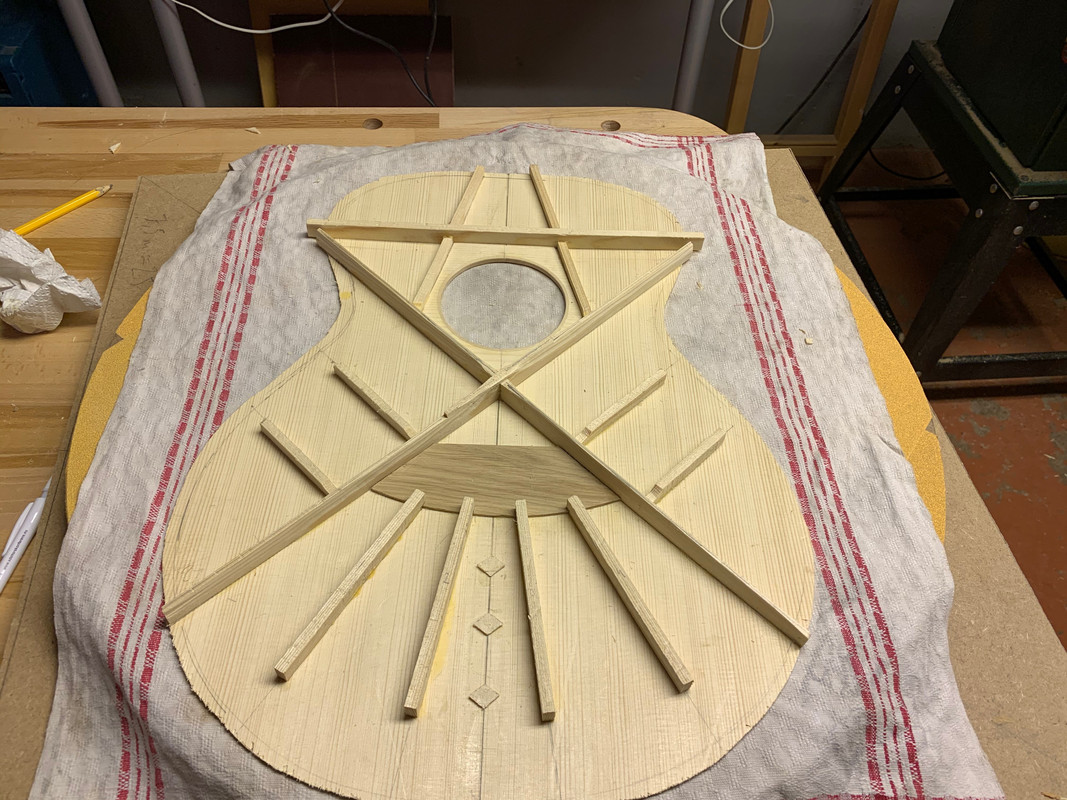 And then came the nervous process of shaping the braces. To "voice" them. Ehrmm, to cut, flex and tap and cut, flex and tap and wonder what I'm supposed to hear and feel. And to hope that you're not stopping far too late - and not too early either. As this is my first guitar and my first instrument with a fixed pin bridge it's really a trial and error process. Anyway - here I'm almost done: 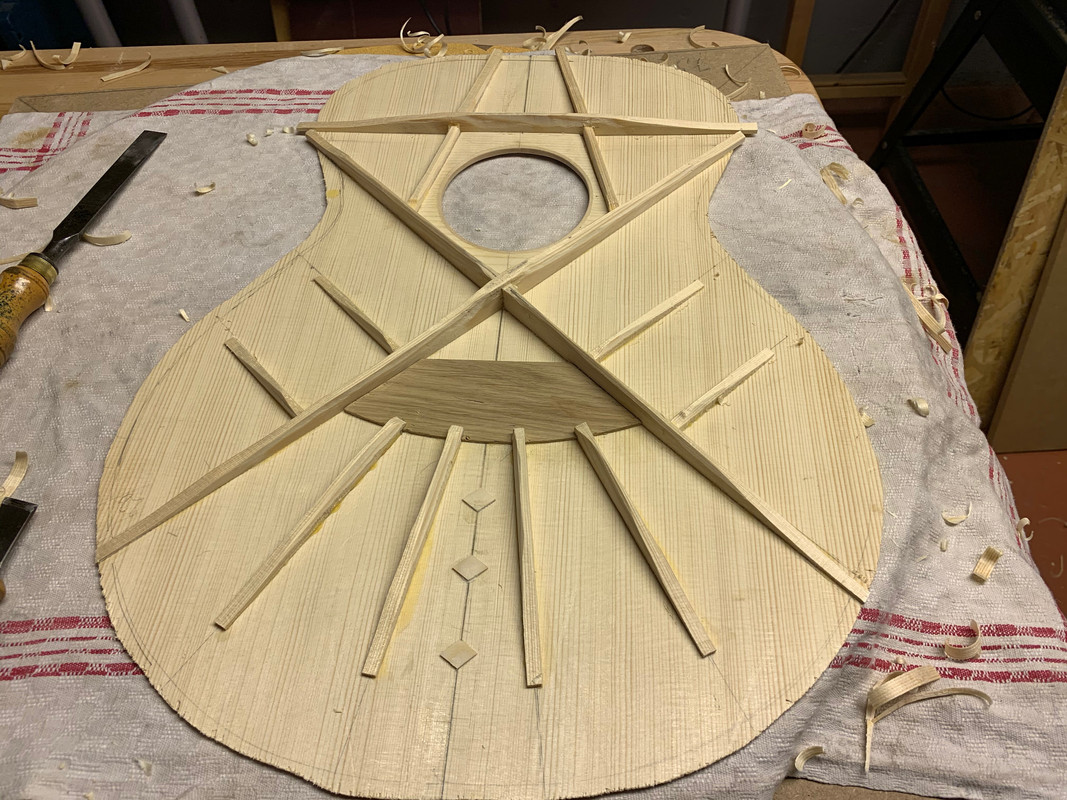 And here I'm completely done:  I've deliberately avoided to sand or scrape the surface of the top. I was longing to have a clean inside of the box, but I decided to not take a micrometer extra from the top thickness so pencil marks and everything is left.
|
|
|
|
Post by lars on Mar 22, 2020 19:30:04 GMT
Adding a sound portA sound port was added to the rim. It was part of the plan all the time, but I nearly forgot about it until it was too late. A small leftover piece from the sides was bent on the hot pipe and glued to the inside of the rim cross grain to the side wood. Then the shape of the sound port was marked and I started to drill many small holes: 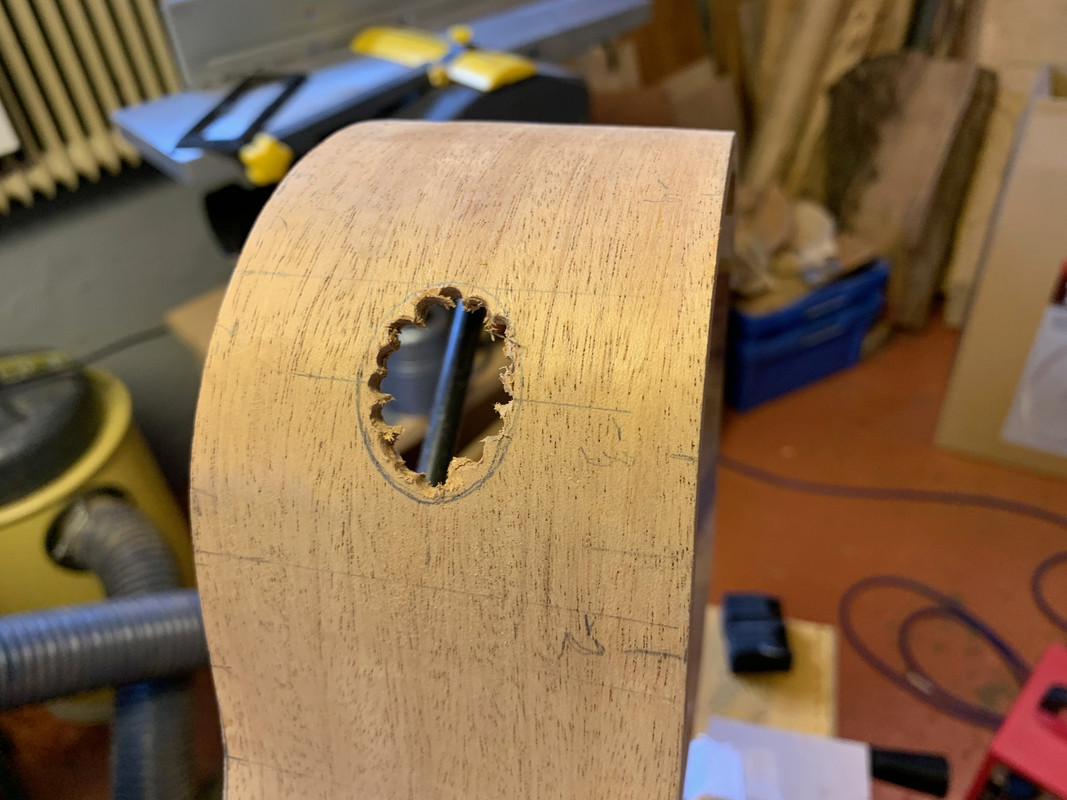 After some work with files the sound port had its final shape: 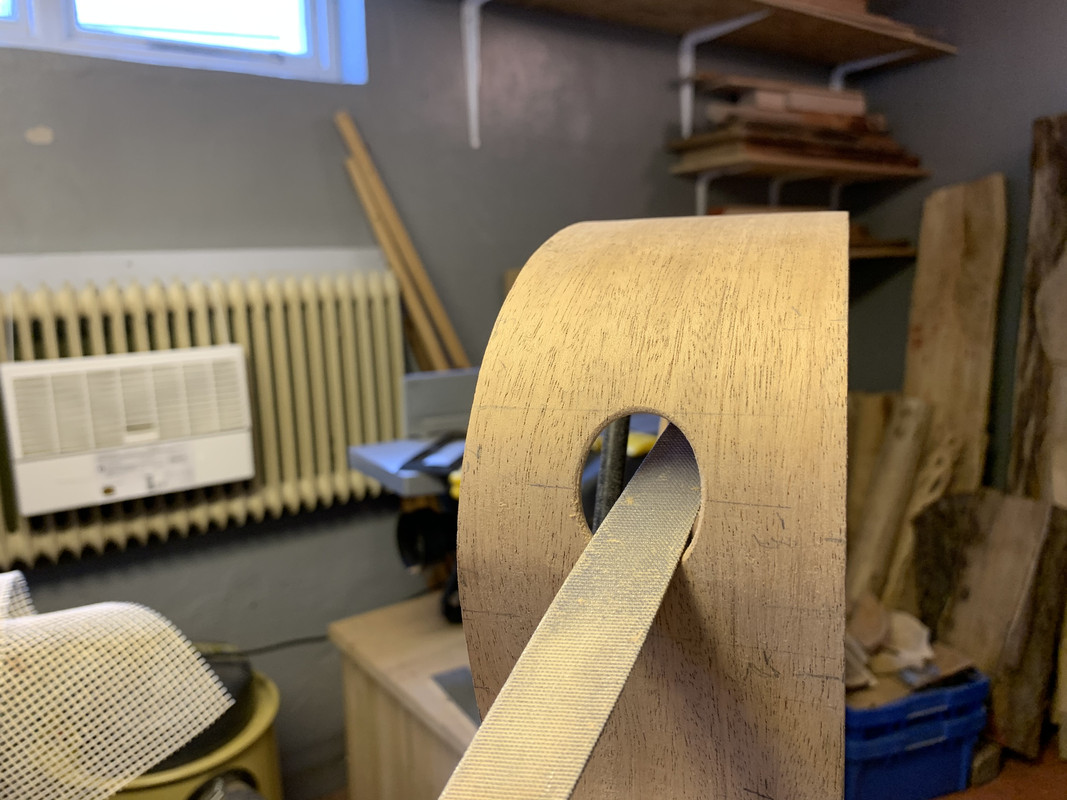 Here is a view from the inside: 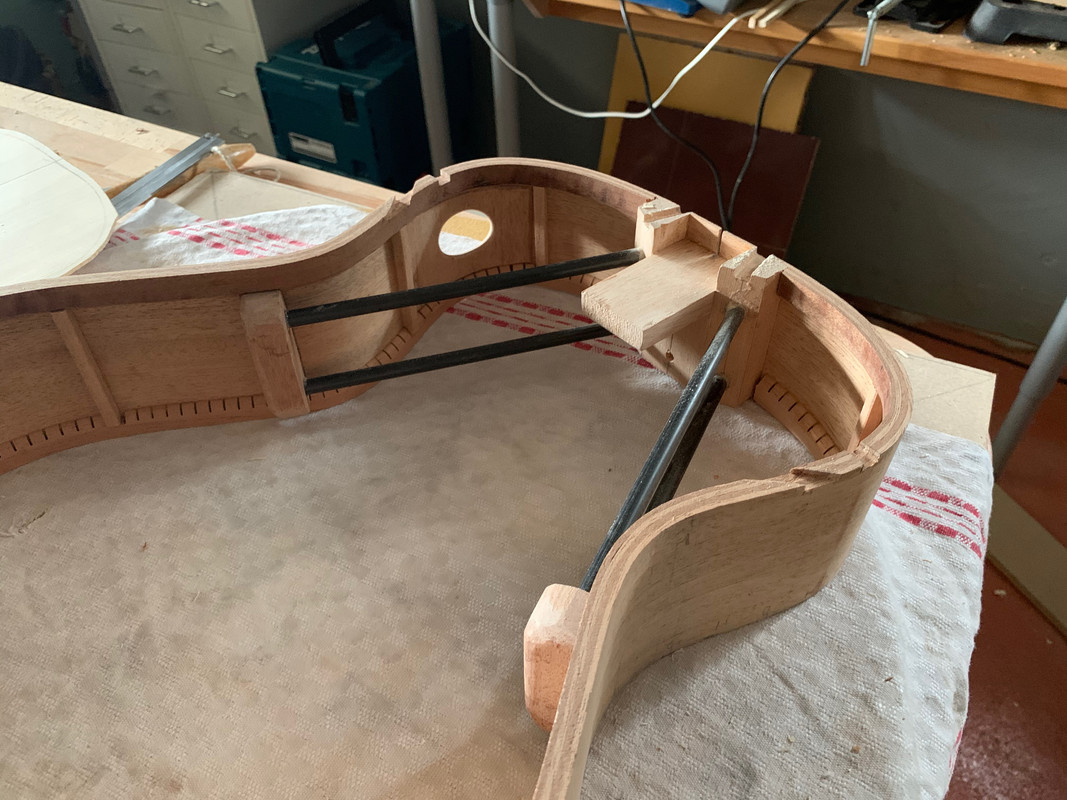
|
|
|
|
Post by lars on Mar 9, 2020 20:40:42 GMT
I'm very impressed
Your woodworking skills are amazing. A beautiful instrument!
|
|
|
|
Post by lars on Mar 7, 2020 20:17:32 GMT
Making the rim - part 2Before I could progress, I had to take one step back. I realized that the neck block had to be set lower to accommodate for the top profile. So I heated the glue joint with a hair dryer and reglued the neck block with a distance, like this: 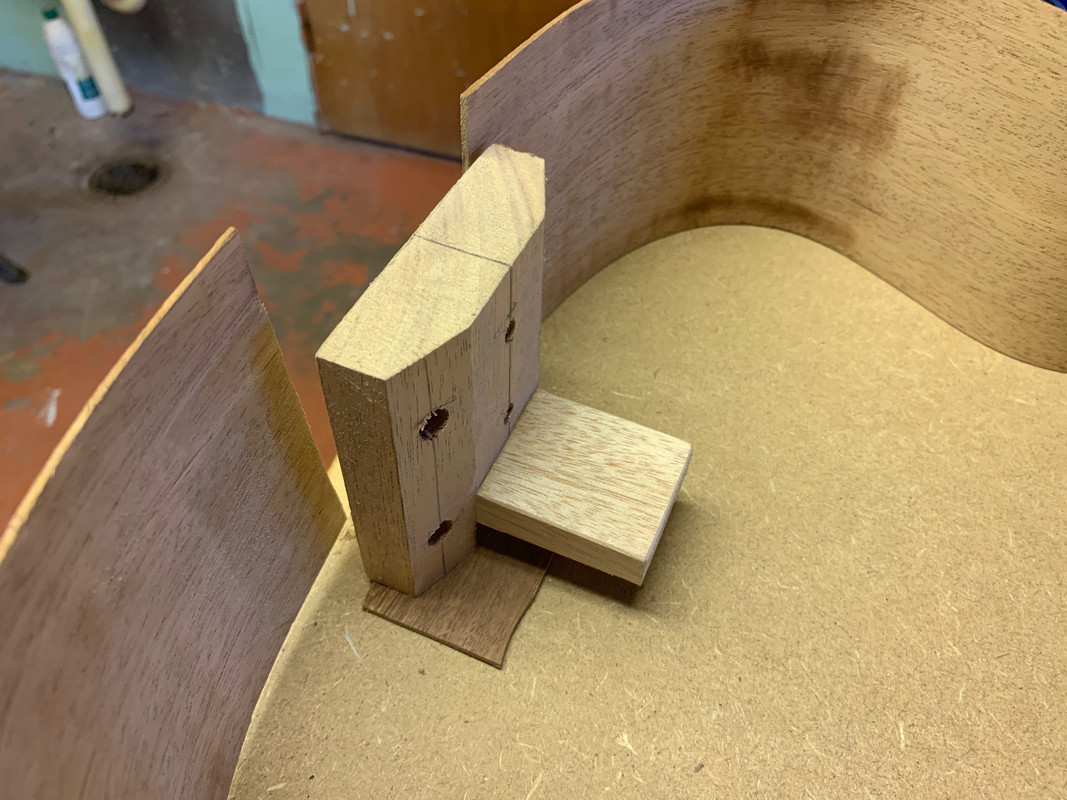 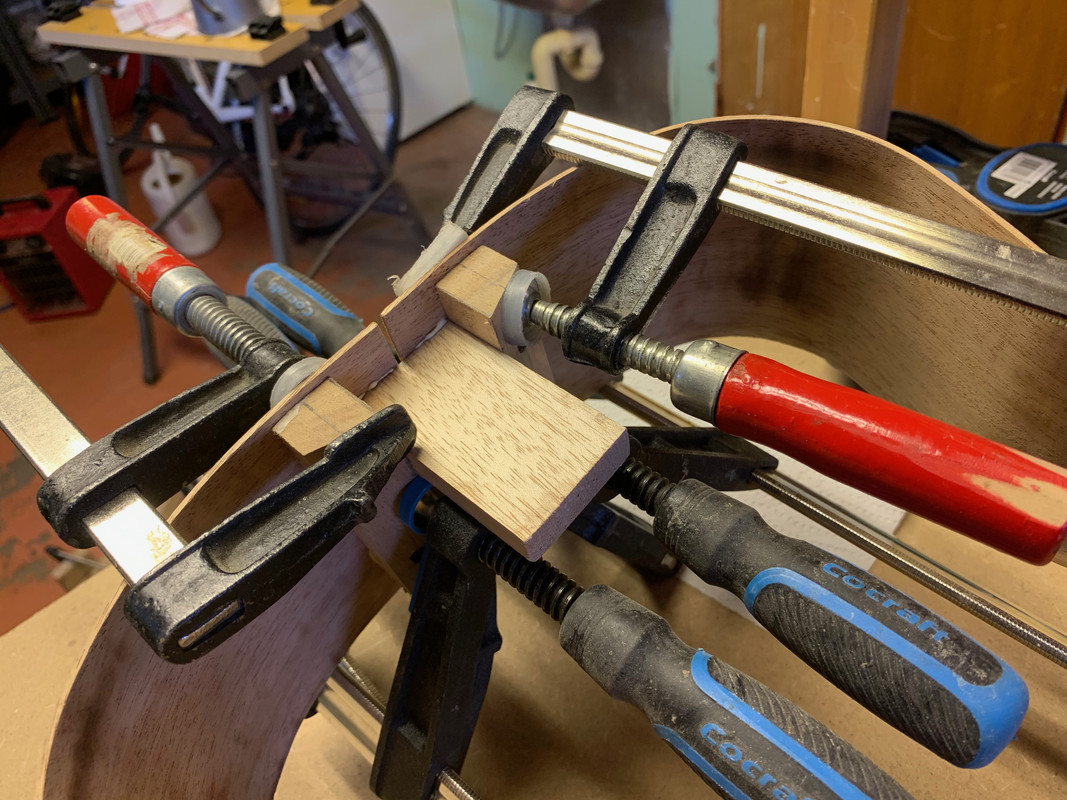 Next I had to calculate the profiles for top and back. I do it in a backward and over complicated way. Here is a view from my cad-model where I mark the radius with 1 mm steps: 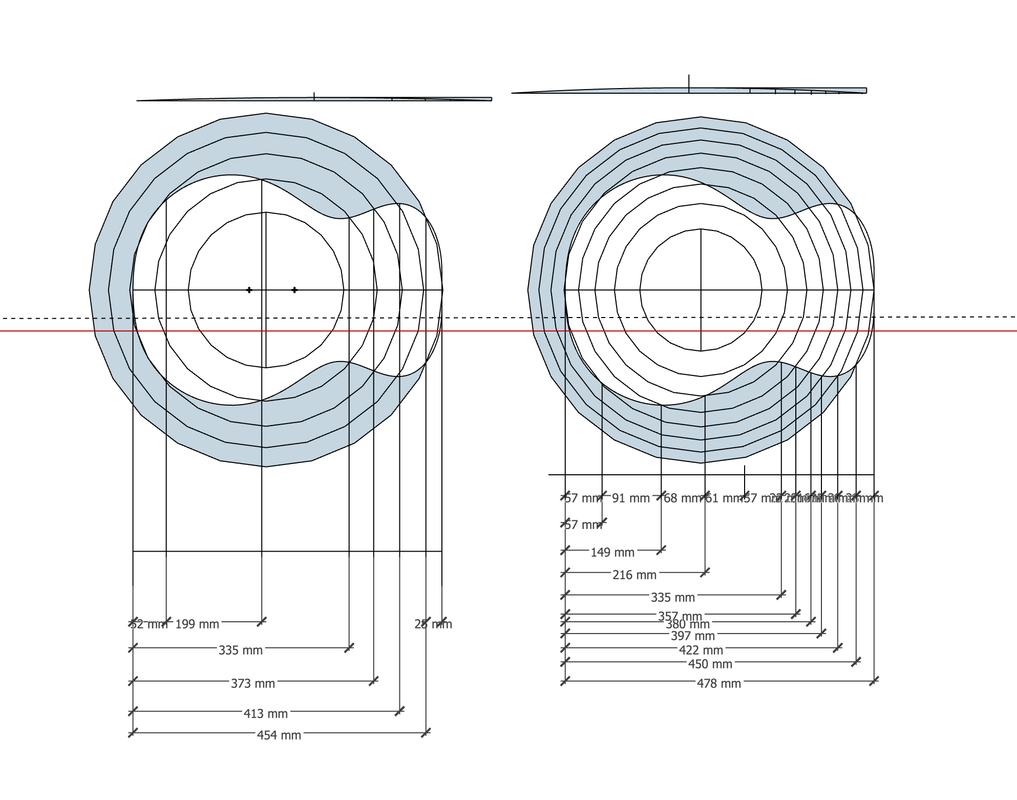 And I transfer it to the rim (I omit a lot of the steps - it's rather complicated :-)): 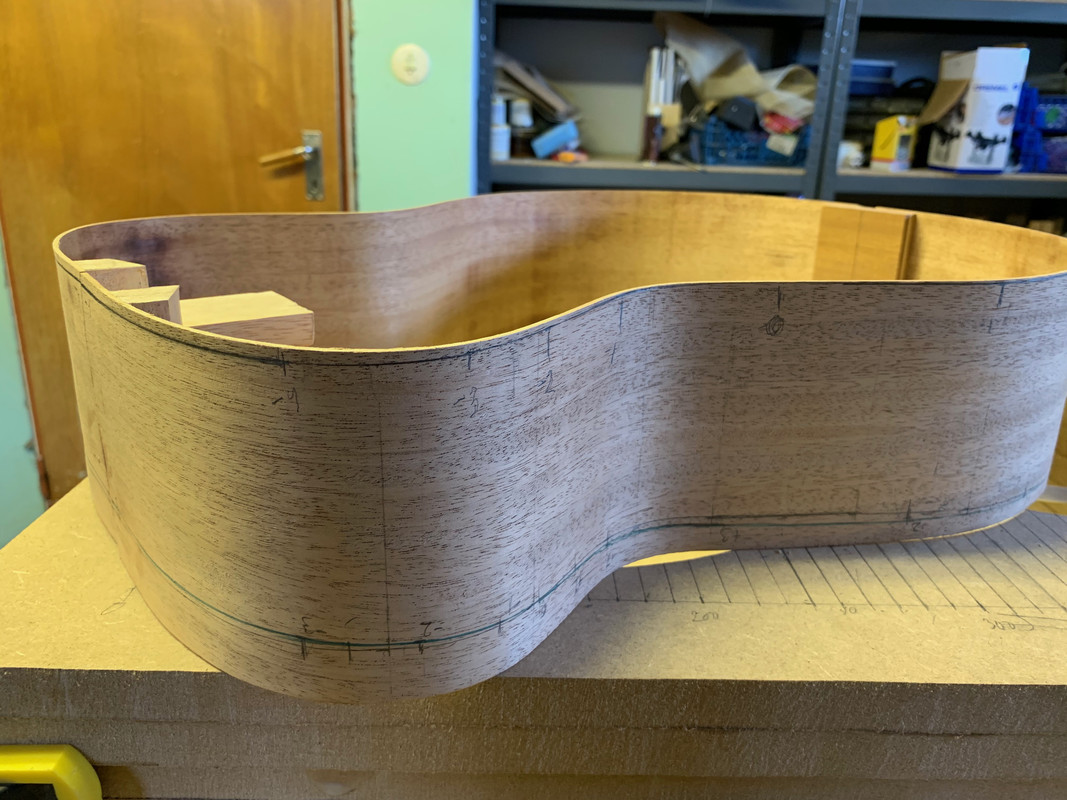 And I carve down almost to the profile with knife, chisel and plane (no photos of that). For the top I use laminated solid linings. Here are the bent linings for one of the sides in the mould: 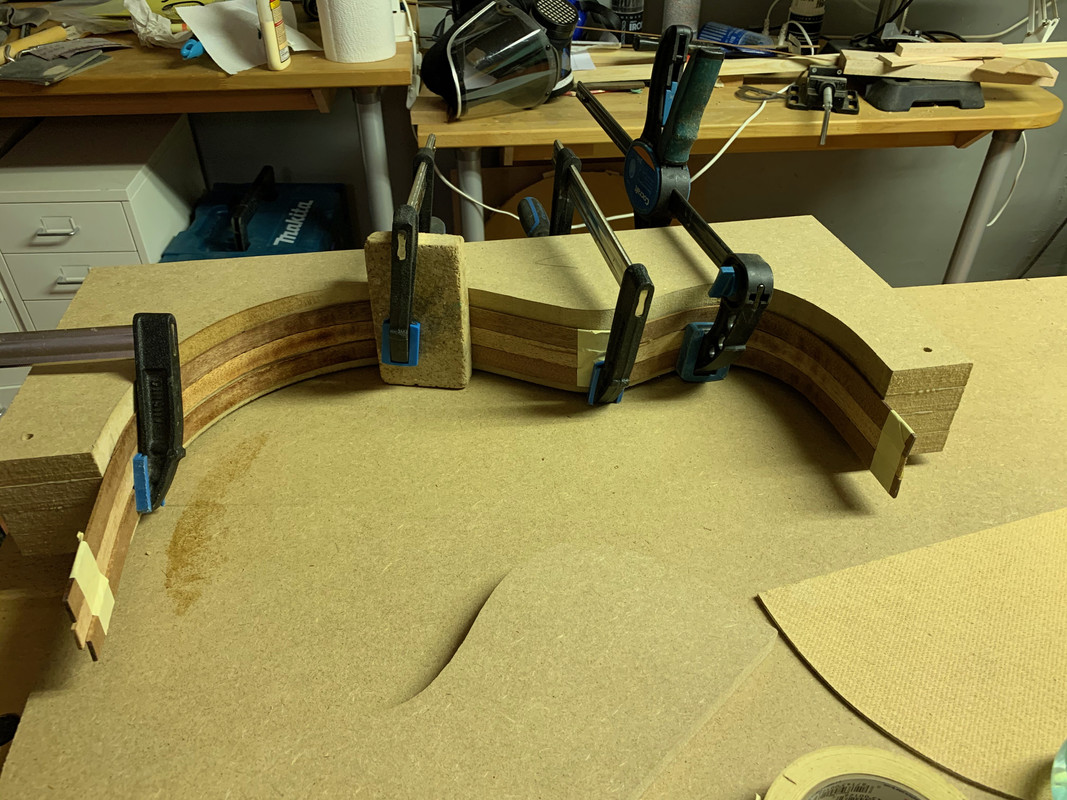 And I glue them one by one: 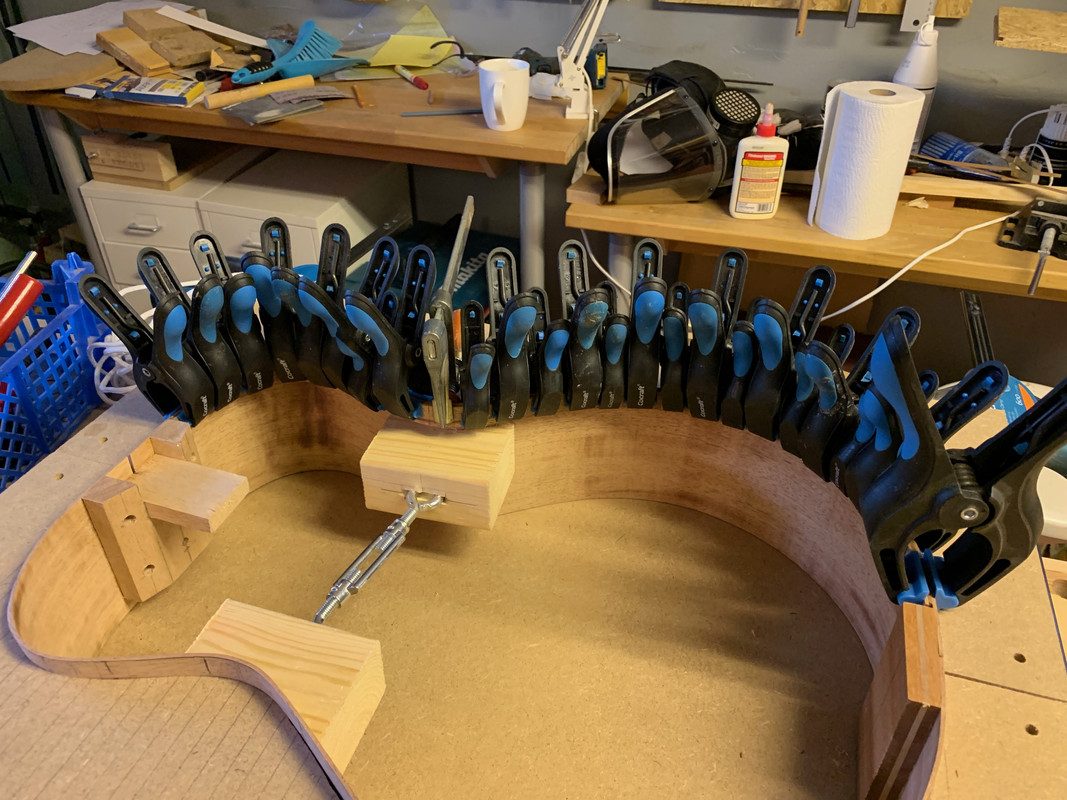 And after six times it looks like this: 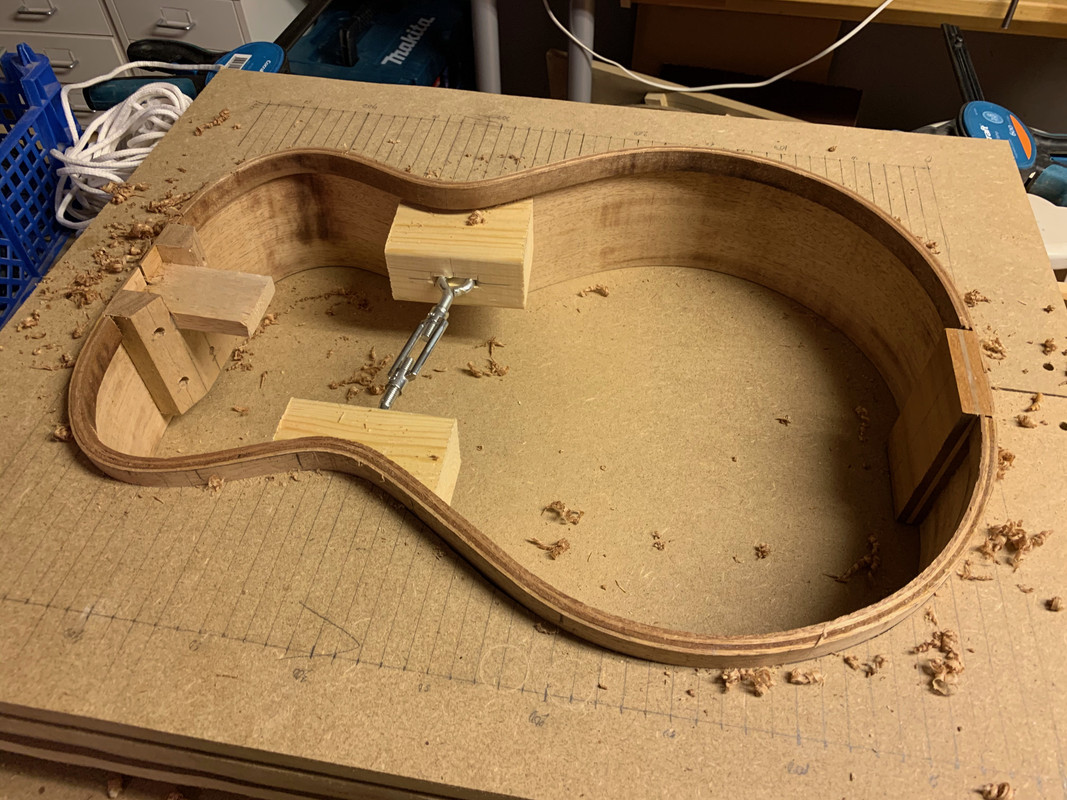 For the back I use reversed kerfed linings. I assume that the needs for stability and rigidity is not as big for the back and installing kerfed linings is a lot easier and quicker: Oops! No pictures taken from this work process... The next step is installing the vertical side struts. They are notched into the linings: 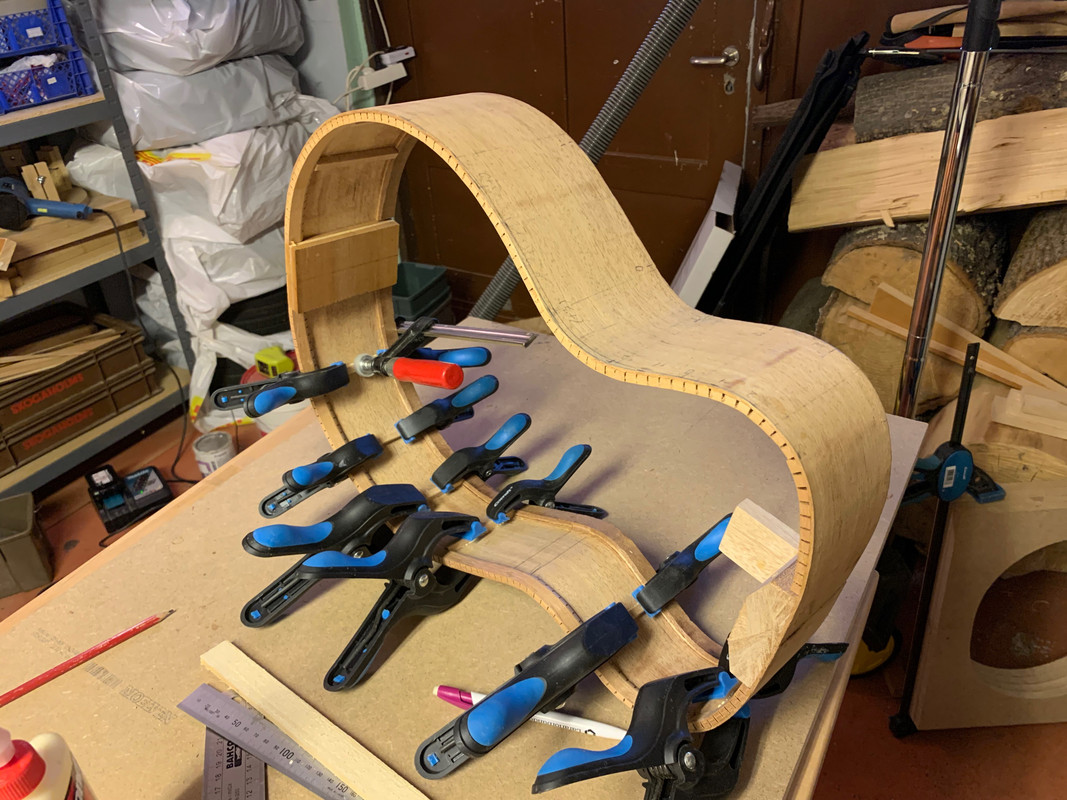 And the next last step is to install the 8 mm carbon fibre tubes: 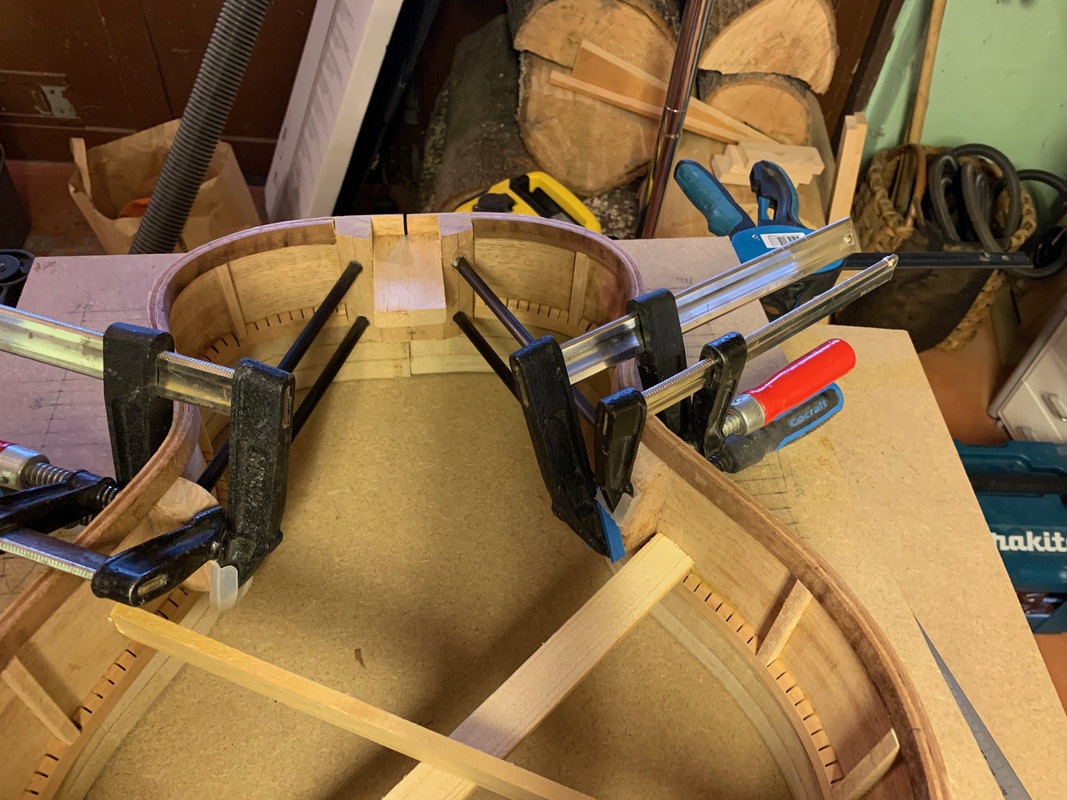 And after some sanding in the radius dishes I've got the completed rim set: 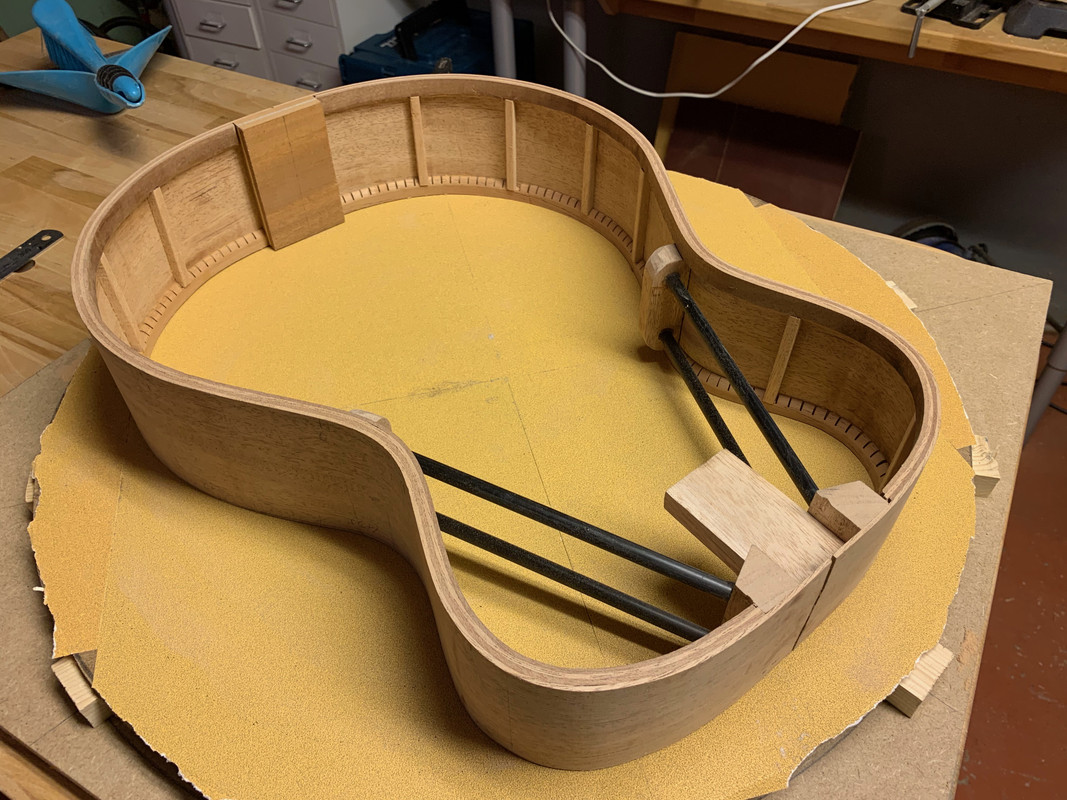 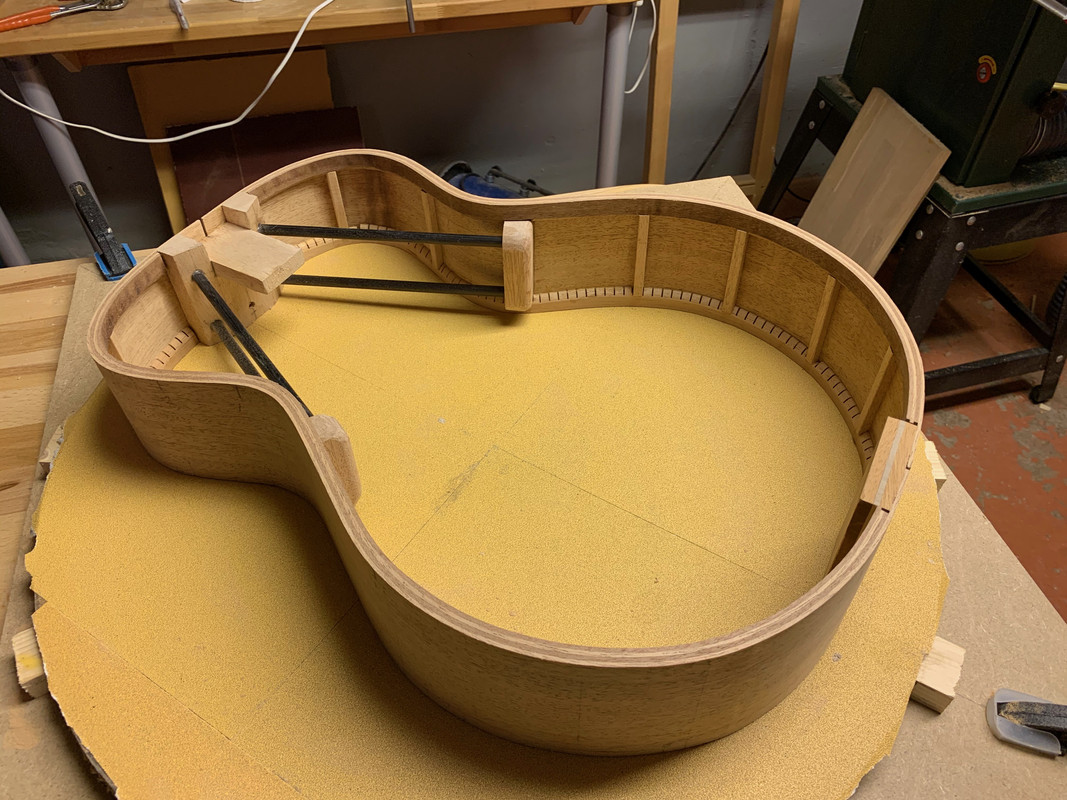 On to the bracing...
|
|
|
|
Post by lars on Mar 1, 2020 21:47:40 GMT
|
|
|
|
Post by lars on Mar 1, 2020 21:43:27 GMT
|
|
|
|
Post by lars on Feb 27, 2020 20:44:59 GMT
Hi Lars, As I mentioned on my OM thread, I received advice from Steve Sheriff and Steve Fischer (who created the PRS guitar). Before we moved house and I found myself without a workshop, I'd almost finished another OM with a more 'modern' body shape and bracing like Steve Fischer's. You can see what his bracing looks like on his website.
This is what mine looks like.
Thank you! I’ve stumbled upon Fischer’s website before and used him as one of my inspirations. Your guitar looks very similar to what I have in mind. And, of course, it looks very nice. |
|
|
|
Post by lars on Feb 26, 2020 18:21:08 GMT
Making the rim - part II bend the sides with a hot pipe. I've got a very simple setup consisting of a steel pipe (a piece from a road sign) and a hot air gun. I've used it for all my instruments so far and it's served me well. I was nevertheless nervous before bending these sides, as a guitar side is more complicated than a mandolin. But it turned out very well. For bending the waist I had a damp cloth between the pipe and the wood, as I had to keep the wood in a fixed position during the tight bend, and I didn't want any burned marks. 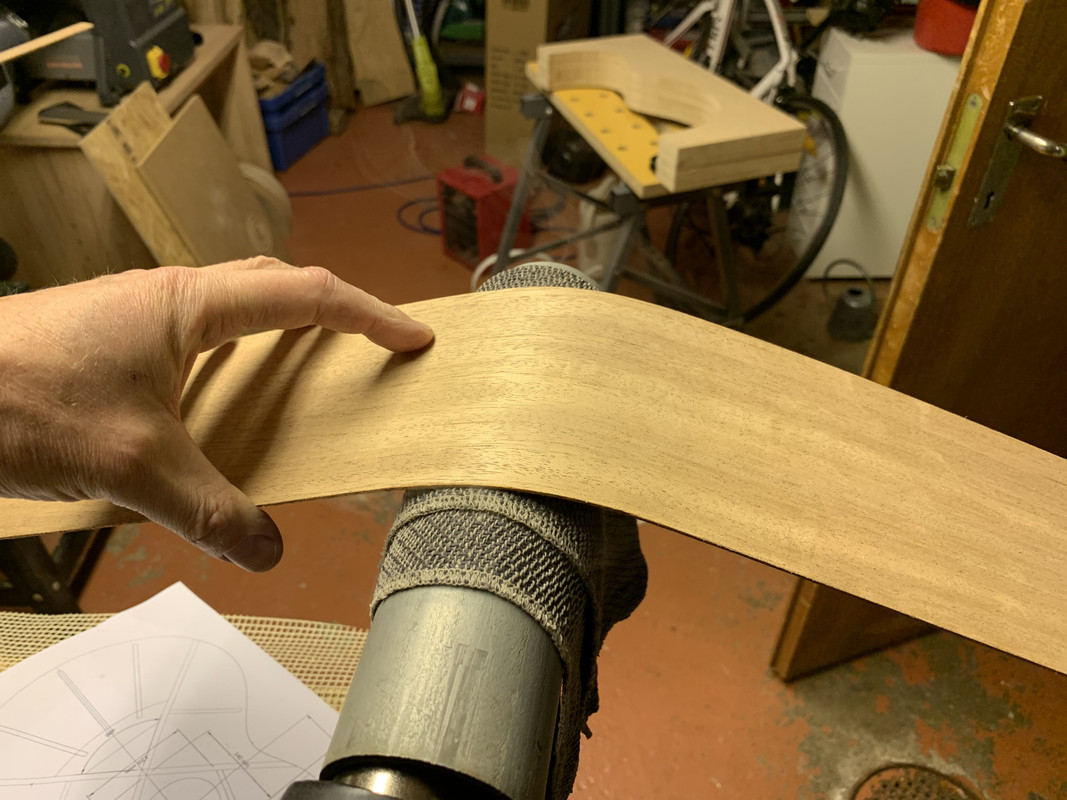 For the rest of the bending I wet the wood and bent it directly with rocking and sliding motions. Here are the bent sides resting in the mould: 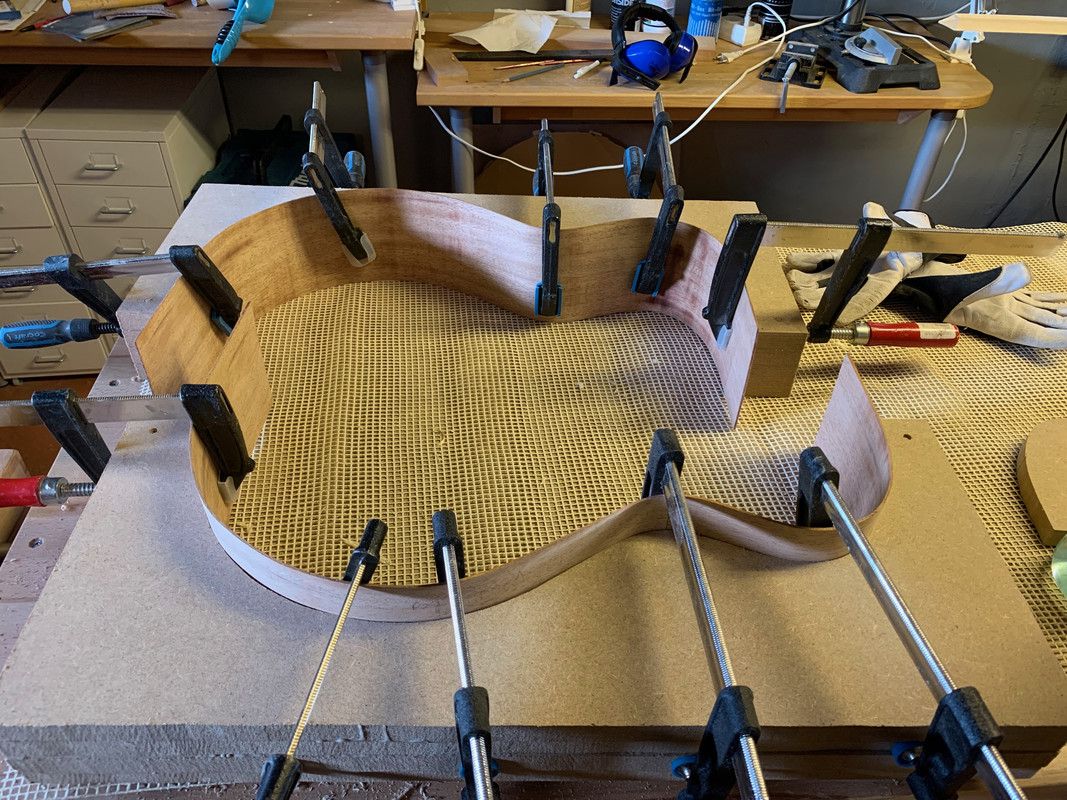 Today I've made the neck piece and the tail piece. Here are a few steps from making the neck piece: 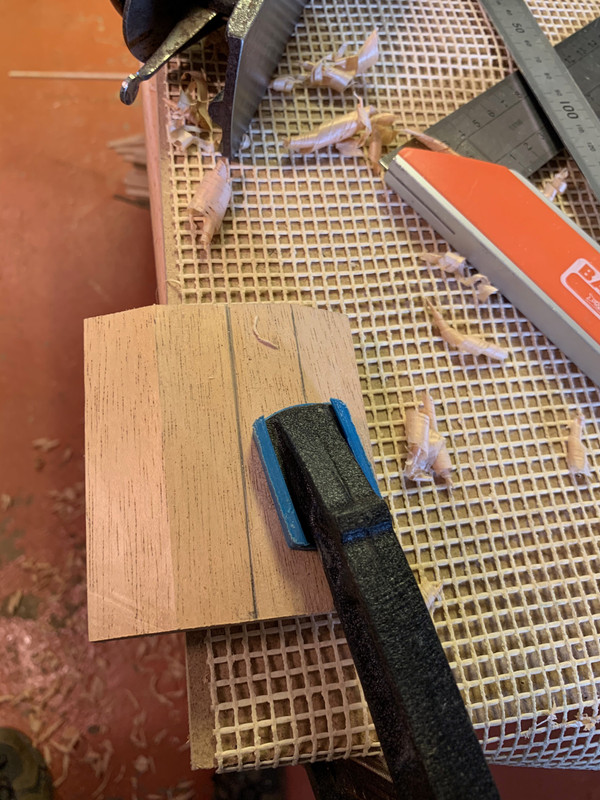 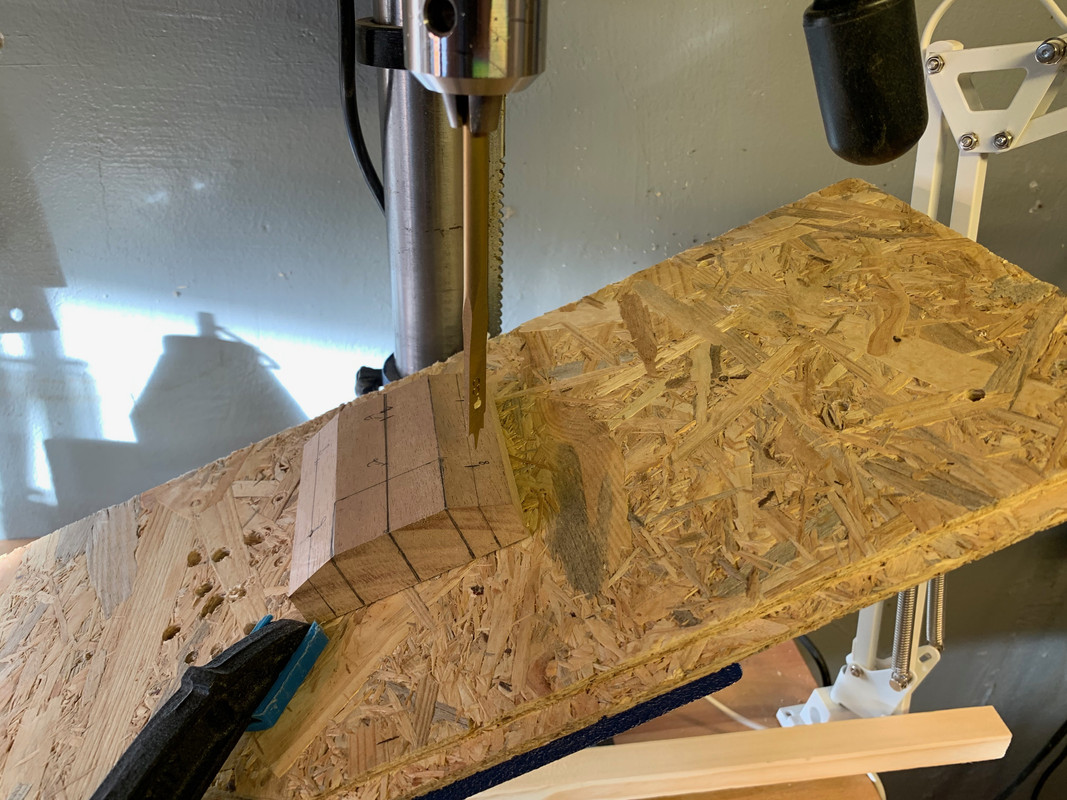 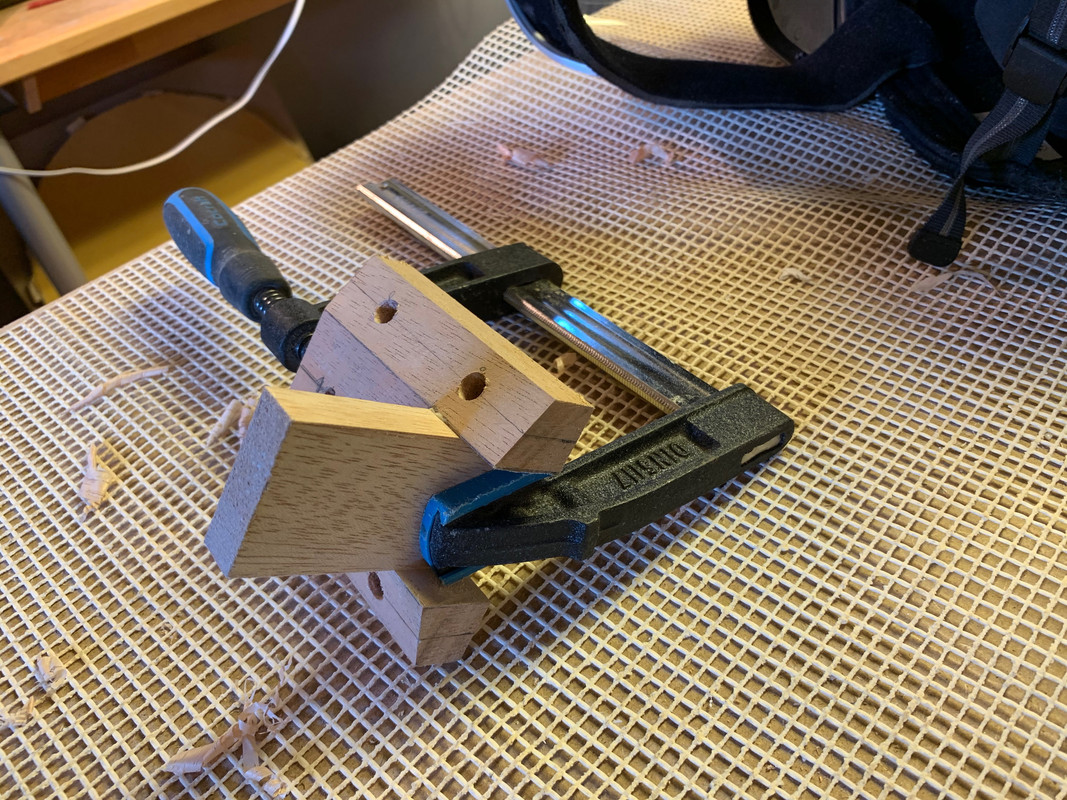 The tail piece was made from three layers of wood were the middle layer was glued cross grain against the other layers (and the sides). This is from preventing cracks if the instrument would fall on the strap pin. Here the tail piece is glued to the sides: 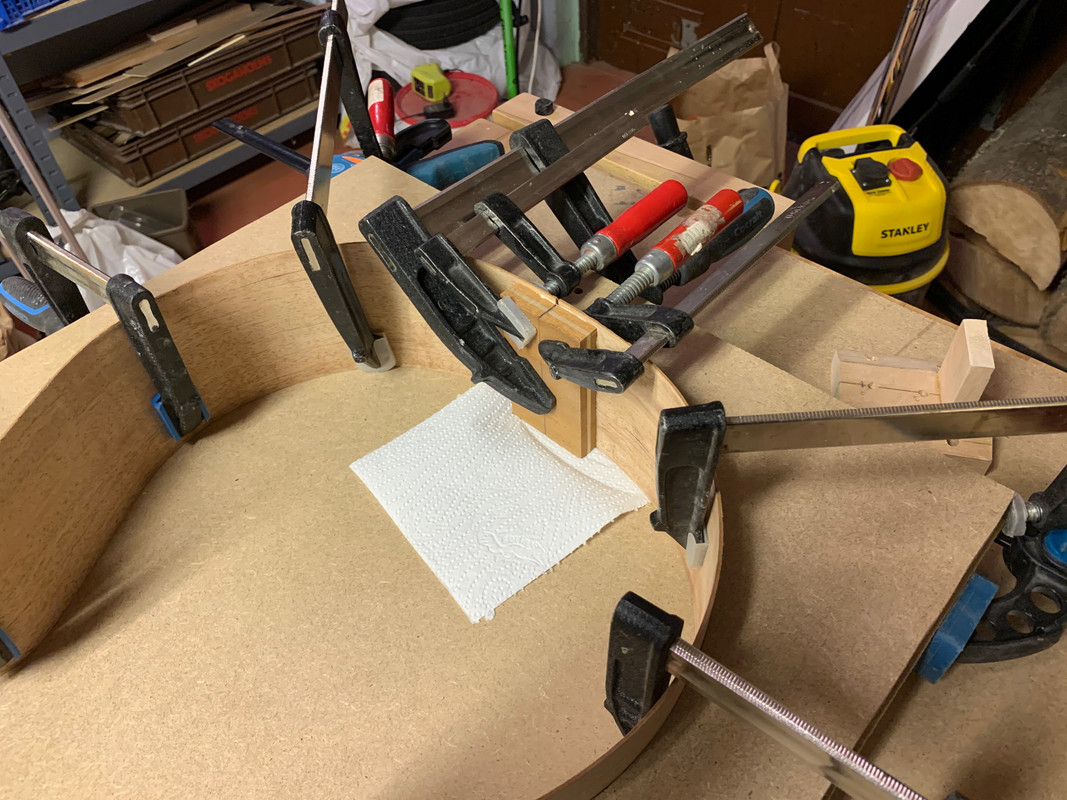 And here the neck block is being glued: 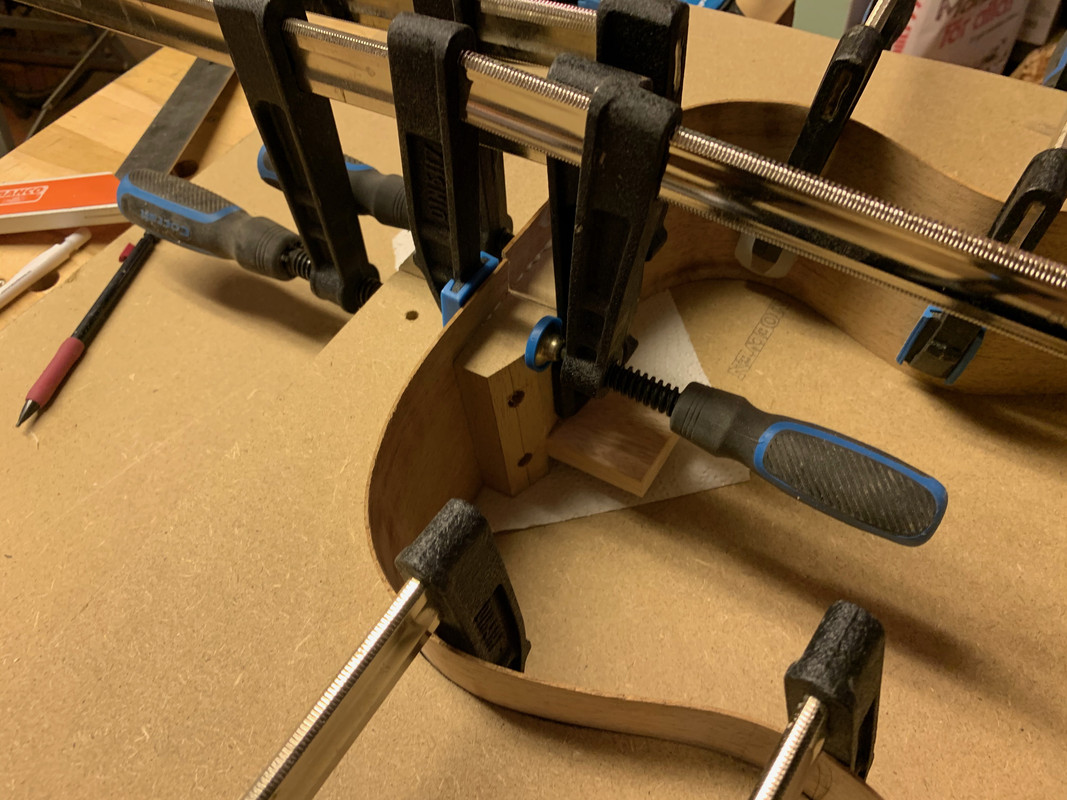 And the rim set in the mould: 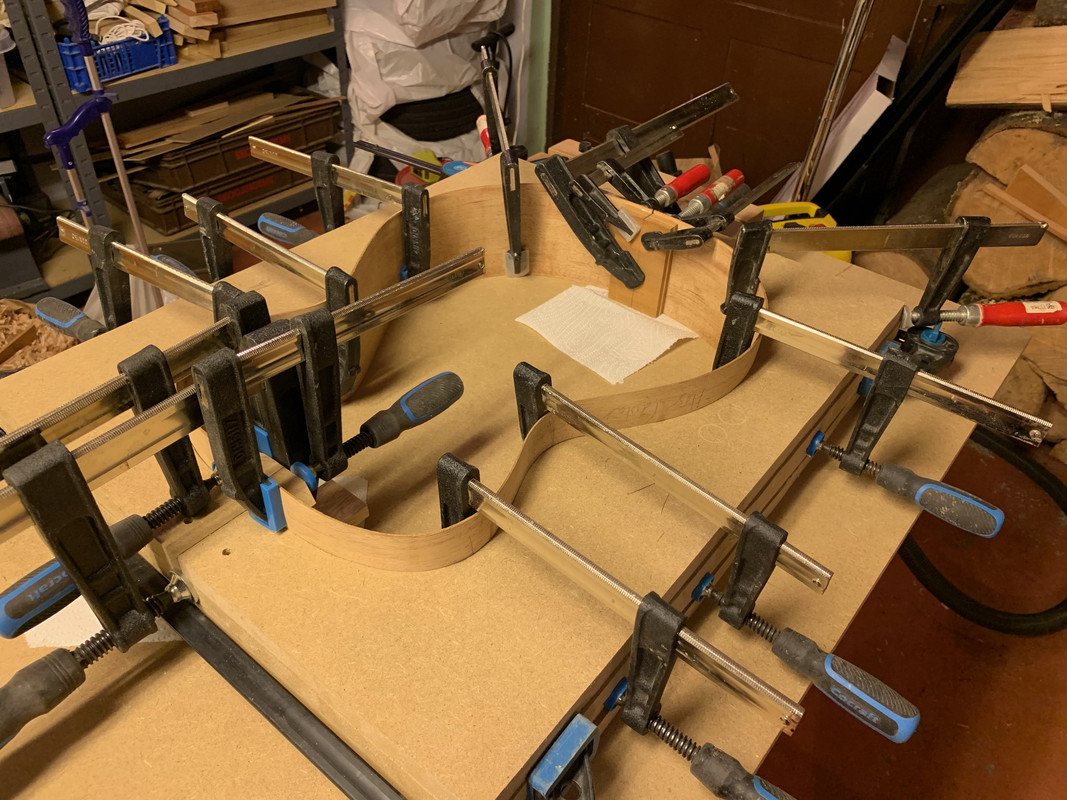 The next steps will be to bend linings for the top and add linings and struts to the rim set.
|
|
|
|
Post by lars on Feb 26, 2020 18:06:22 GMT
This Is such a beautiful build. And one of the cleanest build I've ever seen. I'm green with envy! I'm glad to see the progress!
/Lars
|
|
|
|
Post by lars on Feb 26, 2020 10:38:36 GMT
Beautiful! I look forward to see the "in progress" photos!
|
|