|
|
Post by lars on Feb 28, 2021 12:13:11 GMT
Closing the boxHere's the next installment. First the backstrip is installed. Both backstrip and braces are from European spruce. The ladder braces are profiled to 15`. 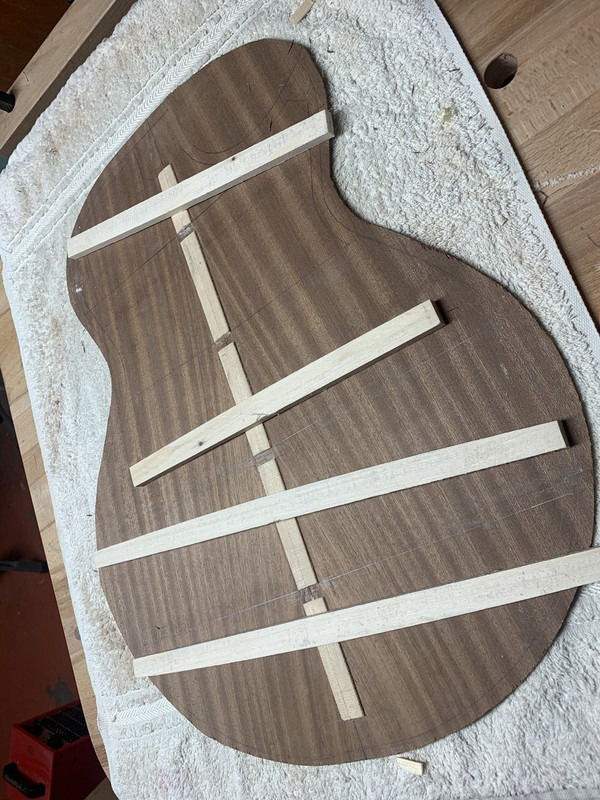 And glued in the go-bar deck. 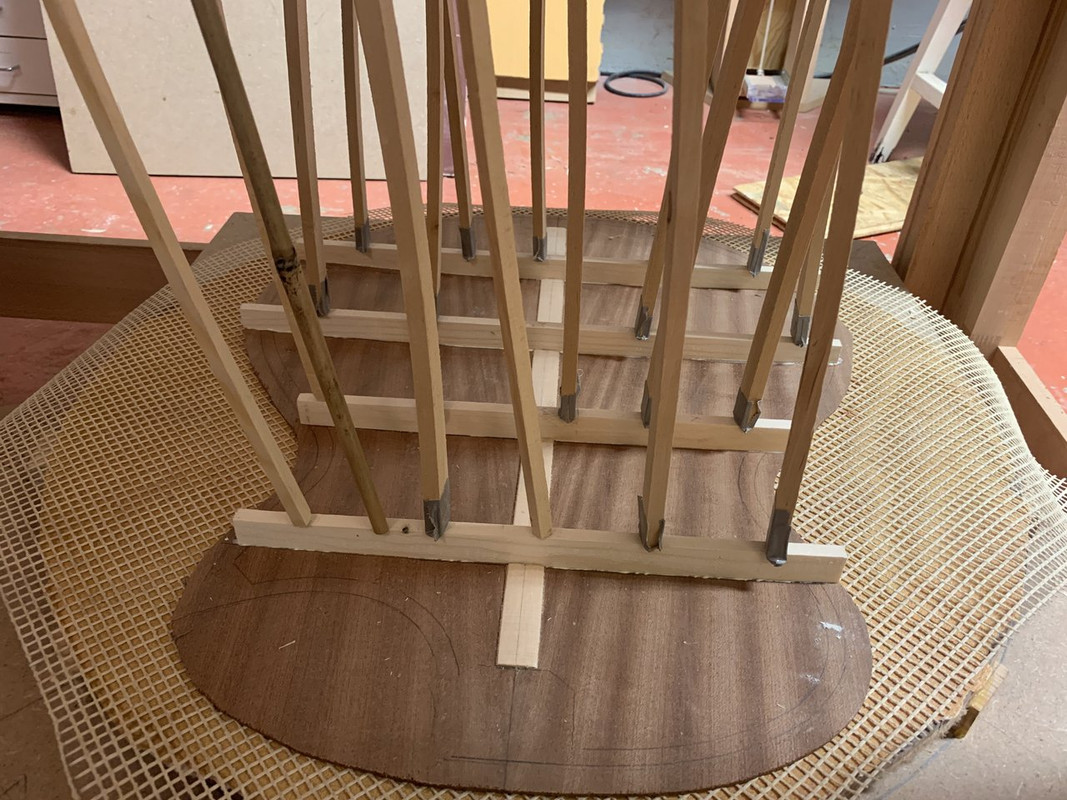 And carved and "tuned": 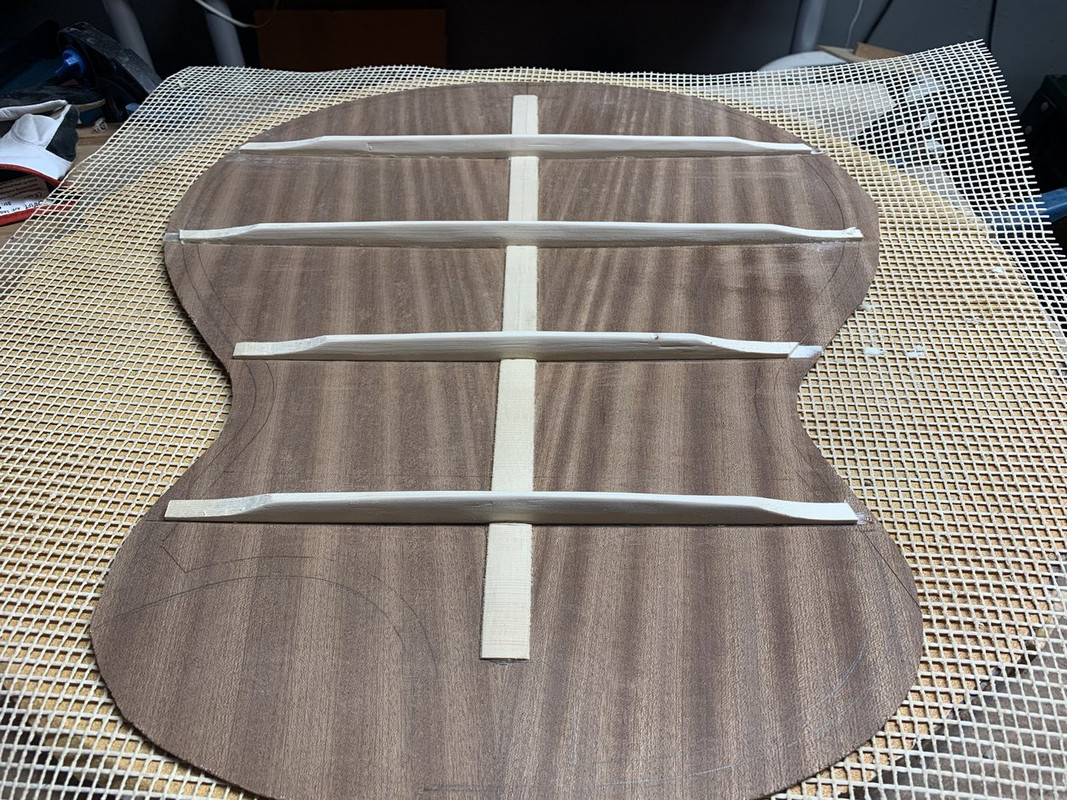 First the top goes on: 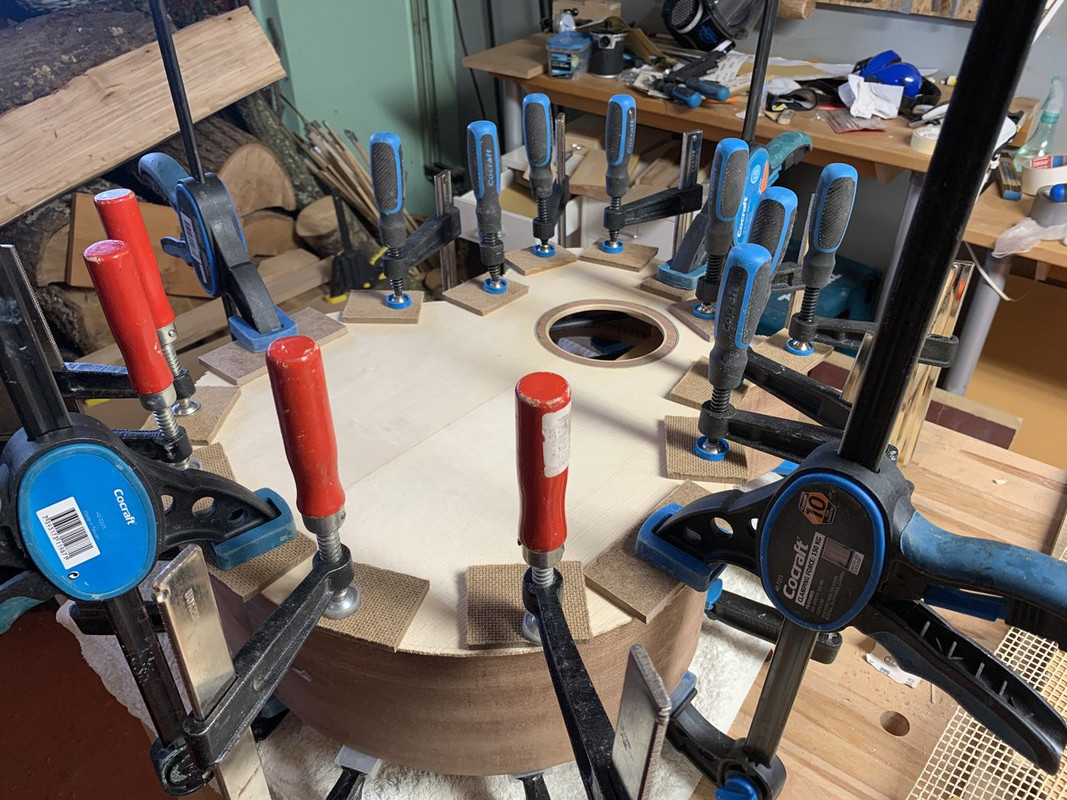 This time I've sealed the interior with schellack: 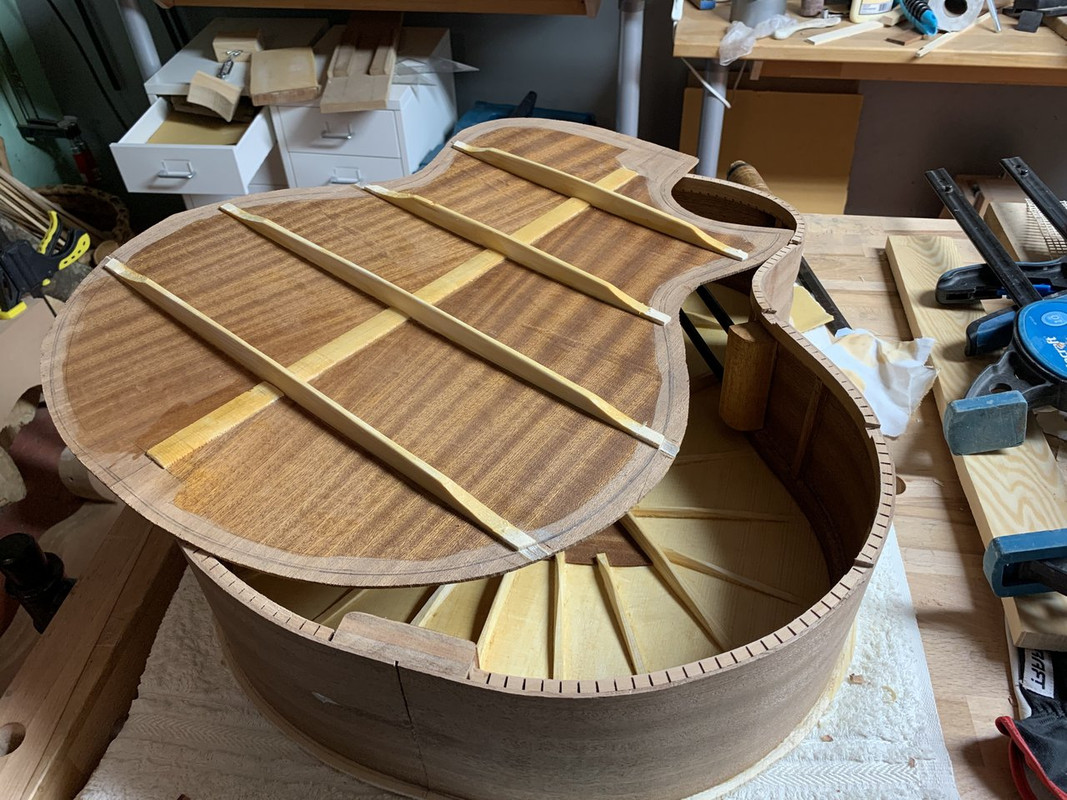 And then the back goes on: 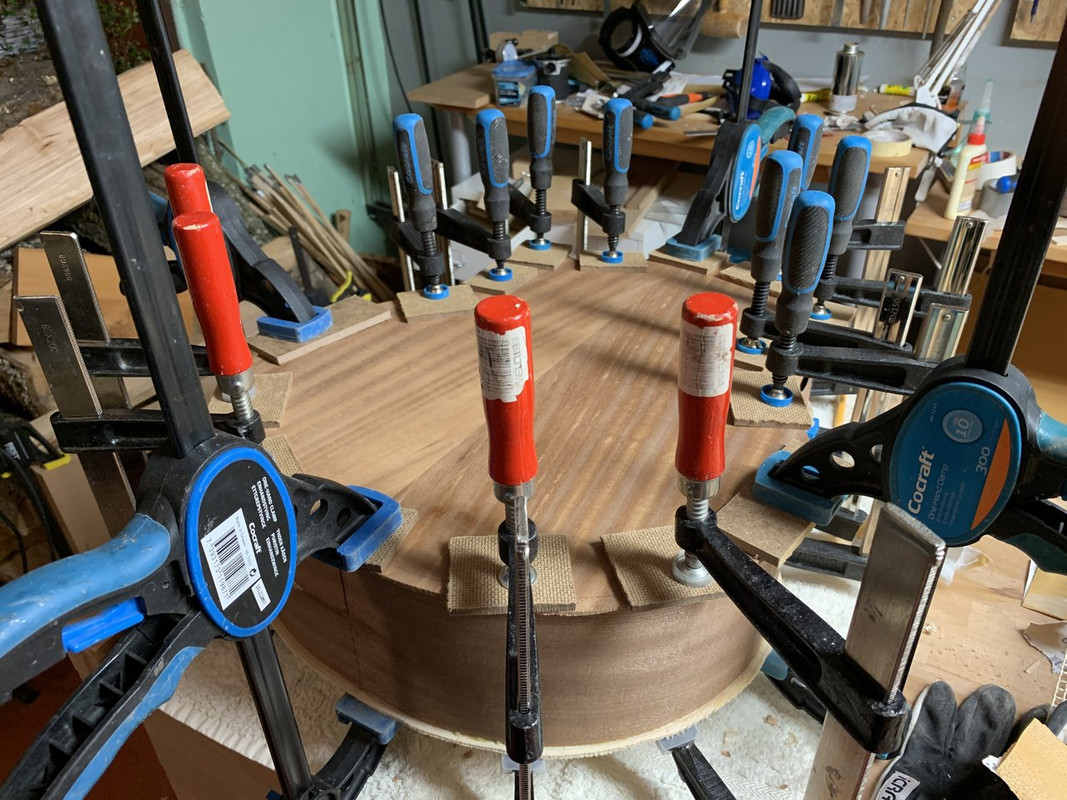 The top is closed and top and back are trimmed flush to the sides: 
|
|
|
|
Post by lars on Feb 24, 2021 20:21:04 GMT
Good to see you building again. Hope that you're keeping well and safe. Cheers Gary Thank you, Gary! Your “welcome back” is much appreciated. I guess that I’m well and safe, though the pandemic has been a dread - and still is. I work very hard with my day job as a teacher and try to get a few moments for myself in the workshop. I’m glad this guitar seem to come along very well. |
|
|
|
Post by lars on Feb 23, 2021 20:44:11 GMT
Good luck!
|
|
|
|
Post by lars on Feb 23, 2021 20:41:52 GMT
Making the rim
I bend the sides with a simple "hot pipe" setup. It consists of an aluminium pipe and a heat gun. Similarly to the thickness sander, I don't have the space for a "bending machine" and all the moulds you would need to bend them in a fox style bender. It has its pros and cons to bend by hand - it's one of the most enjoyable parts of building when it works, but it's difficult to get the same consistency. Here are the bent sides resting in the body mould: 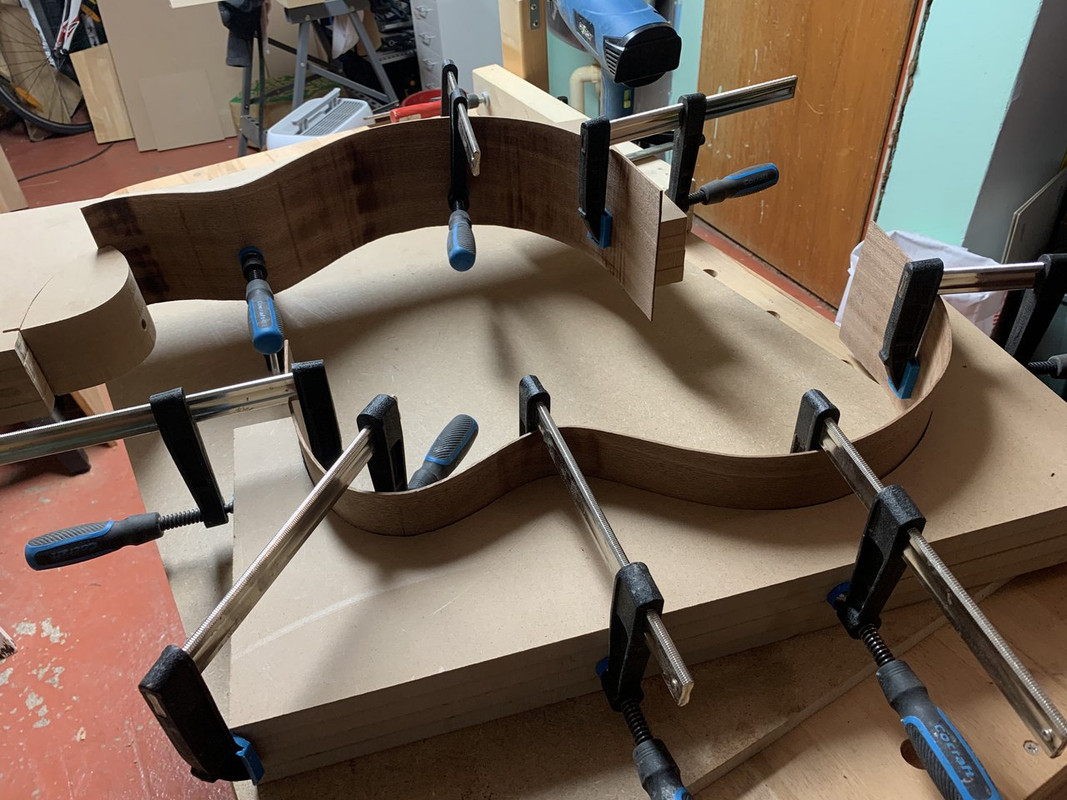 And here is the cutaway part: 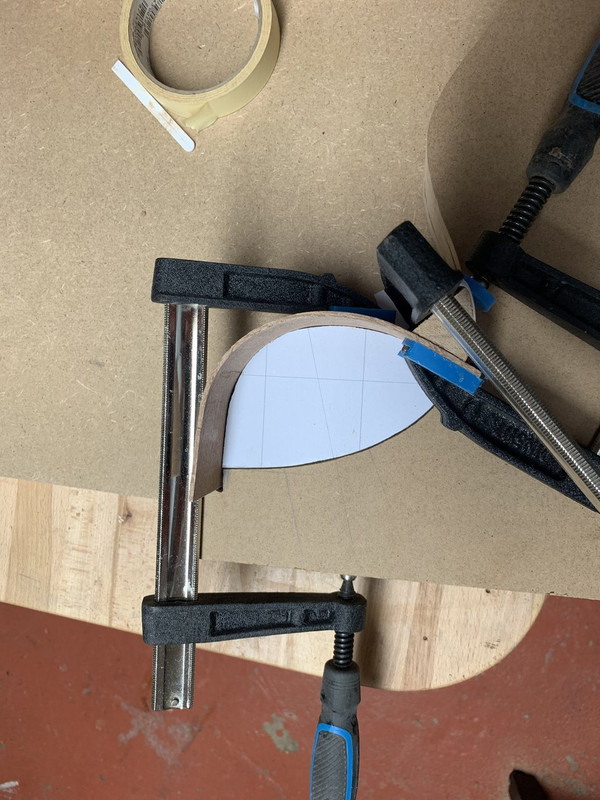 I start by gluing the cutaway with the under side. I use epoxy for this:  Then both sides are glued with the tail block: 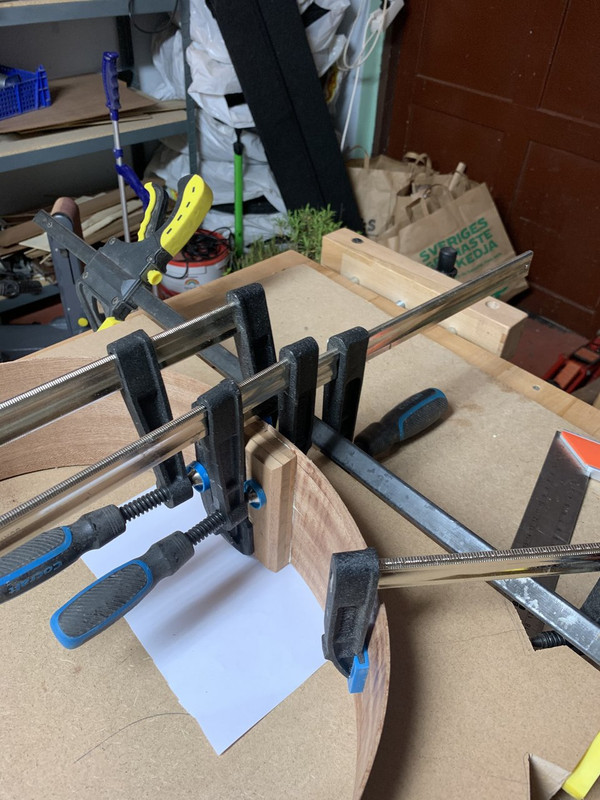 No pictures from the last step, but it's gluing the sides to the neck block. Here the laminated solid linings that I use for the top are glued in a mould: 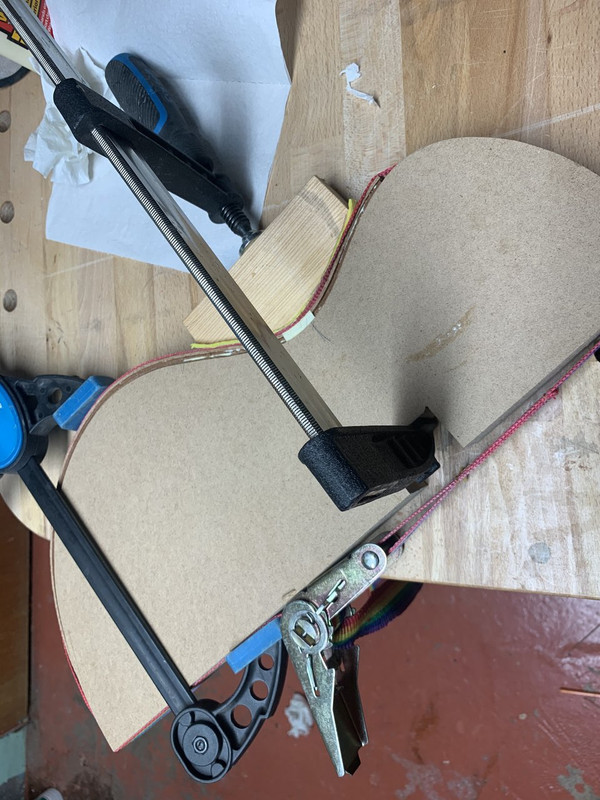 And the result is here: 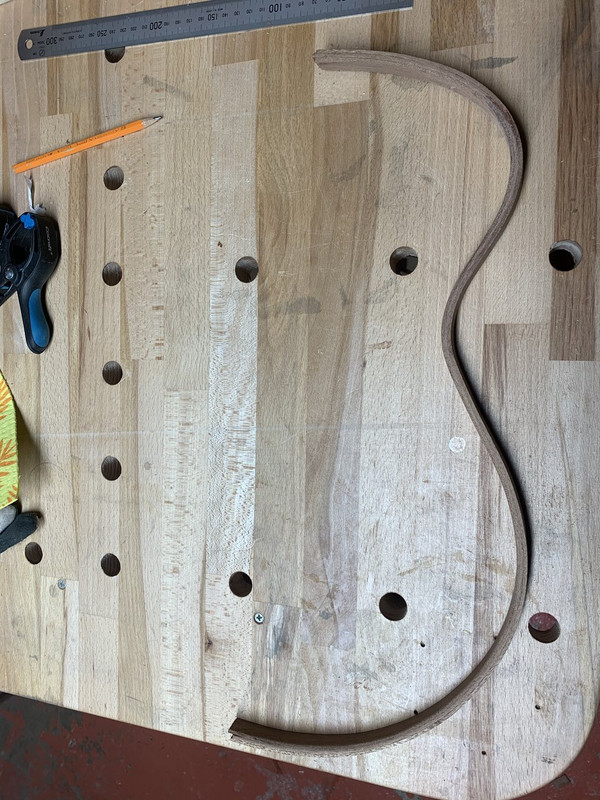 Solid linings glued to the sides:  And reverse kerfed linings are glued to the back side and then sanded to match the profile: 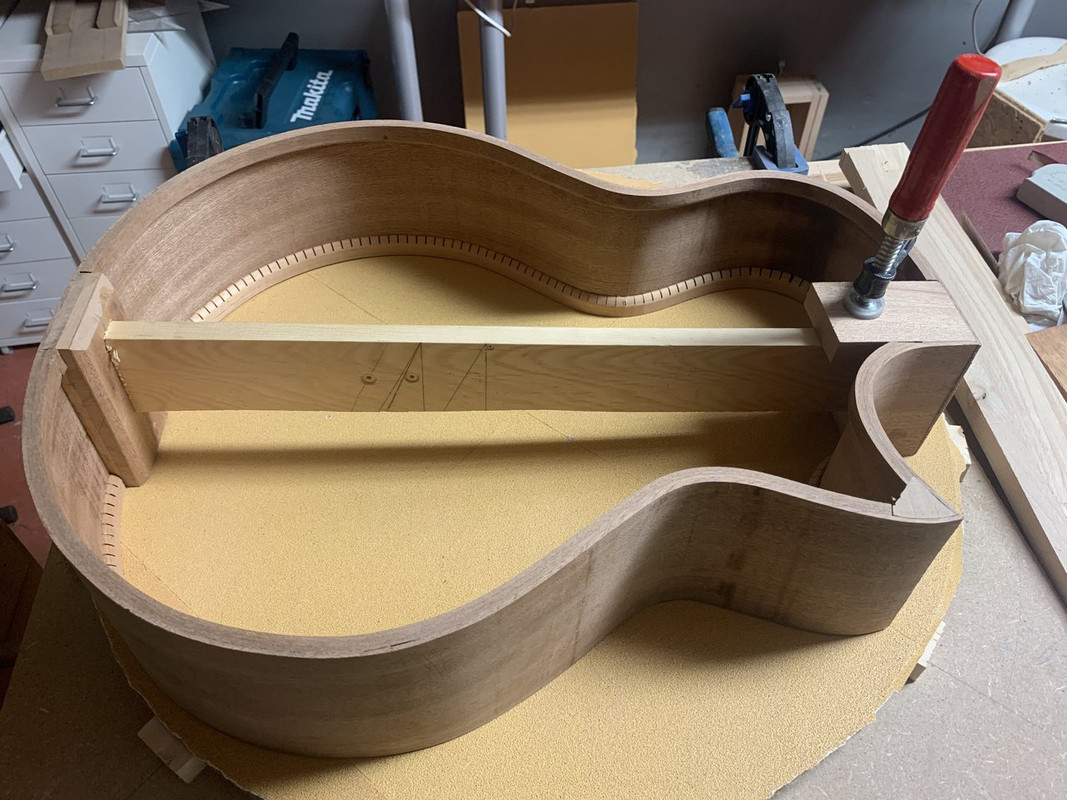 The CF floating rods are added:  And the side struts:  Finally the sound port is created by drilling a series of small holes and shaping with file. The inside is reinforced with a cross grain veneer: 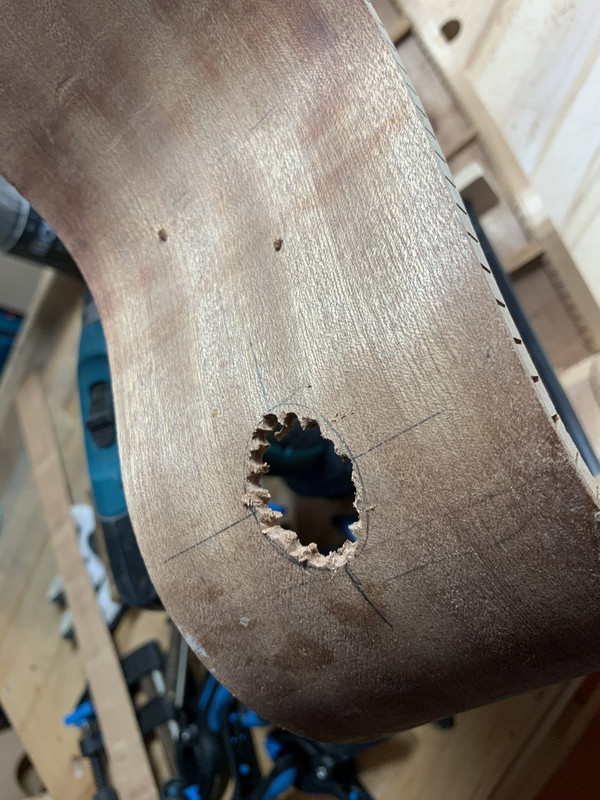 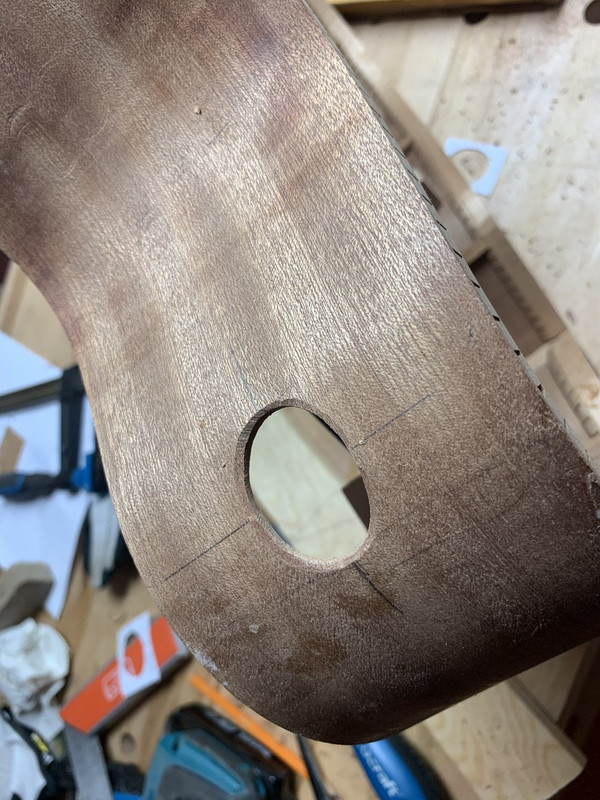 And lastly, here's the finished rim set: 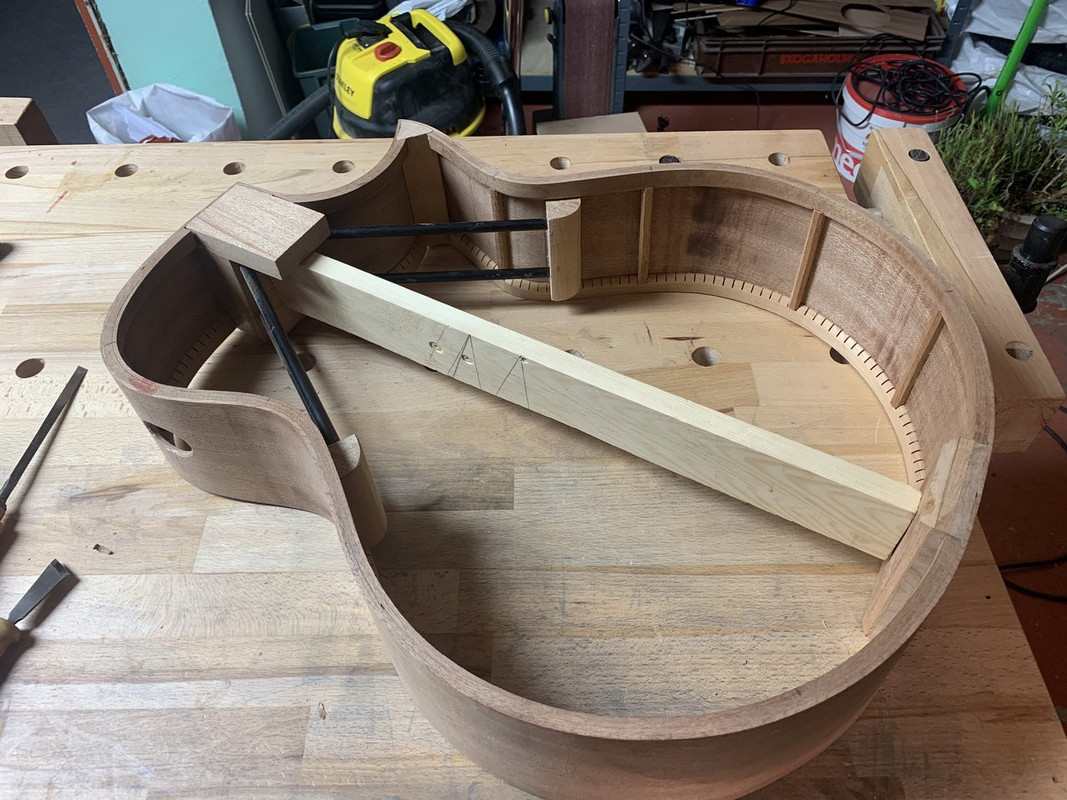
|
|
|
|
Post by lars on Feb 22, 2021 19:53:37 GMT
Bracing the top
The x-braces are profiled in the 25´sanding dish 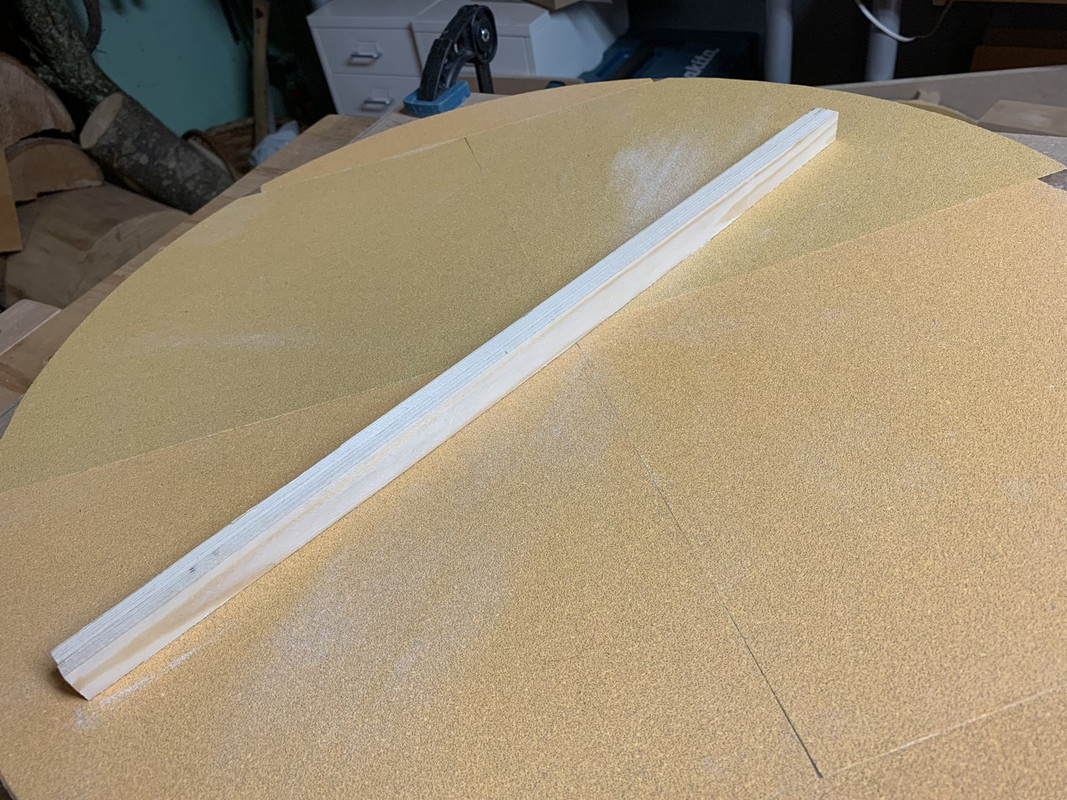 And are notched 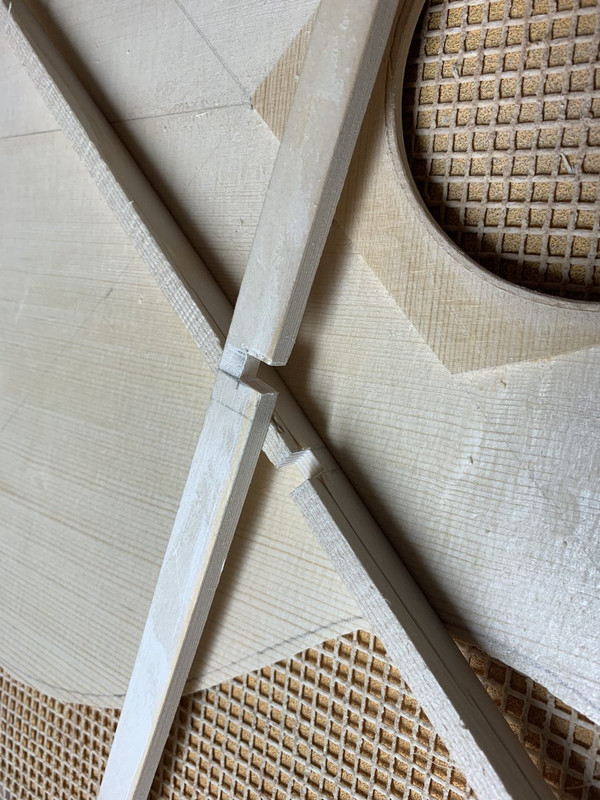 And glued to the top in the "hidden beneath the work bench go-bar deck": 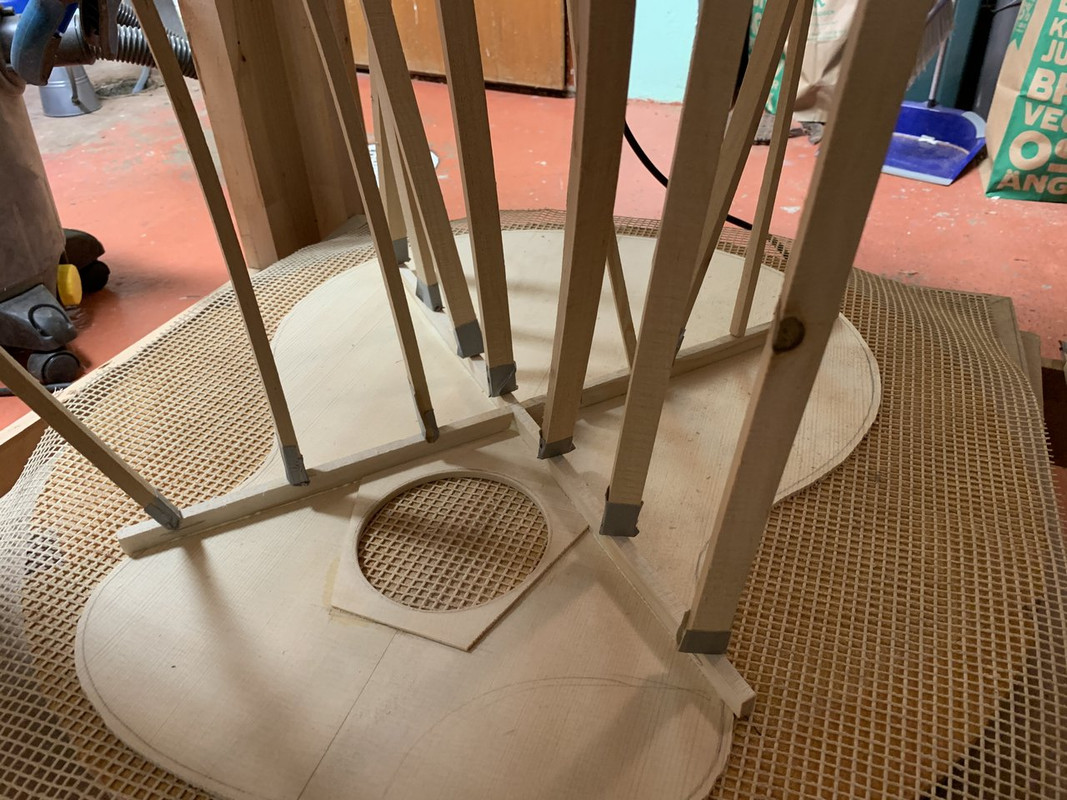 Then the finger braces are added. The top didn't appear to be as stiff as I expected so I went for five fan braces (my original plan was four): 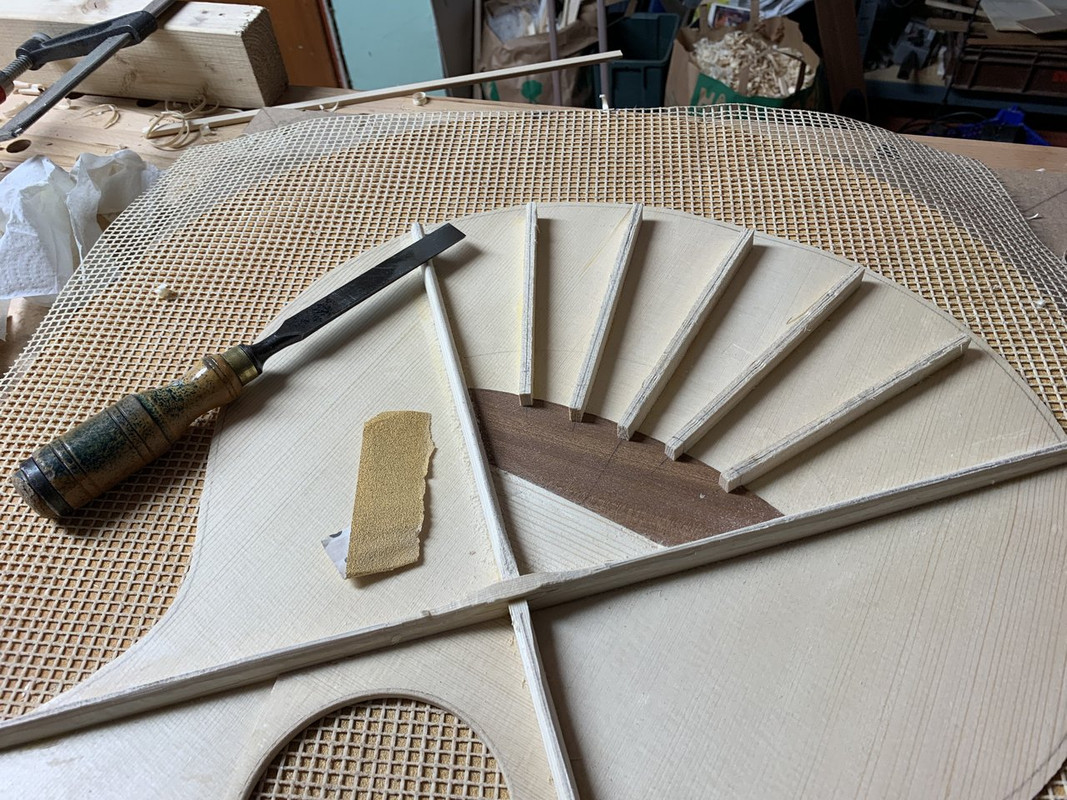 (The bridge plate is also Sapele btw. It may seem like a rather soft hardwood, but the Janka Hardness is a lot higher than Maple and Sycamore, so it's really one of the most suitable woods for this.) For the same reason I went for three finger braces at each side: 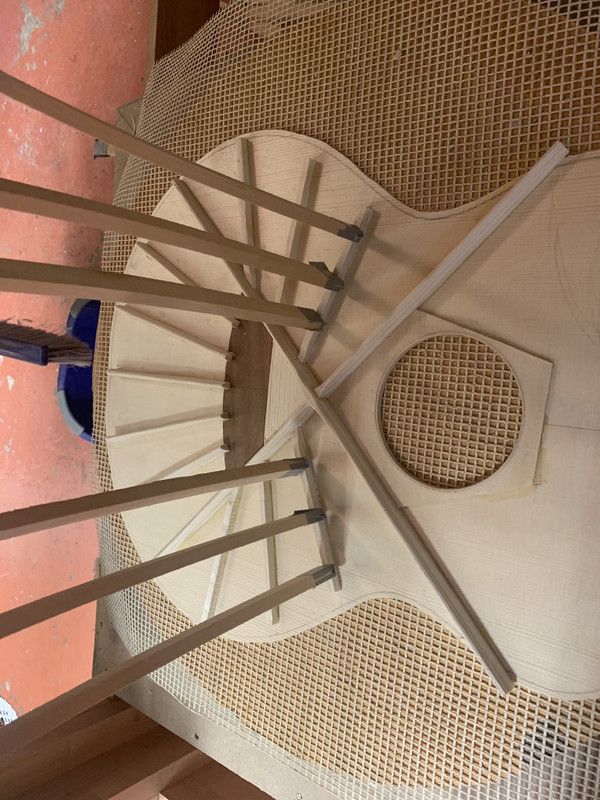 The upper traverse brace is glued. Here I made "fatal" mistake and followed some bad advice on the internet. The advice was "keep everything below the sound hole profiled, but keep everything above the hole straight to give you a correct angle for the neck extension". So I did but it made the top topography a bit awkward. Not a big problem, but it locked me into certain construction and design decisions later on: 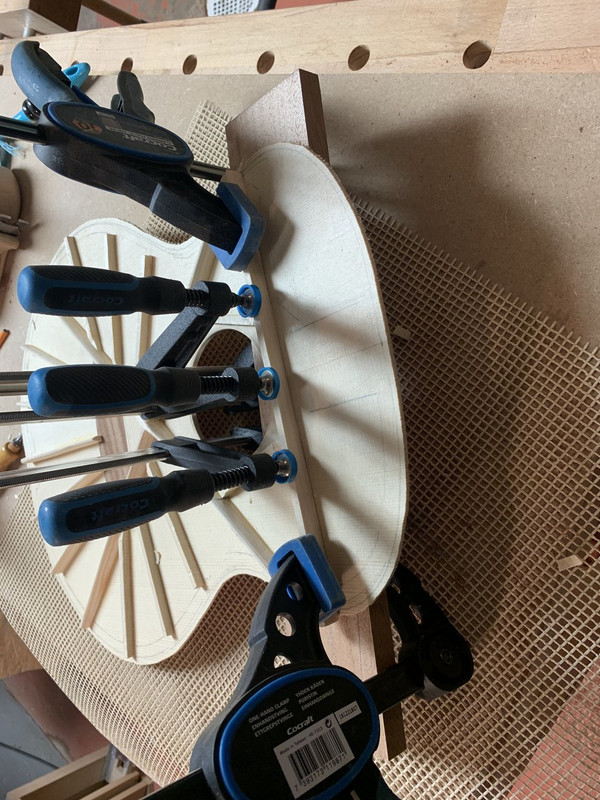 Here all the braces are on: 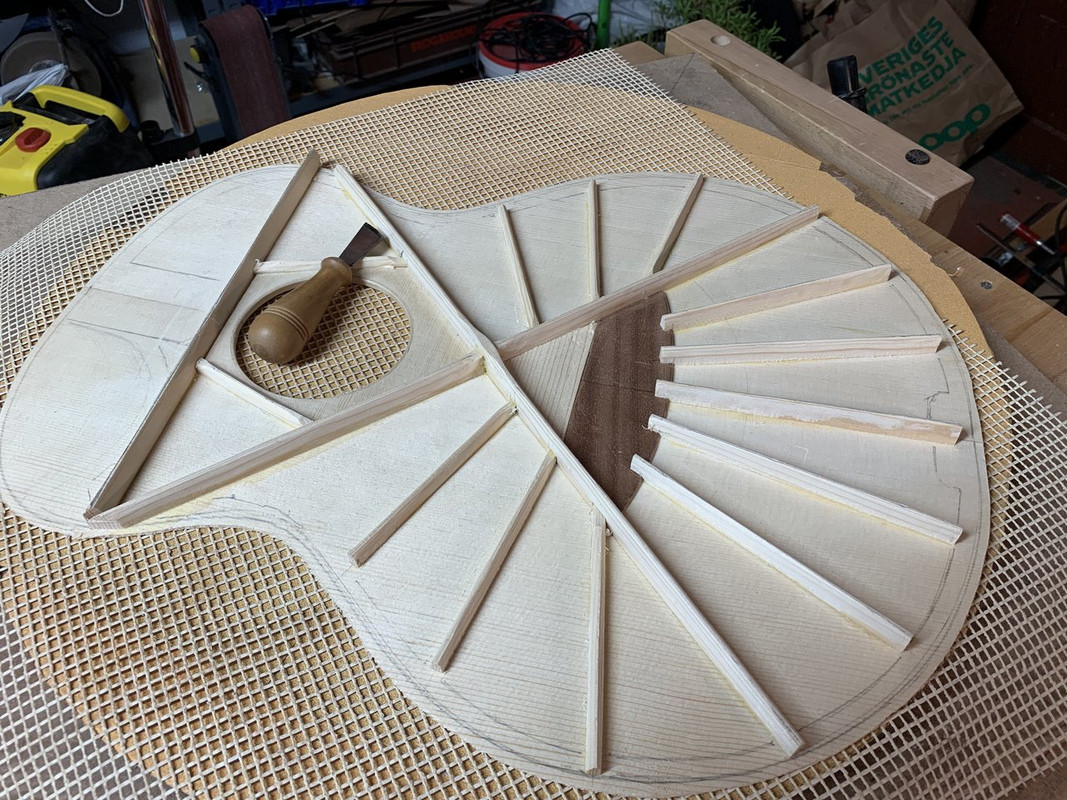 And finally it's time for "voicing the top". This is the part when I whittle on my braces, tap the top and sounds and look like Winnie-the-PooH. This is what the bracing looked like when I was almost finished: 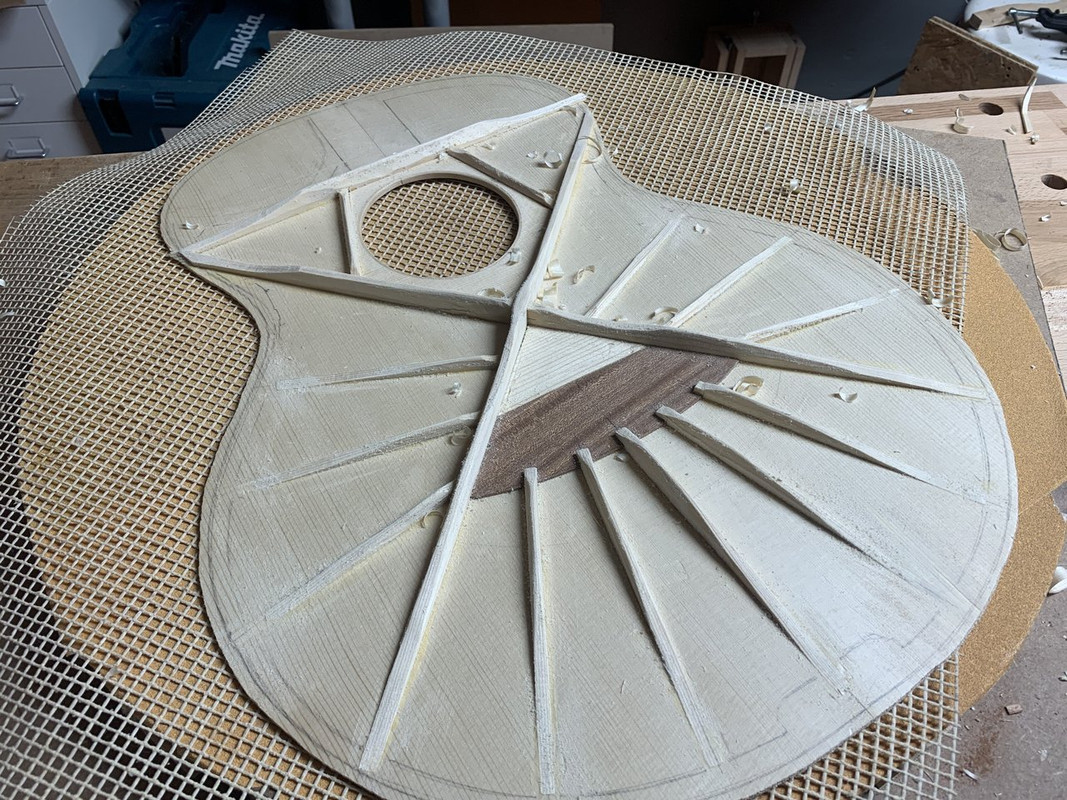
|
|
|
|
Post by lars on Feb 22, 2021 19:05:16 GMT
In the last post I meant to say "Here are the mandatory pictures of planing and gluing pieces of wood", but a few words fell away... Next is the rosette. The "ring" is made of Sapele, just as the sides and back. To tell the truth it is made of the wood for the original sides (I buy back and sides in sets). I made an experiment to see if I could take away the bulk of thickness in the thickness planer. It didn't work out. The planer tore large pieces out of the wood. But it left me with some pieces of wood with interesting grain and figure. So that's what I used for the rosette: ![]() 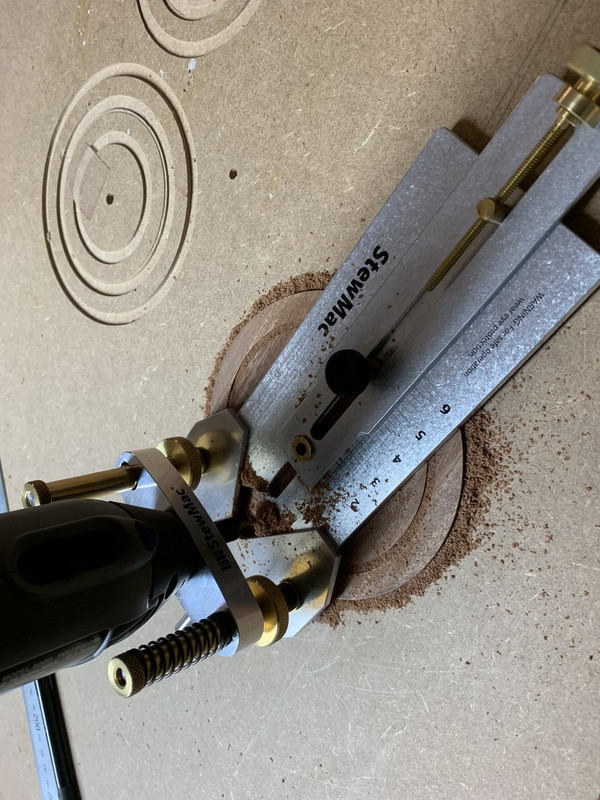 ![]() 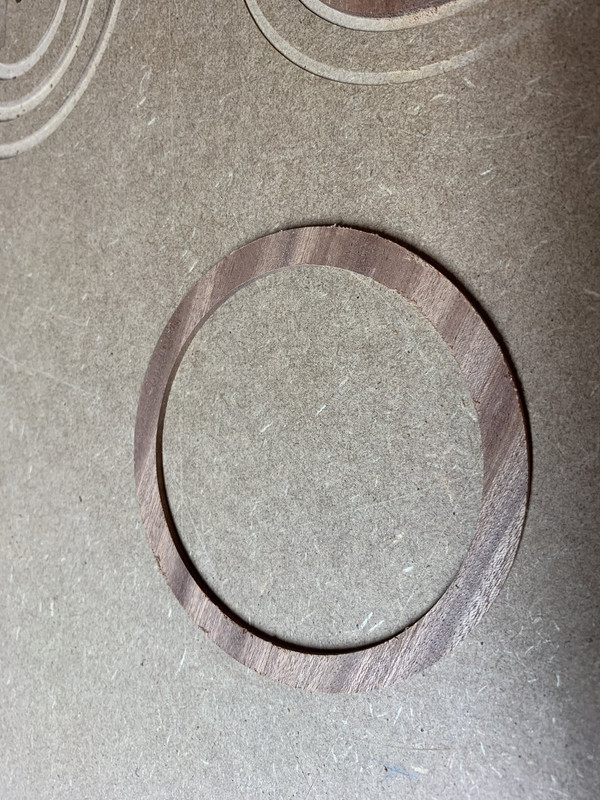 Then I route a circular pocket for the rosette in the top: 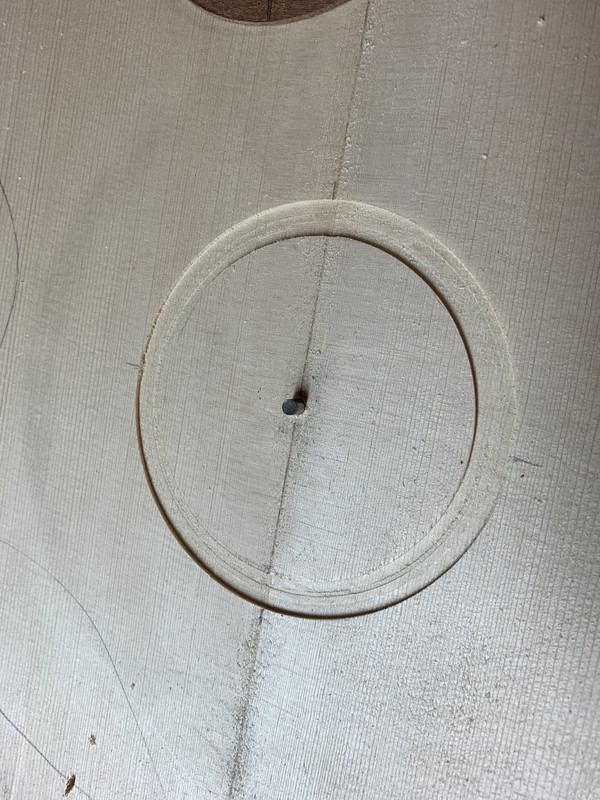 And add a sound hole patch at the back side:  I route a channel for the purfling and then I route the sound hole itself: 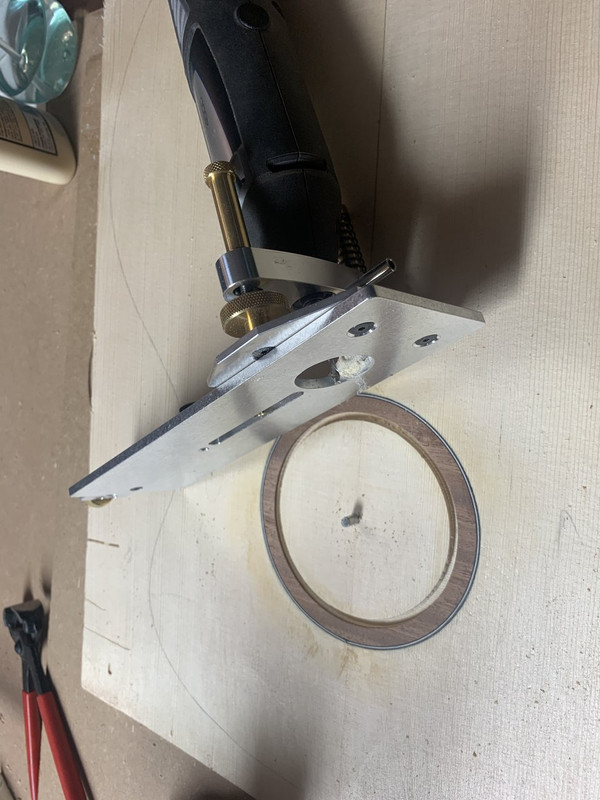 Lastly a Birch wood binding is added to the sound hole: 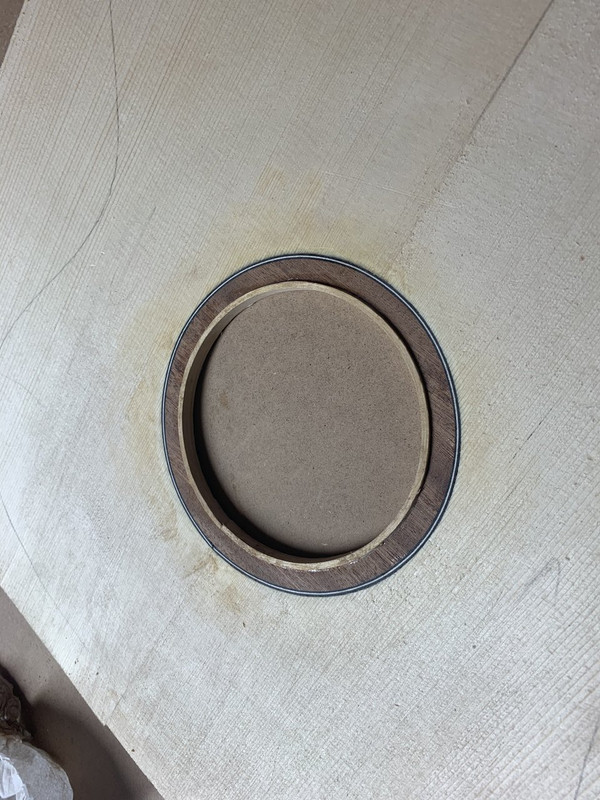 And after some trimming it looks like this: 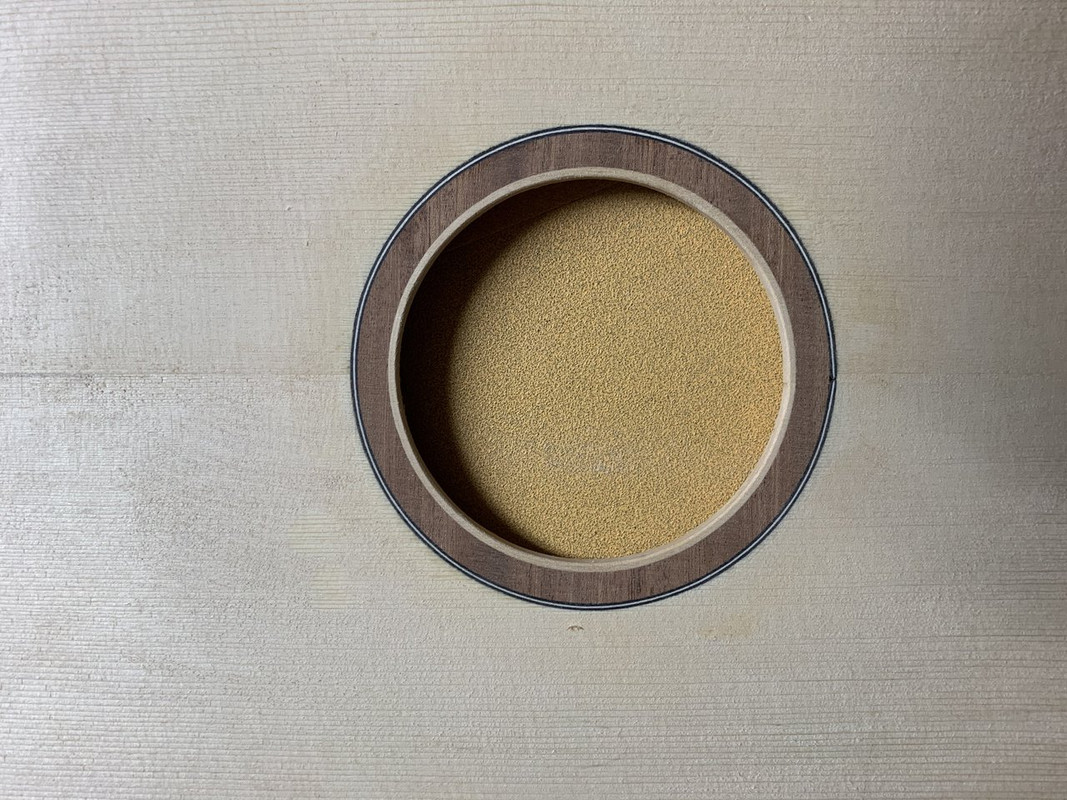 |
|
|
|
Post by lars on Feb 22, 2021 17:21:49 GMT
|
|
|
|
Post by lars on Feb 22, 2021 17:11:00 GMT
Looking forward to the photos as the build progresses, lars  Thank you, Leo! |
|
|
|
Post by lars on Feb 21, 2021 20:13:23 GMT
I’m also a leftie. A rather extreme left handed person who does almost everything with my left hand. But I’ve always played guitar and other instruments “right handed”. I’ve never been a very good player but I’m convinced that - as a beginner and even intermediate player - you will find that the most difficult things are the ones that you do at the fretboard with your left hand.
And it’s not only about being easier to buy a guitar. It’s about every time you step into a room and there’s a guitar in it. Do you want to be able to pick it up and play it - or say, “I’m sorry , I only play left handed guitars”. I’ve never regretted that I picked up my dad’s guitar and started to learn to play. I never even reflected over the fact that he was right handed and I was left handed.
|
|
|
|
Post by lars on Feb 21, 2021 19:36:49 GMT
This is my second guitar build but my 15th steel string instrument. The first guitar was a Grand Concert/00-sized instrument which turned out to be a lovely instrument. Mainly an instrument for finger picking, but also a good instrument for strumming. This time I wanted a larger instrument to compete with a Dreadnaught but more versatile. So I started to design what was supposed to be a Small Jumbo. But when it ended it was very similar to a Grand Auditorium. So I guess this is my take on a GA-guitar.  This guitar shares a lot of design principles with the last one. The lower bout is rounded to push the "sweet spot" forward. So the waist is also pushed forward and the upper bout is slightly smaller than traditional. I continue to experiment with an X/fan hybrid bracing etc. The guitar will be built with an European Spruce top, Sapele back and sides and an African Mahogany neck. It will be a thirteen fretter, as it places the bridge further back on the lower bout. To get access to the higher frets it will have a Florentine Cutaway. A lot of other design- and material decisions are yet to be made. |
|
|
|
Post by lars on Sept 20, 2020 14:04:34 GMT
It looks very nice! Is “bassy and rumbly” what you wanted? Are you pleased with the sound and playability?
|
|
|
|
Post by lars on Aug 30, 2020 6:09:53 GMT
A few more pictures...... and the specifications
Here are some slightly better pictures. But first the specifications: Size: Approximately 00 or Grand Concert size Lower bout: 358 mm Waist: 220 mm Upper bout: 256 mm Body length: 478 mm Total length: 990 mm Depth at tail block: 103 mm Depth at neck block: 83 mm Theoretical scale length: 24.9" Martin short scale, app. 632,4 mm Top: European Spruce Back and sides: African Mahogany (Khaya) Neck: African Mahogany (Khaya) Fretboard and bridge: Laburnum Rosette and Head veneer: African Mahogany (probably Sipu) Bindings: Birch + black dyed maple veneer Tuners: Gotoh SE700 Bridge pins: Bone   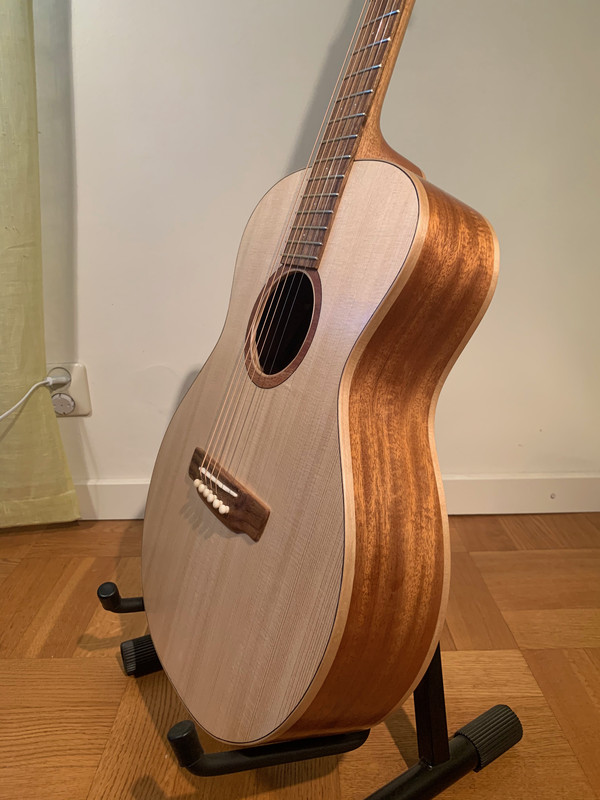 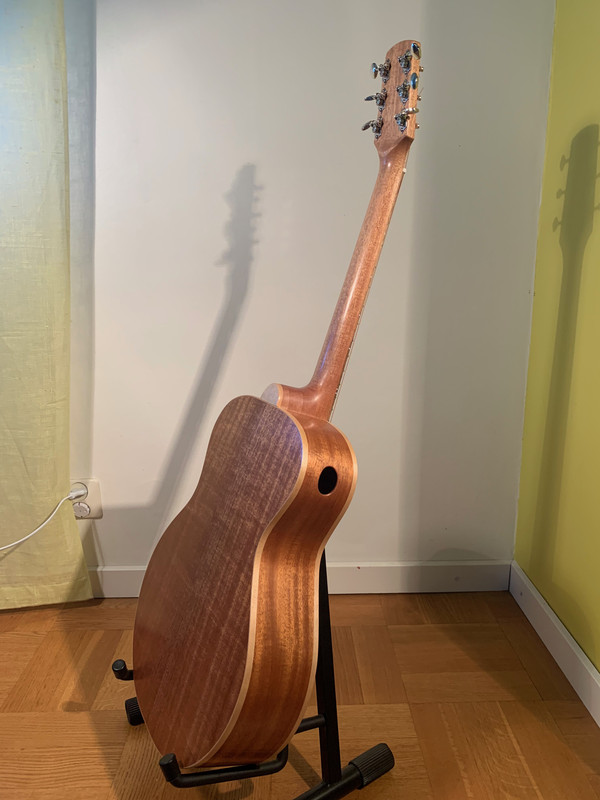 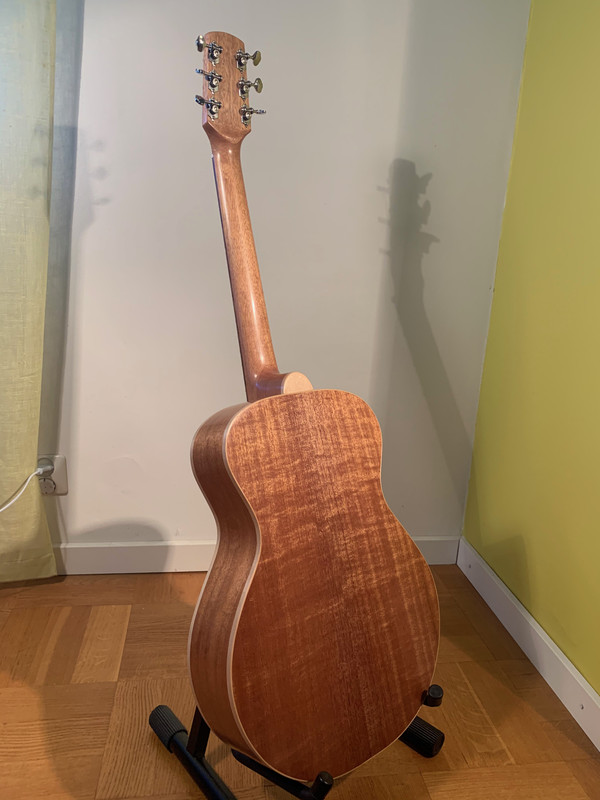 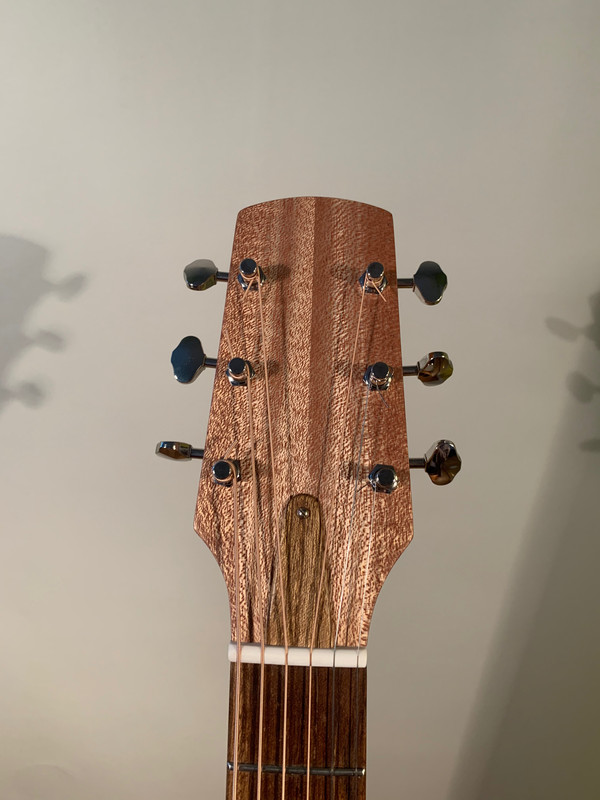 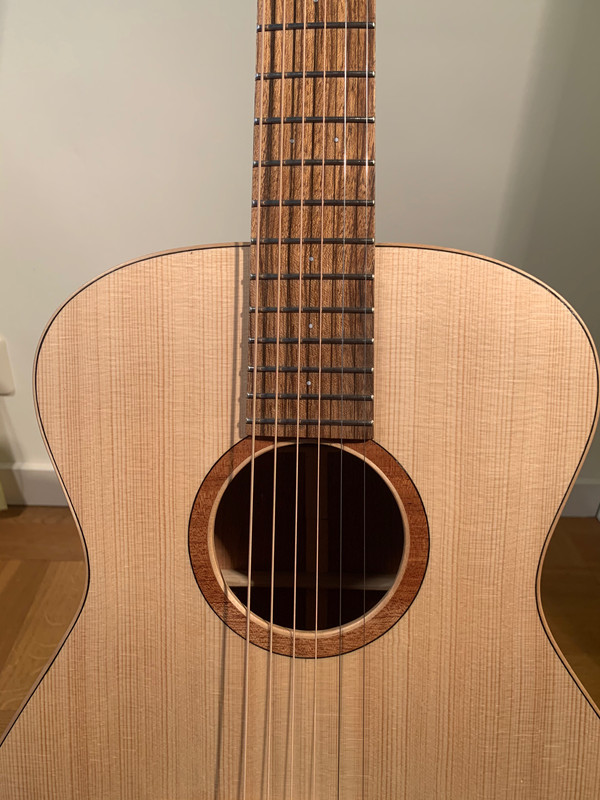
|
|
|
|
Post by lars on Aug 29, 2020 15:43:00 GMT
The last steps
Here are some glimpses of the last steps. This is my first glued on pin bridge - I've only made floating bridges for tail pieces before. When I decided to make the fret board of Laburnum, I also decided to make the bridge the same. I made this jig from scrap pieces, to give me the correct angle for the saddle slot: 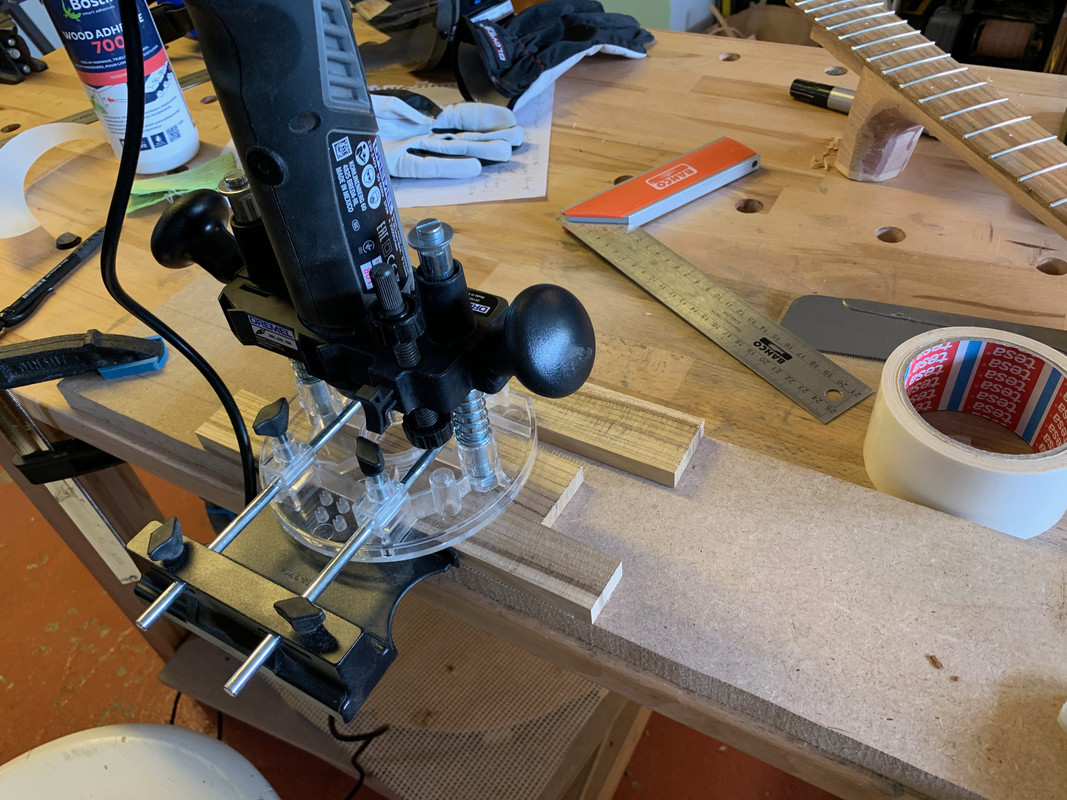 And here the slot is cut and holes for pins are drilled: 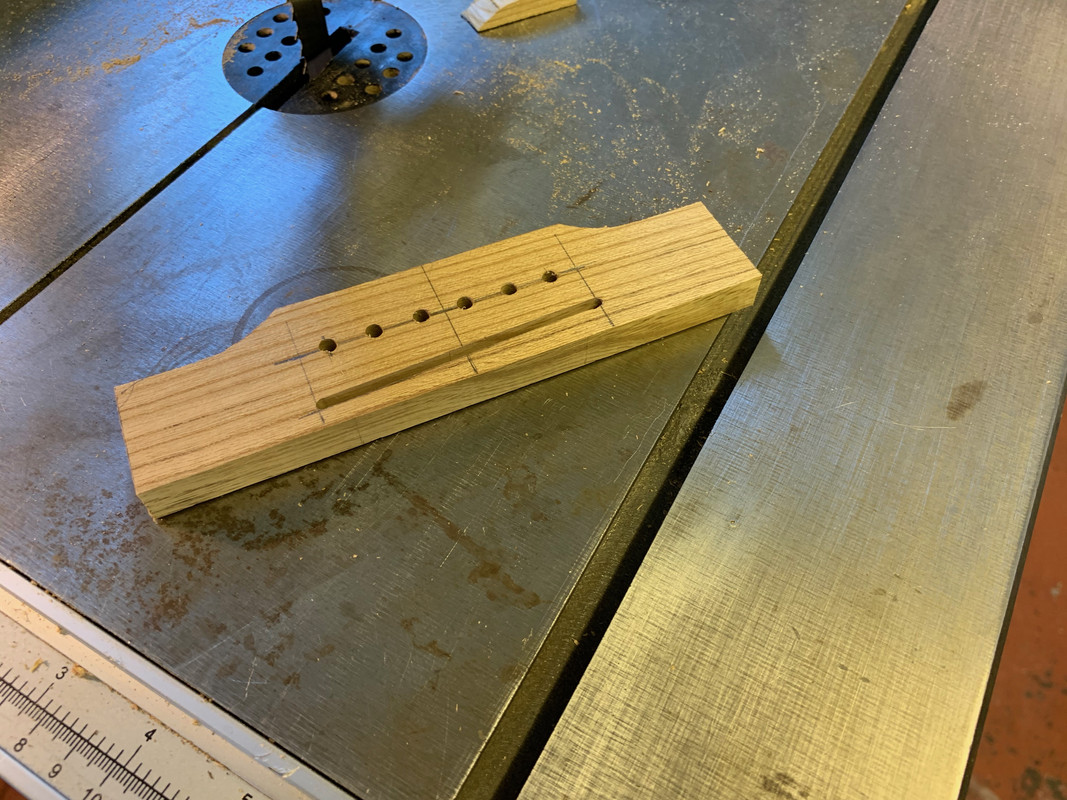 And no more pictures were taken before the bridge was shaped and sanded. And to tell you the truth. The first two photos was from my first attempt to make a bridge. The finished bridge is another one. Here it is loosely positioned on the top to admire the result: 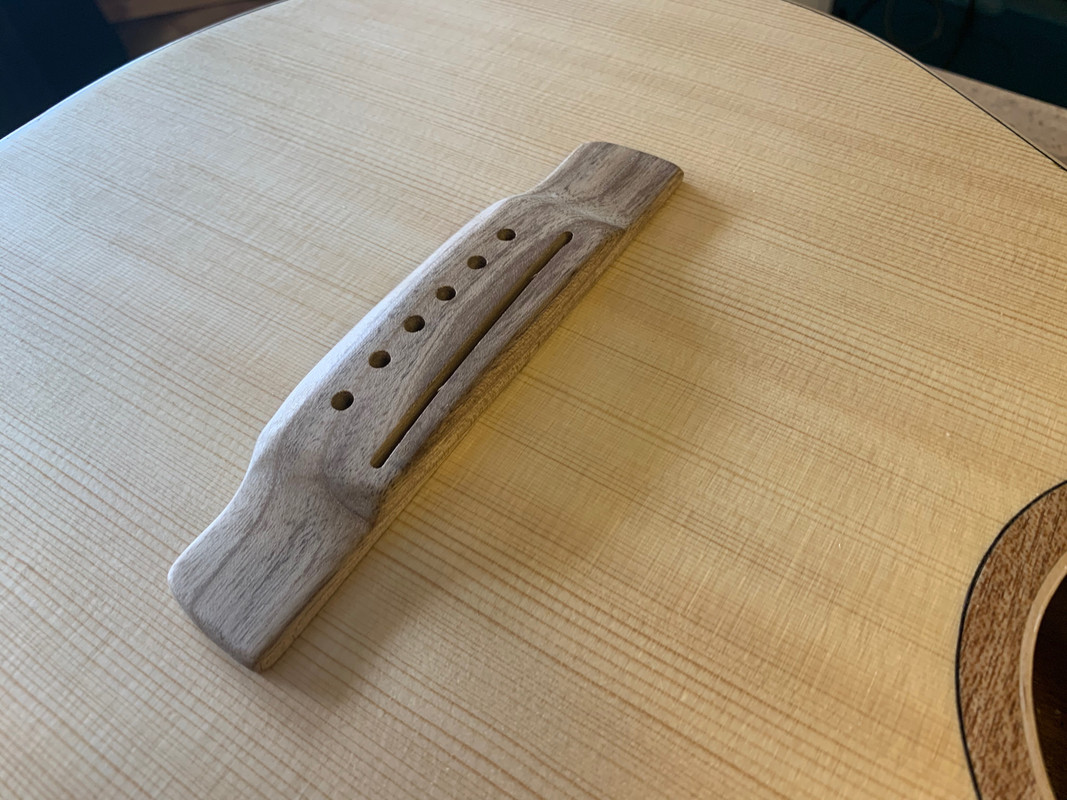 The bridge is placed in the (hopefully) correct position and the two outermost holes are drilled through and temporarily fastened with bolts. Then the contour of the bridge is scribed with a sharp knife: 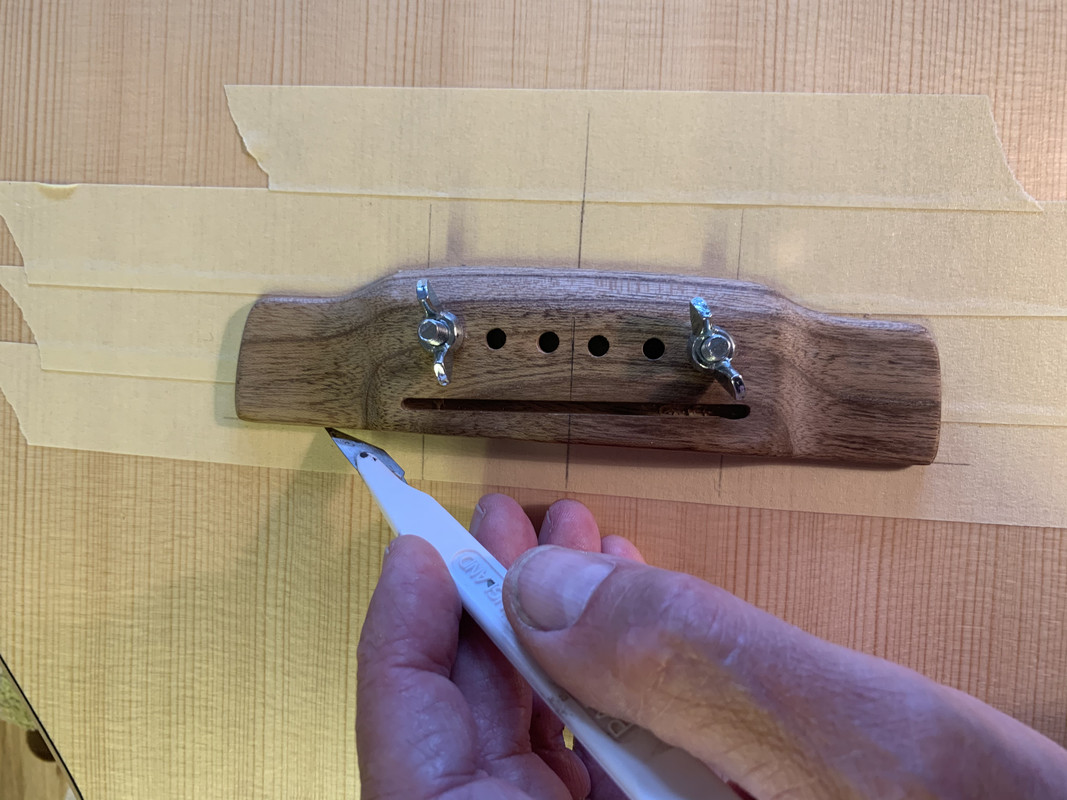 The oil finish is then carefully removed with chisel and sand paper: 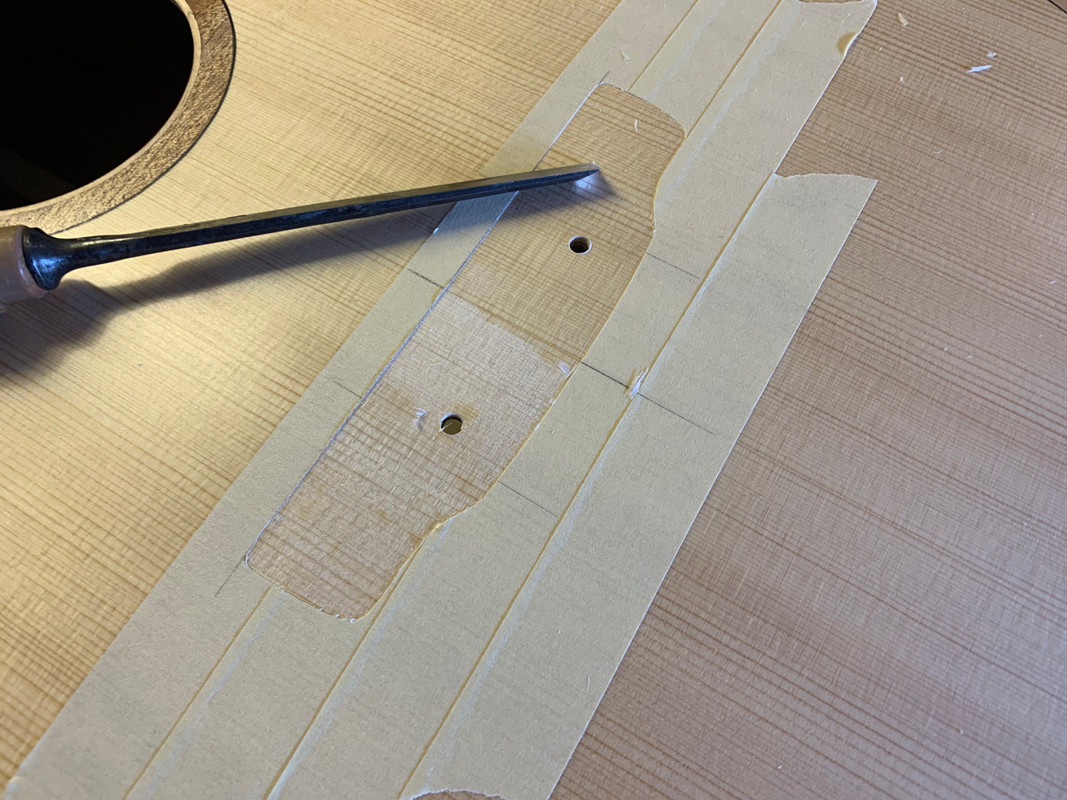 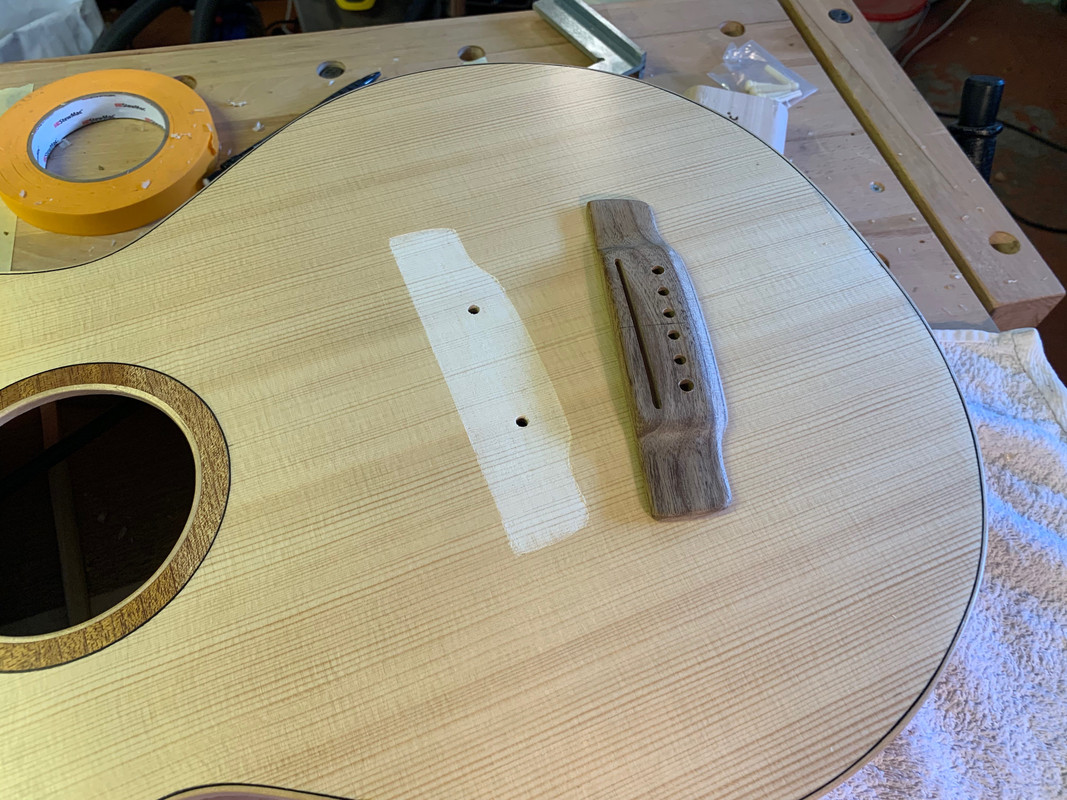 And finally the bridge is glued to the top. The bolts and wing nuts also acts as clamps. The two centre clamps have a "caul" beneath while the outer ones are clamped against the x-braces:  Time to mount the tuners. These are open gear Gotoh SE-700. I love the vintage look of them:  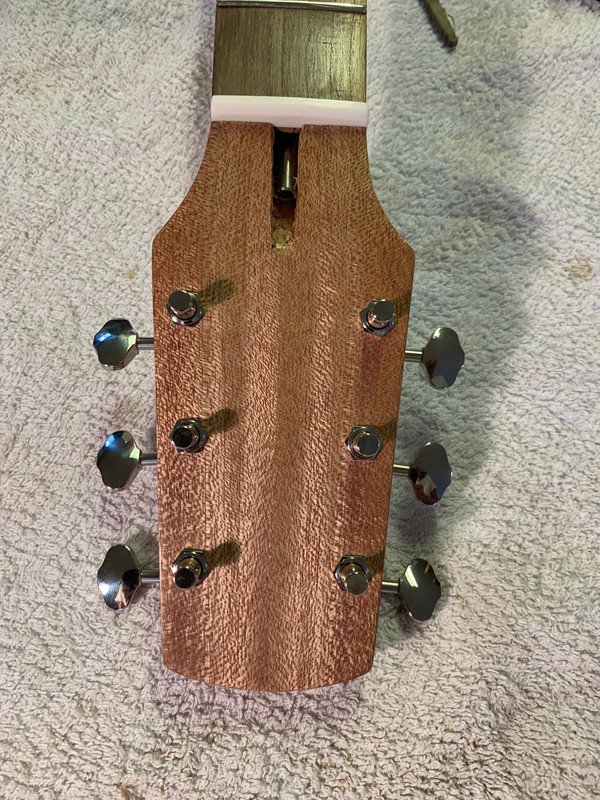 Lastly the compensated saddle was shaped from a bone blank: 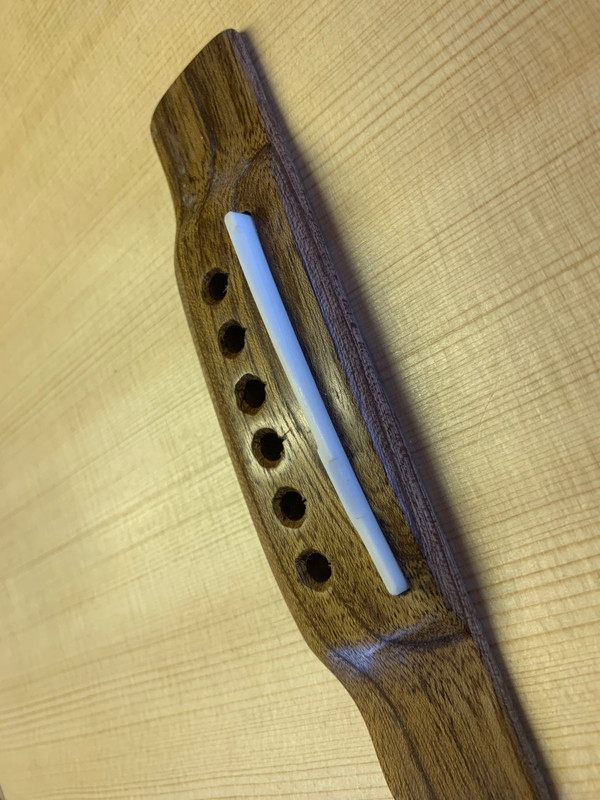 I've omitted many small steps, like reaming the bridge holes, making the nut, the cover for the truss rod, etc, etc. I've also omitted the finishing process, so I'll give you a short resume. Sides, back and neck was pore filled with the egg white method that I've learnt on this site. All wood was then sanded up to 2000 grit. First I applied two layers of schellack and then I added a couple of layers of Osmo hard wax oil. I think it's the same that is branded in the UK as PolyX. After hardening I've polished the finish with 000 steel wool and the finer degrees of Micromesh pads. The result is good on all except for the top which is descent but not more than that. The fretboard and bridges got a thin coat of Teak oil. Today is a dull, grey and rainy day, so the photos are rather shitty. But here are two shots on the guitar after it's strung up: 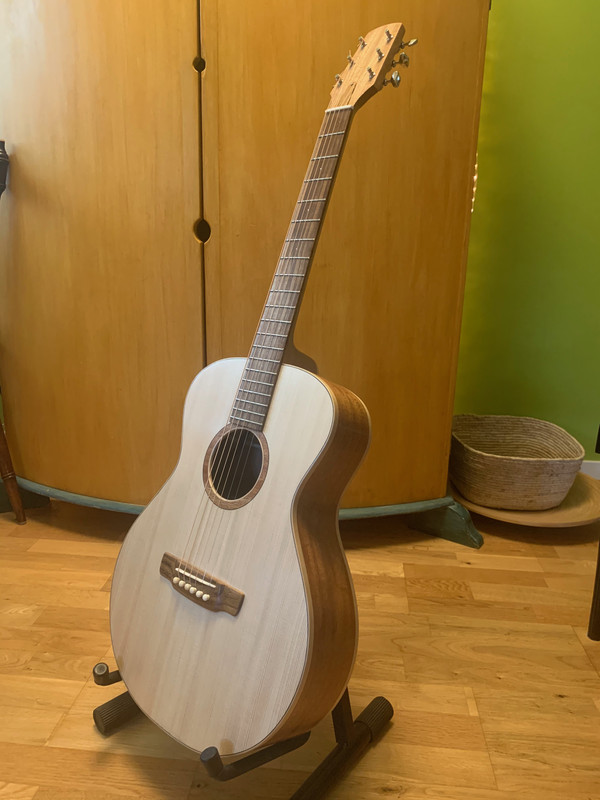 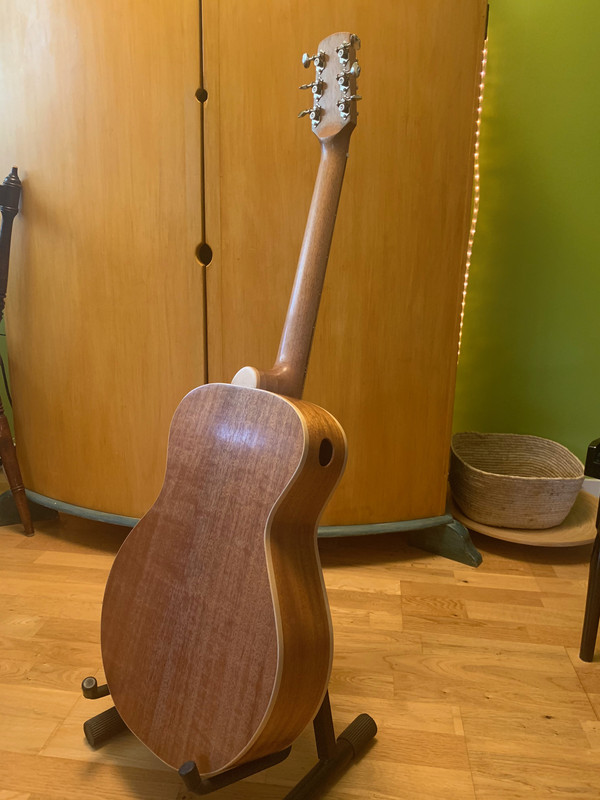 I'll take more and better pictures in a short while. It's been exciting to test play the guitar. I must say it's very promising. It seems to be particularly aimed for finger picking or gentle cross picking - but that is according to the plan. The string height is too high at the moment, but I'll let the instrument live with the string tension for one or two weeks before I remove the saddle to adjust the height.
|
|
|
|
Post by lars on Aug 5, 2020 18:17:01 GMT
I have spoken to Kevin on a number of occasions to discuss oil finishing, I too use Liberon Finishing oil but with a slightly different application regime. Counting up I've finished more than 80 guitars using my method, which seems to work for me including on rosewoods. As with most finishing methods it is important to use a sanding sealer layer, rather than just starting out with the oil, after egg white pore filling, including a plain egg white sizing coat on the top wood, I always use a couple of wash coats of shellac to seal the wood, being especially careful to ensure a good seal on any rosewoods particularly on the black streaking. BRW finished with Liberon. 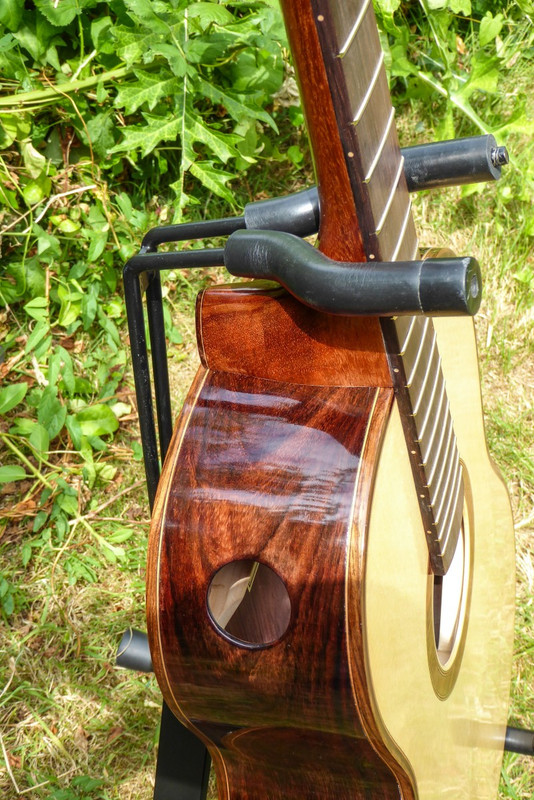 Anyway, I have arranged for a phone call with Martin so that I can go over my method and answer any of his questions. Beautiful finish - far better than anything I’ve achieved so far... |
|
|
|
Post by lars on Aug 5, 2020 15:55:16 GMT
martinrowe Martin, The article is in The Quarterly Journal of The Guild of Ammerican Luthiers, Issue 127/Fall 2016. Just the job I thought when going to oil finish a recent parlour. It caused me more pain than I care to mention. I think the editing of the article has left bits out (like sealing the wood to start with!). Francis, how does the method described in Aram’s article compare to what I describe from the Adamson article? Is it the same or at least similar? |
|