|
|
Post by lars on Mar 26, 2018 20:49:13 GMT
Hello lars , I use a Trend 46/44 rebate cutter and various bearings- I find StewMac a bit too expensive these days (exchange rate, shipping, VAT etc) and most stuff is readily available from UK suppliers. I'm only using this because that's what I have at the moment. For your application I'd suggest that you look at a spiral downcut bit- that's what I'll use once the rebate cutter is knackered and my jig is up and running! Cheers Gary Thanks for the advice. I will try to find a spiral cutdown bit, but I don't seem to find them in my ordinary tool shops. (Neither do I find bearings of various size here in Sweden.) By the way, since a few weeks you can buy most of StewMac's products from Madinter in Spain. I haven't compared prices with the American store, but it ought to be a lot easier to order this way (at least as long as you stay in the union!) |
|
|
|
Post by lars on Mar 25, 2018 17:16:05 GMT
I started on of one of these router jigs a while ago- but I've been too busy to get it completed. My intention is to use a rebate cutter and bearings though. Cheers Gary 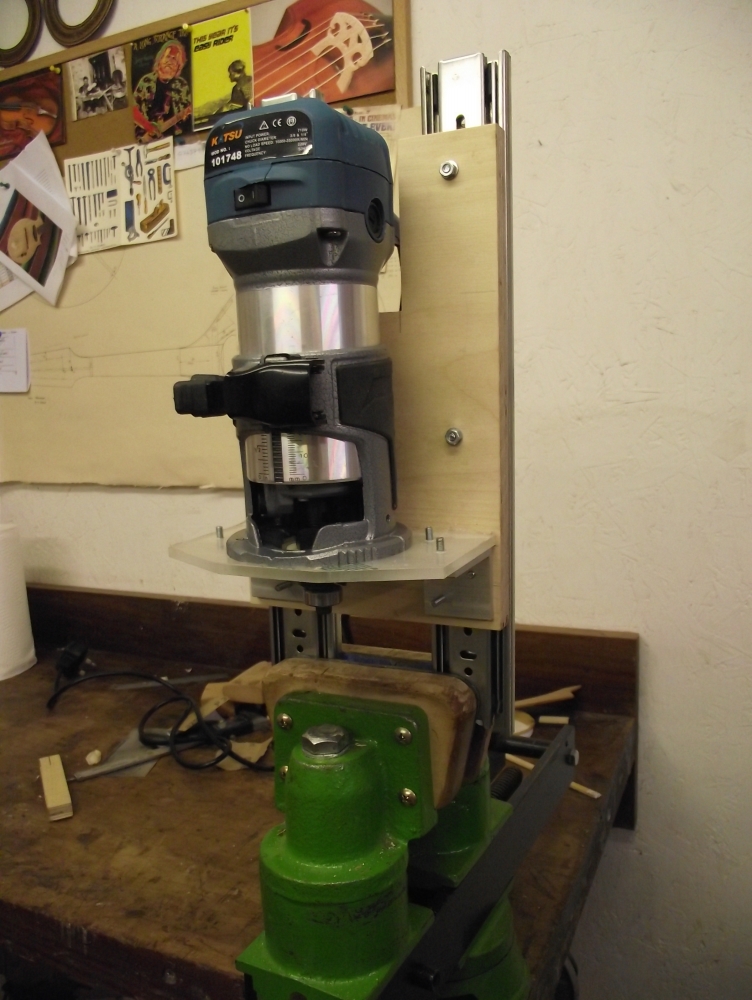 Yes, very similar design. And I have also considered working with the StewMac cutter and bearings. But I already had this add-on to the Makita and it worked very well when I cut the channels for the "octochord" which had a true flat top, so I could just use the trimmer as it was intended. And it seem to work well for Dave White. For a while I considered making a Fleishmann jig likr his, but I simply don't have the space and the more I thought of it, this seemed to be a concept just as good. It will take a month or two before I have chance to test it - I must have an instrument body to work on, and I haven't even made the mould for my next project. |
|
|
|
Post by lars on Mar 25, 2018 13:03:41 GMT
And yet another jig:The most nervous step in the process of building my instruments has been cutting the binding channels. Especially as I've done it by hand. Hopefully it will be safer and more exact with this binding jig:  It's really a two part construction - one for the router and one for the instrument body. This instrument stand is for my pear shaped mandolin instruments. Other instruments will need special stands made for their shape. The jig itself lets the router go up and down with the help of expansion sliders (or whatever they are called) for drawers, while the router bit remains vertical. I will try to add a counter weight as the construction is rather heavy, that's why I got the block on top ('block' as in 'block and tackle'). I planned to use dumbbell wheights, but they came too close to the rest of the construction, so I will have to re-develop that part. Here with the router/laminate trimmer mounted:  And here a peek from beneath. I will use the attachment that came with the router, which lets me adjust the depth of the channel in very small increments. 
|
|
|
|
Post by lars on Mar 25, 2018 12:43:38 GMT
Another jig will do... I recently bought a Makita laminate trimmer and now I've spent some time making two jigs for coming luthier projects. First is my take on a circle cutter - very, very inspired by Dave and Colin, but mostly made of wood. I made a three-ply laminate of African Mahogany.  And here with the trimmer mounted: 
|
|
|
|
Post by lars on Feb 28, 2018 20:40:39 GMT
Thanks for sharing, Gary. Suberb craftmanship and a beautiful instrument!
|
|
|
|
Post by lars on Jan 26, 2018 18:49:19 GMT
Lars, Sounds sweet - result  Great playing too - you should post more at "The Plucky Duck". Thank you so much, Dave. Glad to hear that from an eminent player like yourself! |
|
|
|
Post by lars on Jan 26, 2018 18:27:17 GMT
JJ-labs condensator mic (cheap Røde-copy) + CM3 condensator mic through Zoom H€ as sound card into Garageband. No echo or reverb on the mandolin, but slight compressor and equalizer. Backing with Tanglewood guitar.
|
|
|
|
Post by lars on Jan 26, 2018 18:20:52 GMT
|
|
|
|
Post by lars on Jan 21, 2018 20:07:34 GMT
Thank you all for your comments and your interest in this thread in "broken english". I'm so glad that you enjoyed it! And yes, Leo - I need to practice my ebony skills!
No audio yet, but I hope to make some recordings next weekend.
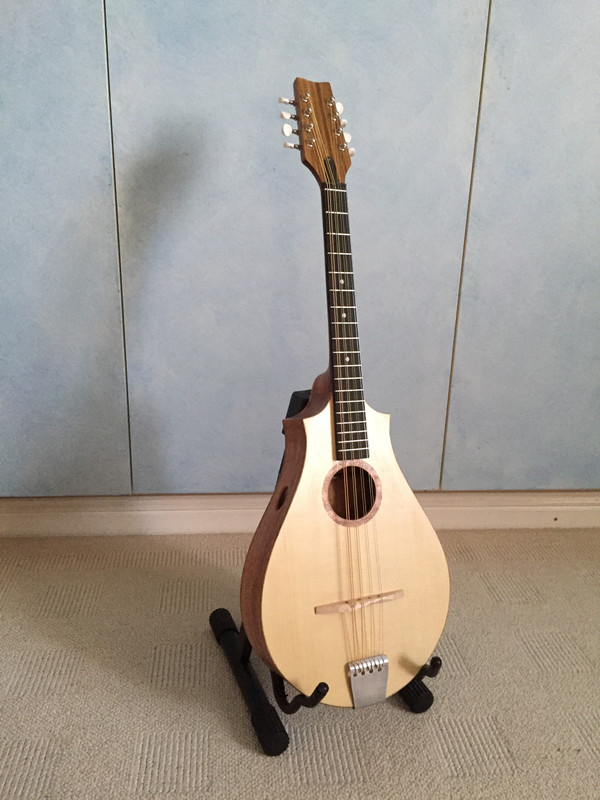
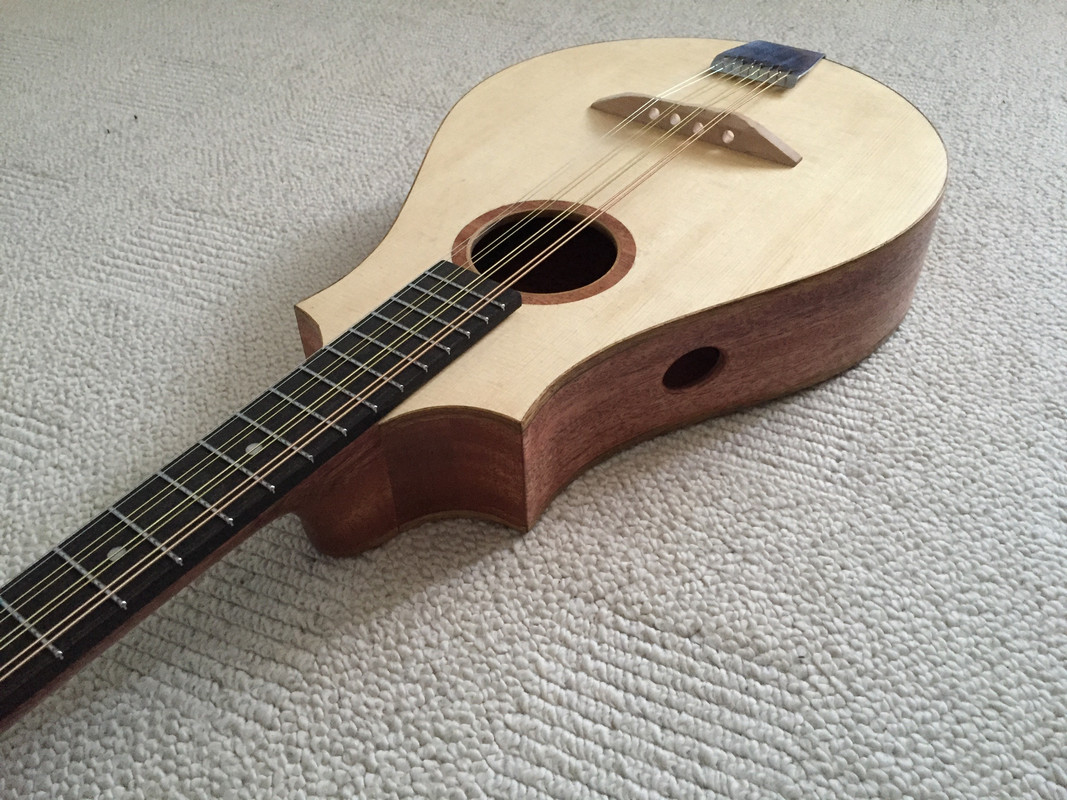
I just came home from session The Octocord was a good melody instrument, that stood out in the wall of sound (at least I could hear myself clearly both when I played right and when I played wrong). Except for volume it had a clarity that I've missed with my old octave mandola. After a while the guitar players left and I was the only one left with an instrument capable of strumming. The octocord was not equally impressive as a backing instrument. The sound was too harsh - not as round as I'm used to. It might develop with time - the top is made of Europan spruce and will surely open after some time. All in all it was a good experience and next week I'll take it to another session and another review.
/Lars
|
|
|
|
Post by lars on Jan 20, 2018 14:53:34 GMT
|
|
|
|
Post by lars on Jan 20, 2018 14:43:16 GMT
The last steps
First I had to make another fretboard. I damaged the first one when I tried to remove a fret that didn't fit - along with the fret came wood chips. I don't know if ebony is prone to split, but now two of my three attempts with ebony fretboards have ended this way. The new fretboard is made of ebonized laburnum and here are some photos from the process:  Marking and cutting the fret slots with a special fret saw.  After trimming the sides of the fretboard so that it's tapered like the neck it's time to hammer in the frets. The special fret pliers makes the work a lot easier than it used to be when I used standard pliers. As you can see I've also installed the fret markers. Like the original octofone it's quite minimalistic with only markers for fret 5,7 and 10.  The "un-ebonized" fretboard in all it's glory! 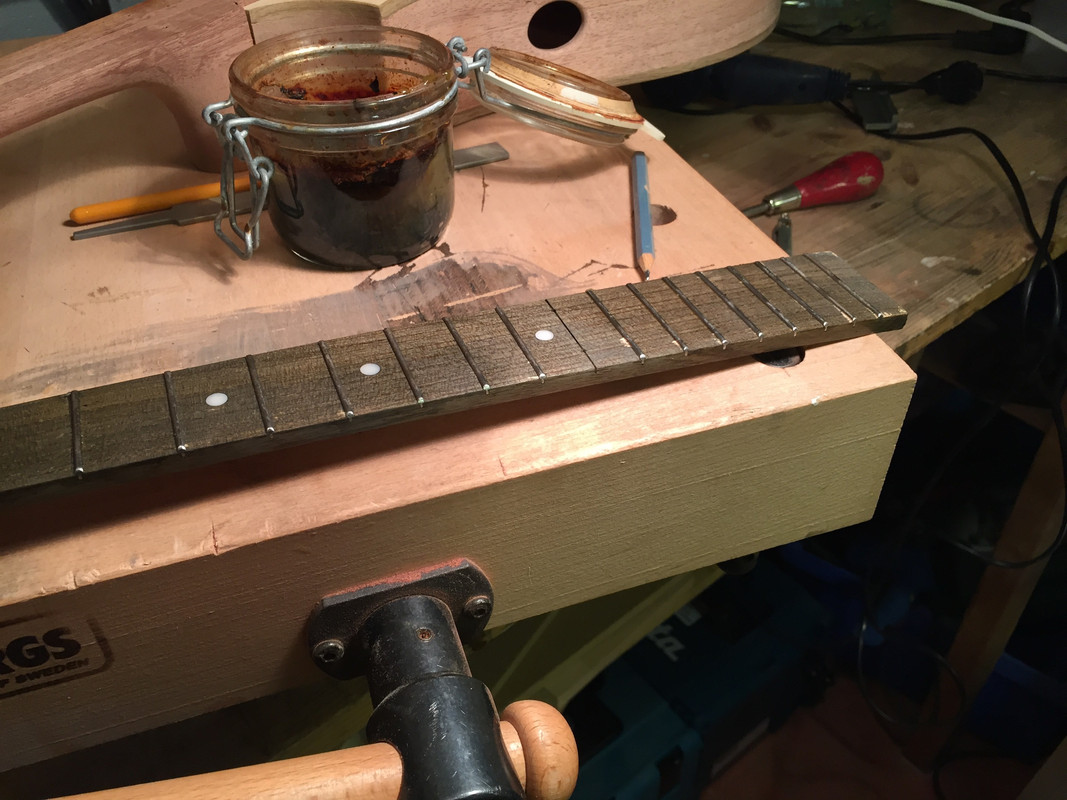 The wood is wet with a solution made of vinegar and steel wool and starts to get darker immediately. I also spilled some on my work table, so now I know that it also works on beech wood. 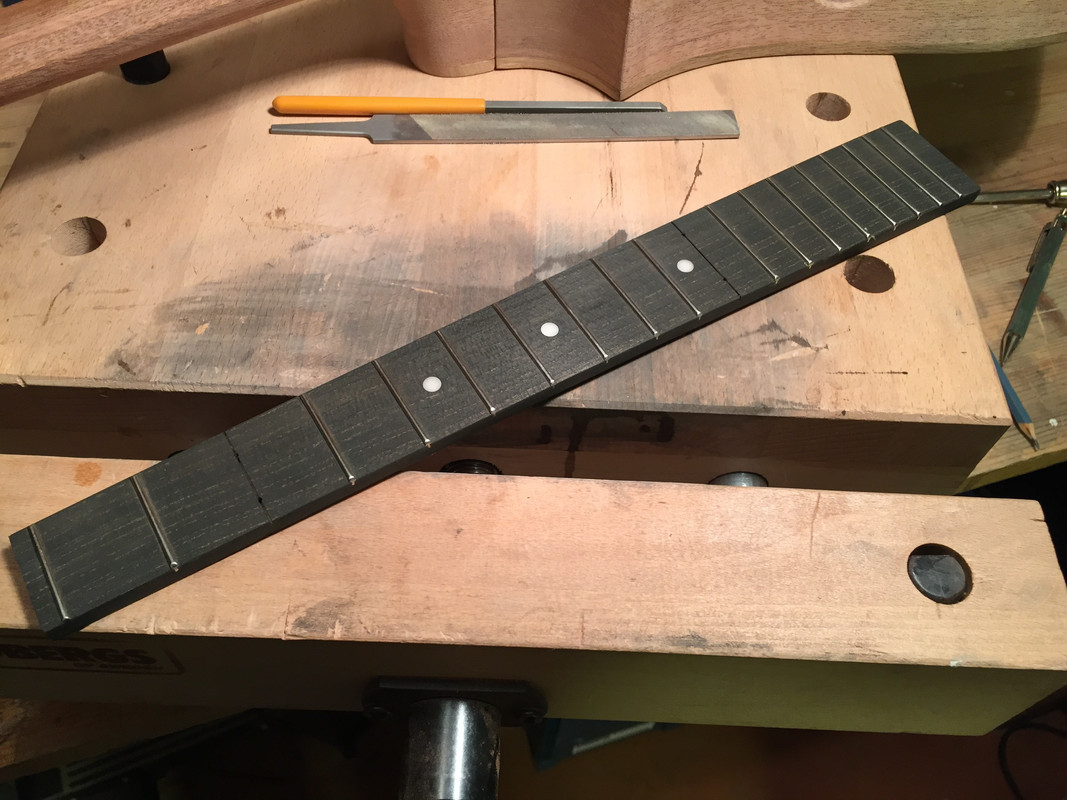 And after a while it looks like this. 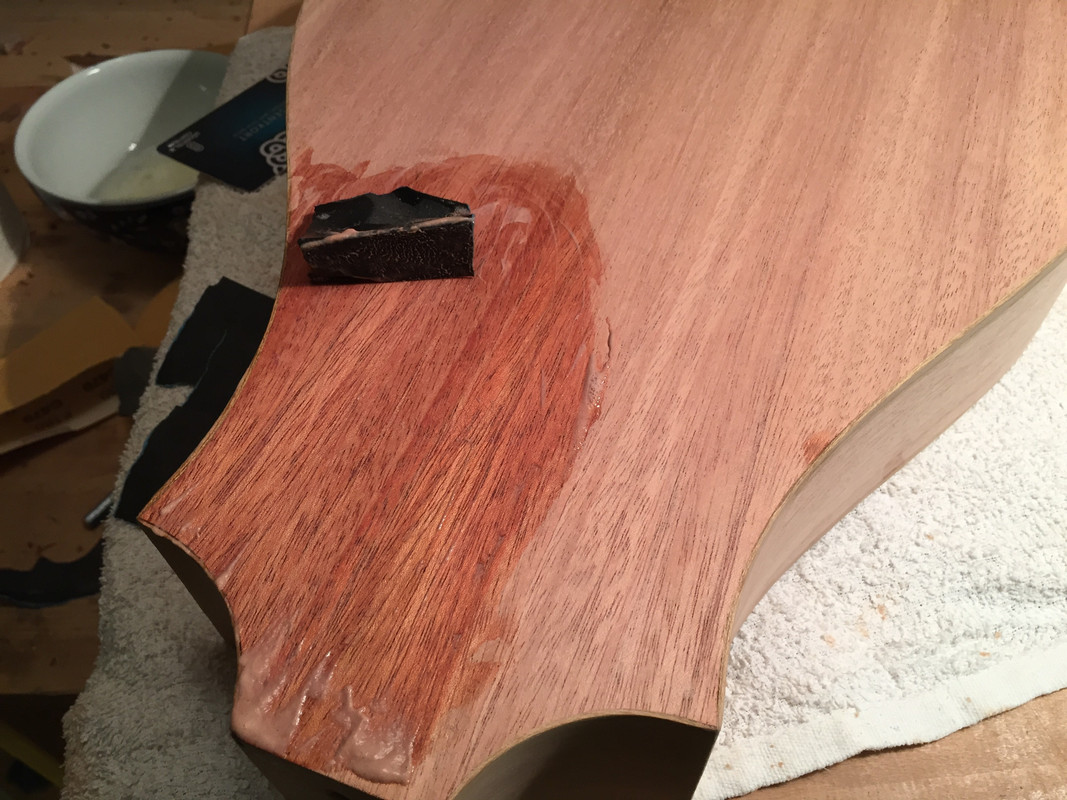 Meanwhile I worked on the finish. First I filled the pores with egg white, the way I've learnt on this site. After that a coat of schellac and a few layers of Liberon finishing oil (no photos) 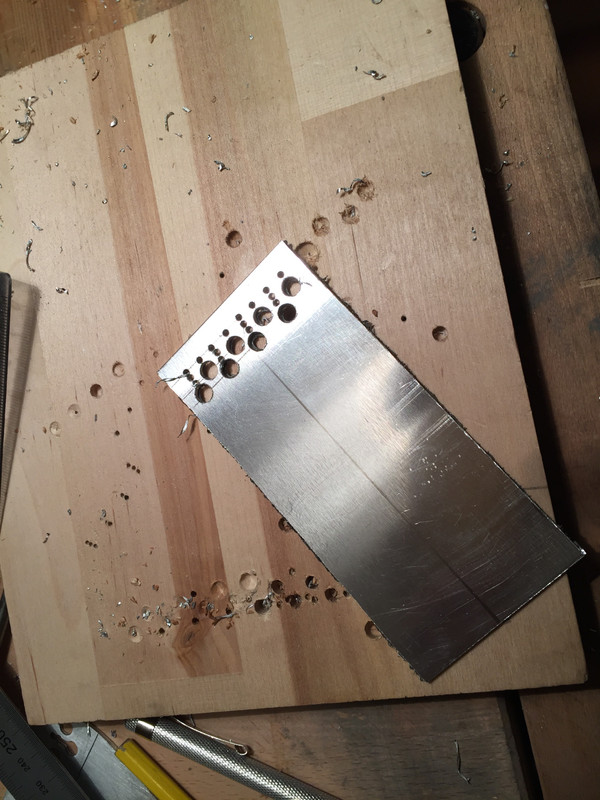 A tailpiece had to be made. It began it's life as a sheet of aluminium... 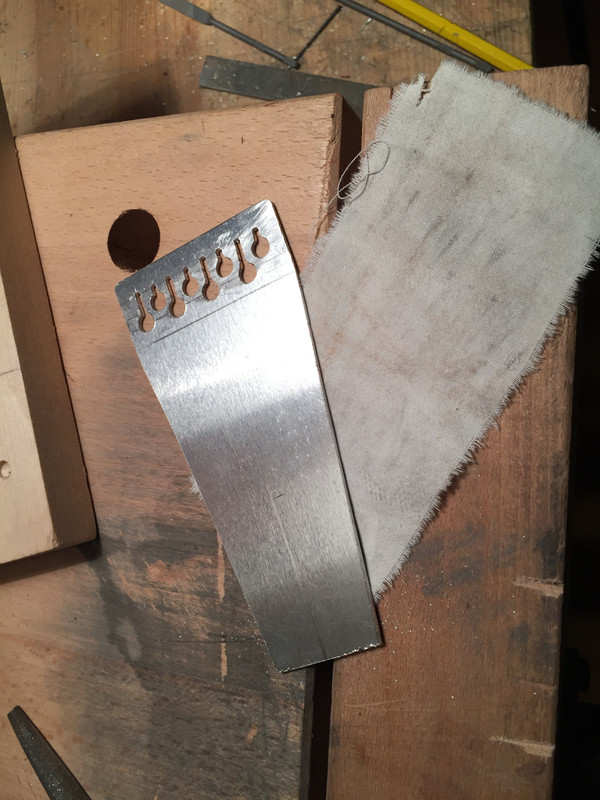  And ended up like this.  Andl lastly the headstock got its holes for the tuners and a final shape that resembles the original octofone.
|
|
|
|
Post by lars on Jan 19, 2018 16:57:17 GMT
Hooray!
This will be an interesting build. I'm really looking forward to see the development of this.
|
|
|
|
Post by lars on Jan 6, 2018 21:24:17 GMT
I'm really looking forward to this build. My next build will probably be an "Irish" 4-course bouzouki with similar specifications and construction (albeit with longer scale length), so I will follow this build both here and on Dave's site with great interest.
|
|
|
|
Post by lars on Jan 5, 2018 14:56:16 GMT
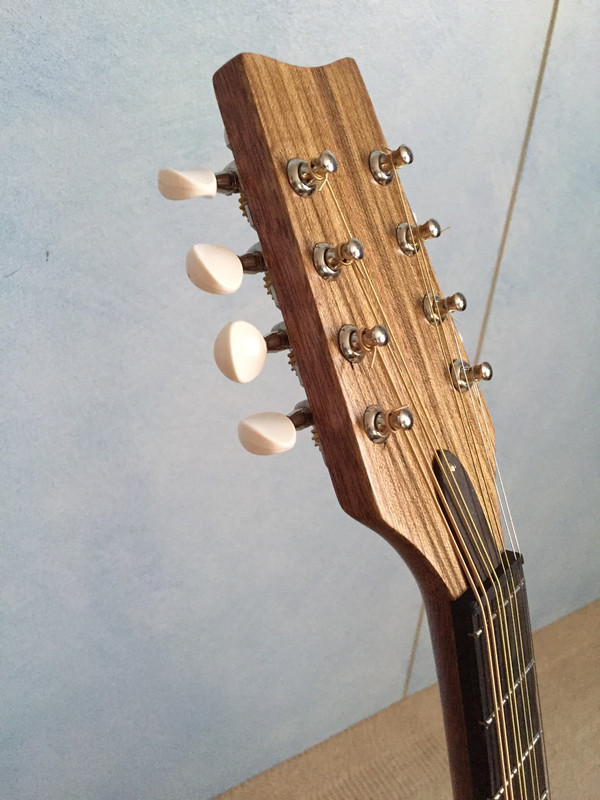
Back on track...After the holidays I've returned to the octofone/octochord. Now it's time to work on the neck. First step is to profile the neck with the band saw:  And add "wings" to the headstock: 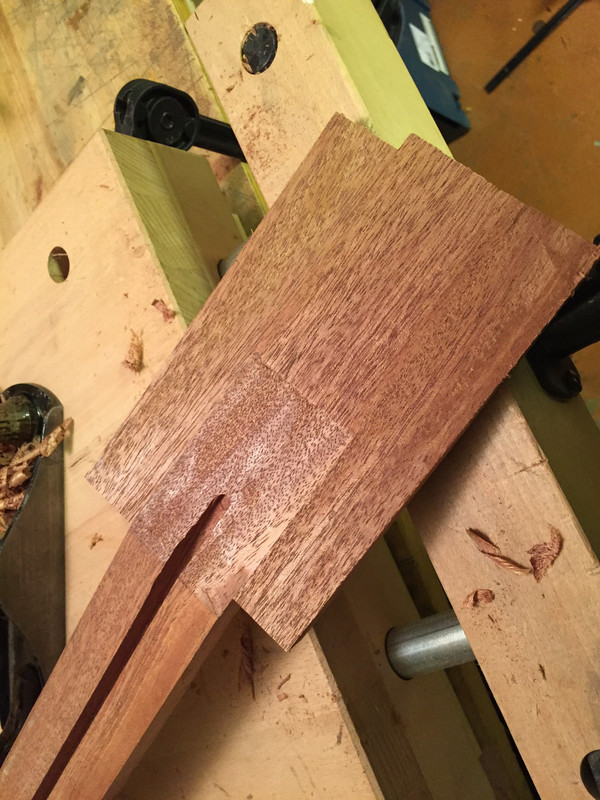 A laburnum veneer is glued on top of the headstock: 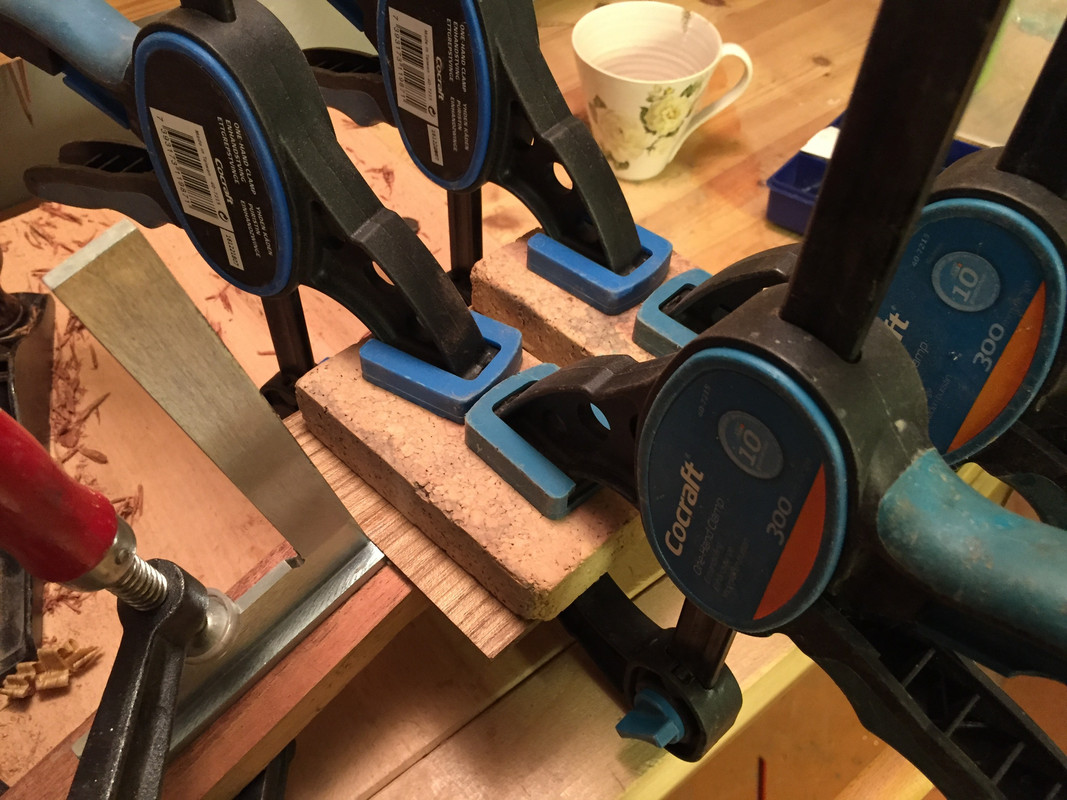 And after profiling it looks like this: 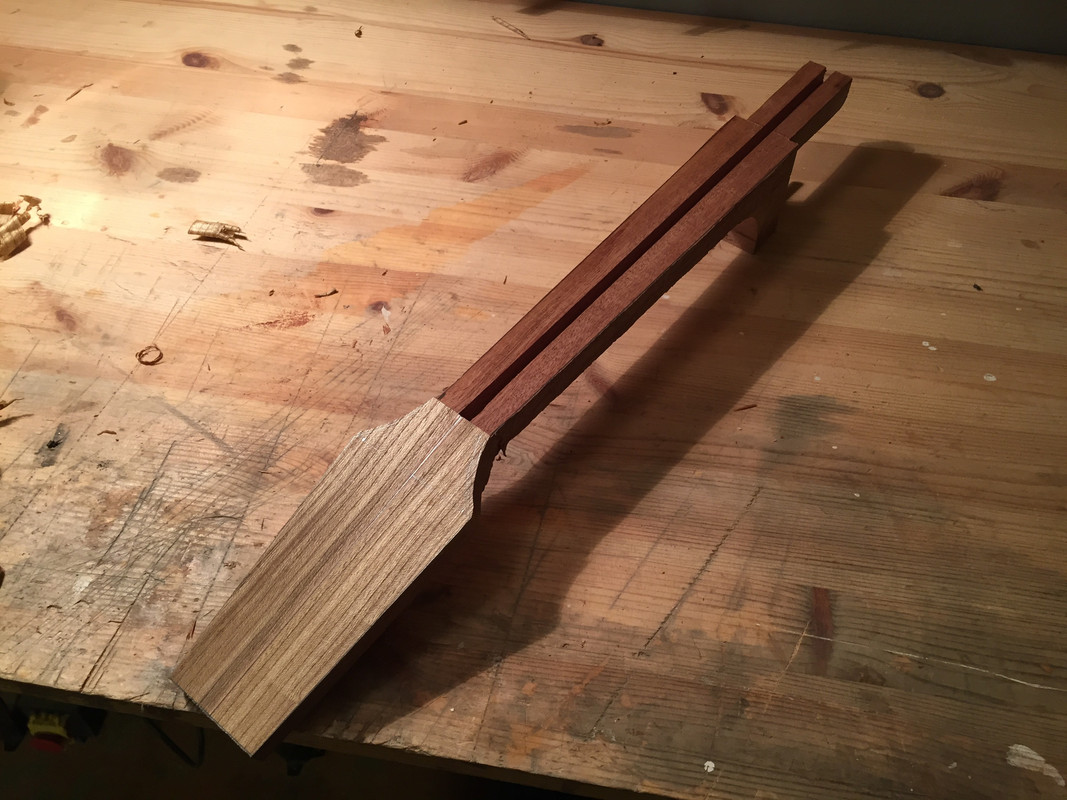 The ebony fretboard is planed in the planer/thicknessser and fret positions are marked with a sharp knife. 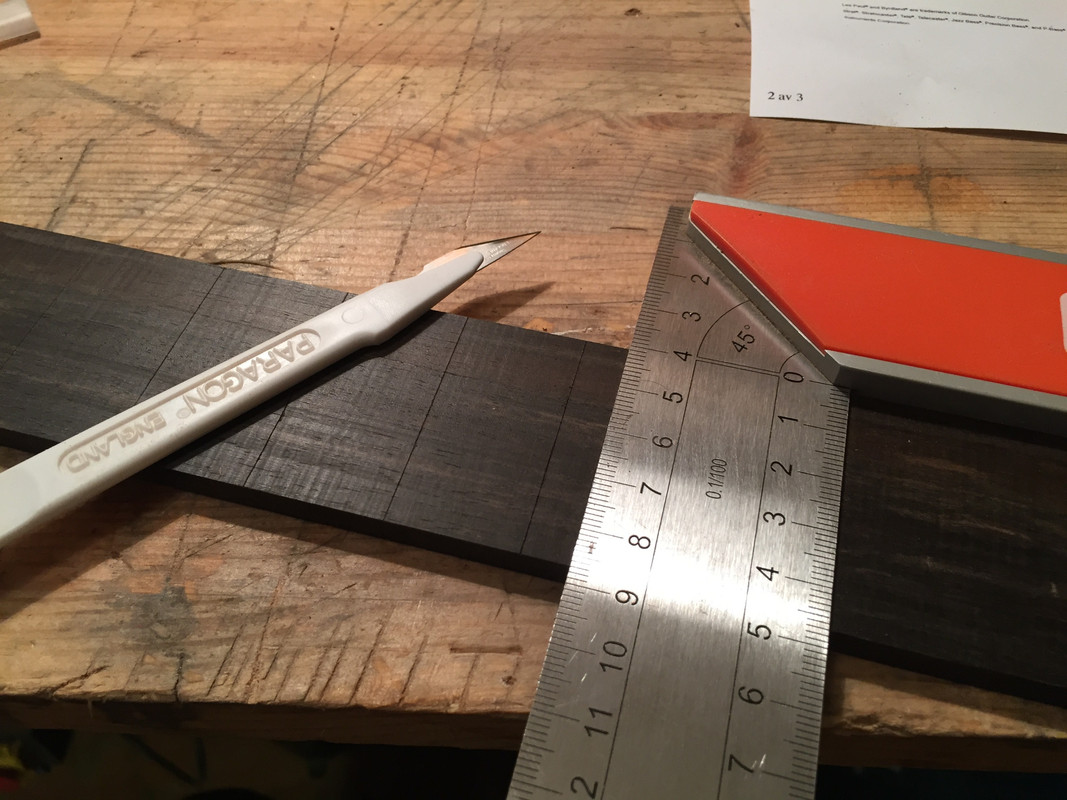 The fret slots are cut with a special slotting saw. I follow the original design and adds fret markers only for the 5th, 7th and 10th fret. Here it's also tapered to the final widths:  And time for the fun, but dirty and dusty part - to sculpt the neck and heel with knife, rasp and file:  And after some additional work it begins to look like a neck: 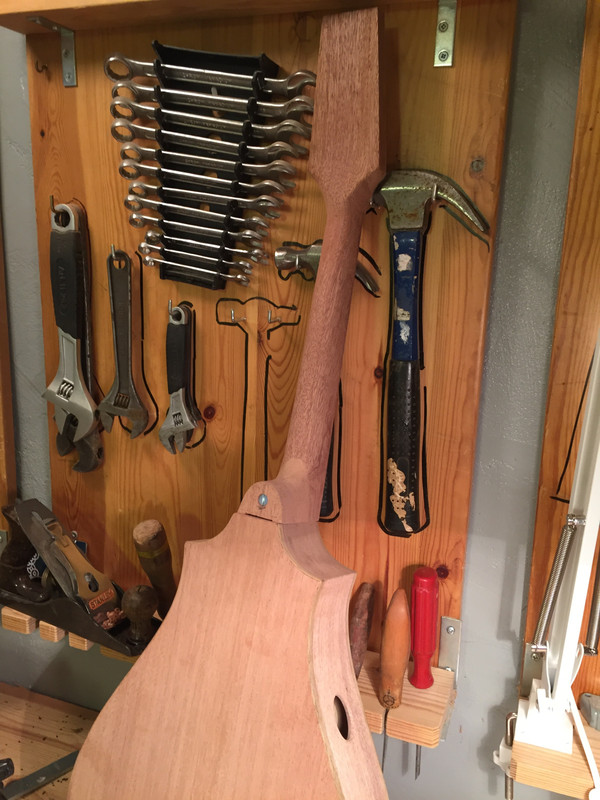 And I almost forgot that I also installed the truss rod: 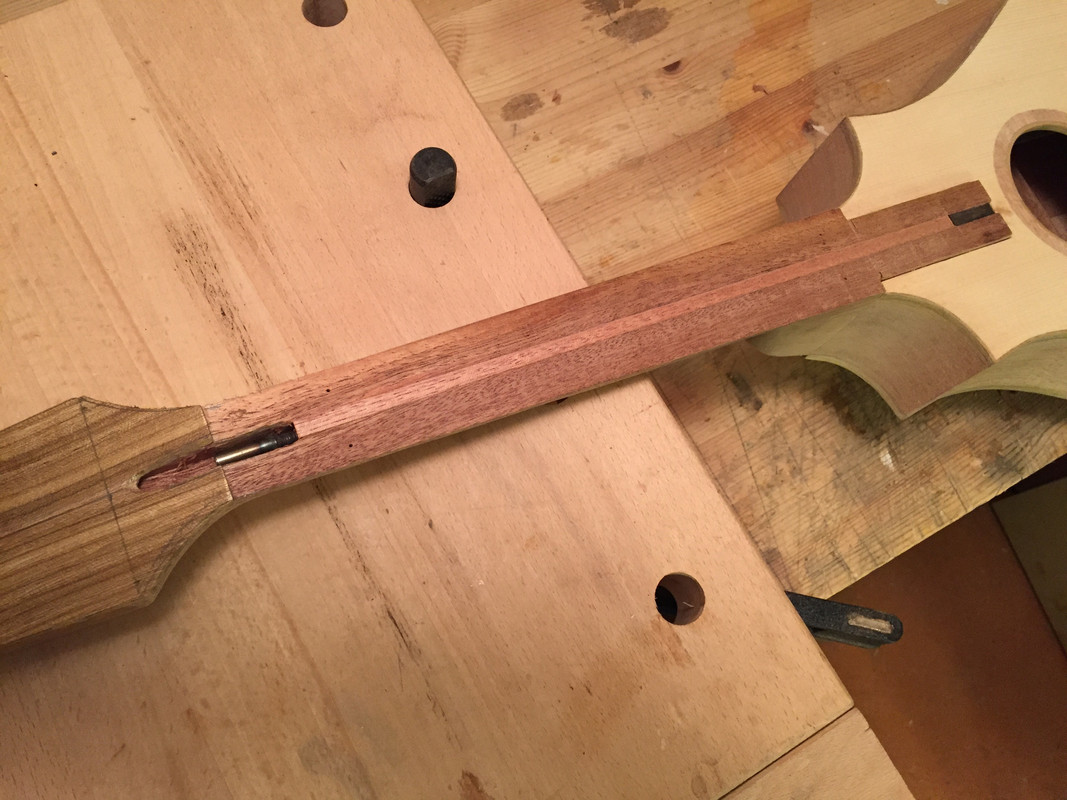 And now it's easy to imagine the final instrument:  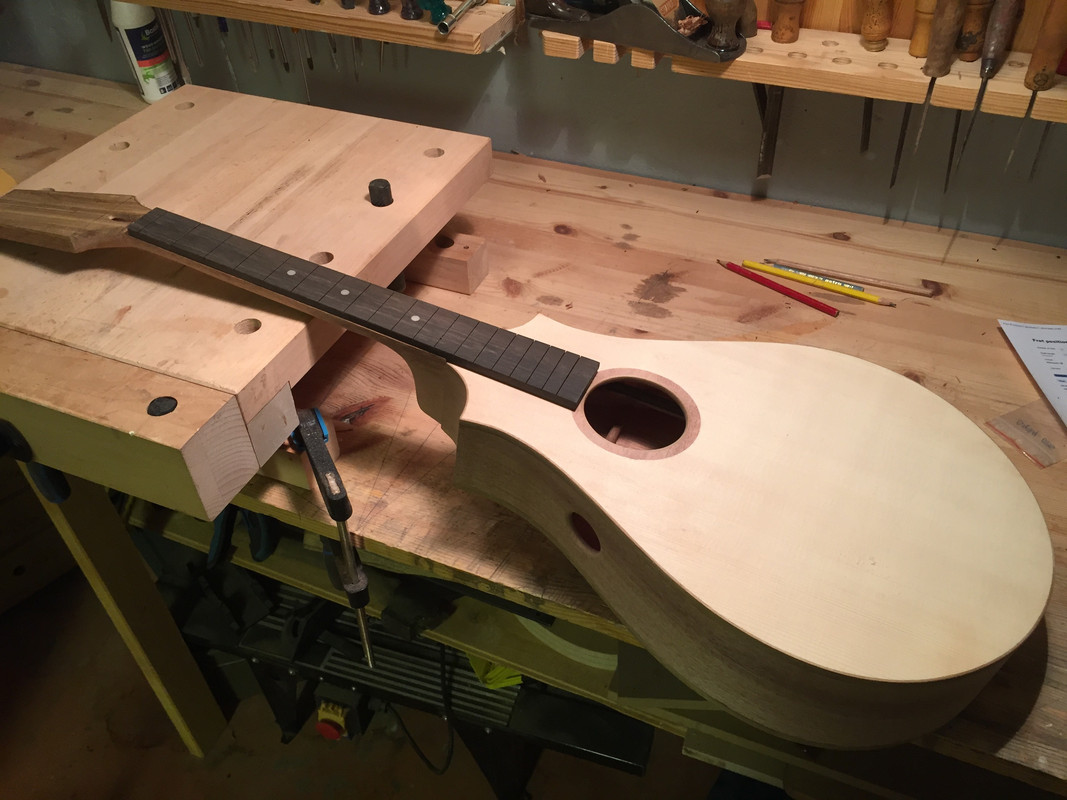 To be continued...
|
|
|
|
Post by lars on Dec 14, 2017 13:23:51 GMT
A minor update
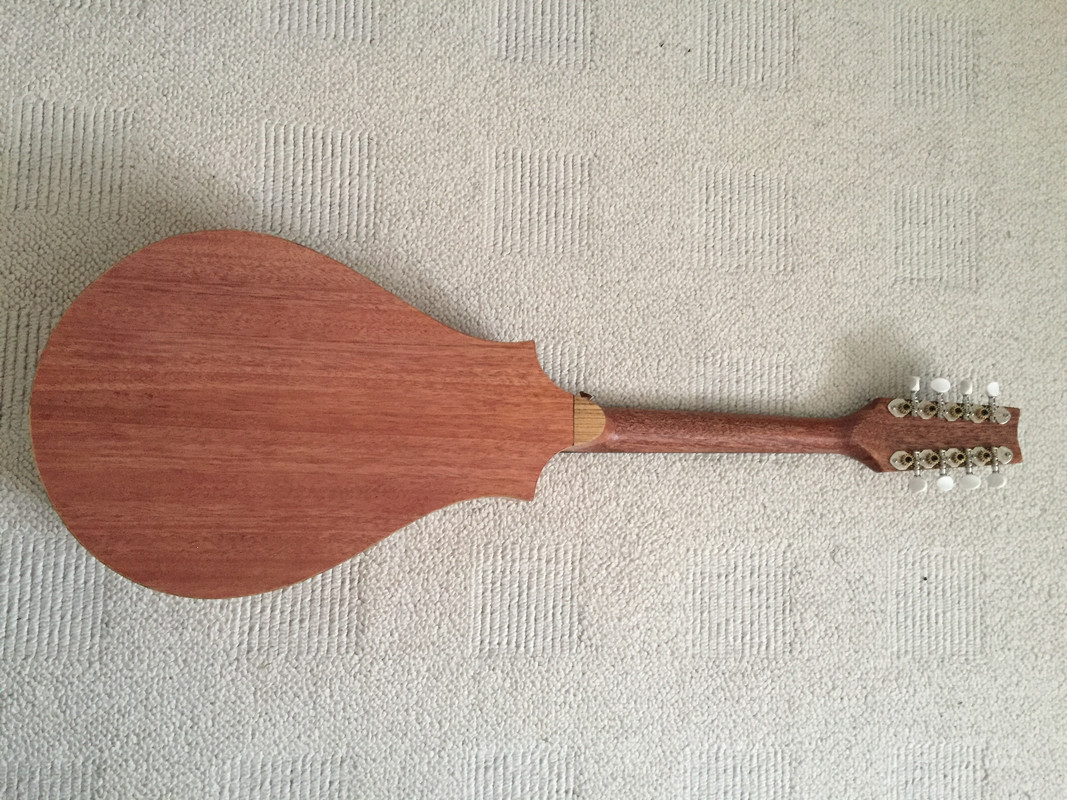
The bindings have been shaped flush to the body. The body has been sanded to 180 grit: 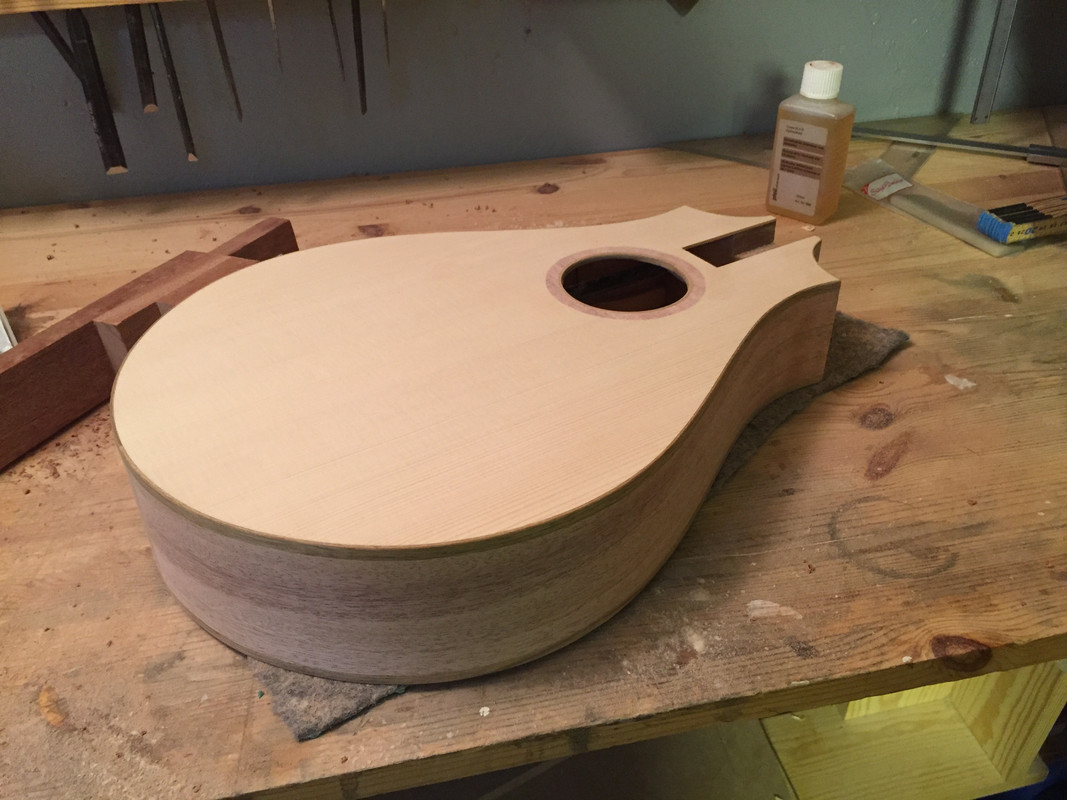  I really hope that the hue of the african mahogany will deepen when finish has been applied. I really don't like this "raw liver"-look Work have also been done to the neck. I´ve cut the neck extension, filed the side of the heel that will meet the body and checked the fit. Here are the parts for the bolt-on sulotion. Holes have been drilled in the neck;  Here the bolts have been inserted and fixed with epoxy:  And a test fit:  
|
|