|
|
Post by lars on Dec 10, 2017 21:22:31 GMT
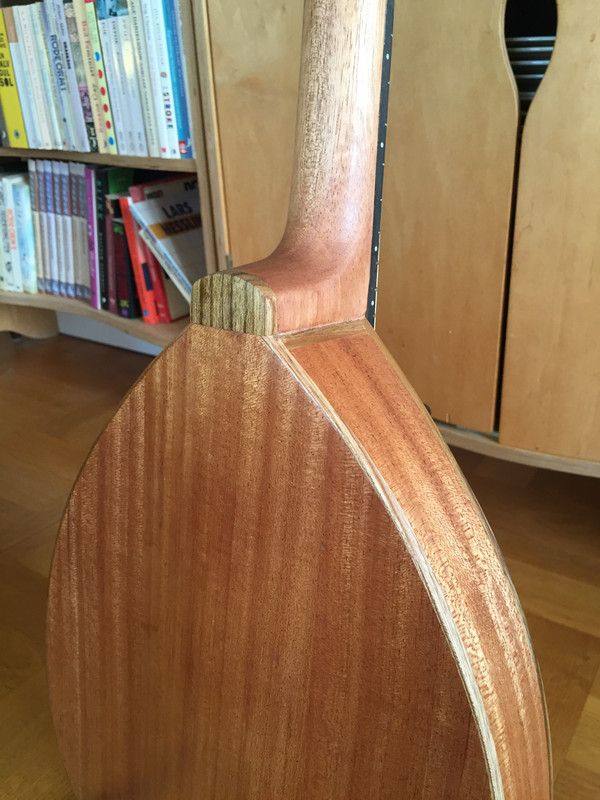
Here's an update. At the same time I did the last details on the Double-S mandolin, I also closed the body of the octofone. Before gluing the top and back I put on a back strip of laburnum. I had planned to make bindings and decorations of ebony, but when it failed at the rosette I decided to stay with laburnum for another instrument. It's a bit pale and bland, but the contrast will increase after a finish is applied. 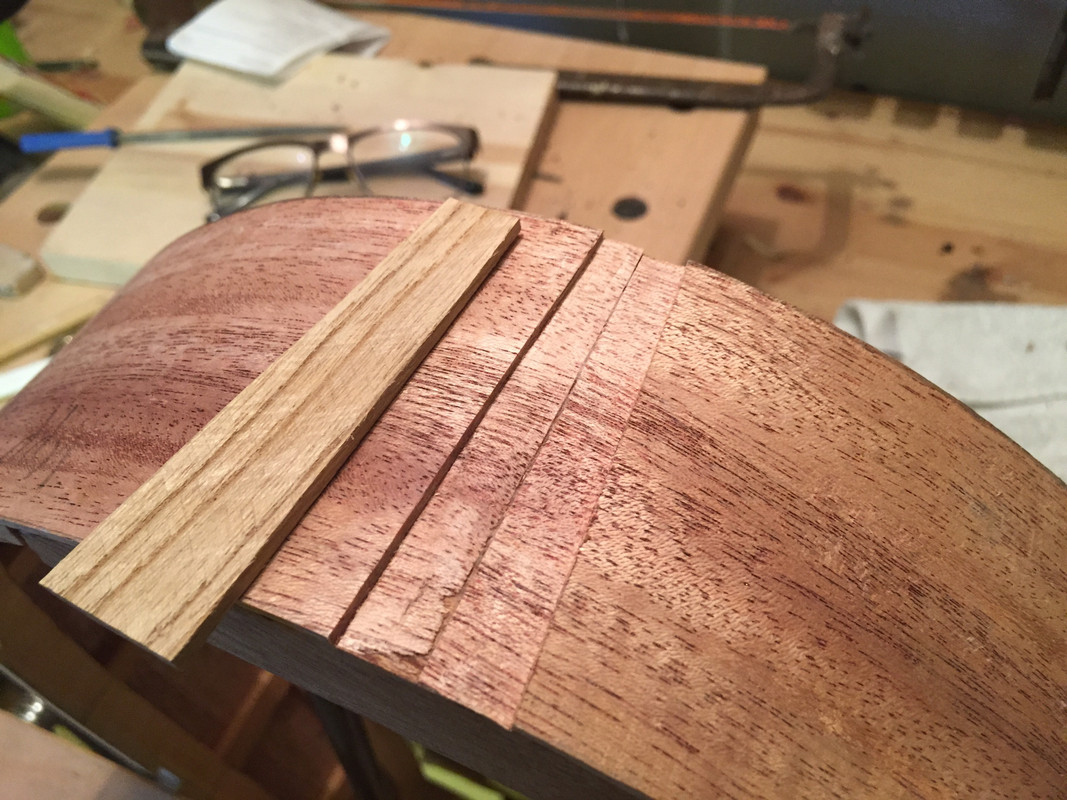 I forgot to take a picture of the result. But I glued the top - as usual using every assorted clamp in my store: 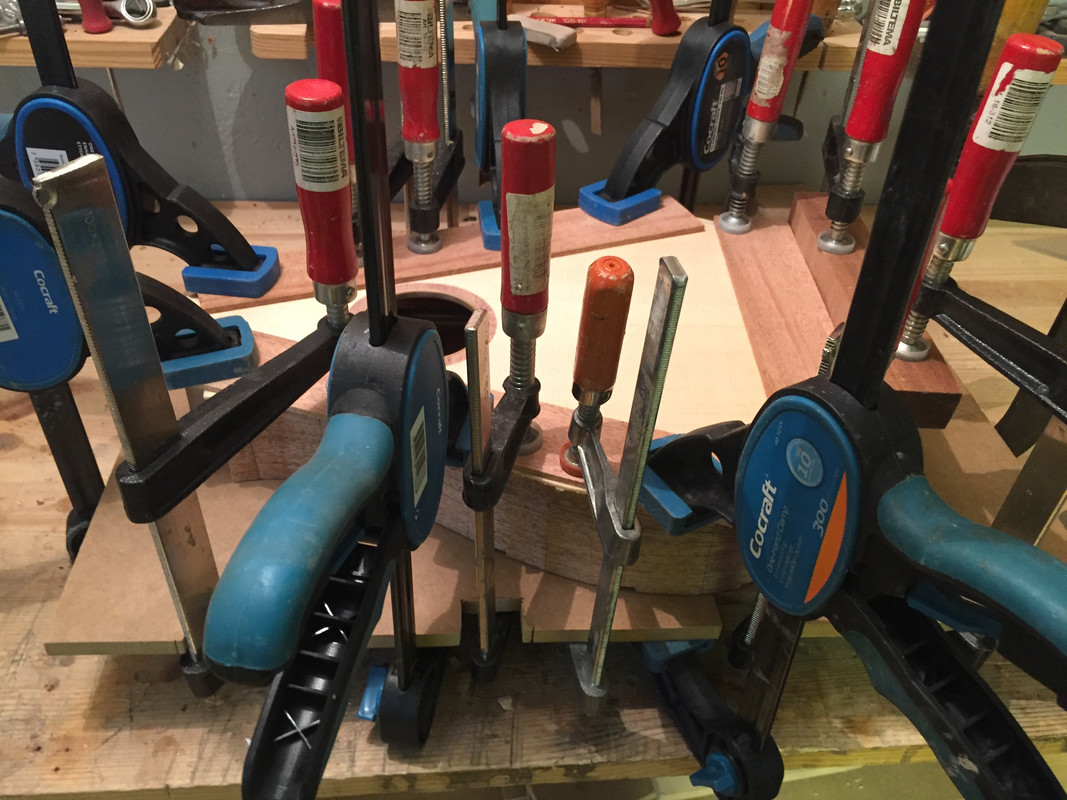 And before trimming the edges it looked like this:  I trimmed the edges with knife, chisels and sand paper. And then it was time to inaugurate my new laminate trimmer to do the binding channels. As this instrument is true flat on both sides I don't need to care about a complicated jig. I just used the trimming jig that followed with the router. I was quite nervous, but it worked out well: 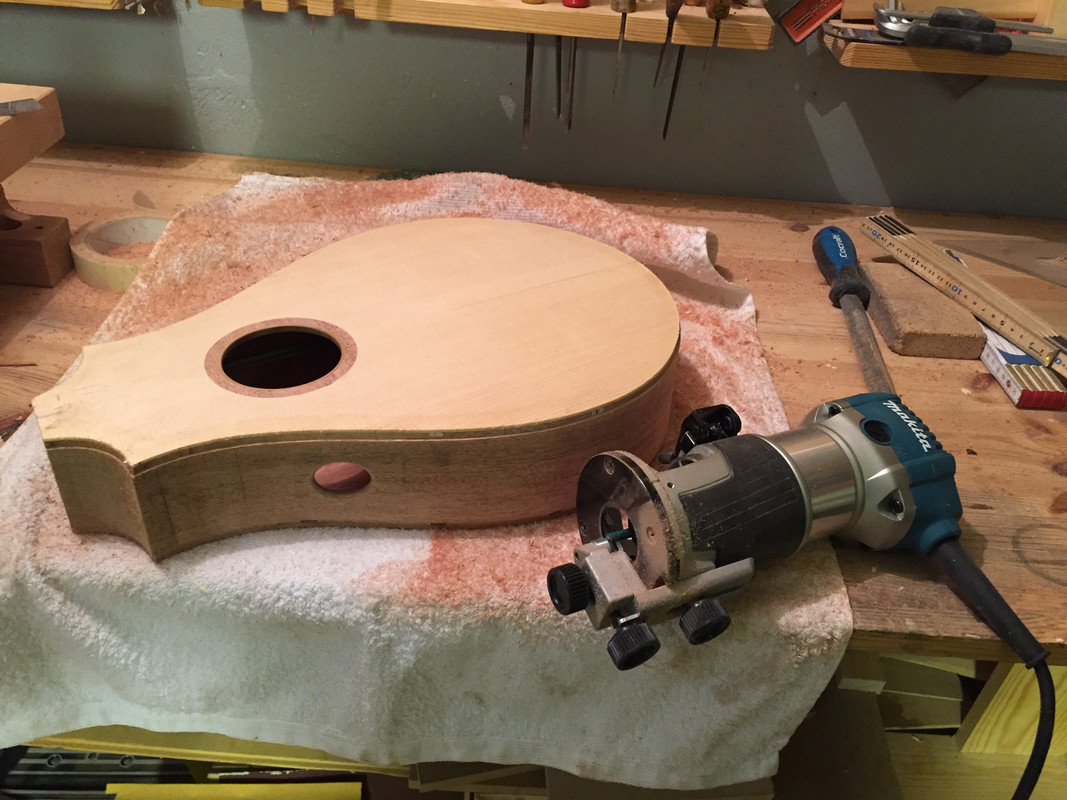 I bent the bindings without taking any pictures. First I glued on the small bindings at the "cutaways": 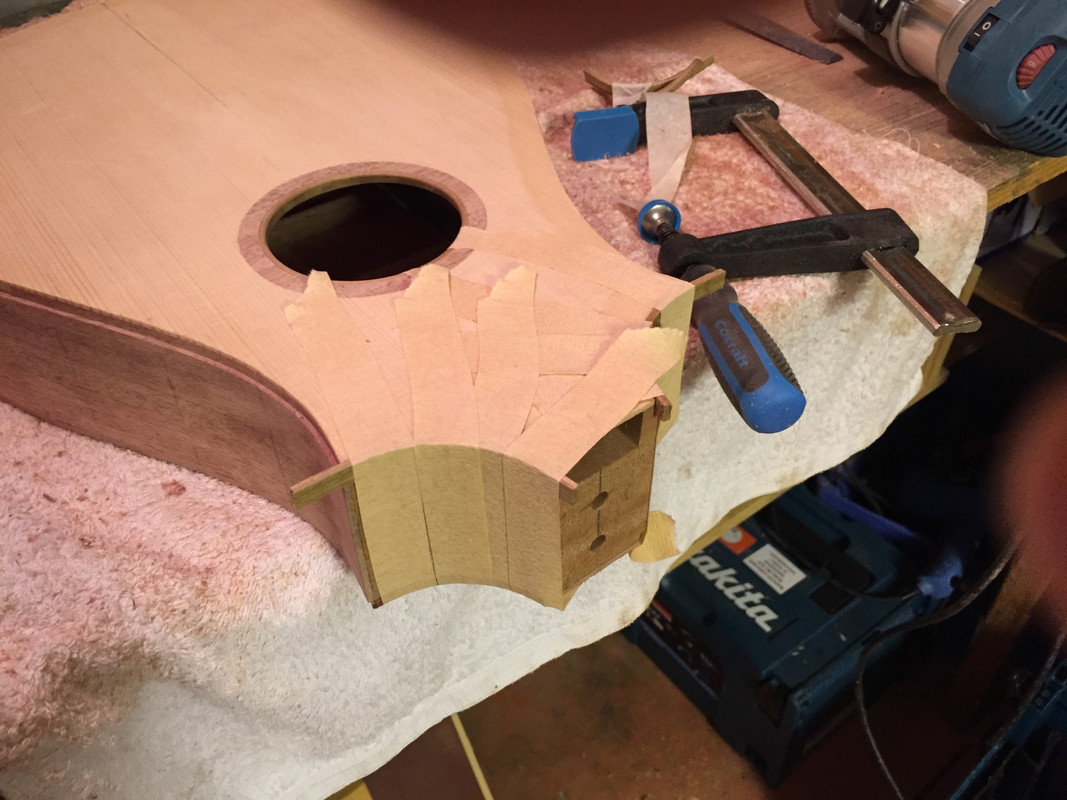 And now I've been gluing the rest of the bindings: 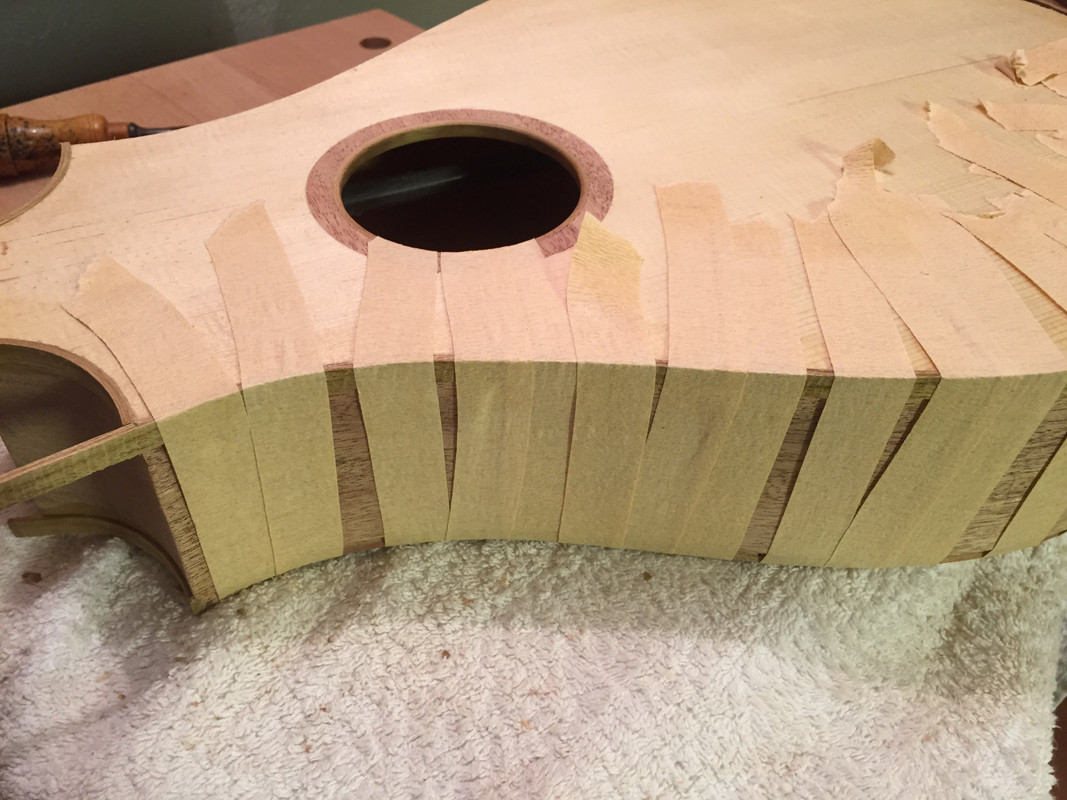 Meanwhile I've started to work on the neck. This time I decided to make the neck to almost finished width from the start. The neck/body width will be 44 mm so I planed and thicknessed the neck piece to 20*48 from the start. After that I cut the neck at 15° and planed the surface: 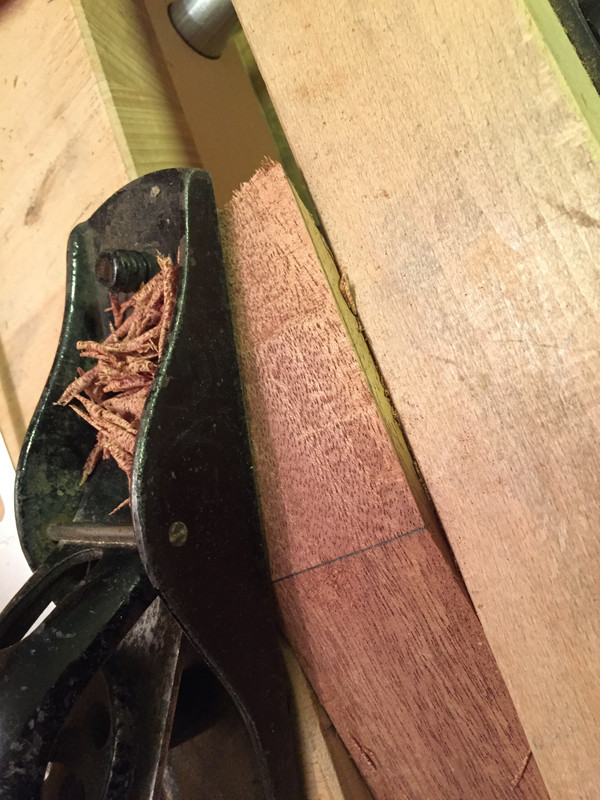 And glued the pieces together so that the headstock would get a 15° angle to the neck (I "know" that I took pictures, but there are none in the camera). Time for the laminate trimmer to be used again. This time for routing the trussrod channel. For the first time I'll use a factory made one. I've always done them myself before. 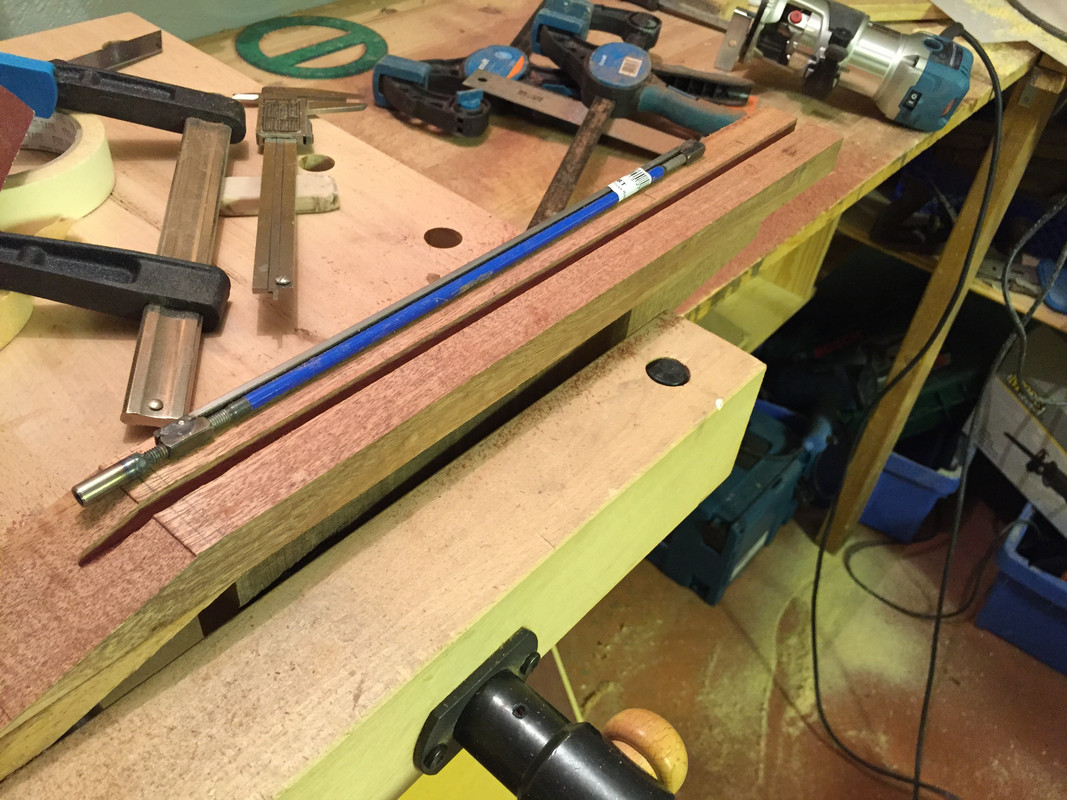 And after that I hand planed the other 15° surface to get a plane top surface for the head. 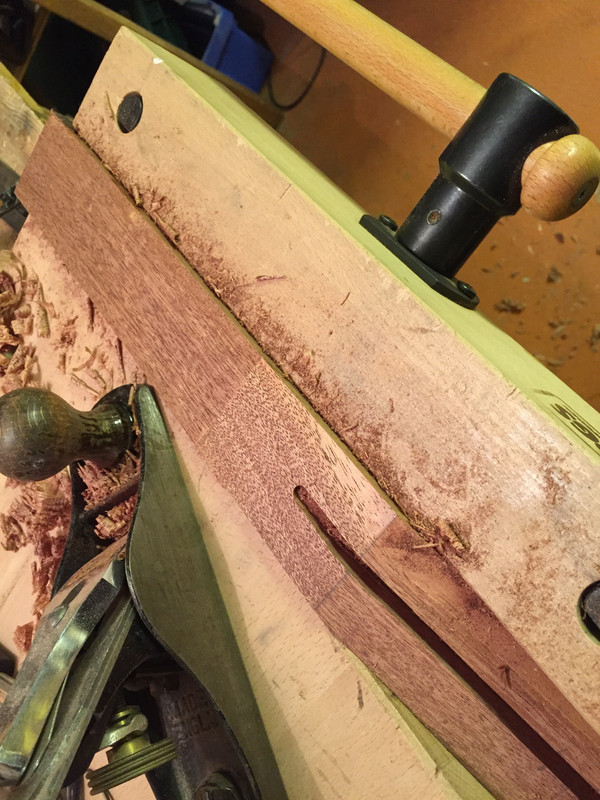 I glued the heel from three pieces, cut and sanded one side to 89° to set the neck/body angle. And then I glued the heel to the neck: 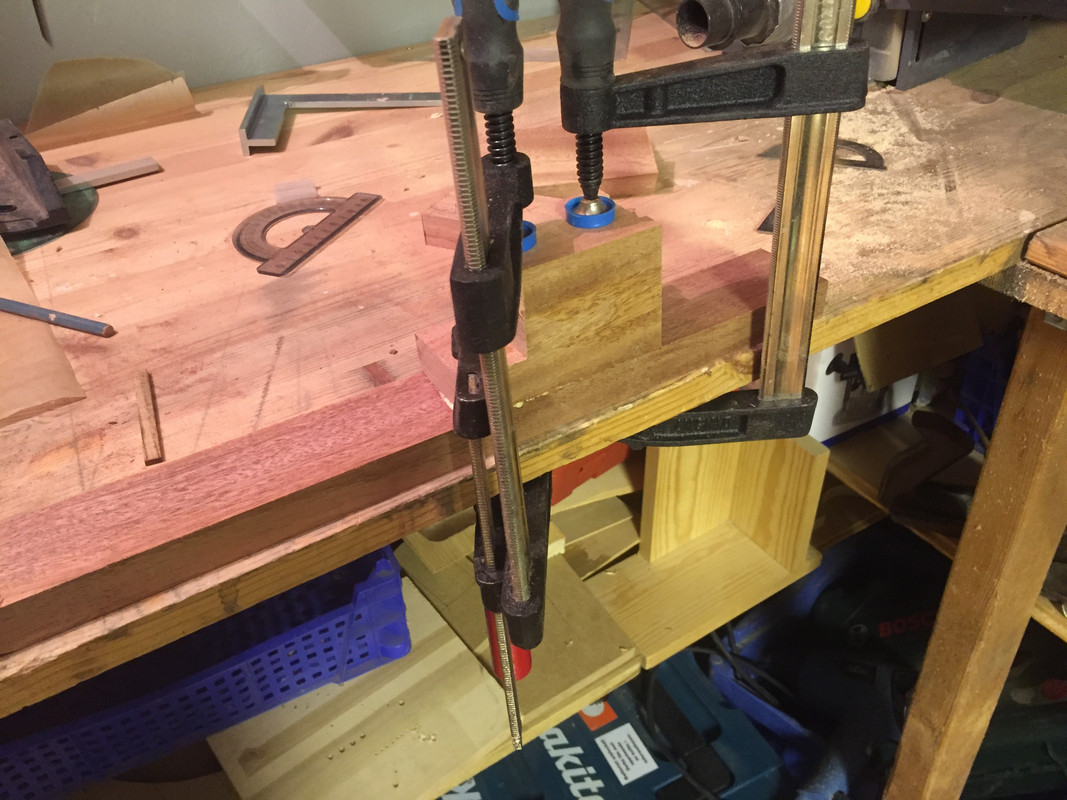 And that's where I am in the work process right now. All bindings are glued and awaiting to be trimmed and after that the body will be finished. |
|
|
|
Post by lars on Dec 2, 2017 15:28:14 GMT
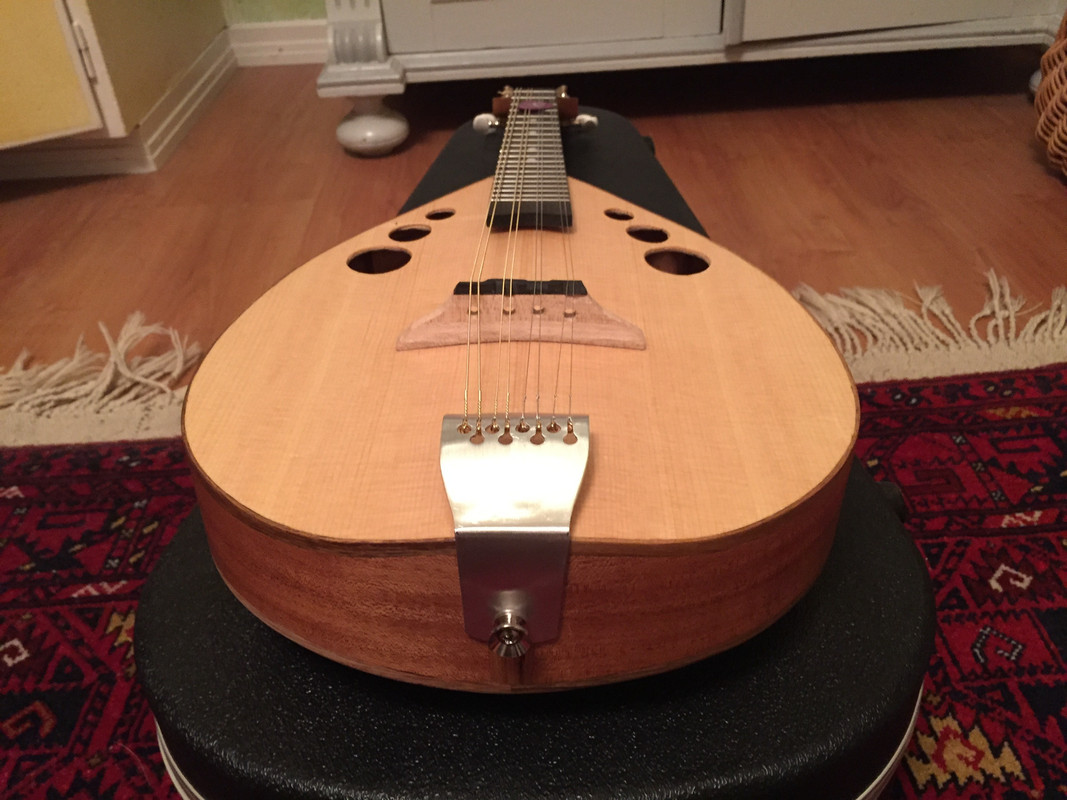
Specifications:
Top: Sitka spruce
Back and sides: Sipu "mahogany"
Neck: Sipu "mahogany"
Fretboard. Ebonized laburnum
Bindings and head veneer: Laburnum
Bridge: Maple with ebony top
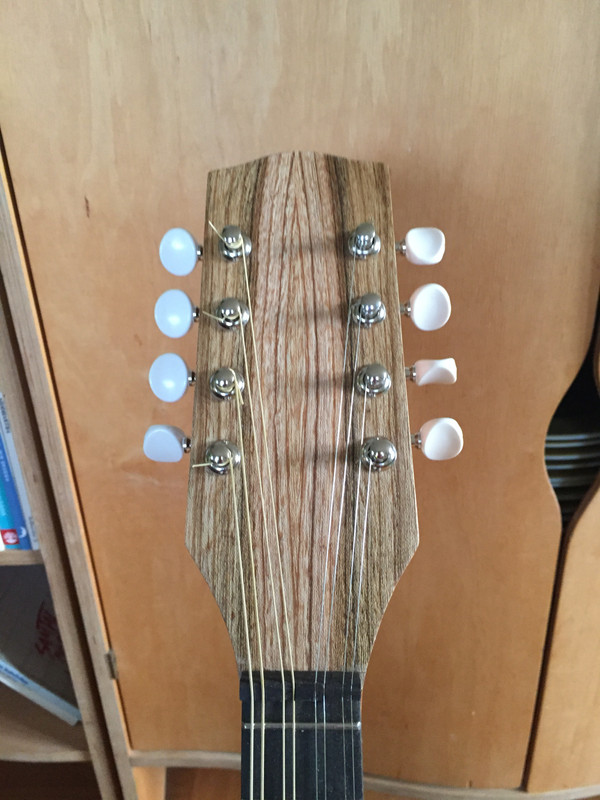
Tuners: Gotoh
Tailpiece: Aluminium custom made for ball-ends.
Scale length: 375 mm
Nut width: 32 mm
Neck to body width: 40 mm
|
|
|
|
Post by lars on Dec 2, 2017 15:20:40 GMT
|
|
|
|
Post by lars on Dec 2, 2017 15:03:20 GMT
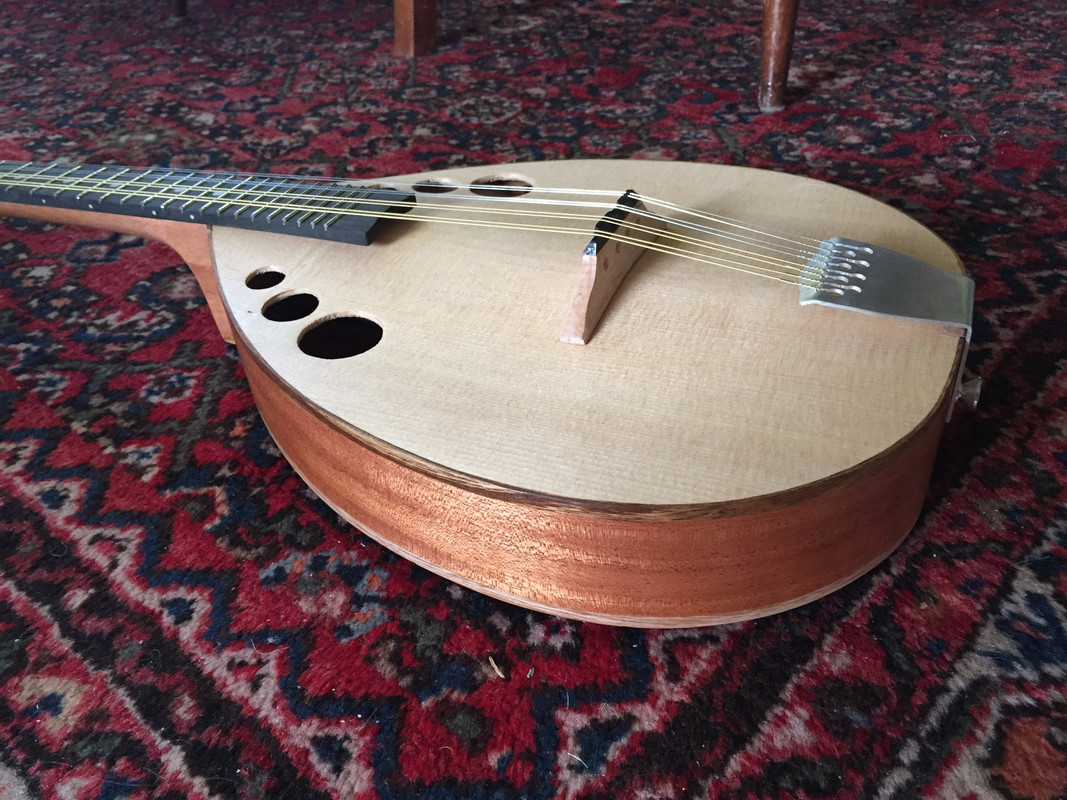
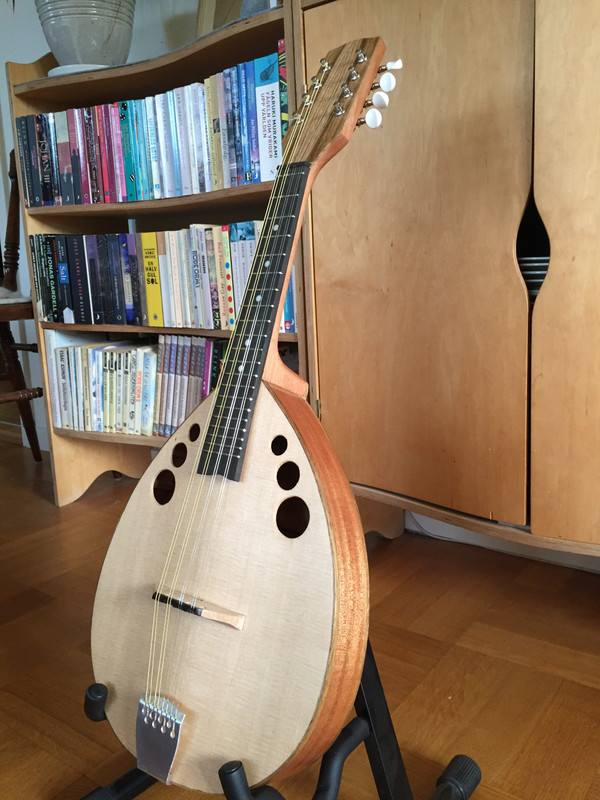
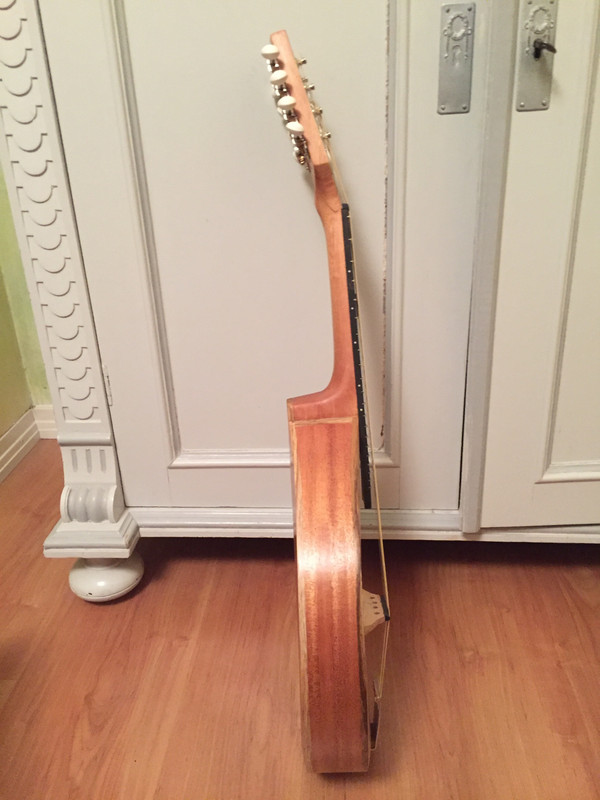
Last stepsI didn't take many photographs during the last steps. All the sanding, egg-white filling and more sanding is completely undocumented. But it happened (and I got real sick, as I'm over sensitive to wood dust) and one day I could start finishing the mandolin with Liberon finishing oil. 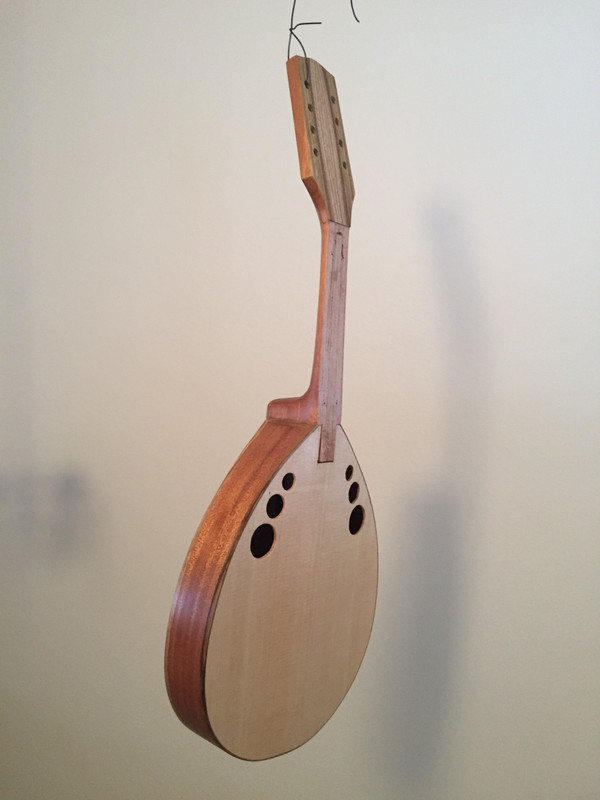 And I could glue the fretboard with the help of four small nails as guides:  And after that I could hammer in the two last frets and file the ends flush to the sides. So far I haven't made any fret leveling and crowning, but hope that it's sufficient that I hammered all the frets straight down to the fretboard. I started to shape the bridge. A disadvantage with the cylindertop instruments, compared to the more common "disc-shaped" flattops, is that the bridge gets higher (and heavier).  My first attempt to a tailpiece was for loopend strings. But I miscalculated the torque tension from the strings, so it collapsed when I first strung her up. But this what it looked like before that: 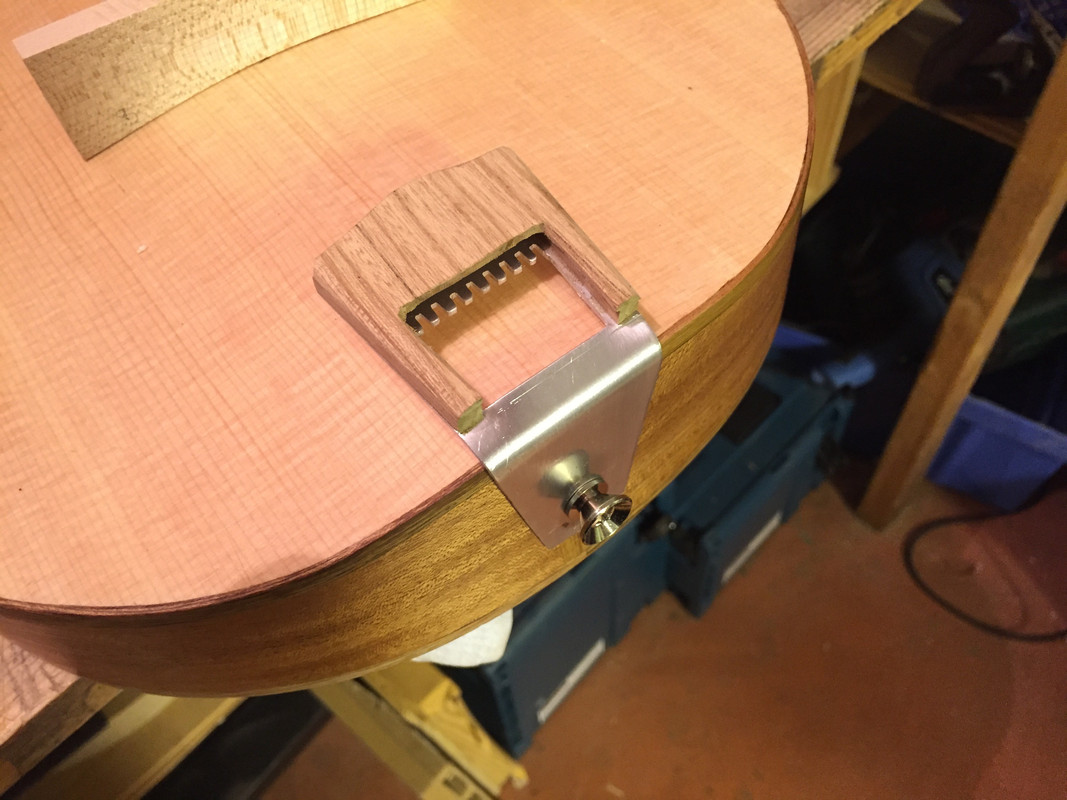 So I had to think of something else. First I adapted a factory made tailpiece, but then I decided to go for ball-end strings and made another custom tailpiece: 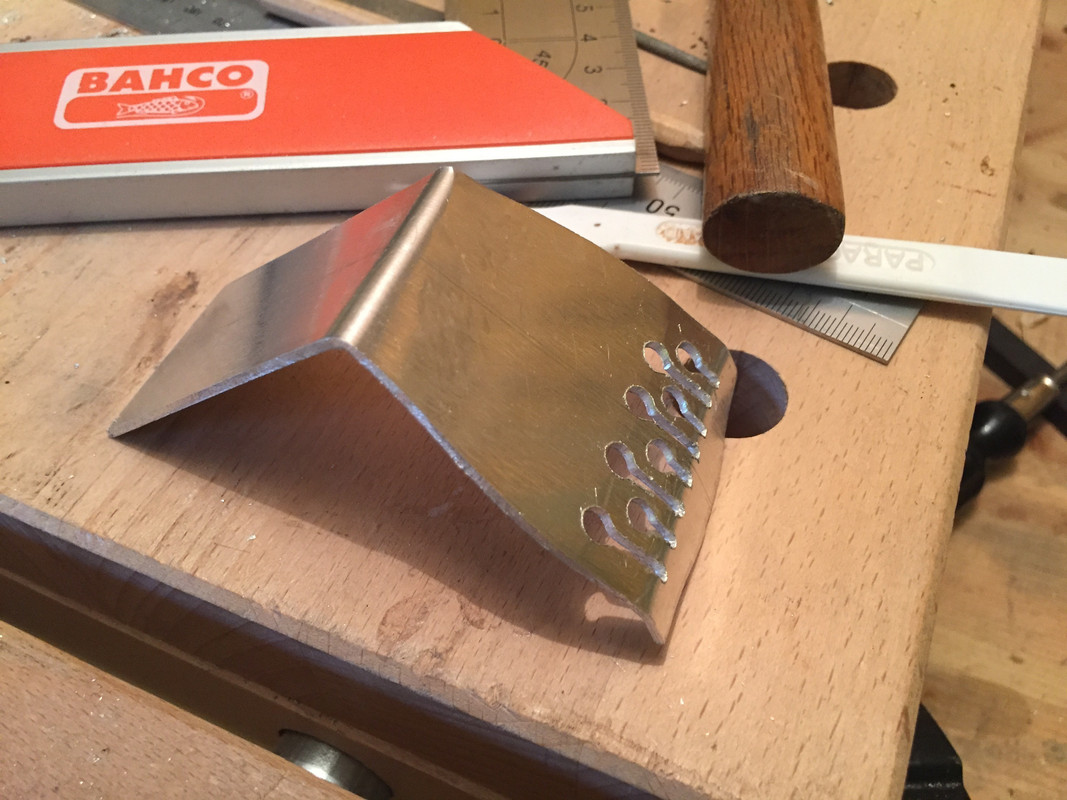 And when it was ready and installed it looked like this (and here you can also see the finished bridge): 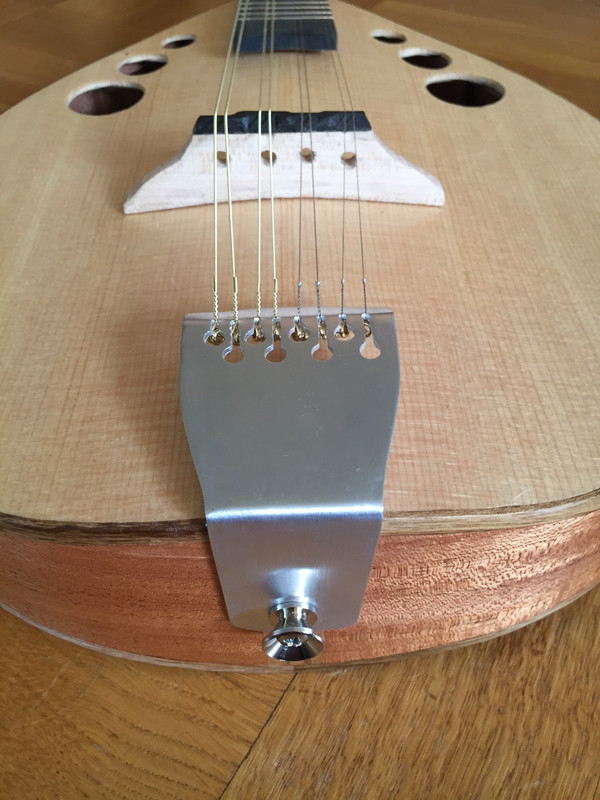
|
|
|
|
Post by lars on Nov 29, 2017 17:23:32 GMT
Do I want to build myself a "Scutter"? Yes I do! I'm sure the result will be as good as in all your other build threads.
A short question: When you make the second channel for top and back purflings - do the bearing (or support) ride on the first channel or on the sides?
|
|
|
|
Post by lars on Nov 29, 2017 17:17:42 GMT
Lars, Nice rosette and even more satisfying for you having made the circle cutter - kudos  How did your chisel get on with carving the carbon fibre? Thank you Dave! I was a bit worried that the cf would harm the chisel so I chose one that wasn't so valuable and already a bit dull. But it was much easier to cut than I thought it would be and I guess the chisel got duller, but honestly I didn't notice. What I did notice was that the brace was so much stiffer than a solid wood one. |
|
|
|
Post by lars on Nov 28, 2017 19:14:18 GMT
Bracing top and back
Bracing the back was quite straight forward. Like the original octofone I made it ladder braced with four braces rather evenly spread out. I planned to make it absolutely flat (as I think the original was), but in the end I put a tiny arc in the braces. Here is the back with "voiced" braces and a cross-grain strip along the centerline. 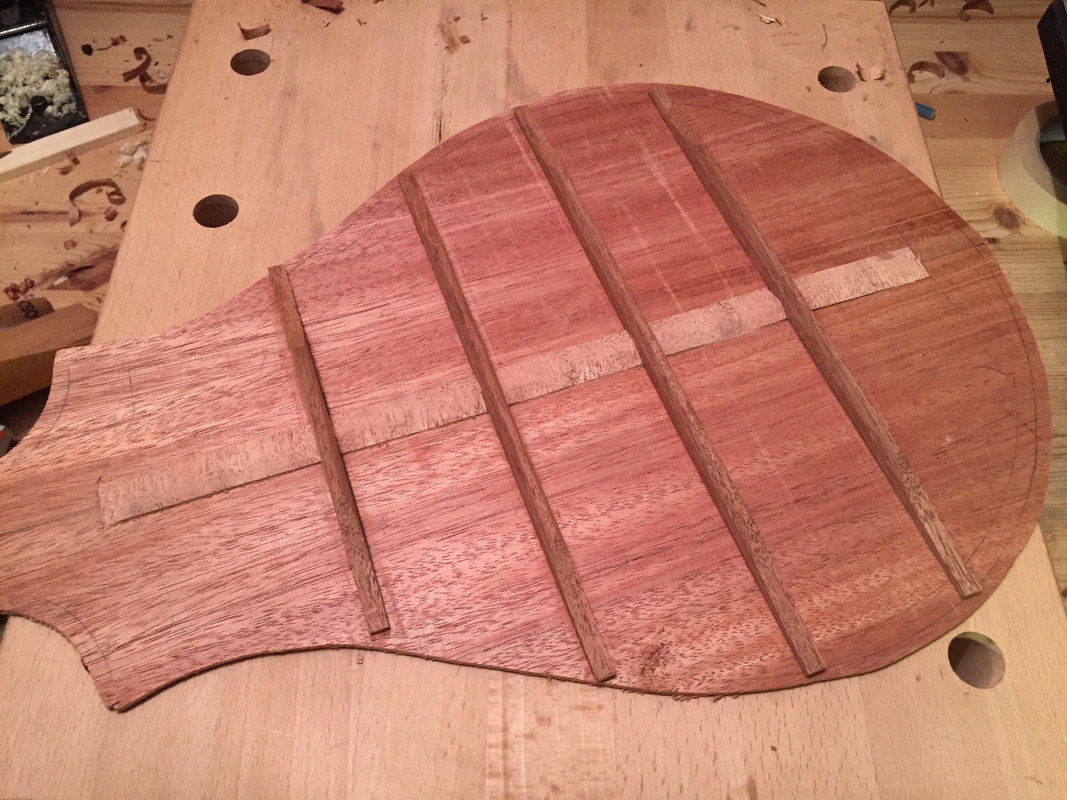 On the original instrument the top was ladder braced, but I've opted for a hybrid ladder-/H-bracing. Furthermore I've reinforced the central brace underneath the bridge with carbon fibre - it's laminated with a cf-strip in the middle. As the top will be "true flat" I hope these measurements will help keep it flat. But as I've never done an absolutely flat top instrument, and have never worked with cf-inforced braces, I'm a bit nervous. I want the top to stay flat - I don't want the top to be too stiff. How do I find the balance? (A swedish saying is that it's like choosing between pestilence and cholera.) Here are some pictures from the work with bracing the top:  The braces cut. 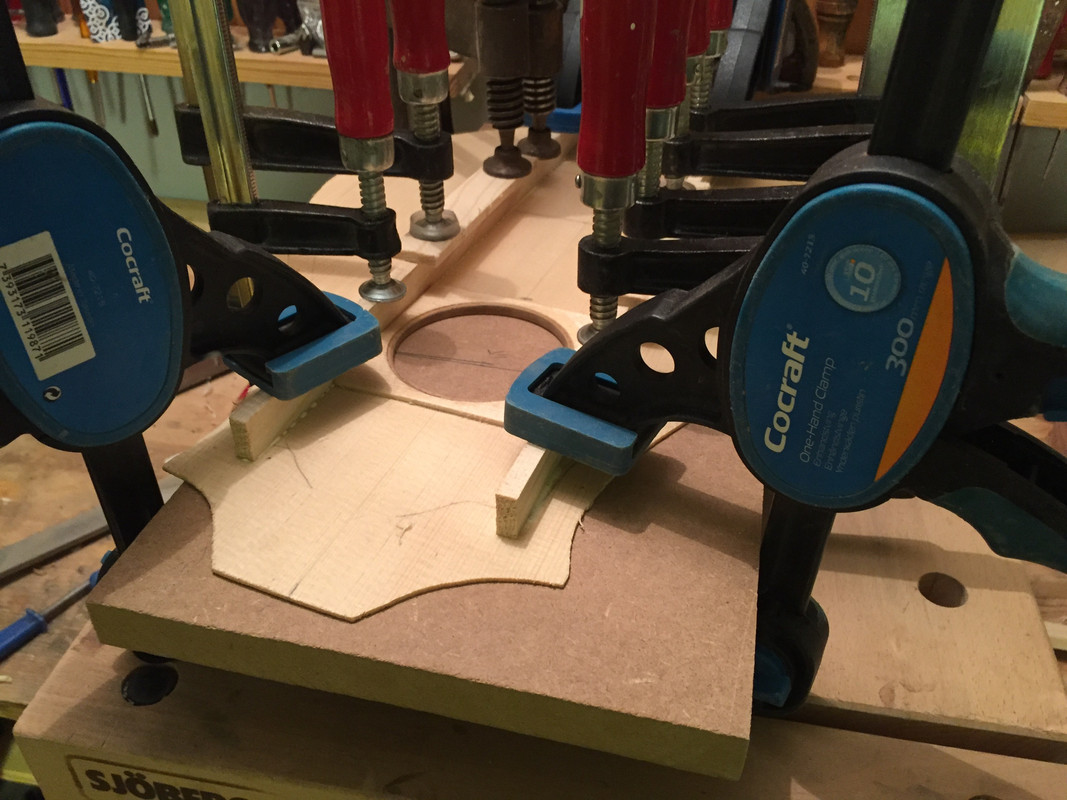 H-braces glued to the top 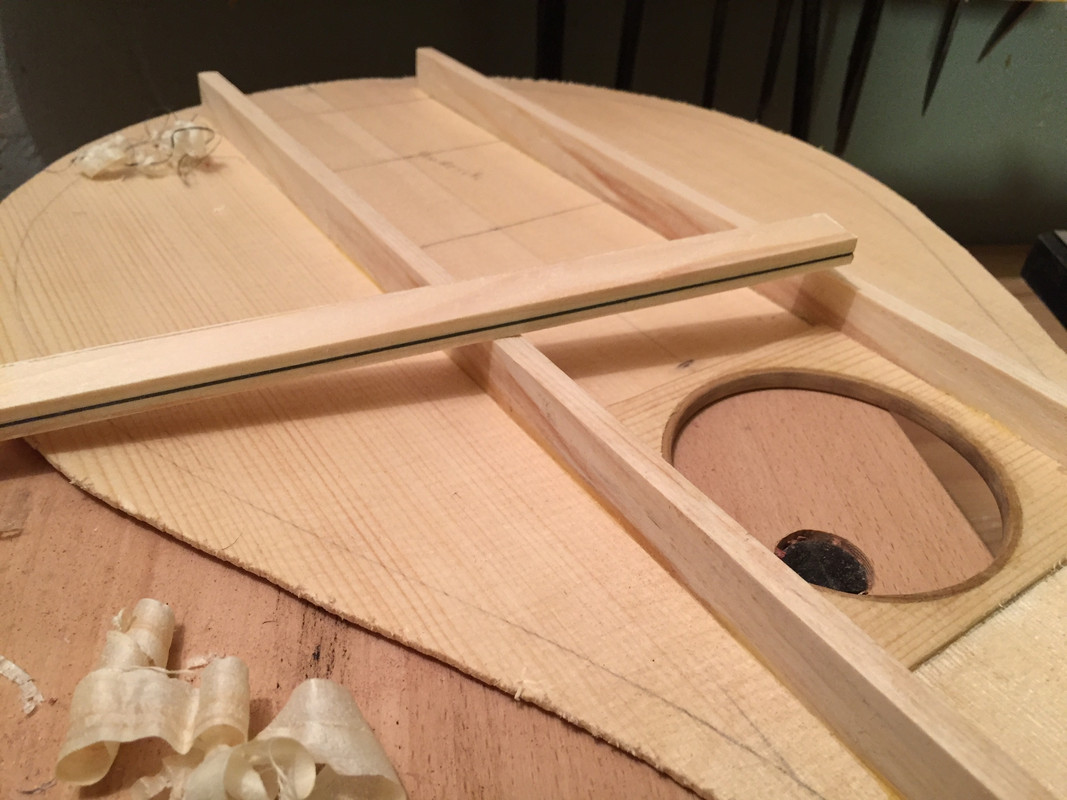 The main ladder brace laminated and ready to have notches cut 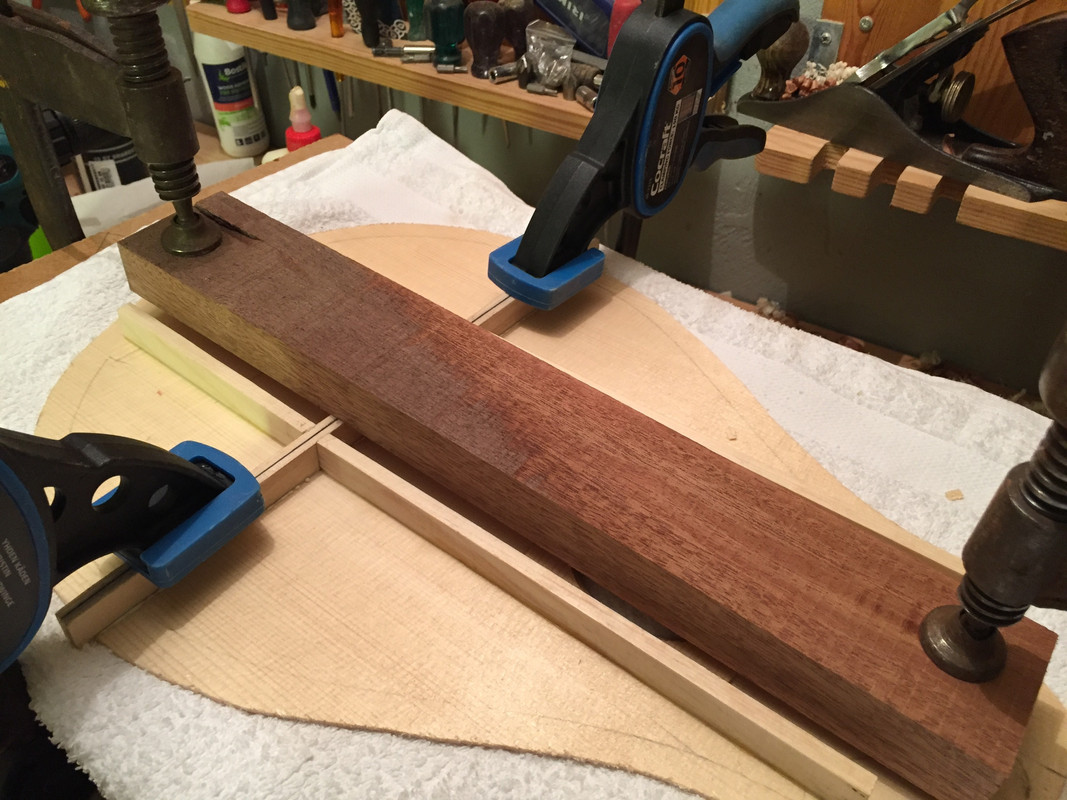 Which is glued here 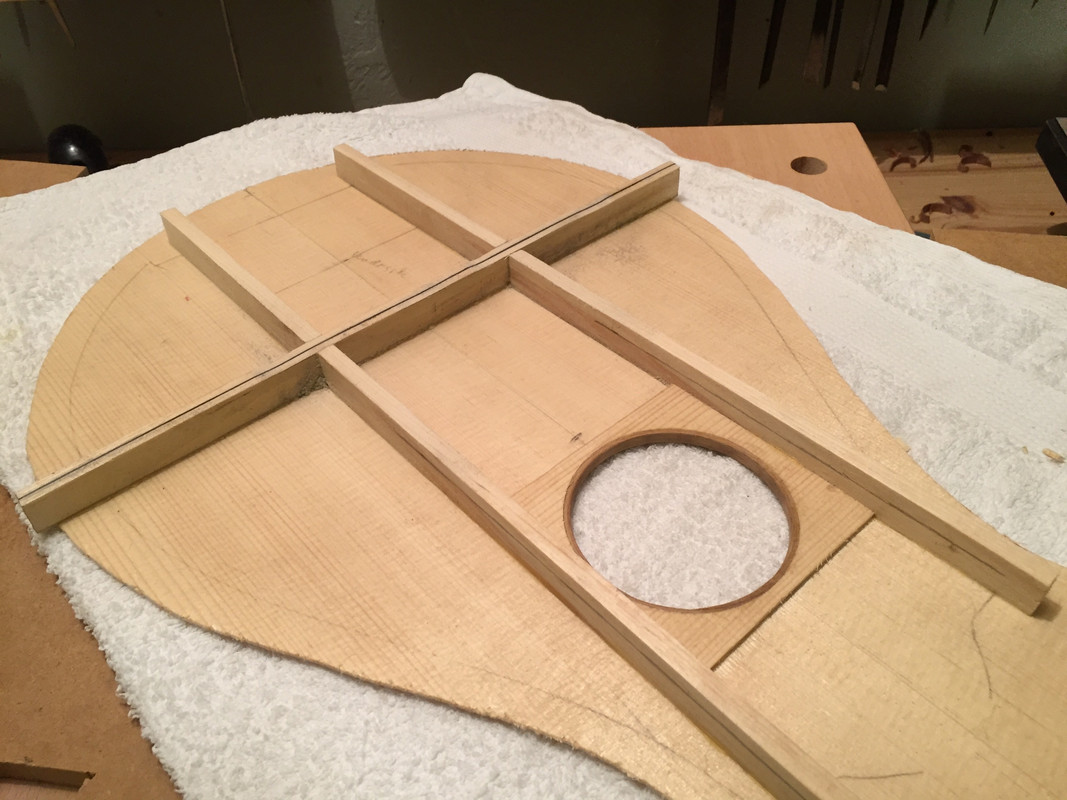 And looks like this. ![]() 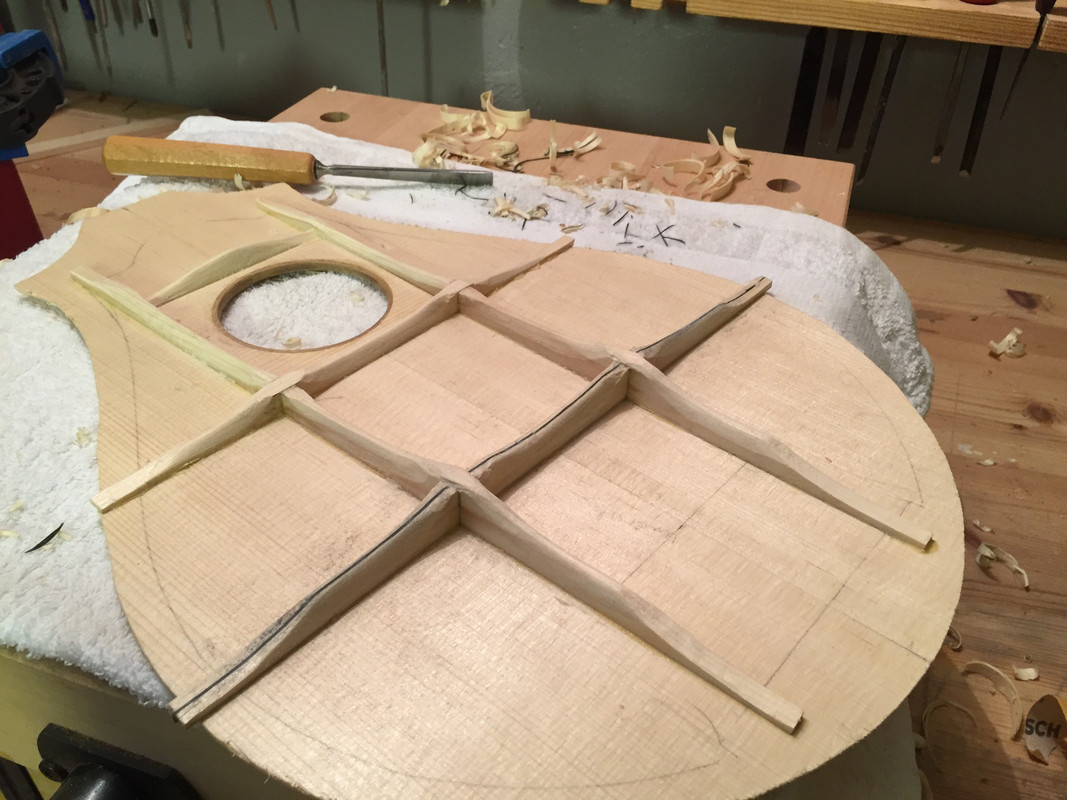 Apparently I forgot to document a lot of steps, but this is the near end result. And then I took a late decision to make a sound port (contrary to the original design): 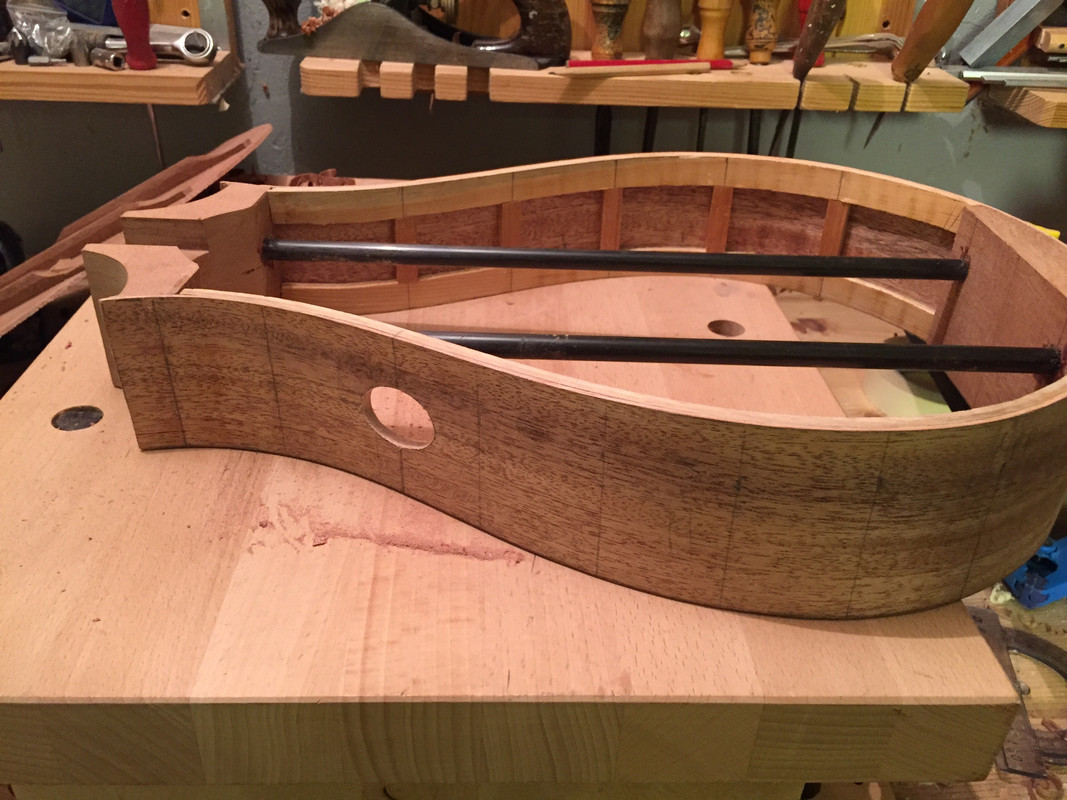
|
|
|
|
Post by lars on Nov 28, 2017 17:43:29 GMT
The soundboard and back were just preliminary planed before gluing, so now it was time to hand plane them down to almost final thicknesses. In this case it was about 2.2 - 2.3 for the top and 2.8 for the back. I aim for the top to be slightly over 2 mm in the end. 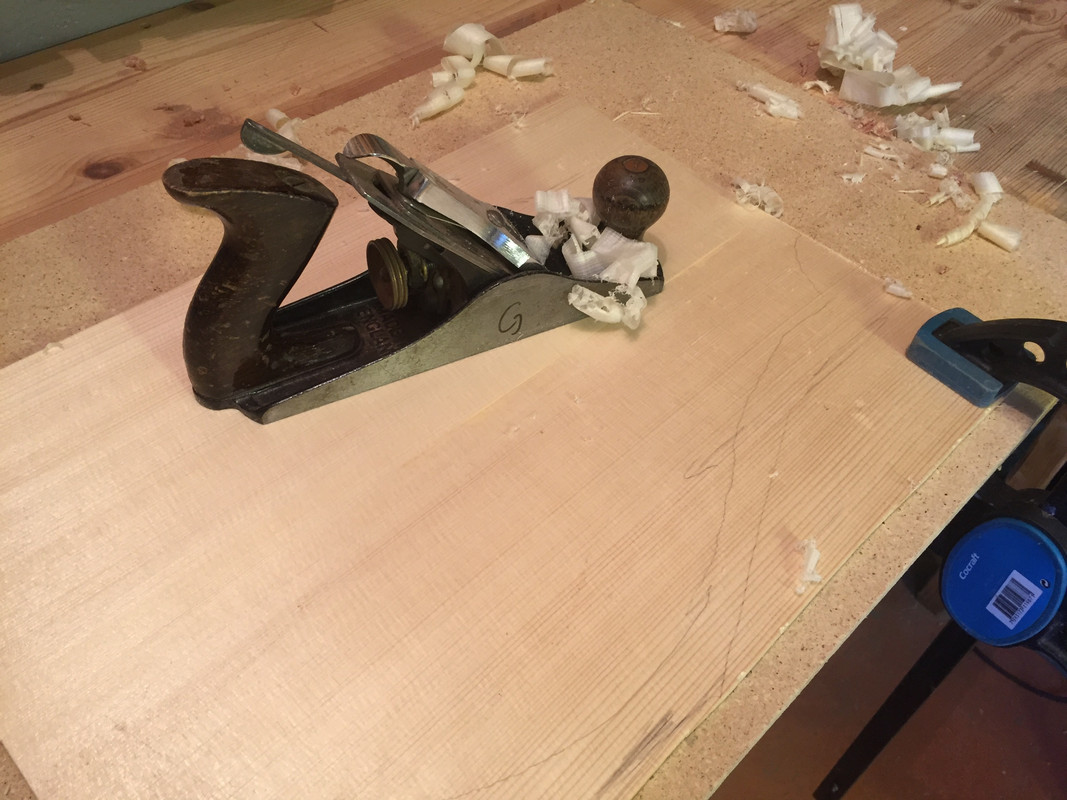 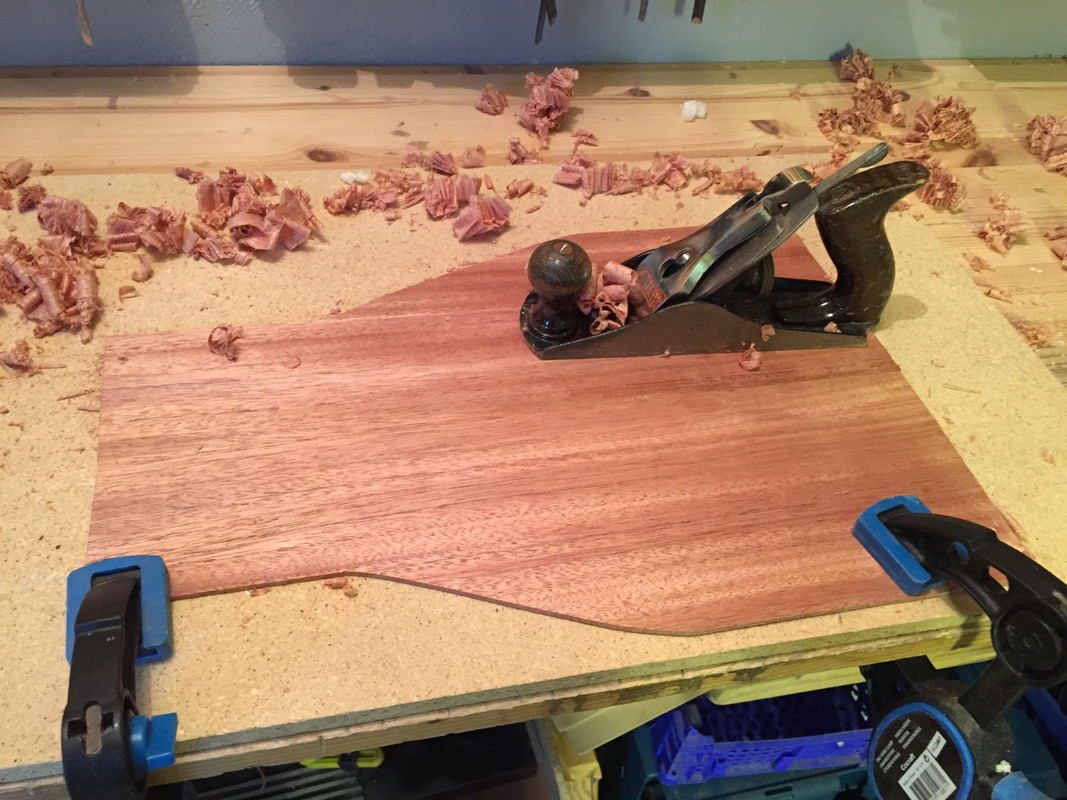 A mood image: 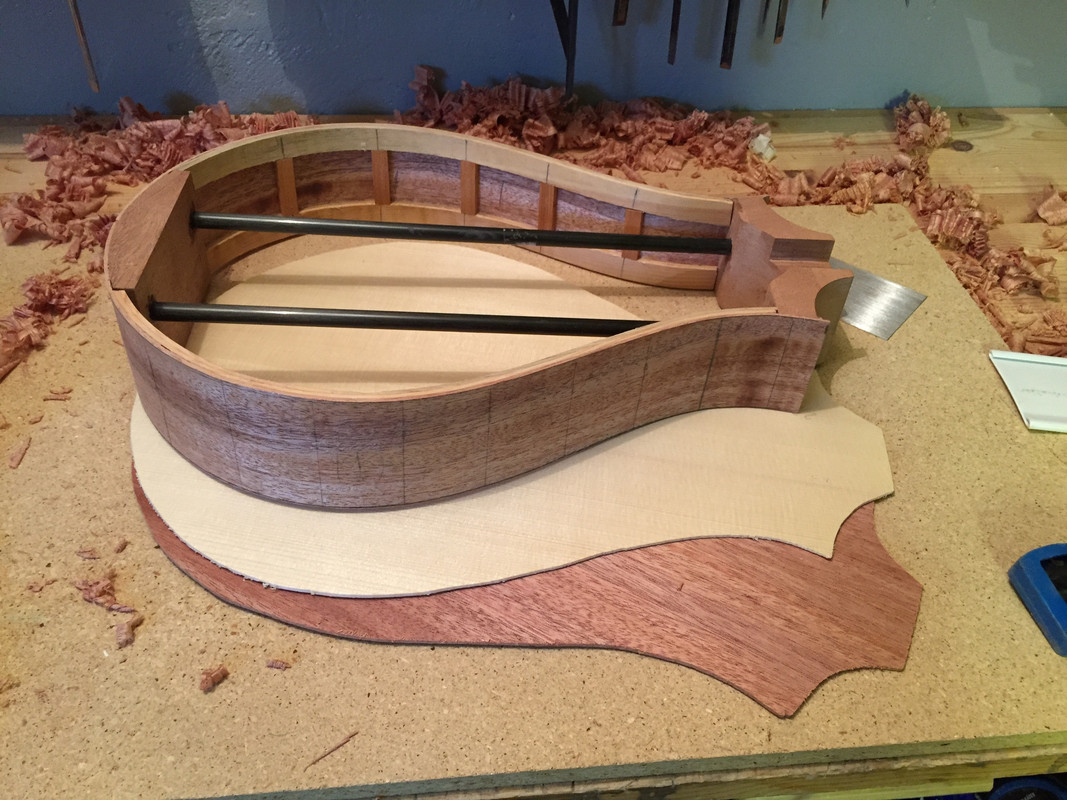 For the first time I've planned for a more "conventional" rosette, though rather minimalistic. My design philosophy is to make things neat but simple, but not to omit things that are structurally necessary or benificial. But first I had to make a circle cutter: ![]() 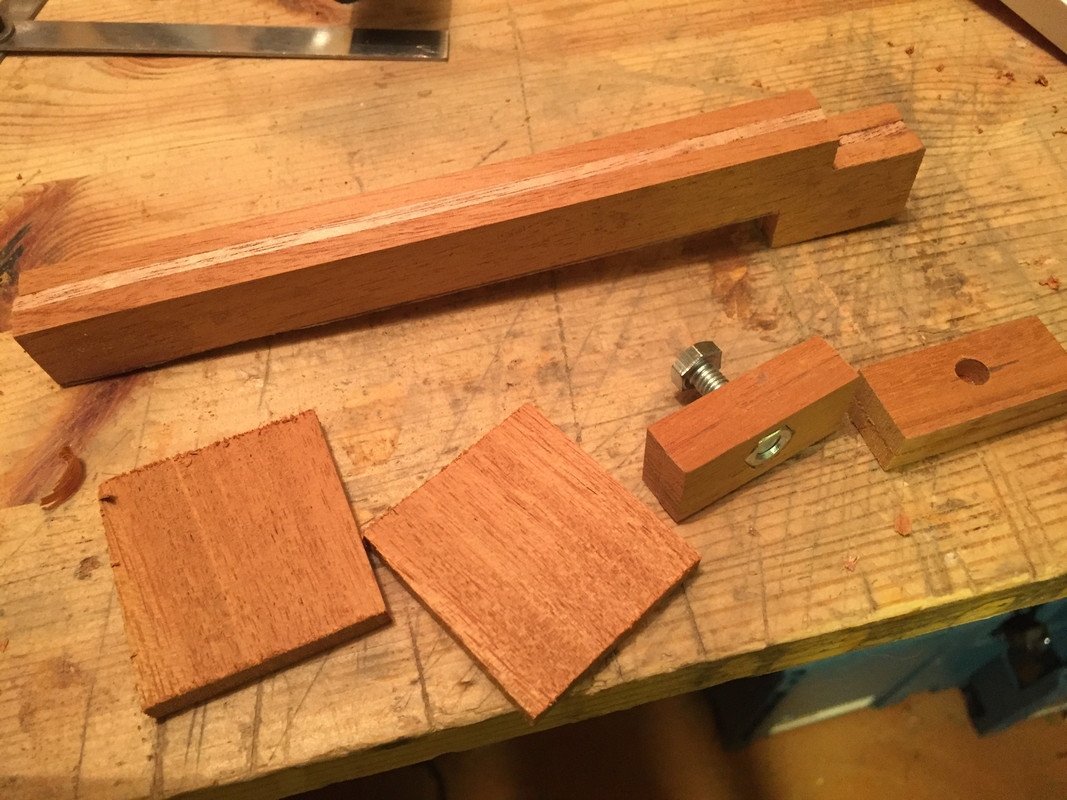 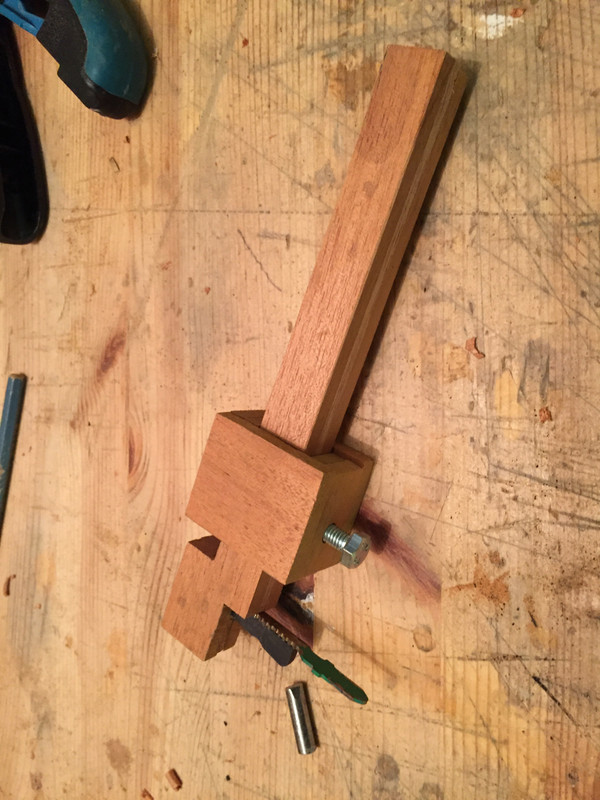 First I cut the rosette from the same mahogany piece as one of the sides. 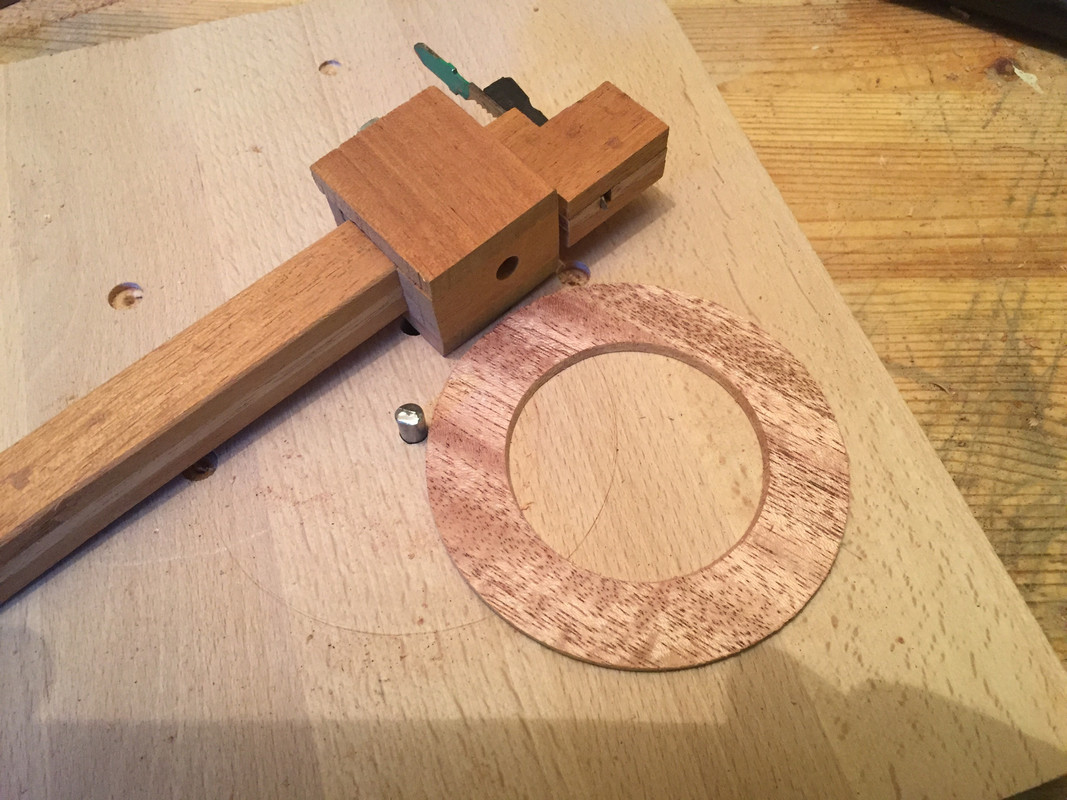 Then I used the cutter and chisels to make a channel for the rosette and glued it: 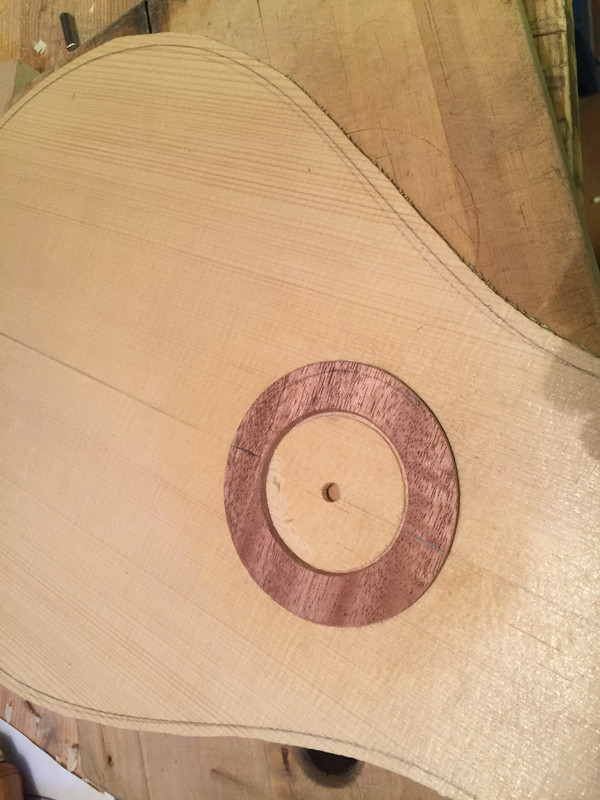 And planed it flush to the top: 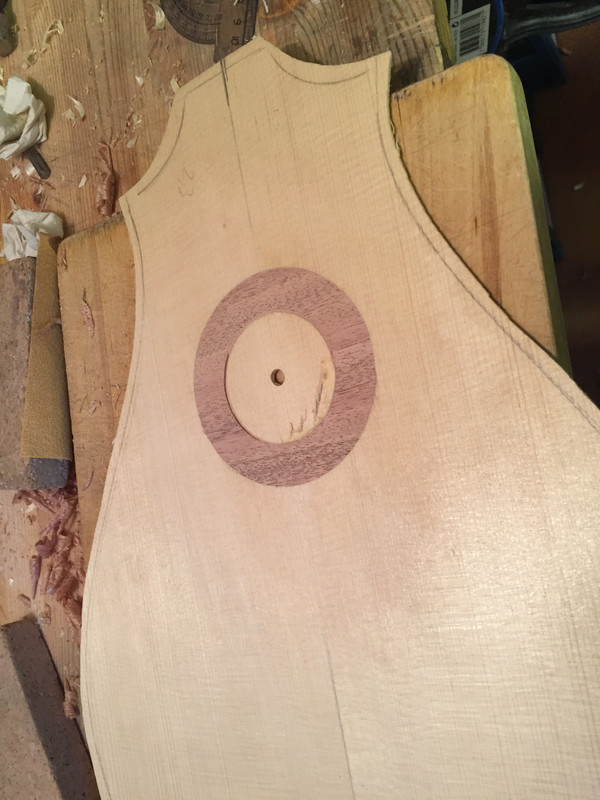 And turned to top upside down and glued a thin piece of spruce cross grain to the top. As the rosette also is glued cross grain, it practically gives me a 3-ply to surround and support the sound hole. 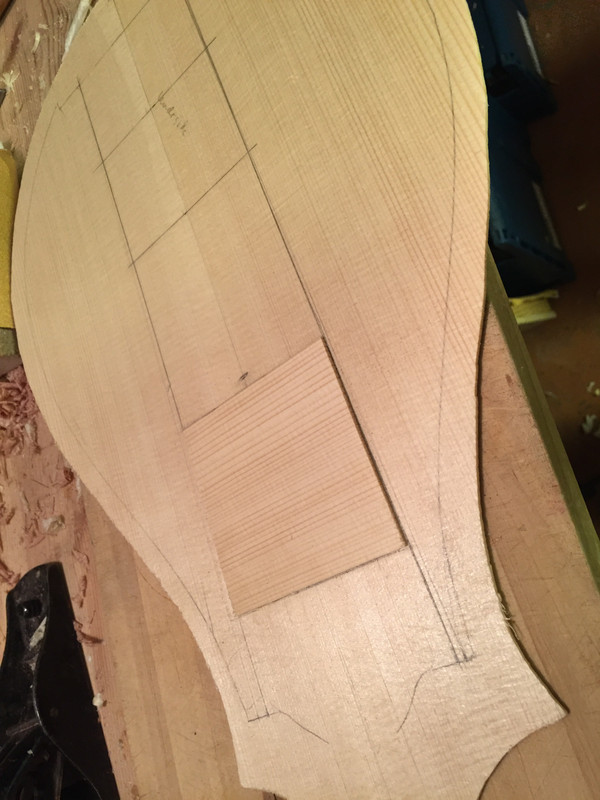 Then I used the cutter again and cut the soundhole:  Last step was to add binding. I planned for ebony, but after three bindings that split when trying to bend them on the hotpipe, I decided for my trusty laburnum (which bent like a charm), glued it and cut/sanded flush to the rosette. 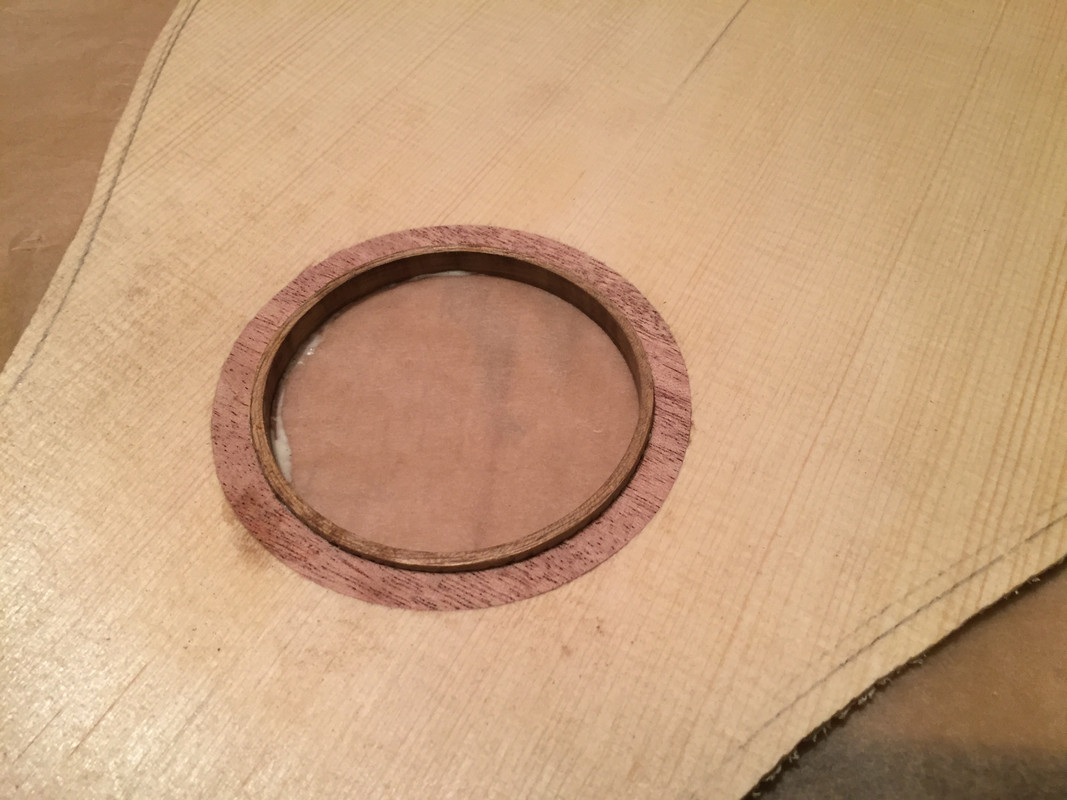 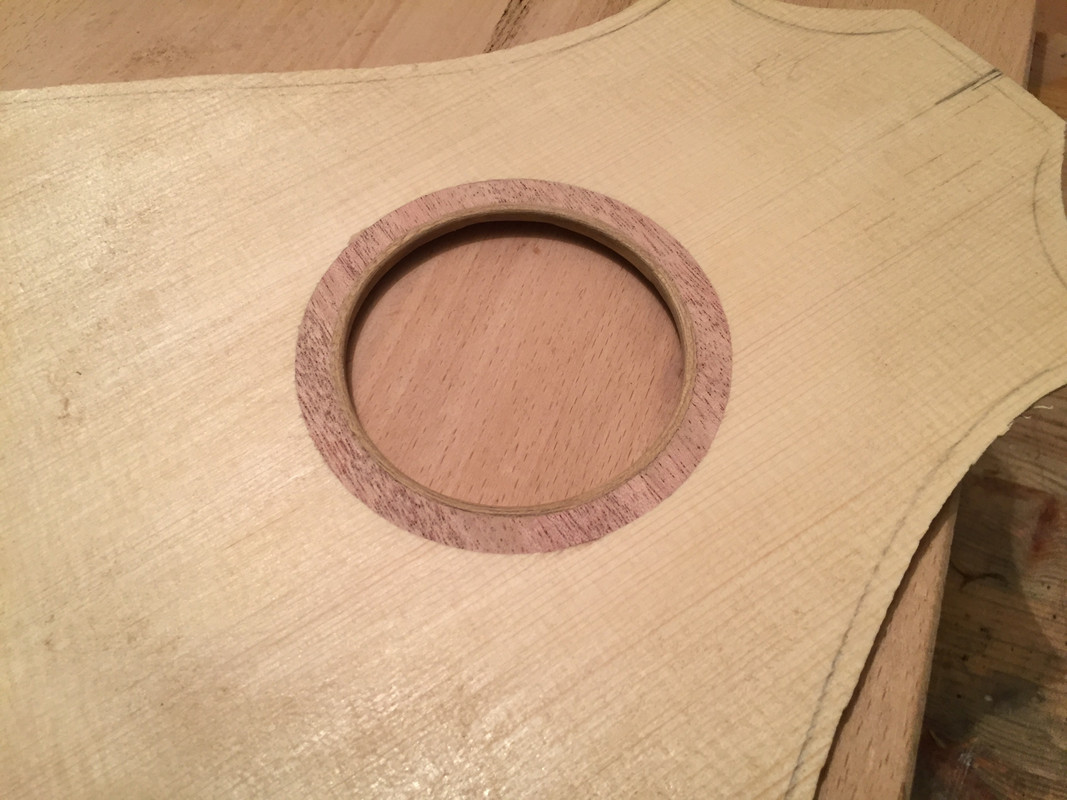 And it actually looks a bit better in real life. There are one or two minor flaws, but not very significantly. I'm quite content. Next post will be about the bracing of top and back. |
|
|
|
Post by lars on Nov 27, 2017 20:38:54 GMT
Hope you like  Yes we like. I'm drooling! |
|
|
|
Post by lars on Nov 15, 2017 20:25:05 GMT
Now the rim is finished. I first marked every milimeter of tapering in the mould and transfered it to the sides. I cut it roughly with knife and then sanded the rim flush against the sanding board: 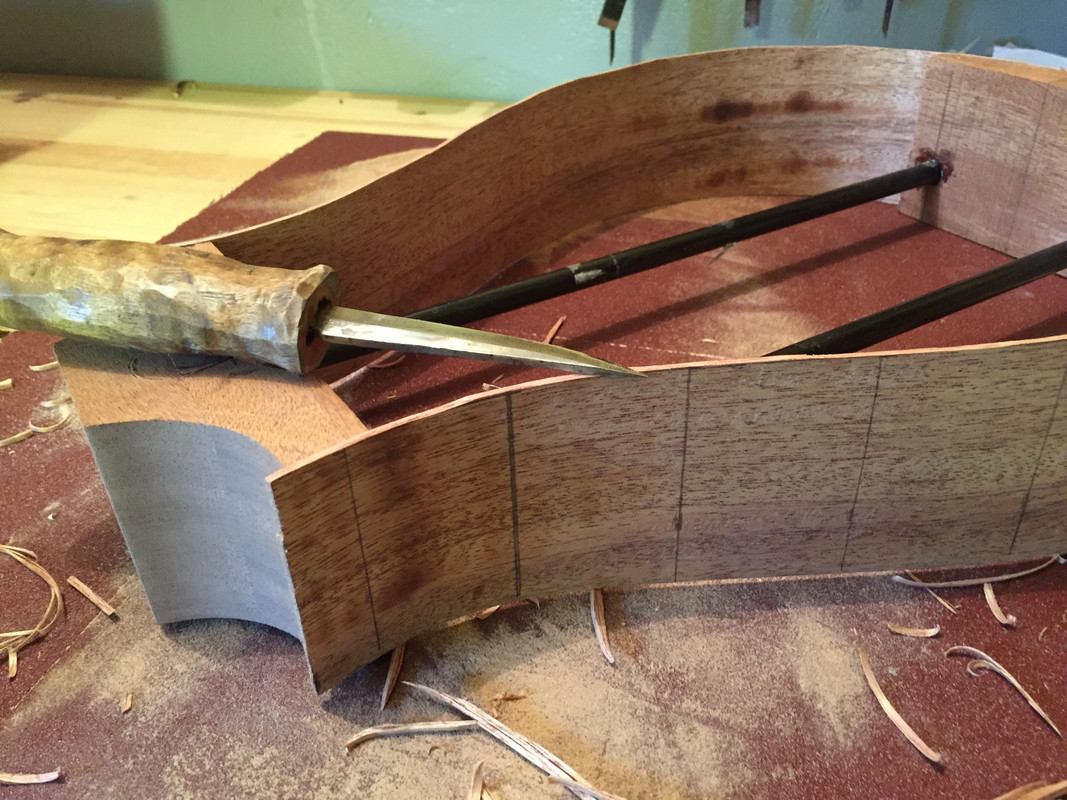 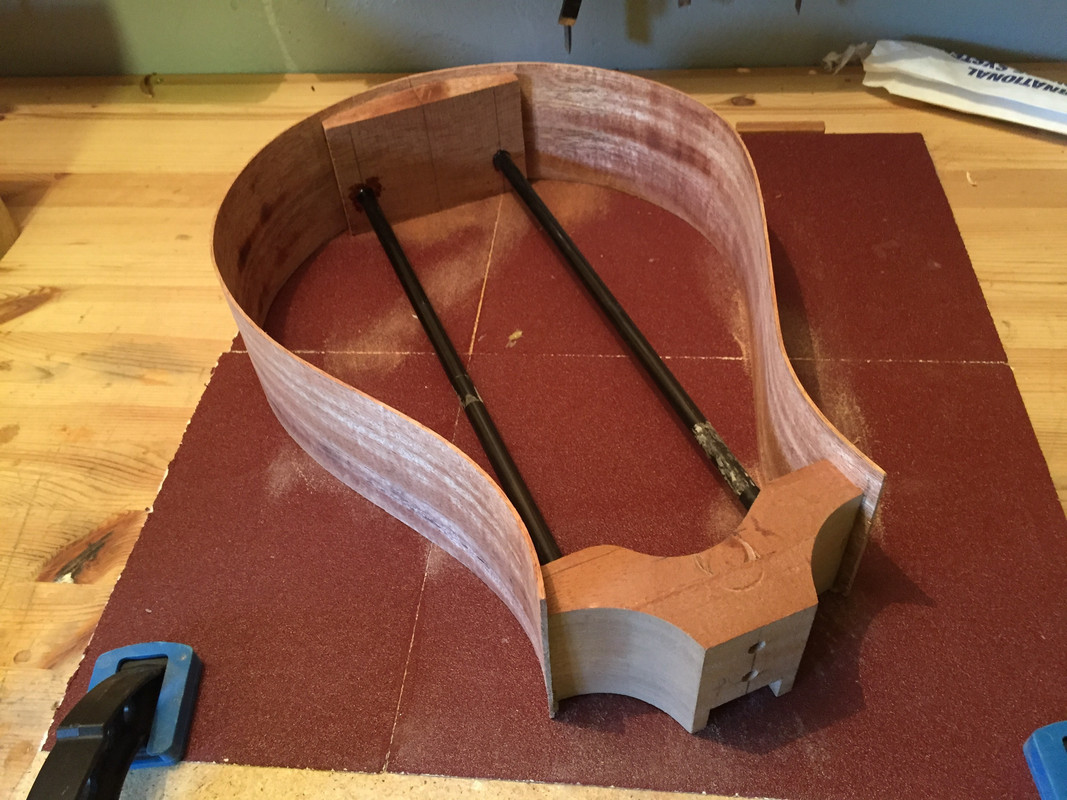 First I planned to use mahogany kerfed linings, but they broke when I tried to bend them. So I made solid linings which I bent on the hot pipe. The wood is Pine, but not any pine. It's an extremely well seasoned very old pine that I had saved for a soundboard - my first two instruments had soundboards from the same wood and I'd say it had properties like douglas fir tonewise. Anyhow that last piece of pine ended up as linings and not a soundboard: 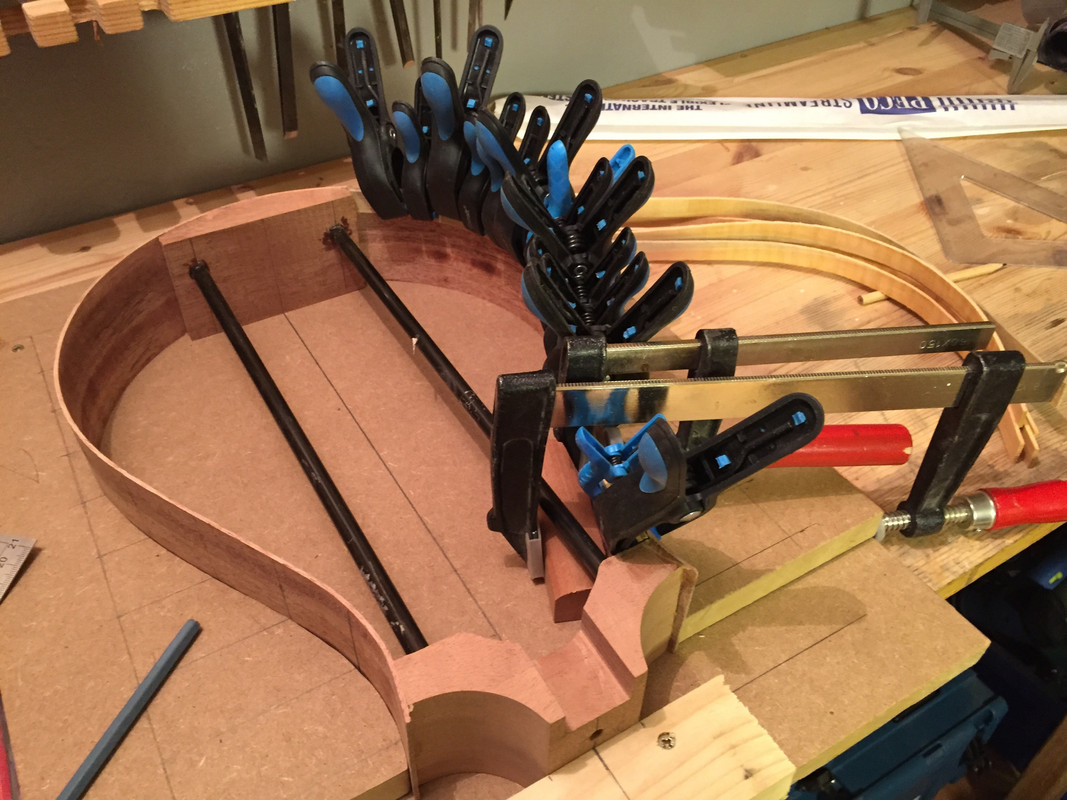 I complemented the linings with braces along the sides and the completed rim-set looks like this: 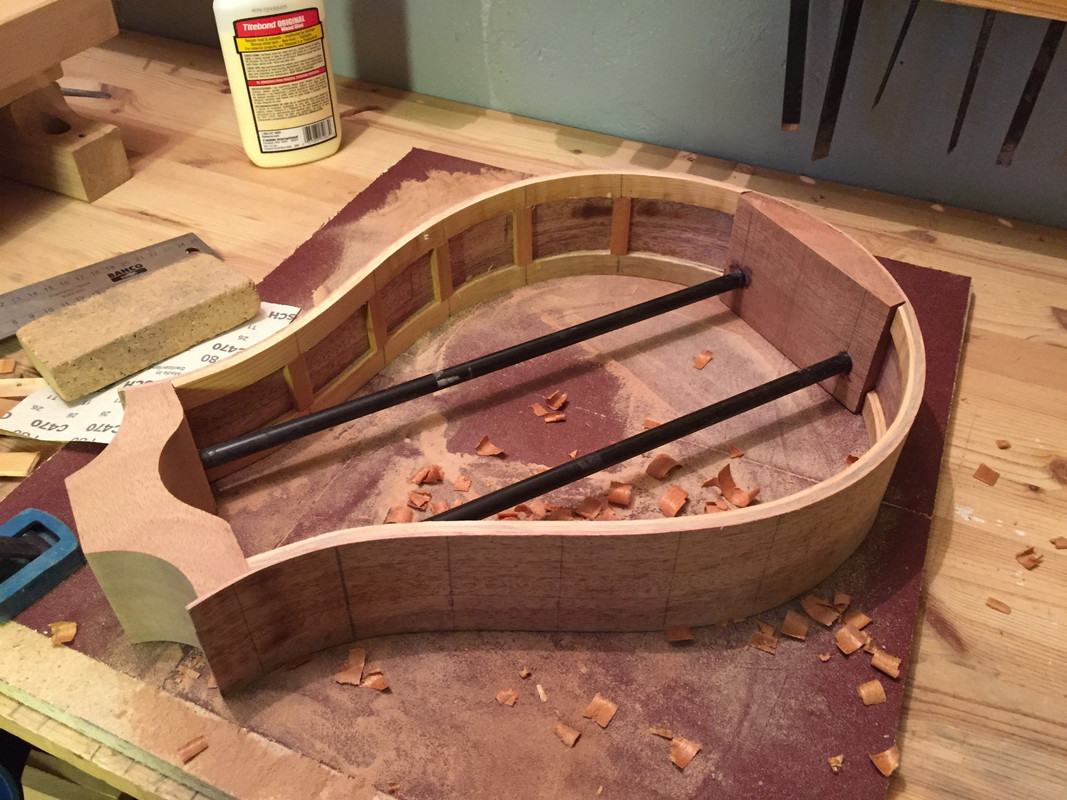 This is very stiff and sturdy construction, far from the light and fragile construction of the original octofone, but I'm pretty shure this is a better way of doing it. |
|
|
|
Post by lars on Nov 15, 2017 20:11:58 GMT
I won't bother talking too much about the fret board that split in two when I hammered in fret nr 17 or the crack in the back that suddenly appeared when clamping the body in the work bench... I'd rather talk about the relative success I've had lately. After closing the box it was time for the bindings. As I said in the last post, I cut it buy hand, first with my home made binding cutter and then with chisels and files. It was a hard work and the result far from satisfying and I promised myself (as I did with my previous two instruments) to never do it by hand again. The laburnum bindings were first bent all four in the profile of the body and then bent two by two regarding to the curvature seen from the side. I ended up with two pair of bindings: 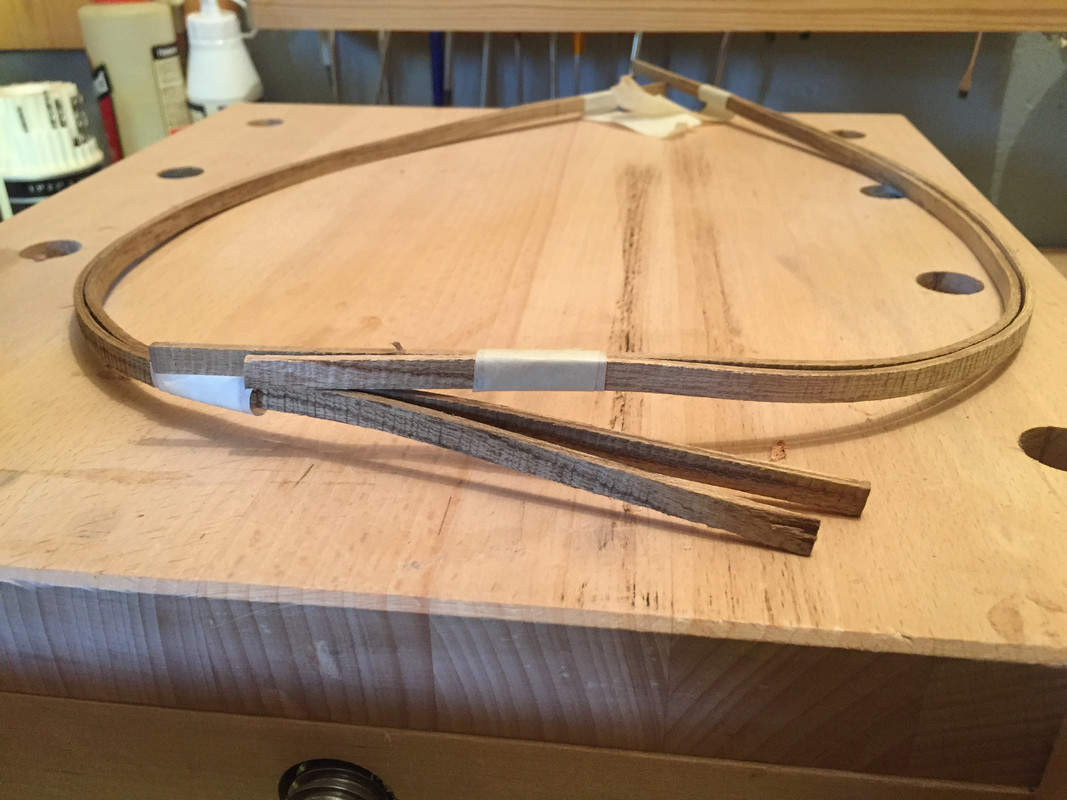 And here the first binding is glued: 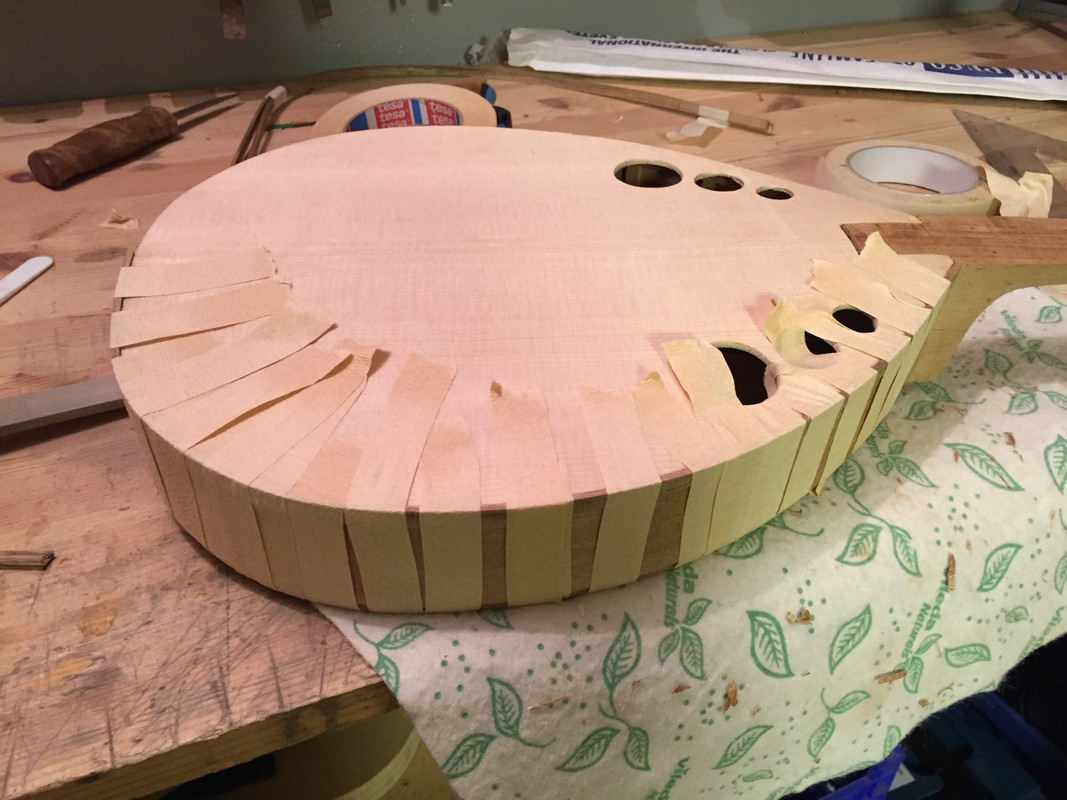 After all four sides were glued there were quite a few gaps which had to be repaired - either by tiny shims that I glued in between the body and the inding - or by saw dust mixed with epoxy. And now it looks like this: 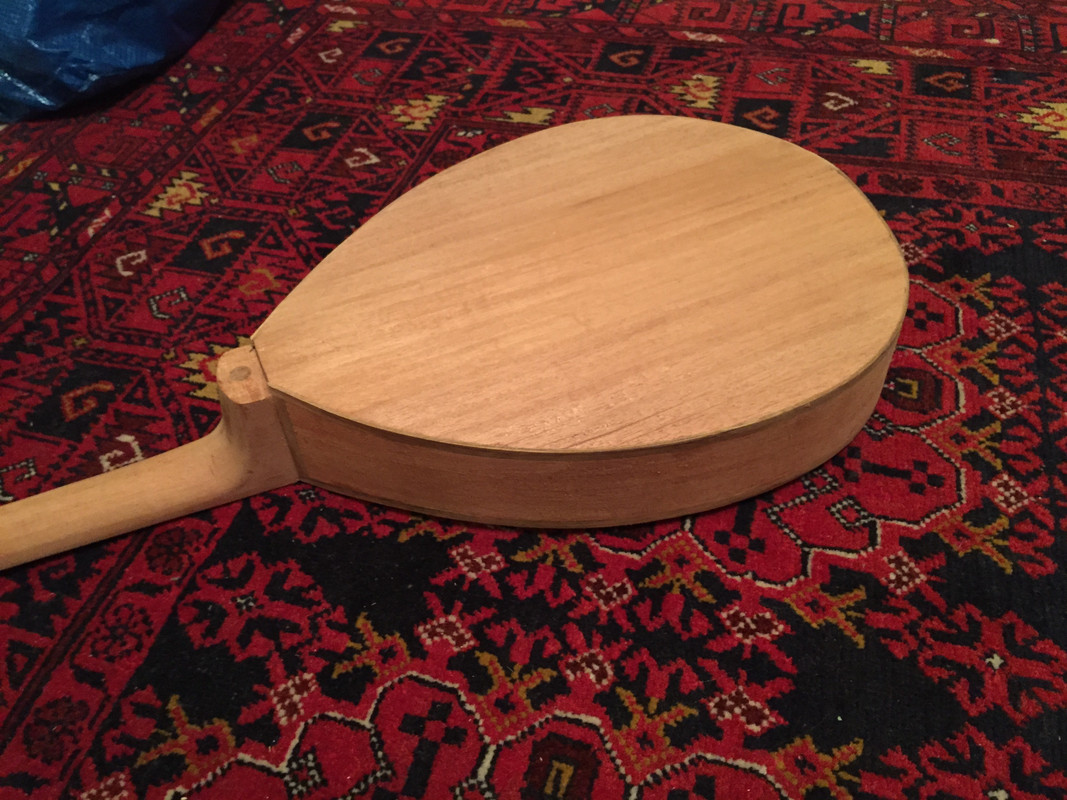  And if I add the fretboard (still unglued) it starts to look like an instrument: 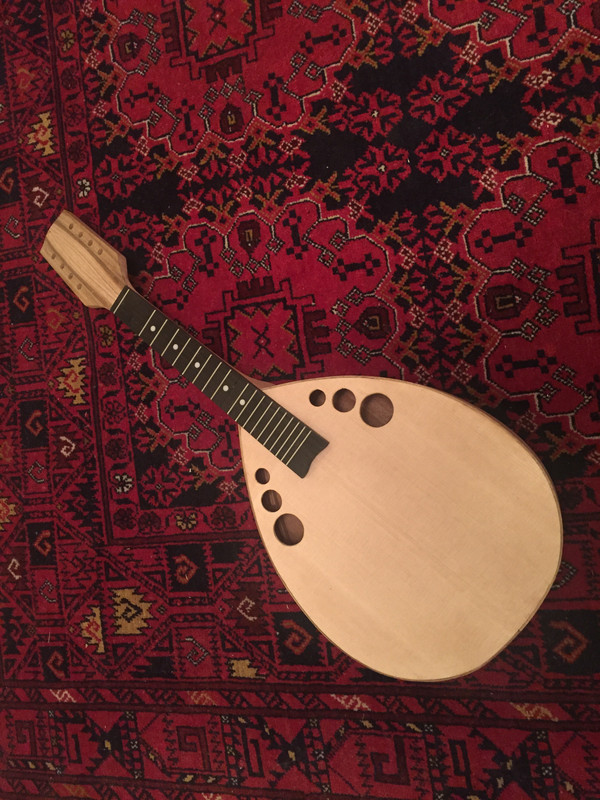 The fretboard is also made of laburnum that has been "ebonized" by a mix of vinegar/steel wool. It replaced the first fretboard of rea ebony. This one actually looks better! Next step will be to make a heel cap. |
|
|
|
Post by lars on Nov 13, 2017 18:03:59 GMT
You probably know this but... If you tune a 10 string cittern GDAEB then this gives you an Octave Mandolin (GDAE) on the lower 4 strings. Capo on 5 and you get CGDAE: CGDA (Mandola) on the lower 4 strings and GDAE (Mandolin) on the top 4. (that's right isn't it?) Three for the price of 1 - I like that. Martin Haha... I just thought this afternoon about a 10 string cittern tuned GDAEB as my next project. Because of the possibilites you mention. I like the idea because I can have many roles at a session or in a band without changing instruments for every song or tune. The only disadvantage is the compromise in body size. No matter what you choose, you will have too much bass or too much treble for one of these tunings. Earlier this summer/fall I made a tenor mandola with the intention to get a combined mandola/mandolin. It turned out to be a much better mandolin than a mandola, which didn't come as a surprise, since I based it on a mandolin body and the same scale length as my octave mandola. So watch out for a new build later this autumn, winter or spring: "10 string cittern - three instruments in one" :-) |
|
|
|
Post by lars on Nov 13, 2017 9:02:58 GMT
Thank you all!
Octofone is apparently a registered trademark once again (search for octofone.com) so that's why I named my instrument an octochord instead. Noone can disagree that this will be an eight stringed instrument!
I really hope it'll be an easier and more straight forward project than the double-s.
I have never seen one of the few remaining instruments in real life. I guess that there are not many of them at our side of the pond. I stumbled upon a thread at Mimf.com were Mark Swanson described the making of his Octofone mkII and that was how I found out about the instrument. I fell in love with the looks...
|
|
|
|
Post by lars on Nov 13, 2017 8:56:06 GMT
Thank you, lars ; great photos and amazing application to the task. You have managed to put my own trials and tribulations into perspective! I hesitate to say it but... good luck with the rest of the build. I hesitately accept your wishing me luck :-) |
|
|
|
Post by lars on Nov 13, 2017 8:53:40 GMT
Lars, Looking good. Mistakes are one of the best learning processes that I know and you've learned lots  Thanks Dave. I have shurely learned a lot... And I even forgot to tell about the fretboard... Ok, that will come in the next post |
|