|
|
Post by lars on Nov 12, 2017 21:46:46 GMT
I must say that the craftsmanship of your guitars is fantastic. Your sense for details is absolutely stunning, and I have no idea of how you achieve it.
Me - yealous? Absolutely!
|
|
|
|
Post by lars on Nov 12, 2017 21:42:38 GMT
And so I've started another instrument project. Lookwise it will be a copy of the Regal Octofone from the twenties. A lovely looking instrument that according to the advertisements could be played as eight different instruments - hence the name. You could concider it as a small bodied octave mandola och a tenor mandola or a double strung tenor guitar. The original instrument was apparently very fragile and light built. I've never seen one in real life, but I fell in love with the looks and decided to make an instrument inspired by it. Here is a link with good information about the instrument from Jake Wildwood: 1930 Regal OctofoneAs I don't want to violate copyright I can't share any images of the original instrument here. But here is my mould to give you an idea of the body shape; 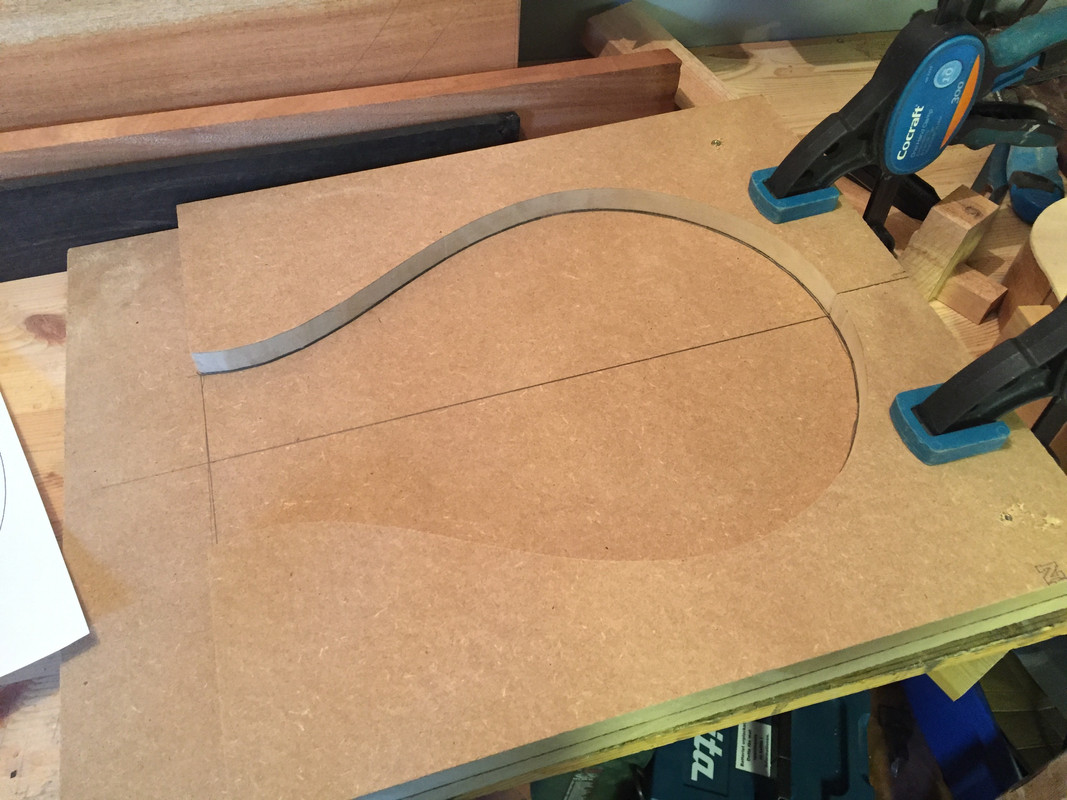 The original design was very simple, and in parts I'll keep it that way. For example I will let the top and back be true flat. And the neck block covers the hole front of the body. So what might seem like a complicated double cutaway with twin- points ( a bit like Gary Navas twinpoint mandolins) is relly just a fancy shaped, very large neck block. So here are the neck and tail blocks: 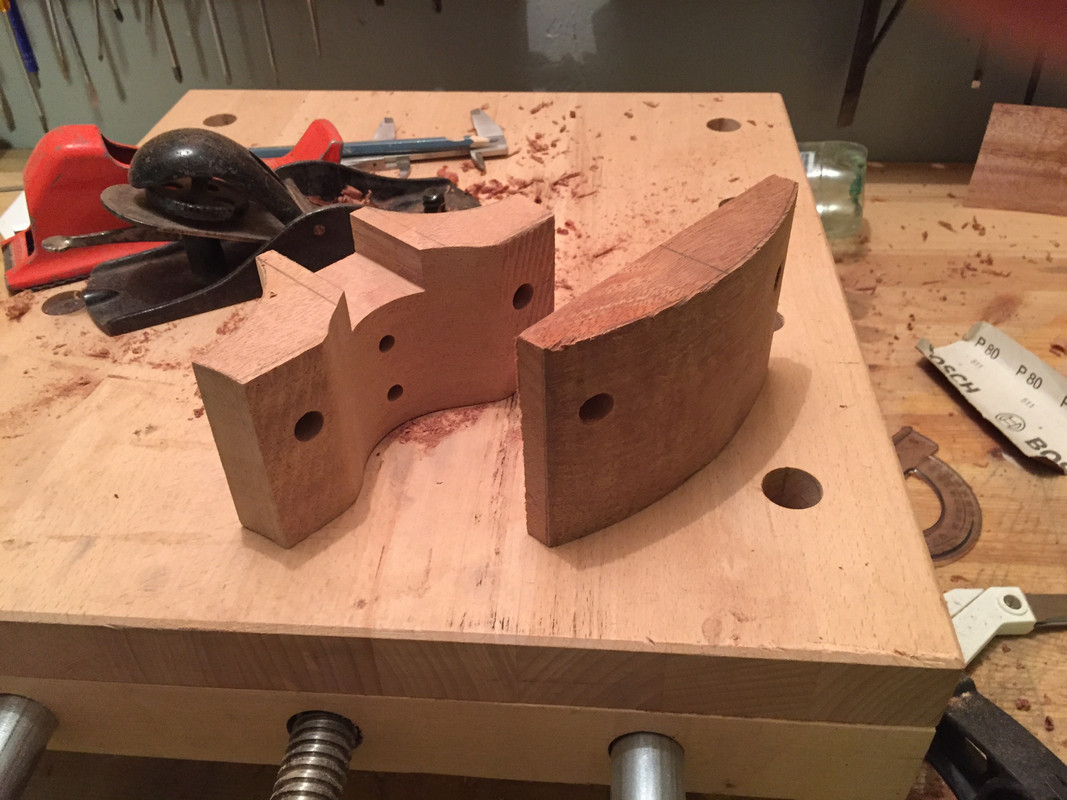 As you can see there are holes for the carbon fibre rods that will go through the body. That is NOT part of the original design! And by the way - specifications. The original octofone was a spruce/birch instrument. I like birch very much and have used it for some previous instruments, but I won't use it this time. Top: European spruce Back, sides, neck- and tail block, neck: African mahogany (Khaya) Fret board: Either ebony or ebonized laburnum. Bindings: I don't know yet. I'd like to have ebony, but I don't have access to that yet. First I glued the sides to the tail block (the original instrument had one long side piece that went all around the instrument without any joint): 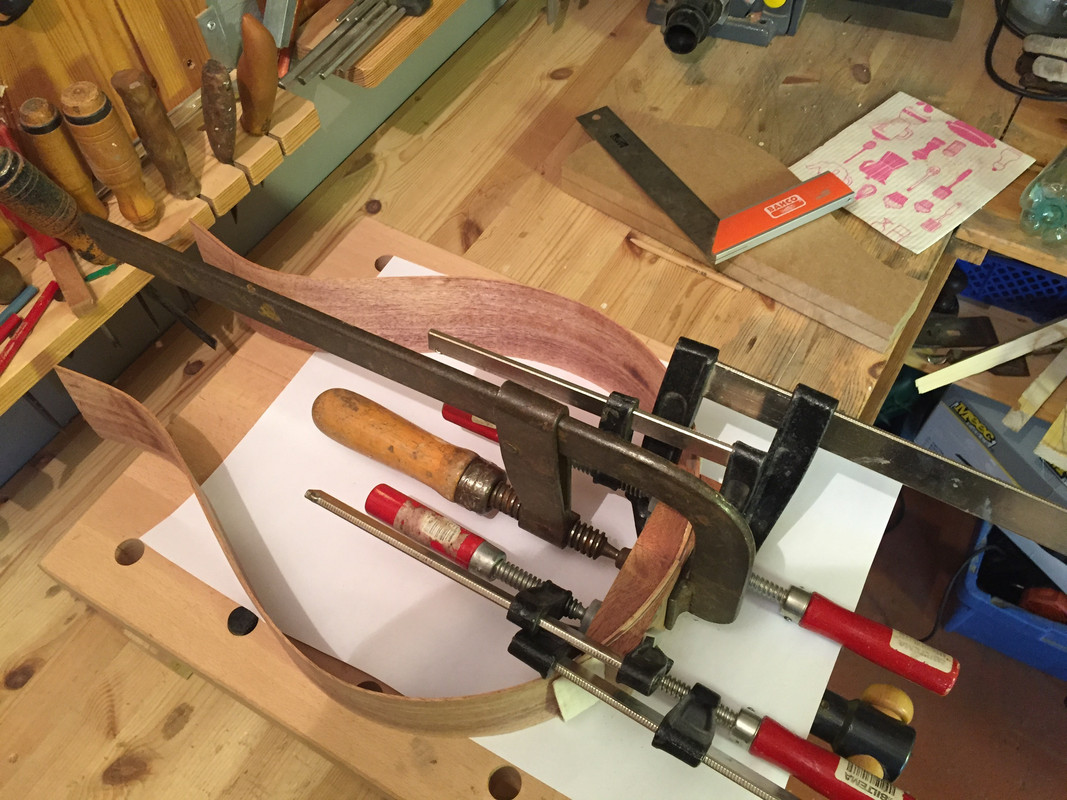 And then I glued the sides to the neck block and inserted the carbon fibre rods: 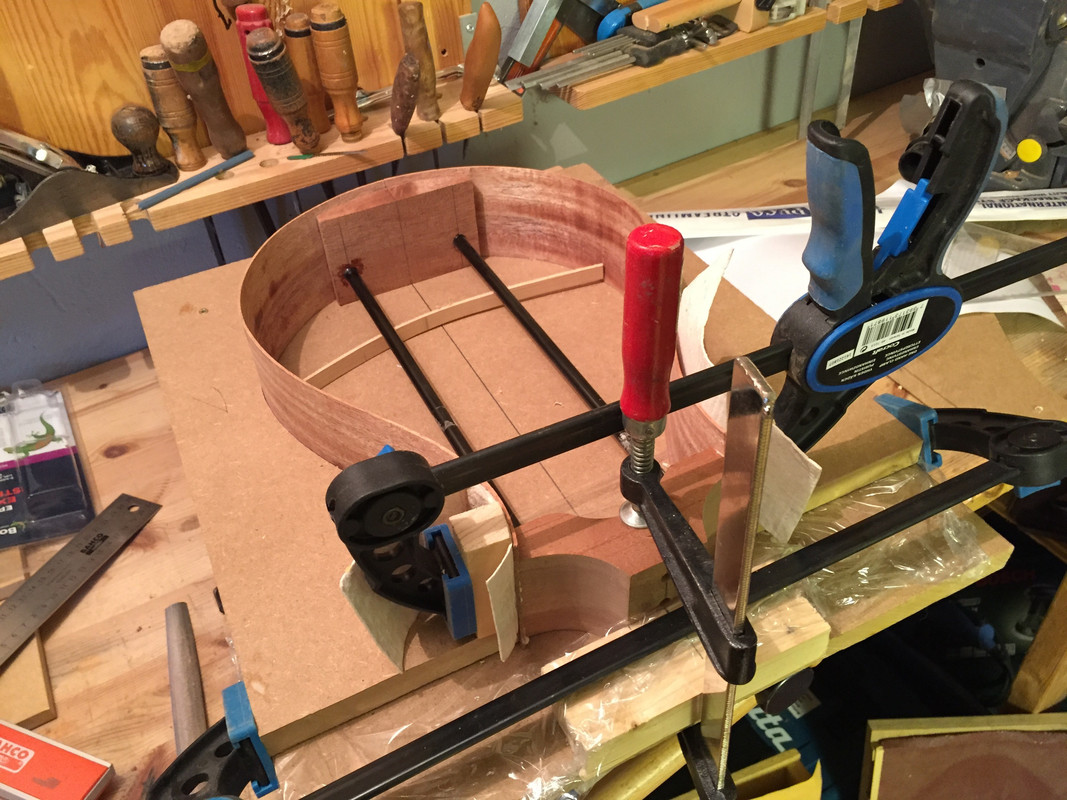 And that's all for now. I end with a mood image of some of the parts (I didn't bother to publish images of me planing the top, planing the back, planing and bending the sides, but obviously I've done all of that):   |
|
|
|
Post by lars on Nov 12, 2017 21:12:18 GMT
The continued story of the haunted mandolin
It's been a long time since I updated. Progress has been slow and full of mistakes and new takes. In one of the last posts I showed how I worked with the back plate. It was actually my second back, but I didn't tell you. The first one had cracked when I tried to bend it to the profile. And guess what happened to the second back: 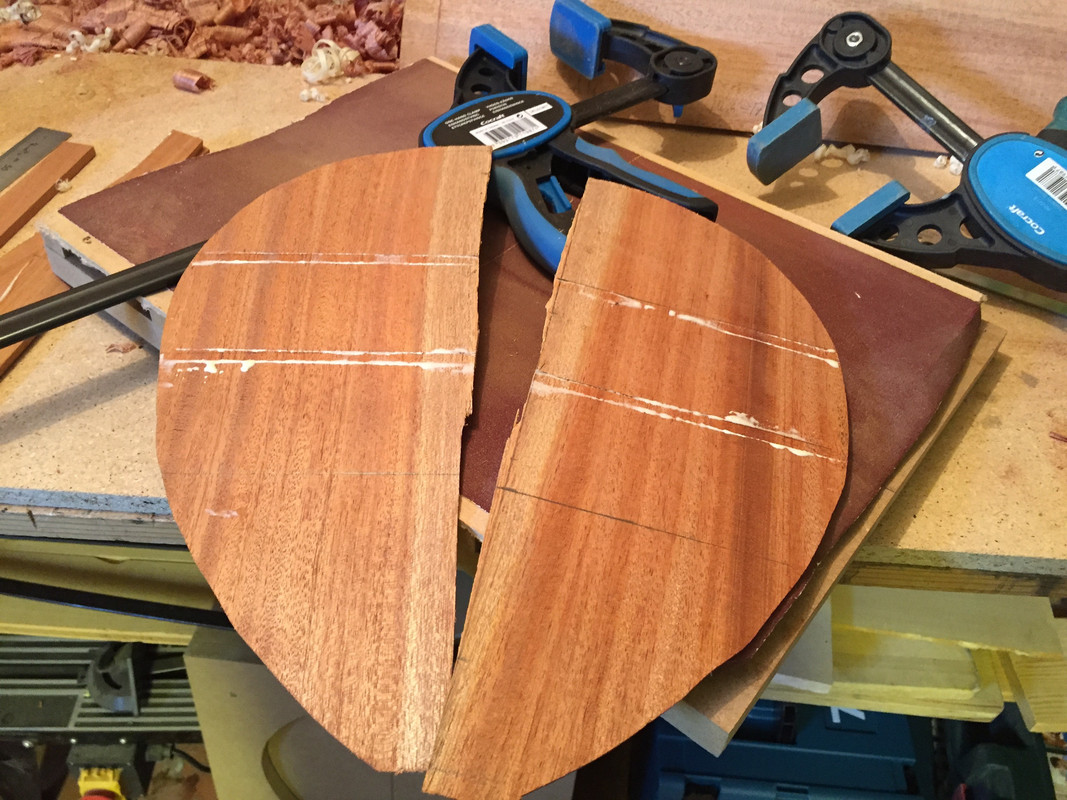 So it was back to make another (third) back and this time I did it a three-piece, so I didn't have a joint where the strongest tensions was. And this time it worked out fine (I could use parts of the first back as "wings" around a center piece). And i could glue on the braces. I forgot to take any pictures after shaping them, but this is how it looked directly after gluing: 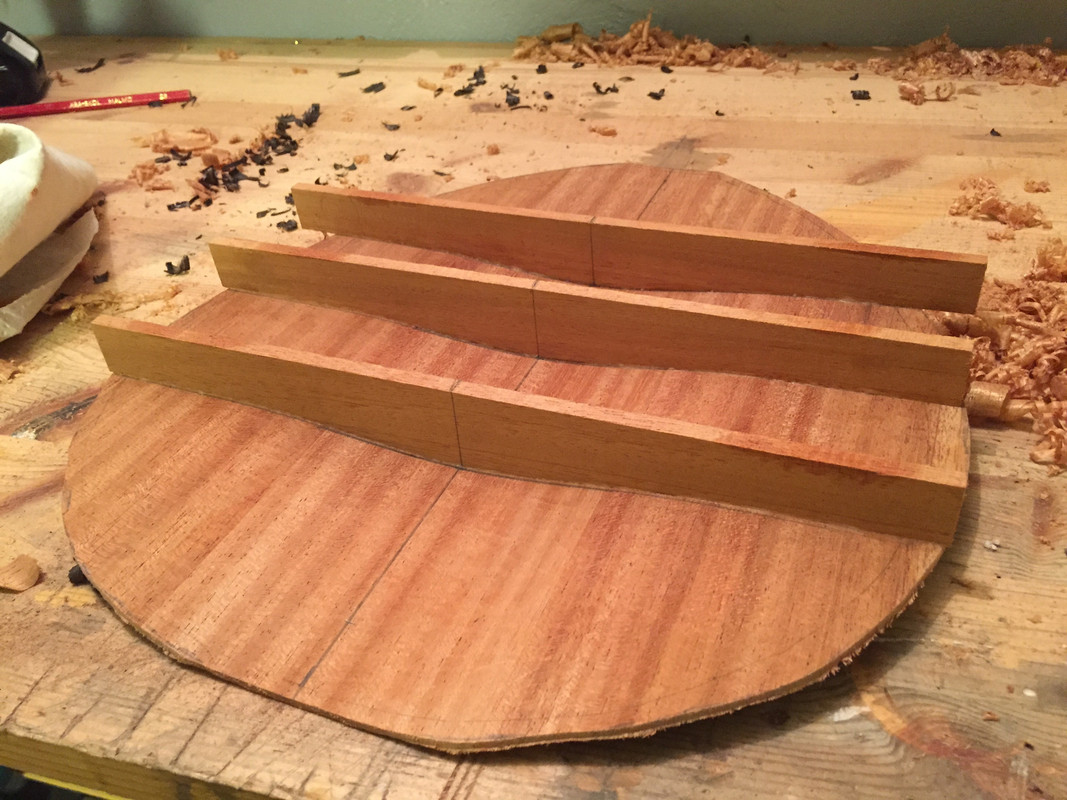 And then it was back to work with the neck. As I don't have a normal sound hole I've decided to glue the neck, but to reinforce the joint with a screw from the inside. As I'd finally found the kind of "nut" that I've seen a lot of you use for bolt-on necks, I decided to try one of those: 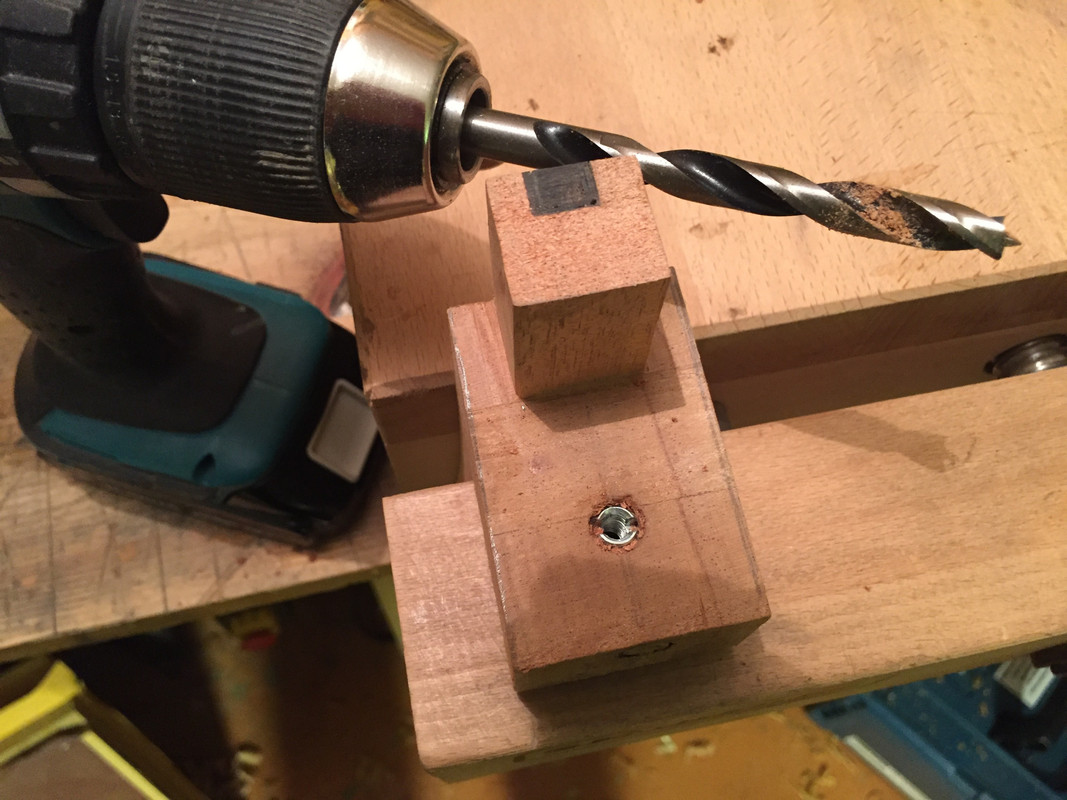 Everything looked great, but when I did a "test drive", the screw screwed up the hole thing - it just broke the heel in two. So I had to cut off the heel and glue on a new one. I decided to skip the "nut" but decided to drill for a wooden dowel, so that the screw wouldn't meet end grain wood. I don't know how, but when I inserted the dowel with the help of a hammer, I smashed the heel! "Gör om - gör rätt" is a Swedish saying meaning "Do it again - do it the right way". And so I did. I was to exhausted to photo document "the making of a completely new neck", but after a while it looked like a neck: 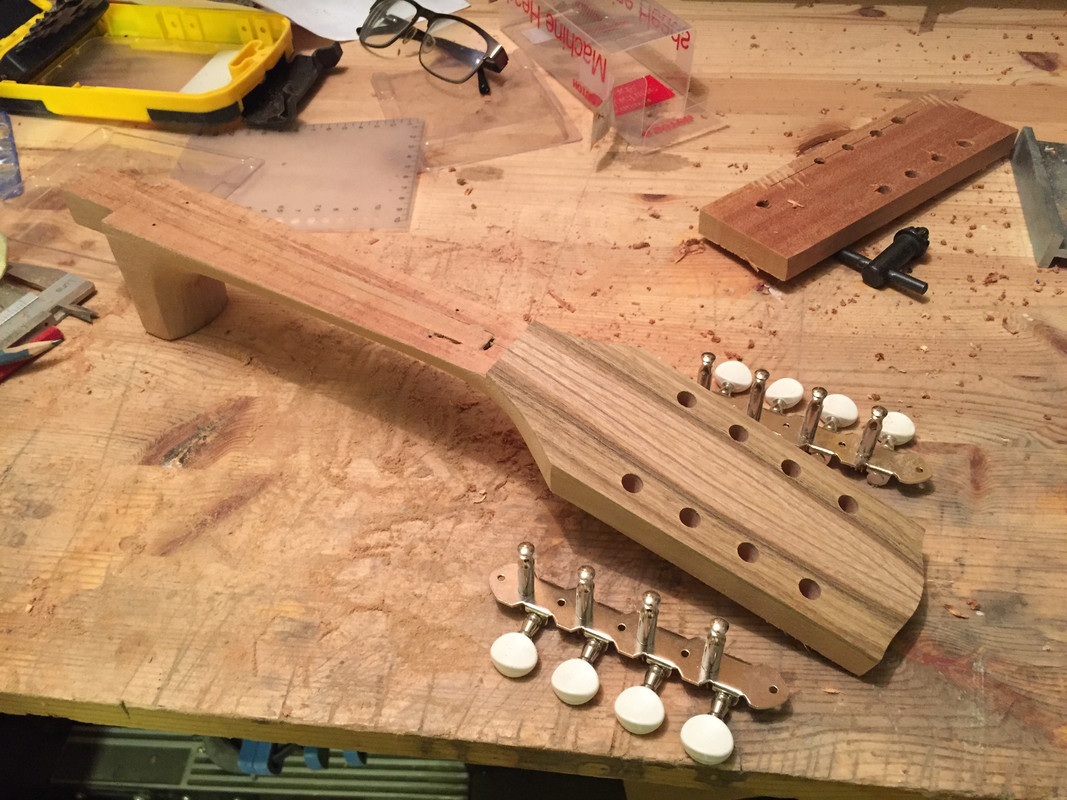 The head plate veneer is laburnum, and I will use it for bindings and "decoration" like I did with the tenor mandola. Right before I should have glued the neck to the body I took a look at the tenor mandola and found that the top was beginning to sink around the bridge area. As I have the same "bold" neck angle of 2 degrees on both instruments, and about the same stiffness in the top bracings, I decided to rework the neck-body joint on this one. So with the help of files, japanese saw and a lot of swearing I changed the angle to about 1.5 degrees. And as a result did the joint become so sloppy so I had to glue it with epoxy - so much epoxy that I'd have to kill you all if I told you. 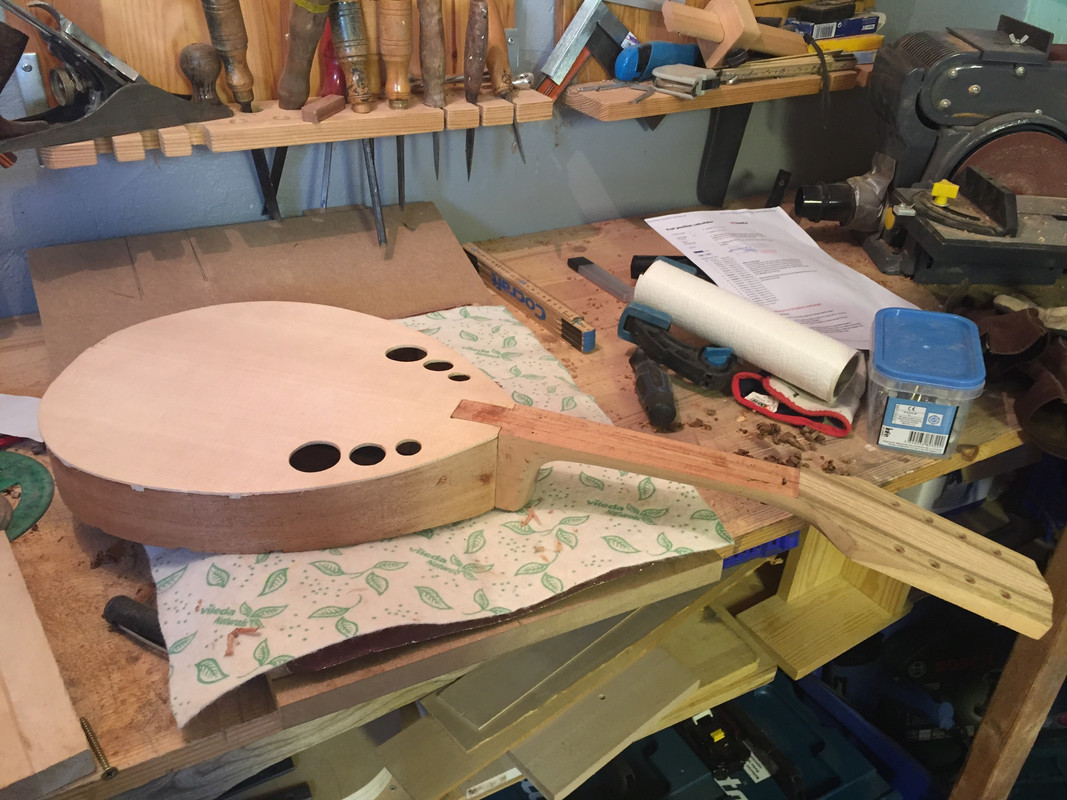 Before gluing the back I did some writing inside:  And on with the clamps: 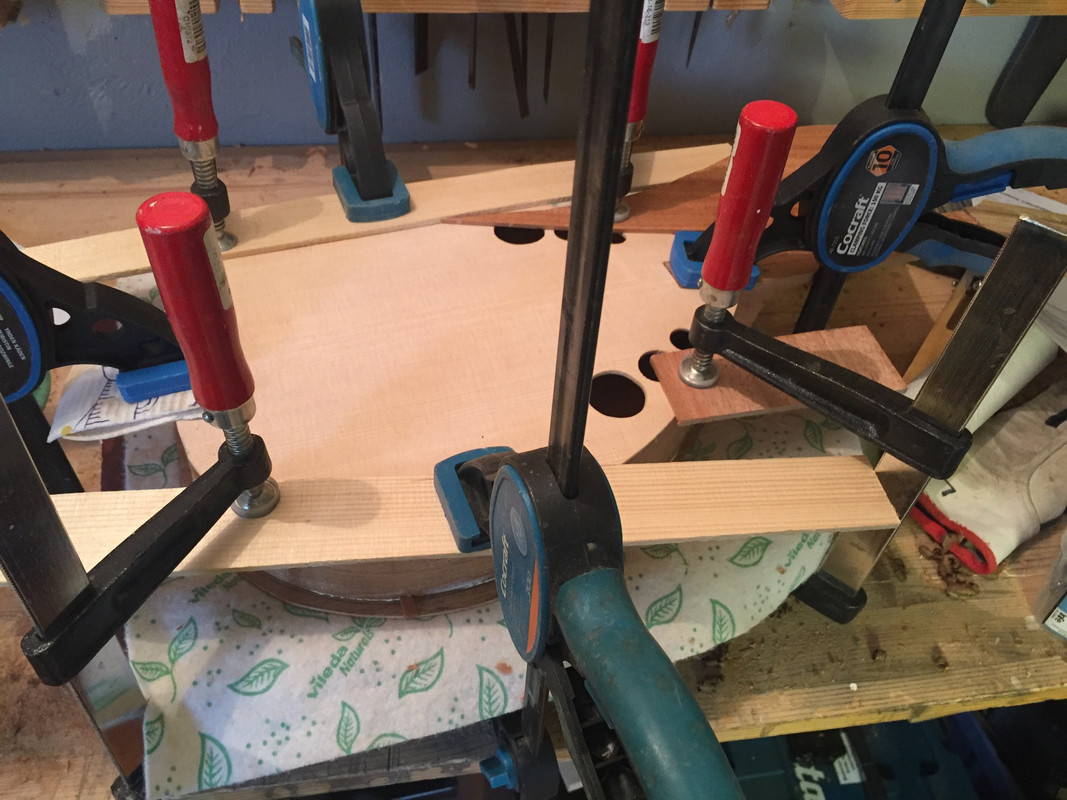 And now I'm in the middle of the process of adding bindings. Due to the complicated curvature i have to cut the channels completely by hand, which is a nerve wrecking job. But this is the current state: 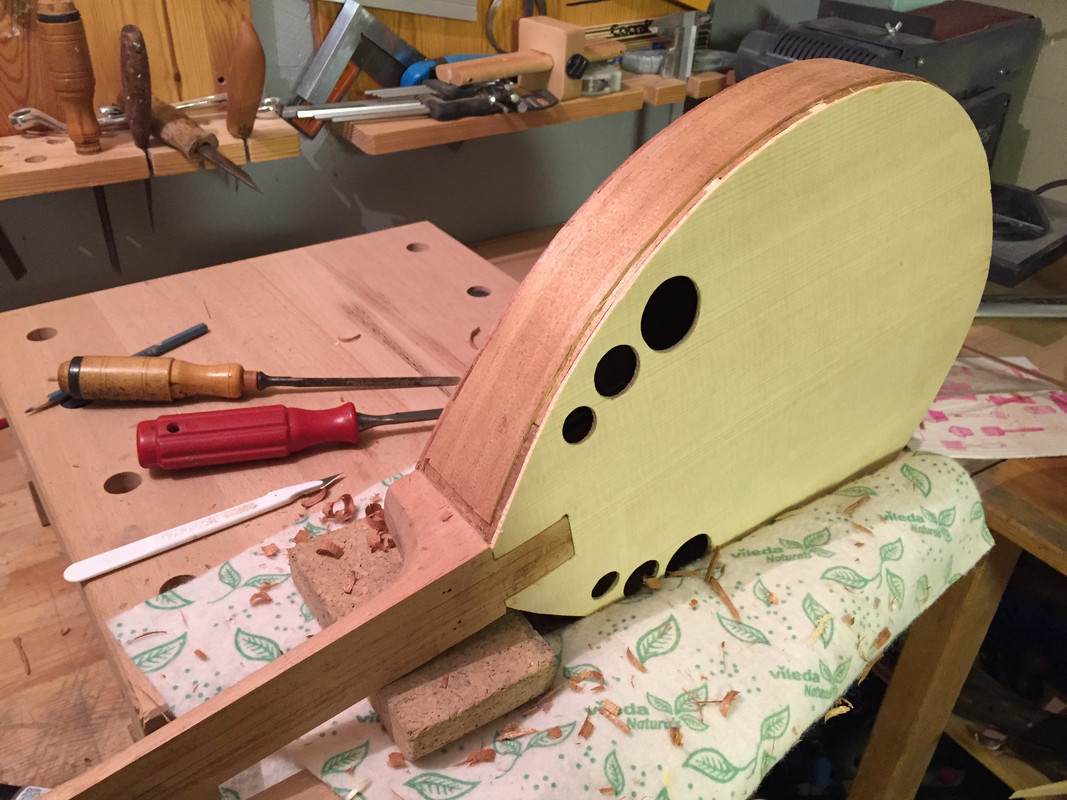 Hopefully to be continued.... Self portrait after breaking the neck: 
|
|
|
|
Post by lars on Oct 24, 2017 18:07:00 GMT
Having read that a few times I THINK I've got it  Ditto that But it looks good and I love the slender waist. |
|
|
|
Post by lars on Oct 16, 2017 20:12:32 GMT
Thank you! I really enjoyed it all. Lovely instrument and a great build thread. |
|
|
|
Post by lars on Oct 14, 2017 16:18:27 GMT
Sorry, lars . Not "an answer to my question" because it was supposed to be an answer to francis 's original question! Hmmm... I wish I wasn't so egocentric! Thanks for the link! |
|
|
|
Post by lars on Oct 14, 2017 5:47:49 GMT
I've used egg-white a couple of times as you and Colin describe above but only because I've read about it on this-here forum. However, nobody ever mentions that it's quite an unpleasant activity - a slimy-sticky smelly mess - and I'm not sure how much difference it makes to my polishing time. I tend to fill the grain by pulling the shellac hard into the grain when polishing with a rubber and then cutting back hard (with, say, 240 or 360 paper) and repeat until I'm happy with the finish. The advantage is that there's absolutely nothing masking the wood if you do it this way. I've not really answered your question though, have I? Maybe not an answer to my question but good information. Btw what do you mean by 'polishing with a rubber'? And what kind of finish do you use upon the shellac? Francis: sorry for hijacking your thread |
|
|
|
Post by lars on Oct 14, 2017 5:42:18 GMT
Lars, I do usually let it dry for at least 4 hours, then hand sand it back so that only the pores are filled, then repeat. The egg White acts as a binder for the wood dust from the initial wet sanding. Colin Thank you Colin! I will have to sand it back better next time. /Lars |
|
|
|
Post by lars on Oct 13, 2017 11:42:48 GMT
A short question to Colins and any other with experience of the method: How long will you let it dry before you repeat the process?
I tried this summer and the second layer made what was left from previous layer wet and sticky. May be I just didn't sand the first layer enough? But I believe that egg white dries in two steps: First the water evaporate and second the egg white hardens just like linseed oil.
|
|
|
|
Post by lars on Oct 6, 2017 16:01:47 GMT
Good to see lots of hand tools used and no over reliance on fancy jigs. Cheer Gary Thank you Gary I have a lot of machines and power tools but really prefer to work with hand tools. I'm glad you chimed in. Your blog have been a big inspiration and source for information and ideas. |
|
|
|
Post by lars on Oct 6, 2017 7:42:51 GMT
I didn't use a truss rod for this instrument, but made an enforcement of carbon fibre and ebony (1: couldn't find a massive cf-rod, so I took a square tube and filled it with an ebony core. 2: routed the slot too wide by mistake, so I filled up the sides with thin ebony stripes): Music to my ears: a compromise compounded by a cock-up - a man after my own heart. Things seem to be going pretty well, though, and a fine instrument will result. Keep up the good work! Yes, I feel we have a kind of kinship in this 'design by mistake'-filosophy. I hope you are right about the result. Personally I have my doubts, but of course I hope and strive for a fine instrument. Thank you for support! |
|
|
|
Post by lars on Oct 5, 2017 17:38:50 GMT
I haven't had much time to spend on luthiery, but there have nevertheless been some progress: This is the top after shaping the braces: 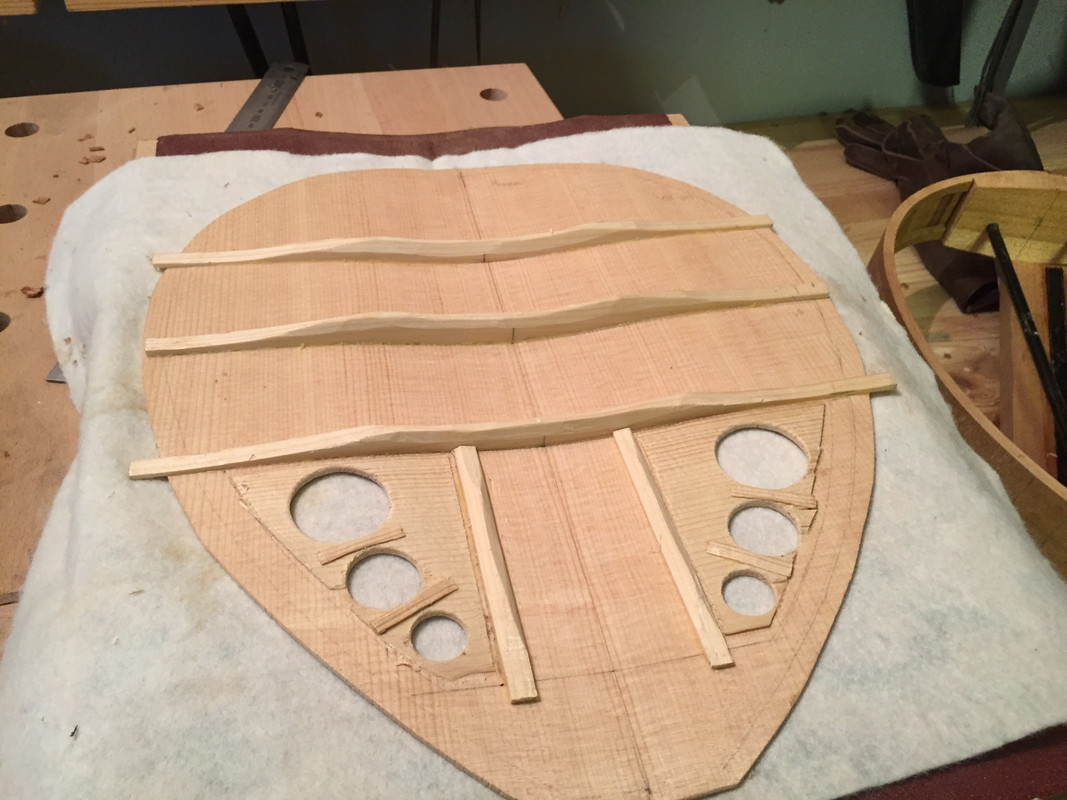 And here is the rim after I cut out notches for the braces: 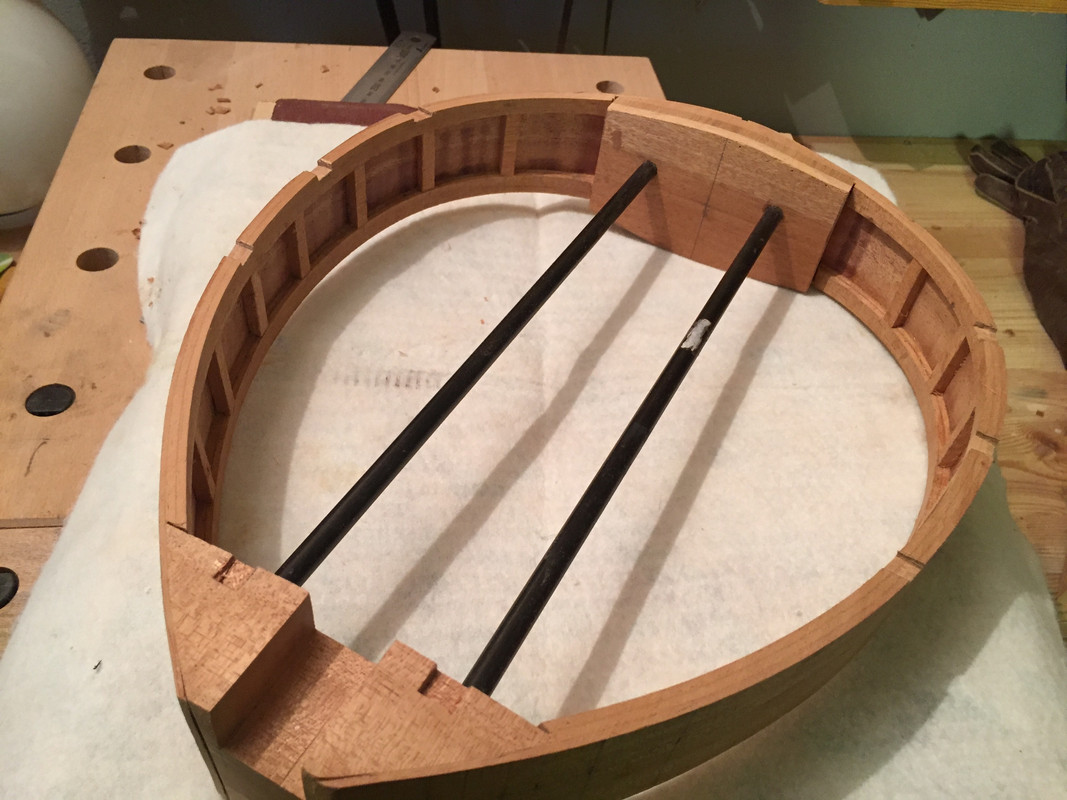 Here I glue the top to the rim: 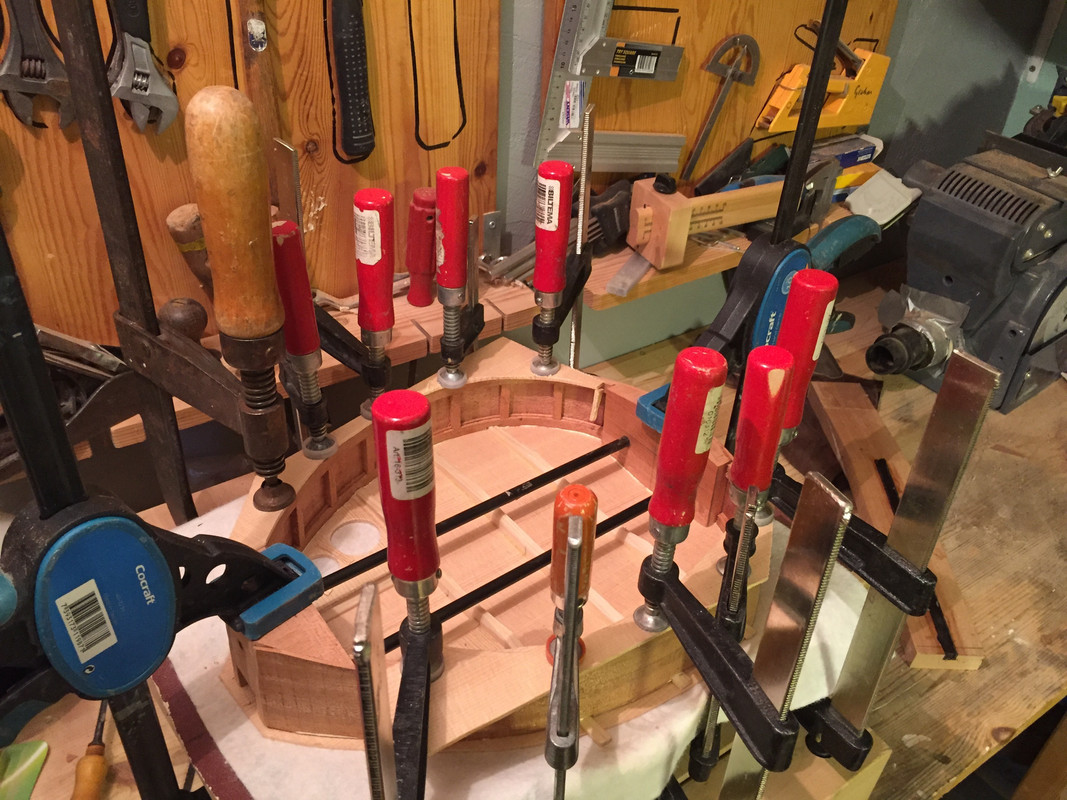 And the result is...  And meanwhile I started to work on the neck. First by cutting it in the band saw with an angle of 13 degrees and gluing the pieces back together like this:  And shaping the surface with a planer. This will be the top of the headstock and I will glue a veneer upon it (after gluing "wings" to the sides to make room for the tuners): 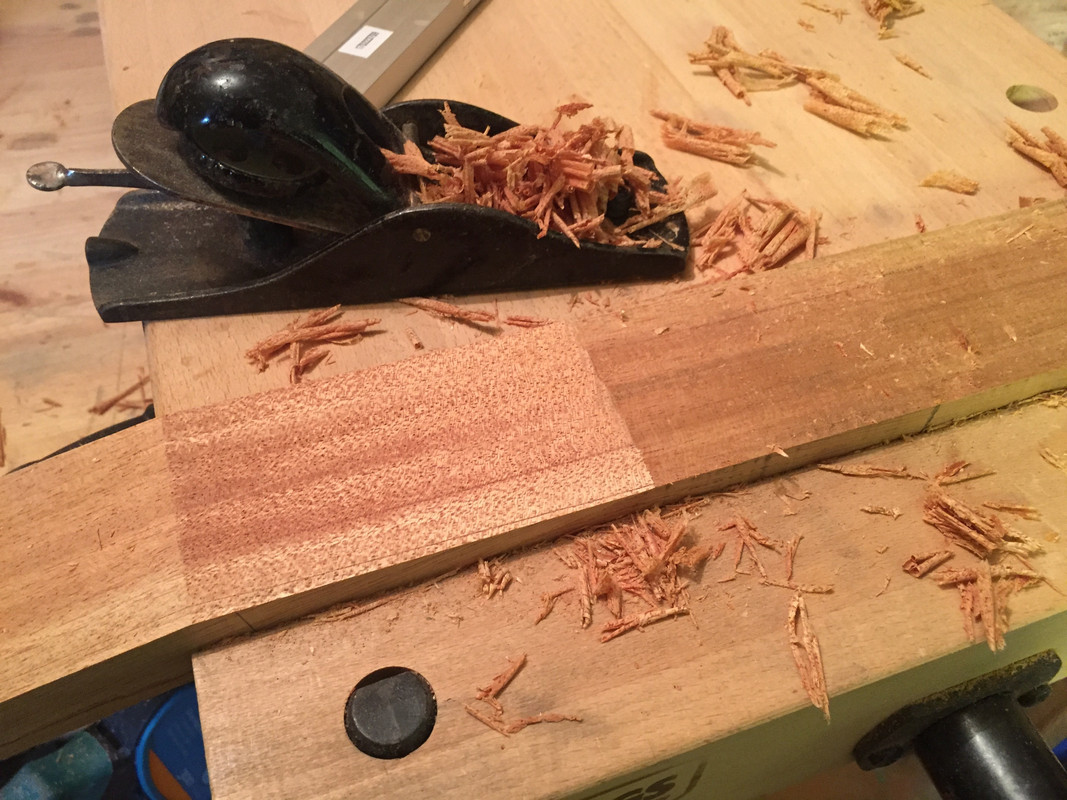 I didn't use a truss rod for this instrument, but made an enforcement of carbon fibre and ebony (1: couldn't find a massive cf-rod, so I took a square tube and filled it with an ebony core. 2: routed the slot too wide by mistake, so I filled up the sides with thin ebony stripes): 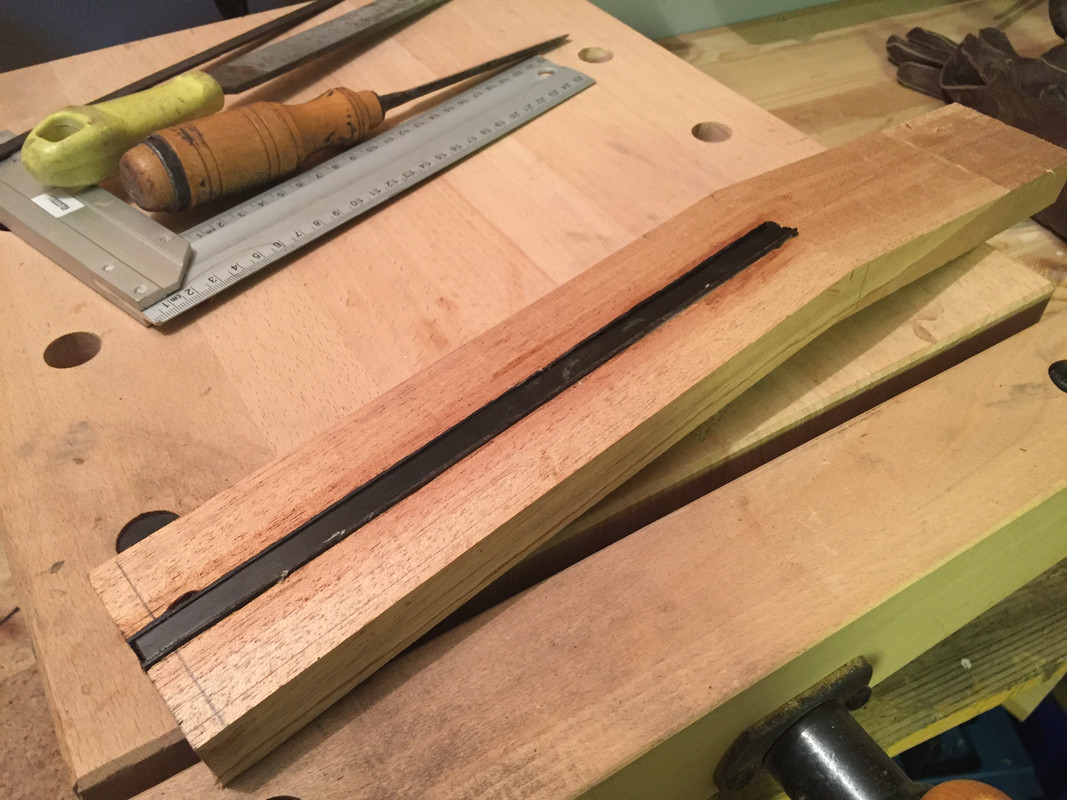 Glued a heel to the neck and cut out for the neck/body connection with an angle of 2 degrees: 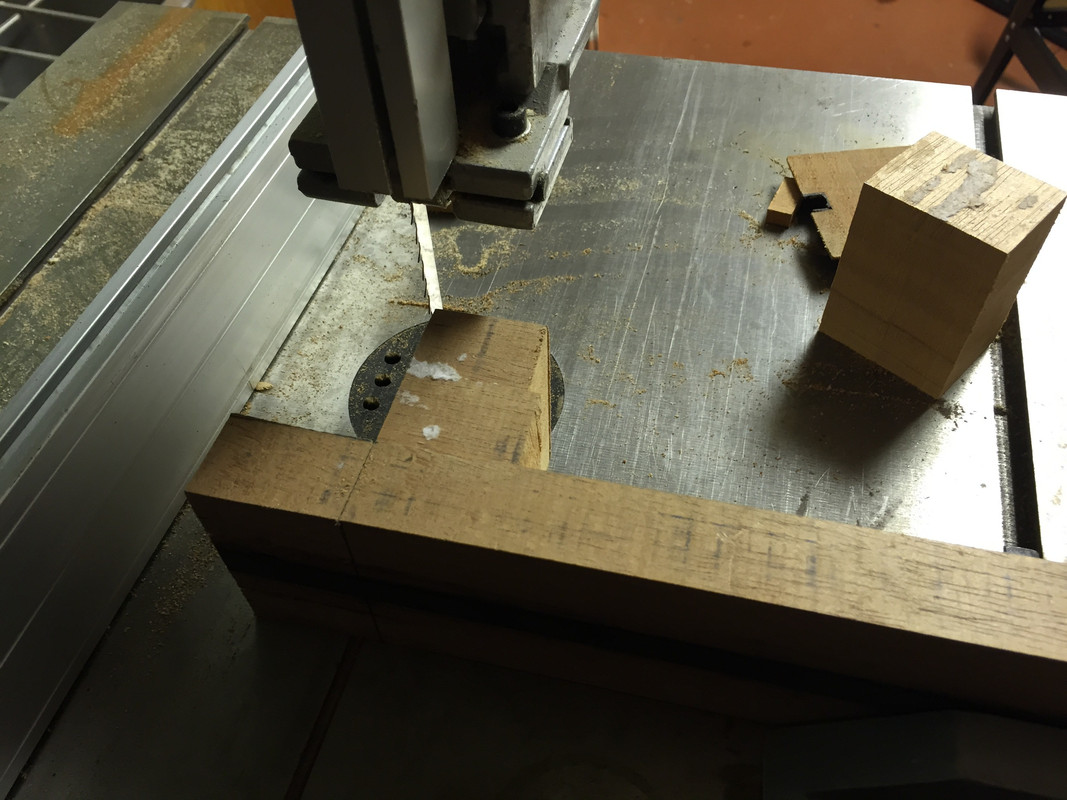 And after some further work the joint looked like this:  And after more adjustements with chisel and files I could fit the neck and body together like this. And this is the state of the instrument right now: 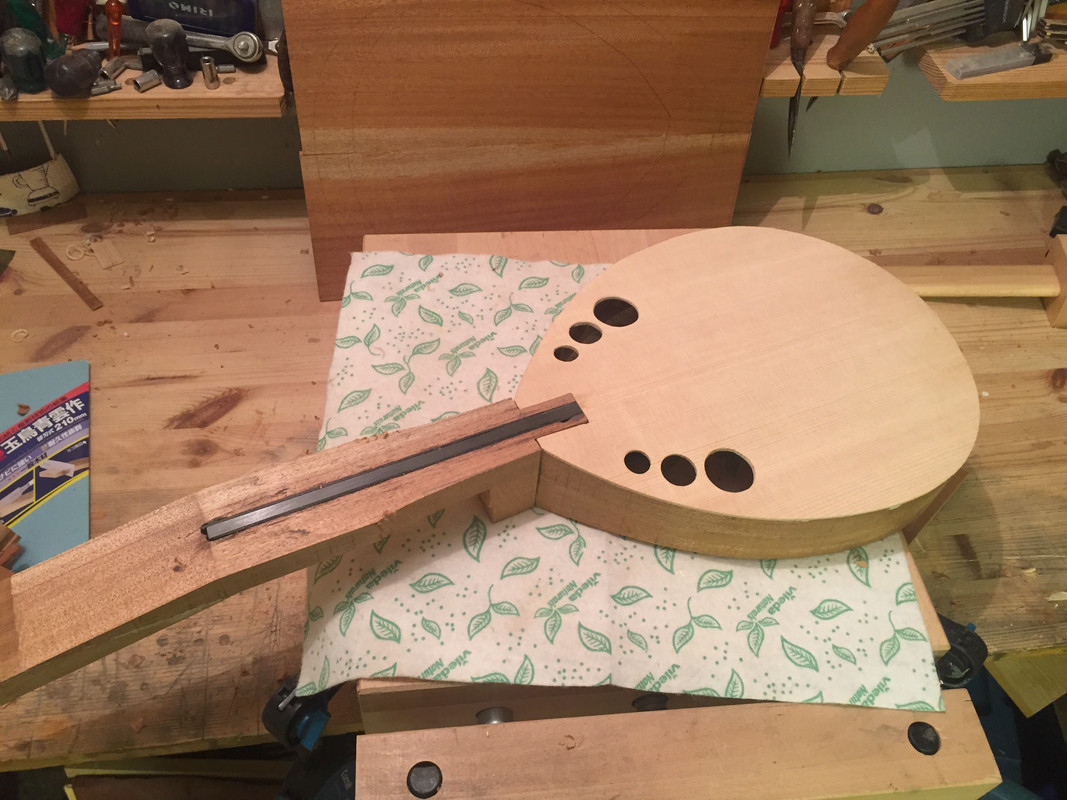 And besides that I've done some preliminary work with the back. No need for a fancy shooting board when you can shape the joint like this: 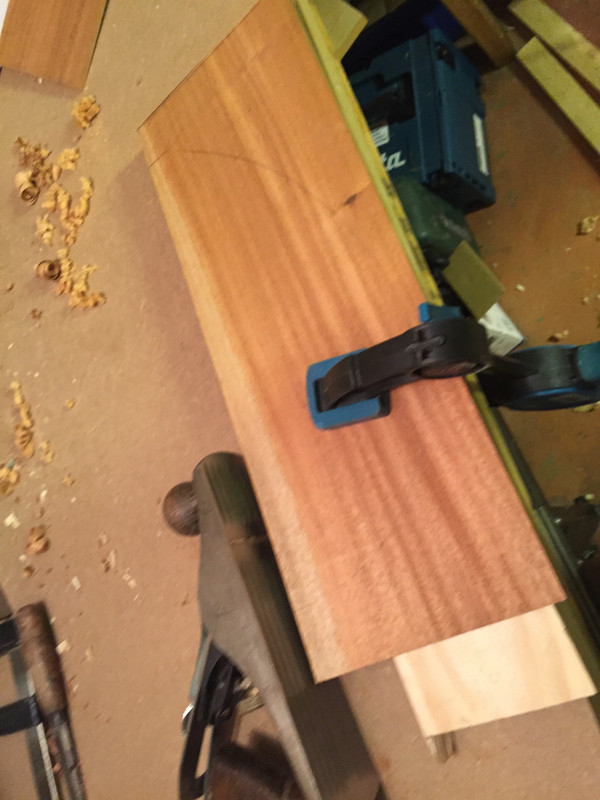 For the first time I tried the wedge and rope method for joining the halves together. And it seems to have worked quite well: 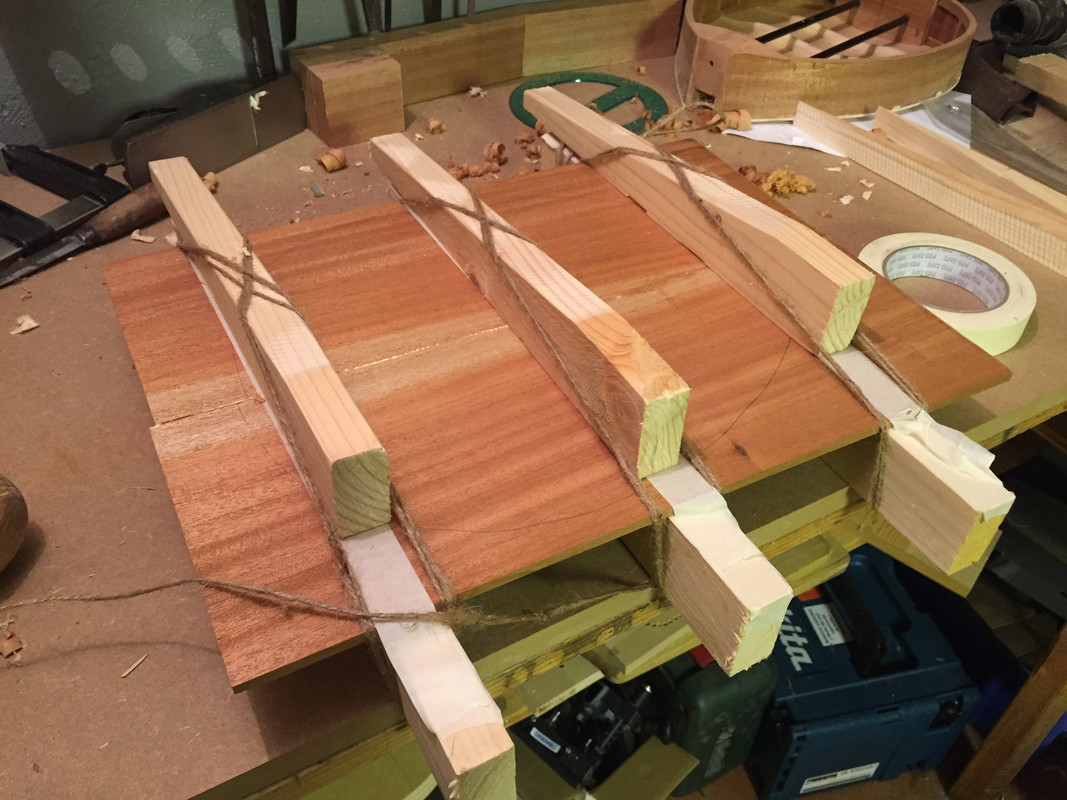 And lastly I've sanded the back braces in the through: 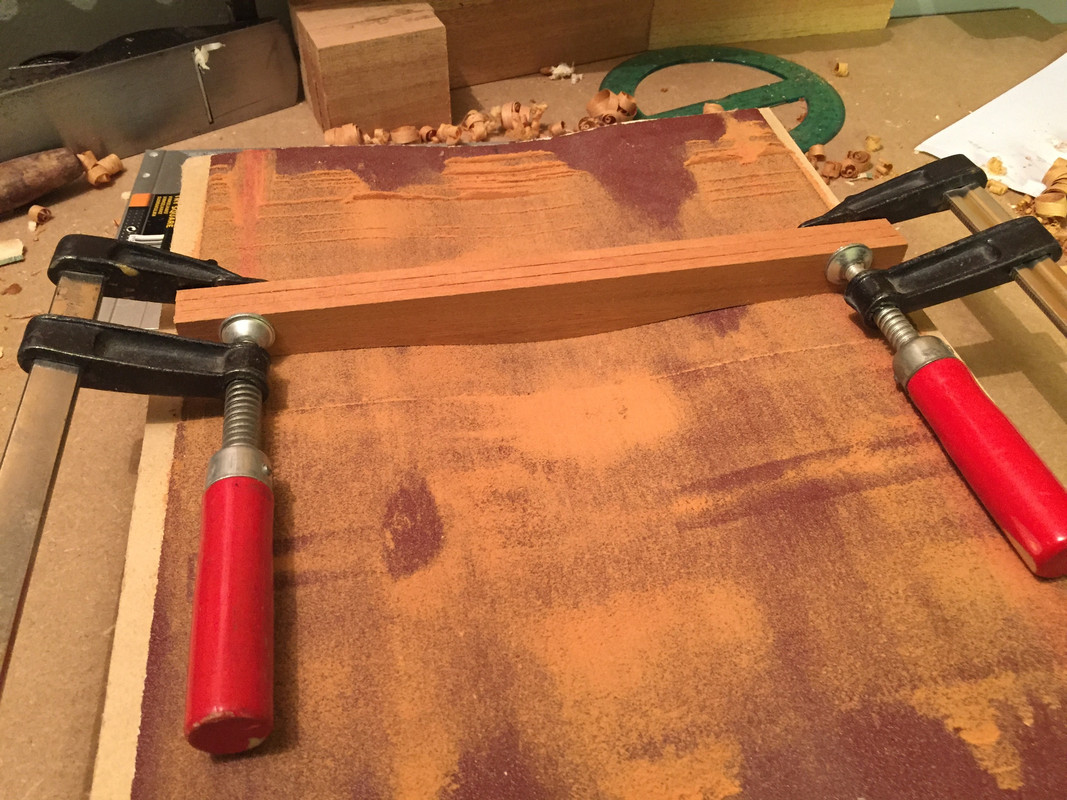 |
|
|
|
Post by lars on Sept 15, 2017 15:23:16 GMT
And I've also made some progress with the soundboard. First I planed it down to about 2.4. My goal is to have it even thinner by sanding the top after I've glued it to the rim. I've been thinking a lot about the soundhole design as I can't have an ordinary soundhole in the middle. It didn't work with f-holes, c-holes, ellipses or blurbs, so I ended up with this strange 6 hole design. 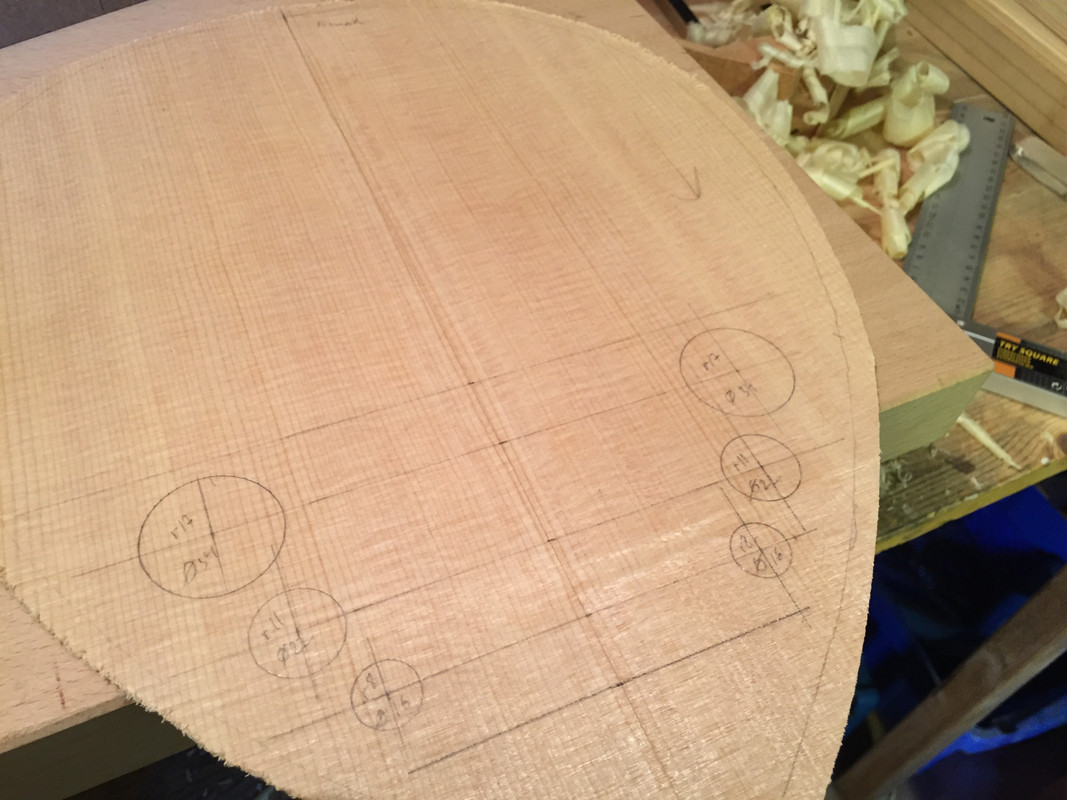 I will keep it simple and omit "rosettes" and bindings. But I glued wood in cross grain direction on the inside: 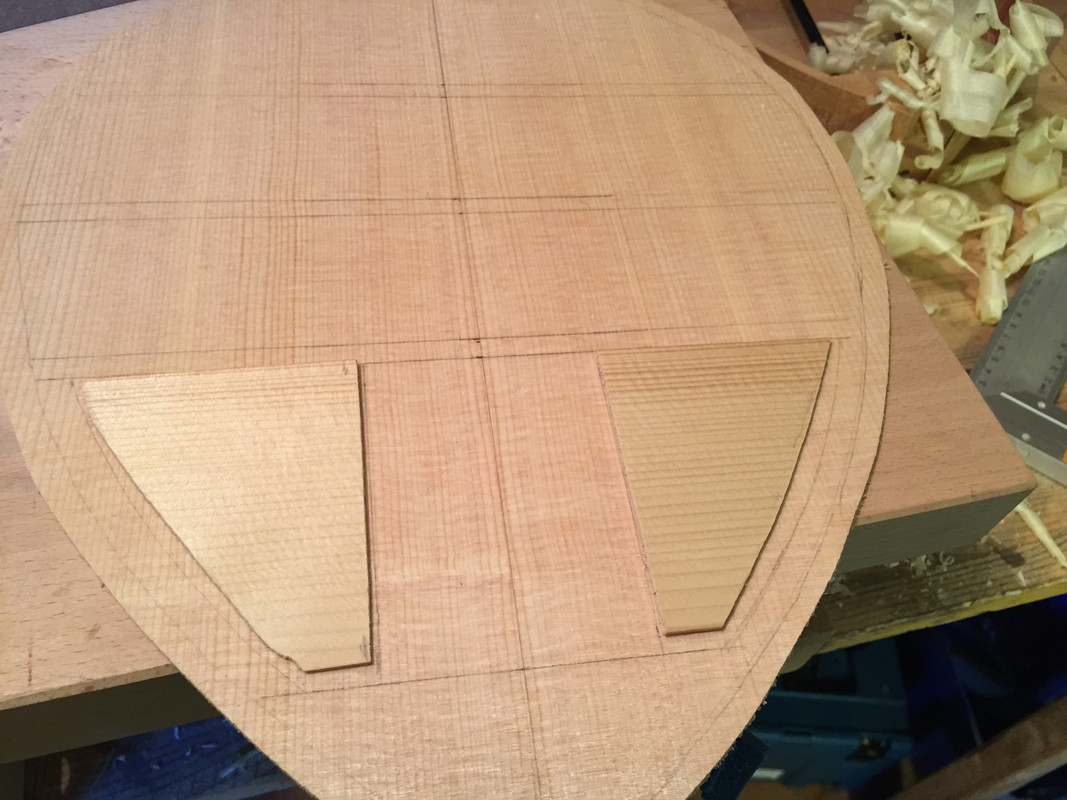 the smaller holes were drilled with drills of the exact radius. the large holes were drilled with a lots of small holes and then cut out with a gouge: 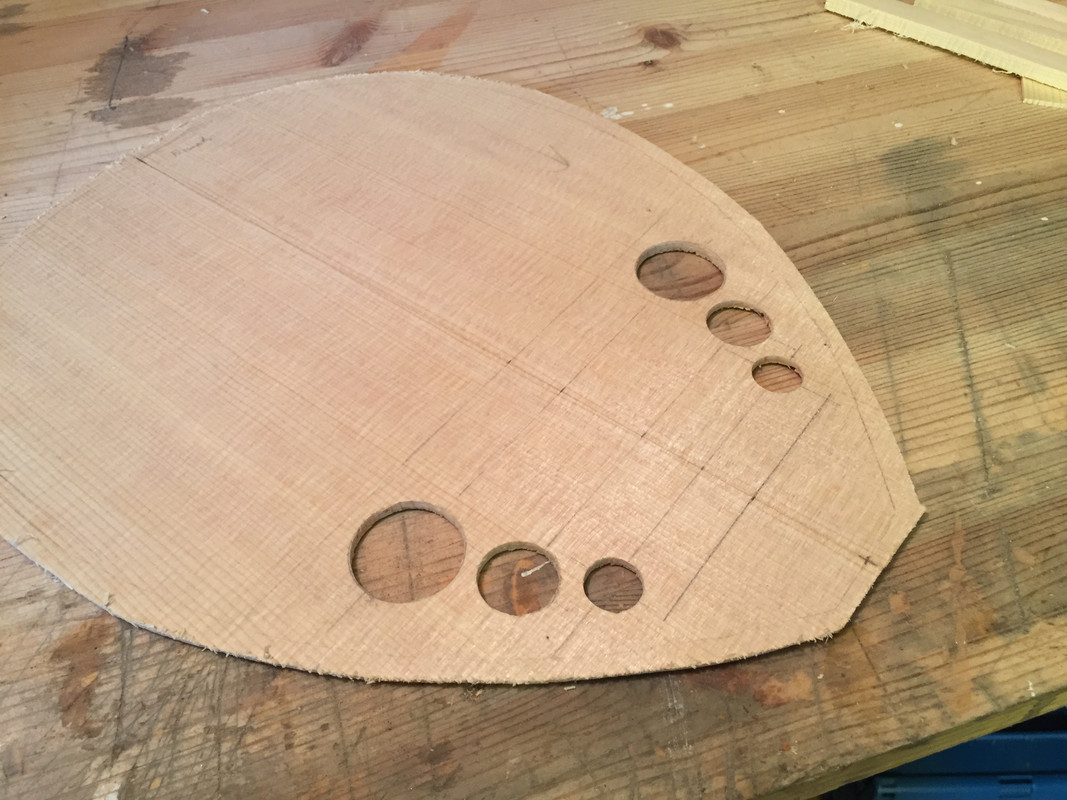 And from the backside (I hade to repair it a little, the image is after gluing the repair parts but before shaping them): 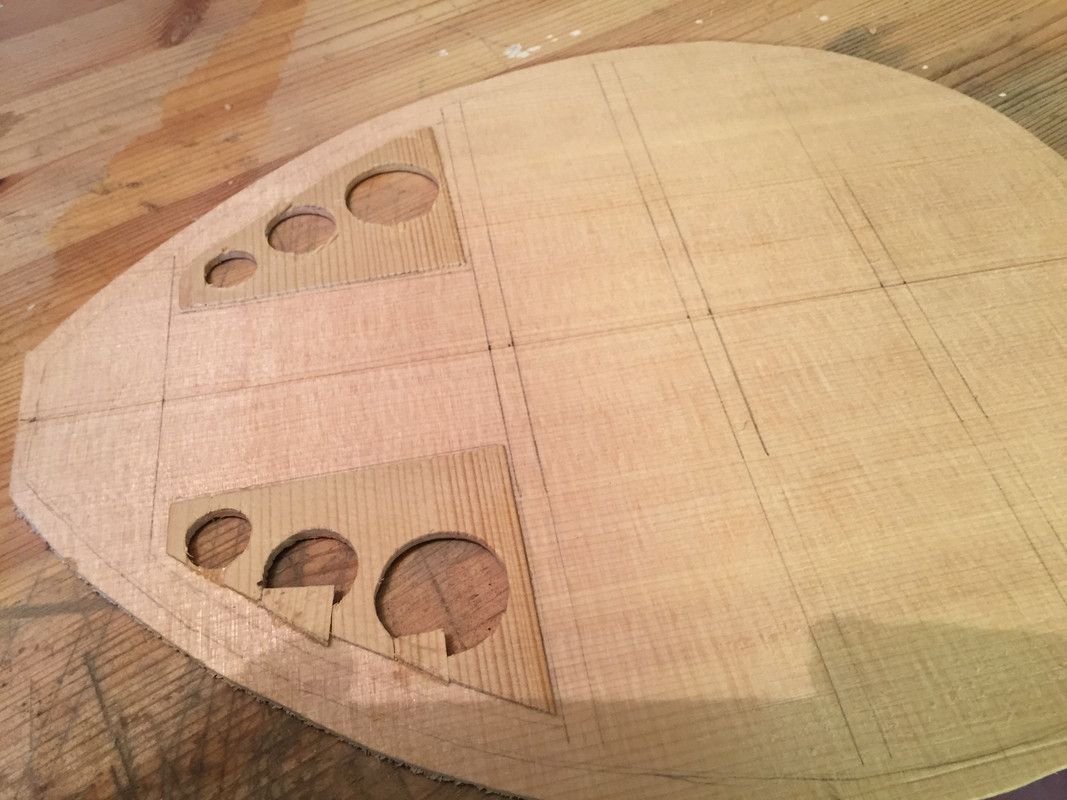 Meanwhile I sanded the braces to the profile. I clamped them together and sanded them as one piece: 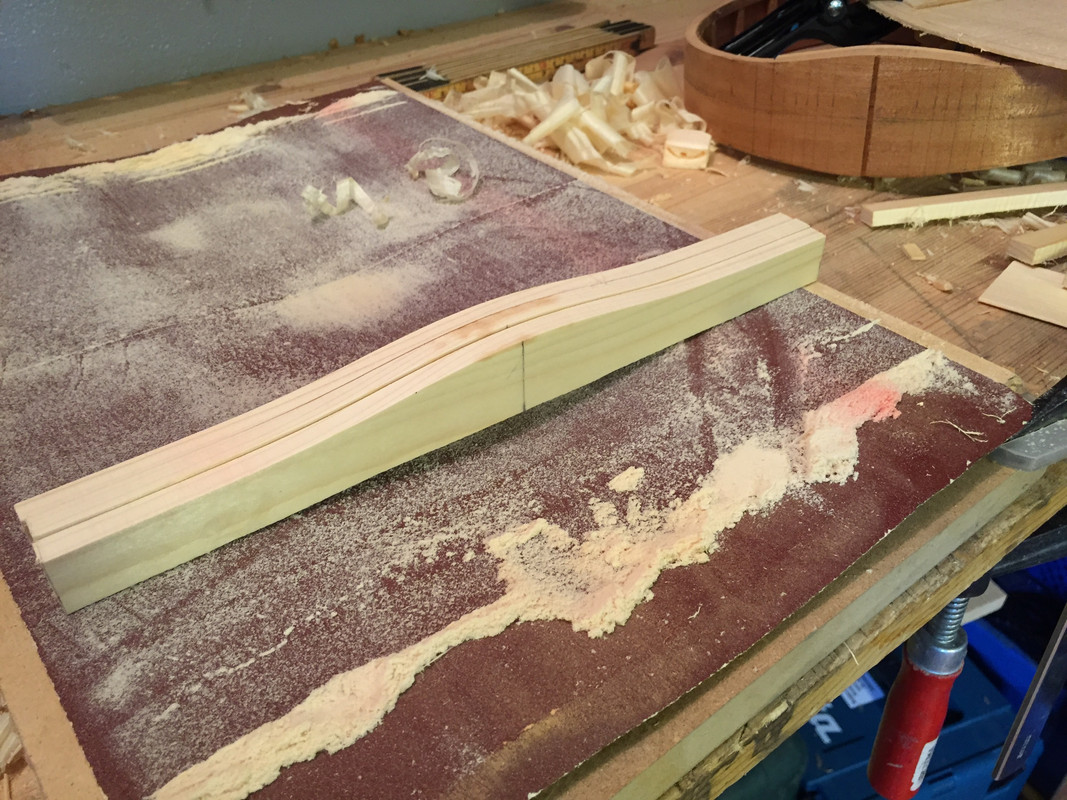 And glued them to the top: 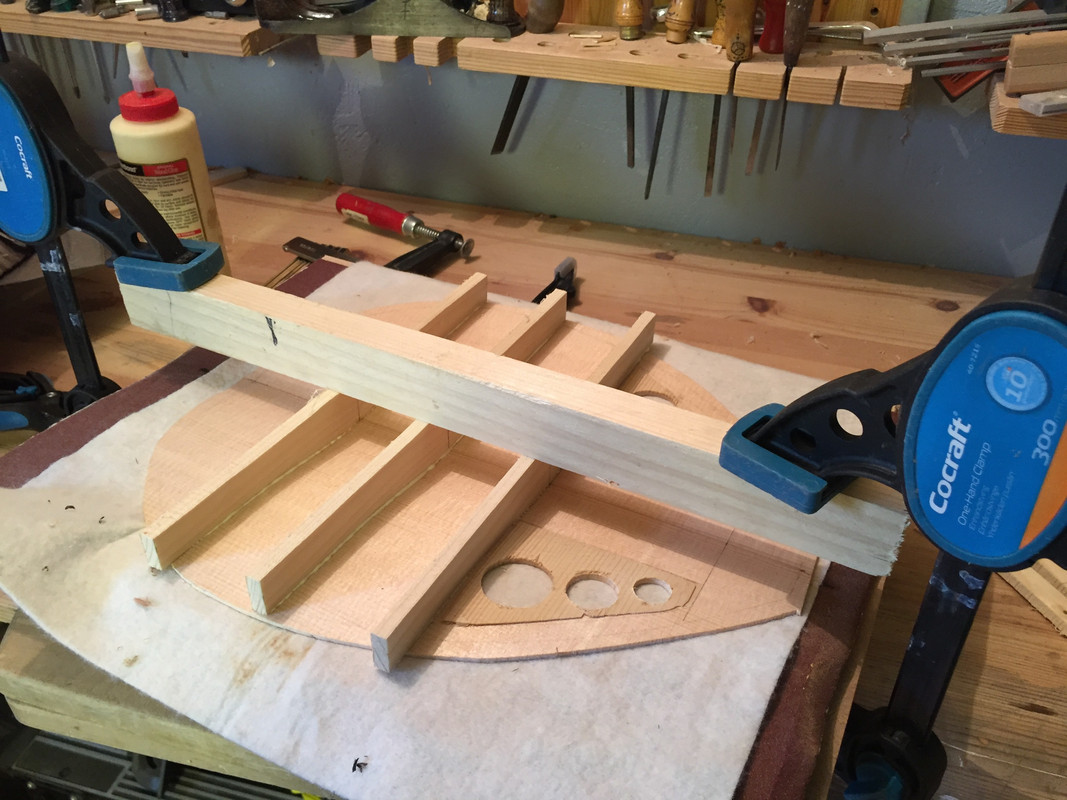 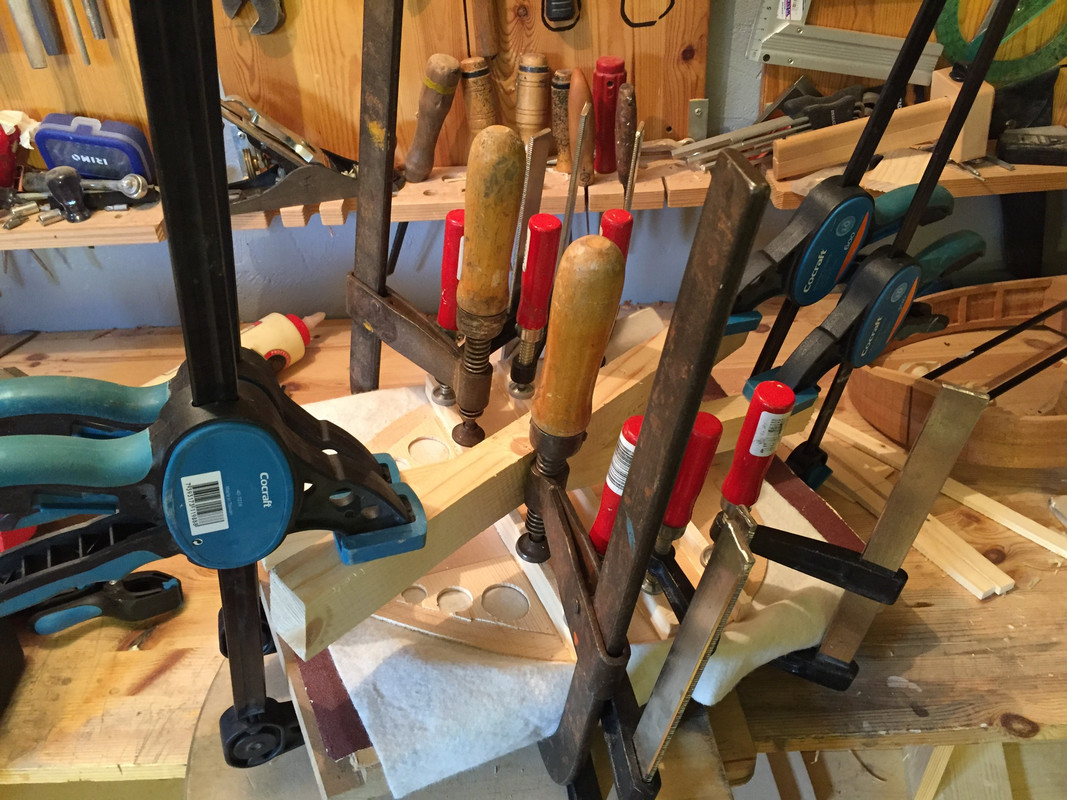 Planed down to a more reasonable height (but this is just a first step): 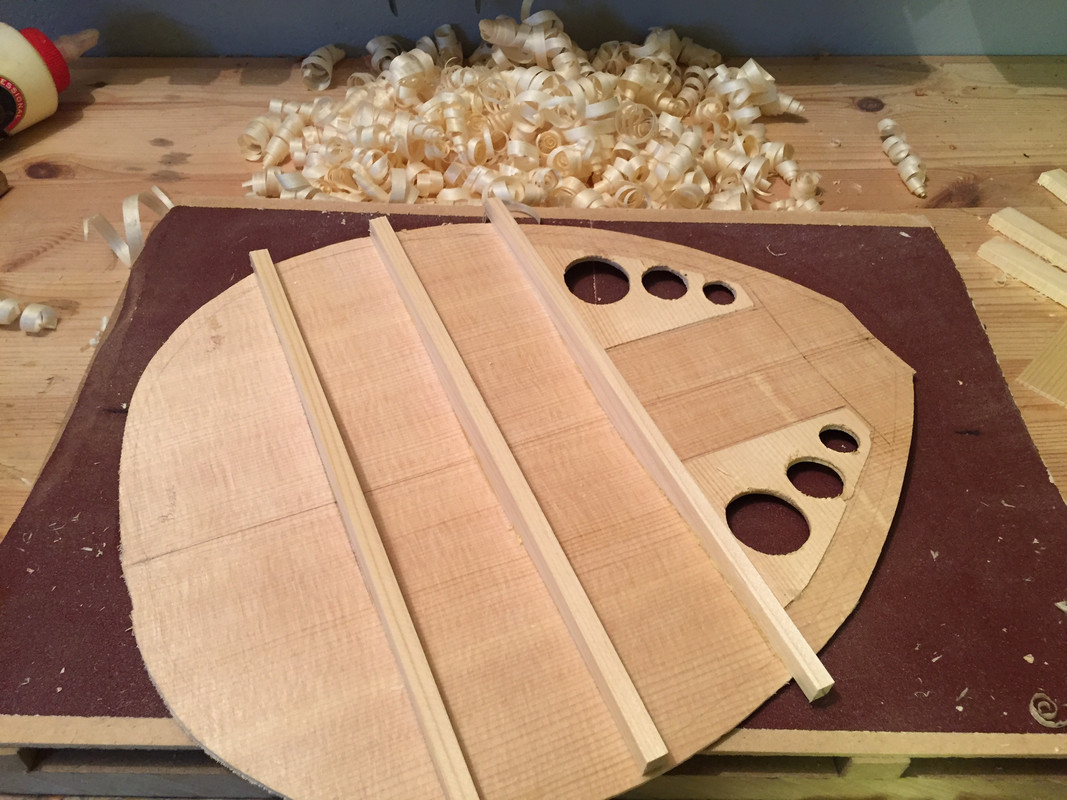 And this is what it looks like now: 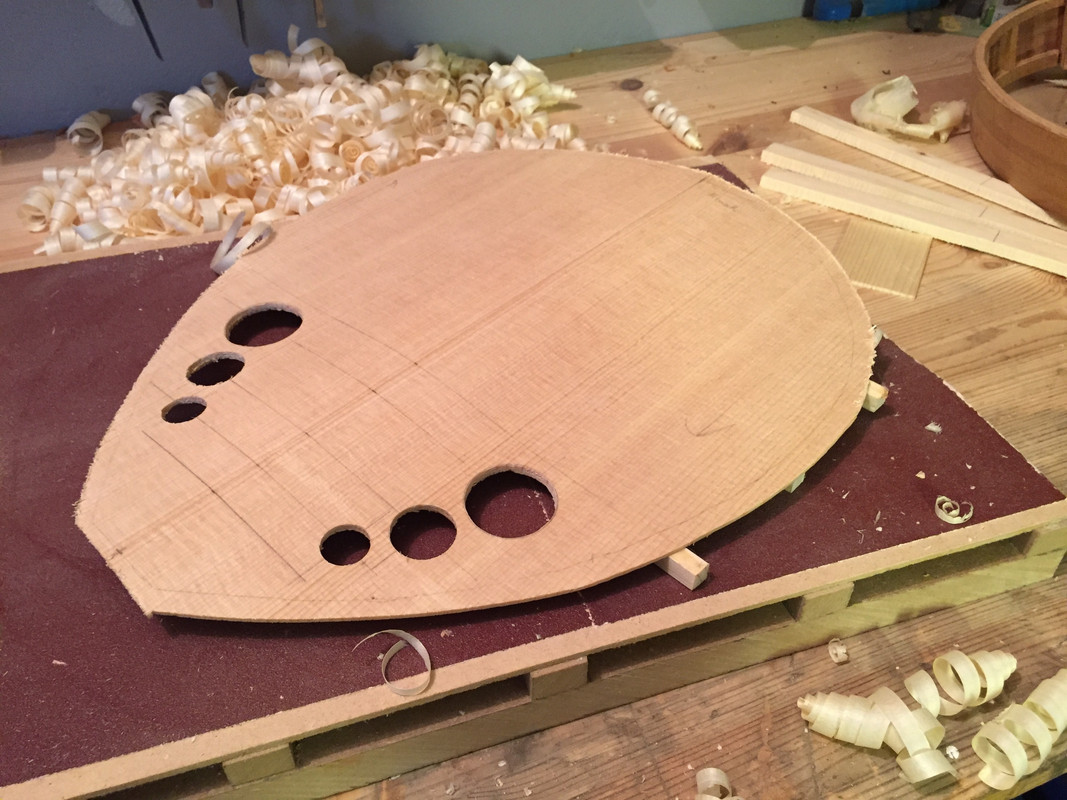 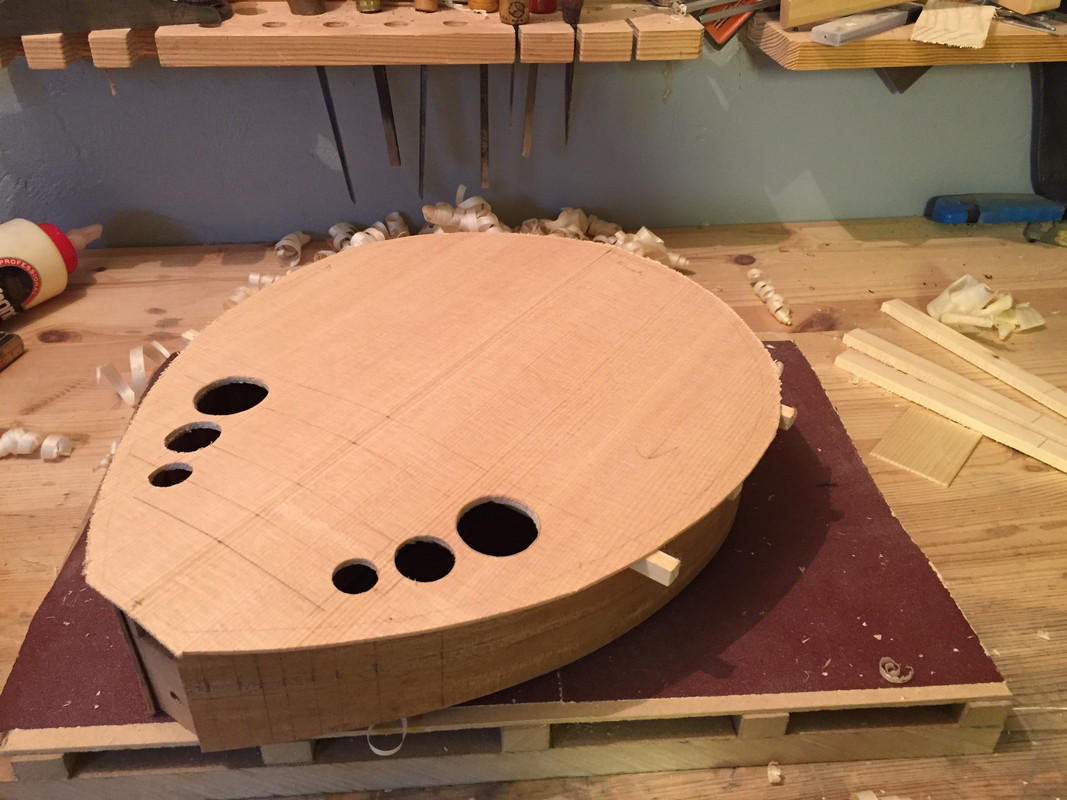 |
|
|
|
Post by lars on Sept 15, 2017 15:04:42 GMT
Here is what has happened since the last post. The end block and the carbon fibre rods were glued at the same time. Epoxy for the rods and titebond for the wood. The tricky part about gluing neck and tail block this time is that they don't have flat surface to rest upon, as they are shaped with the same s-curve on the downside. 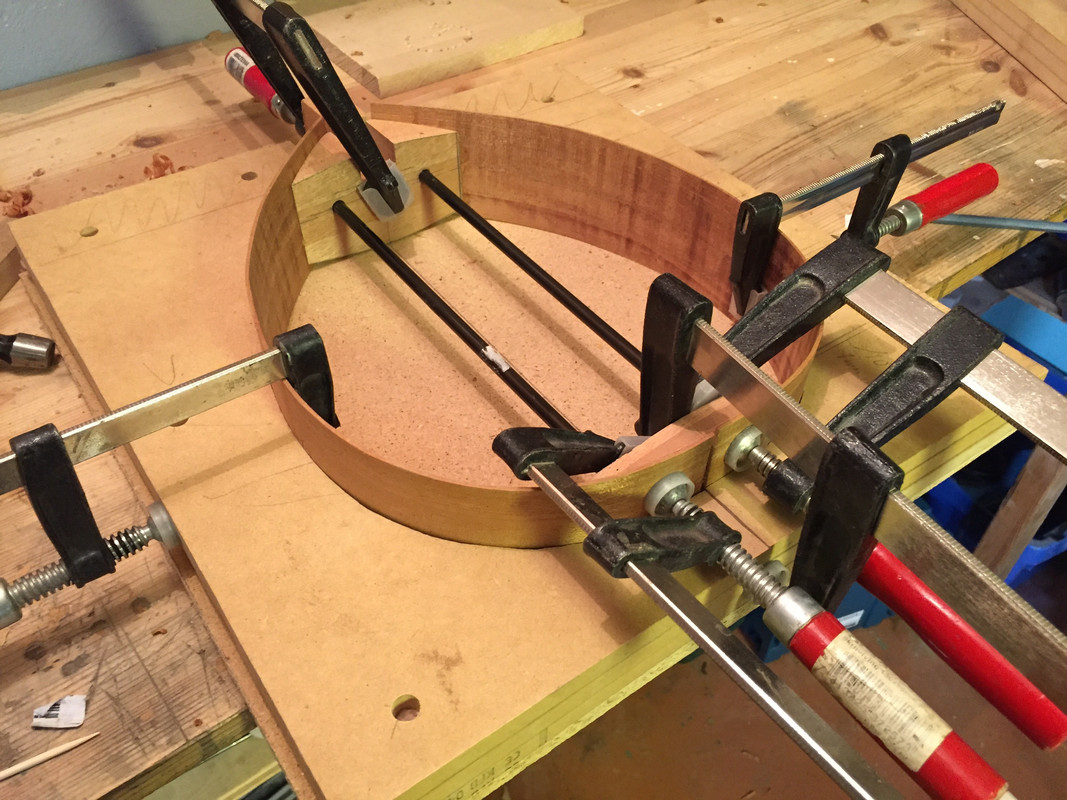 The profle marked out on the sides: 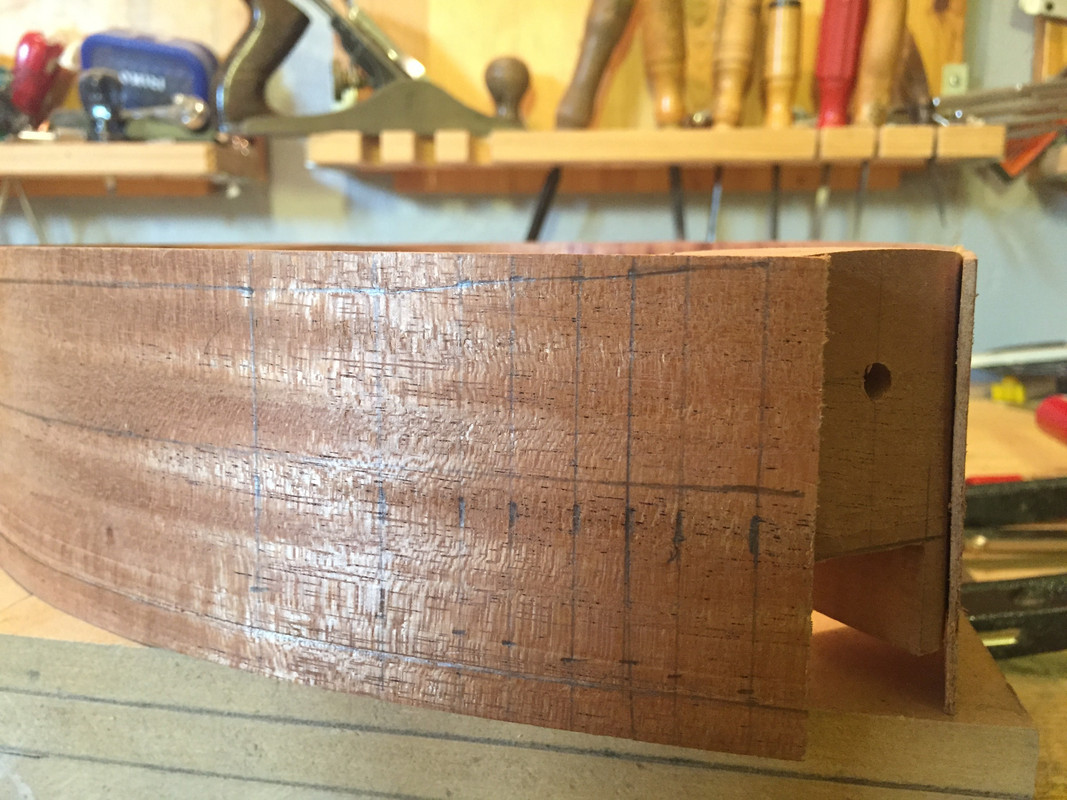 And shaped roughly first with knife: 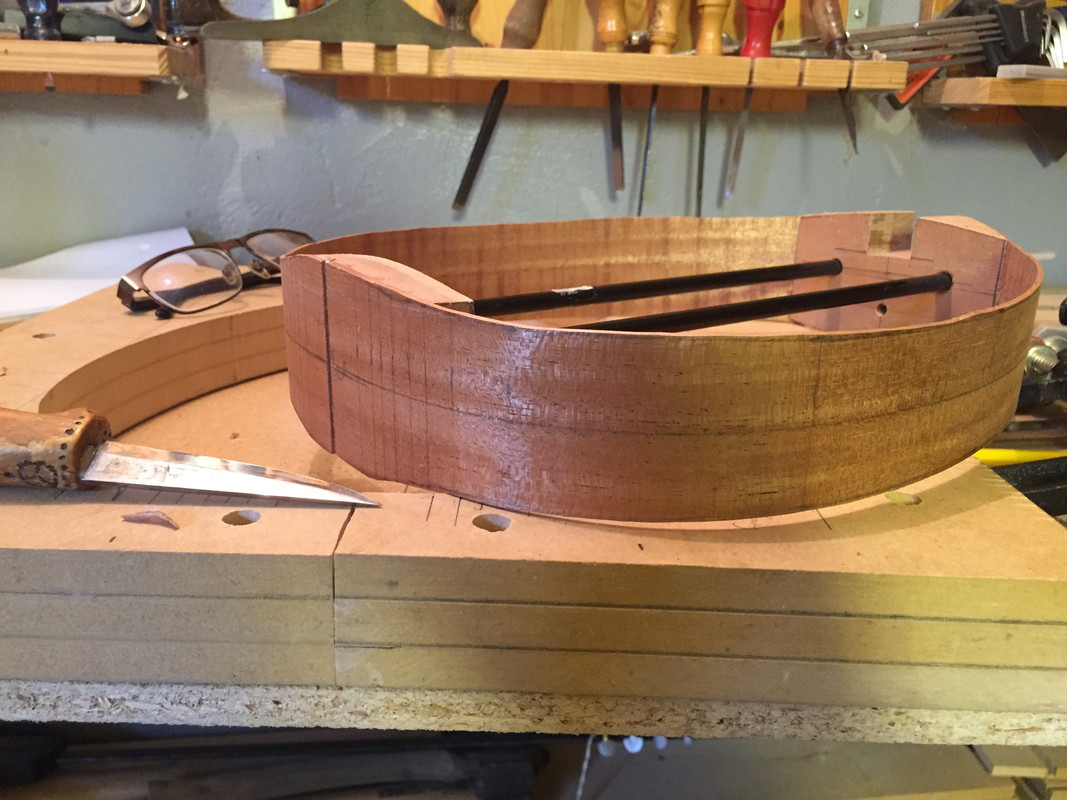 And then in the sanding trough: 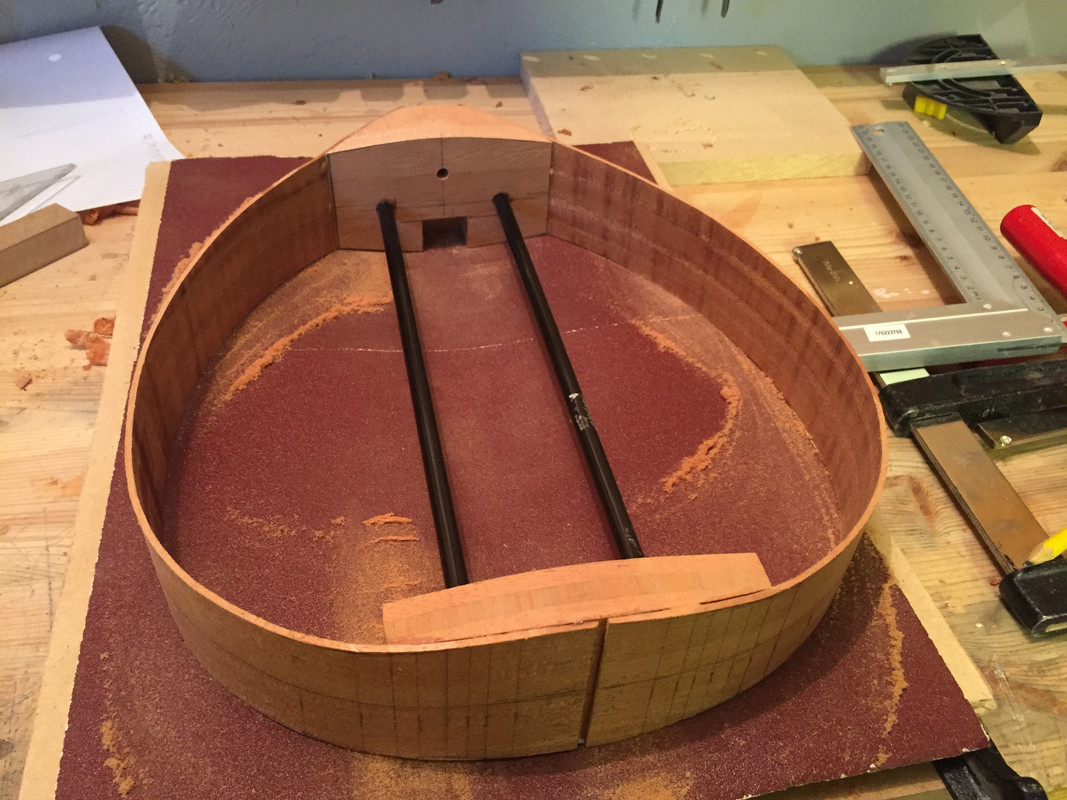 I took the discarded sides, cut them in slices and used them as linings. As the sides are really thin I added a lot of butresses between the linings: 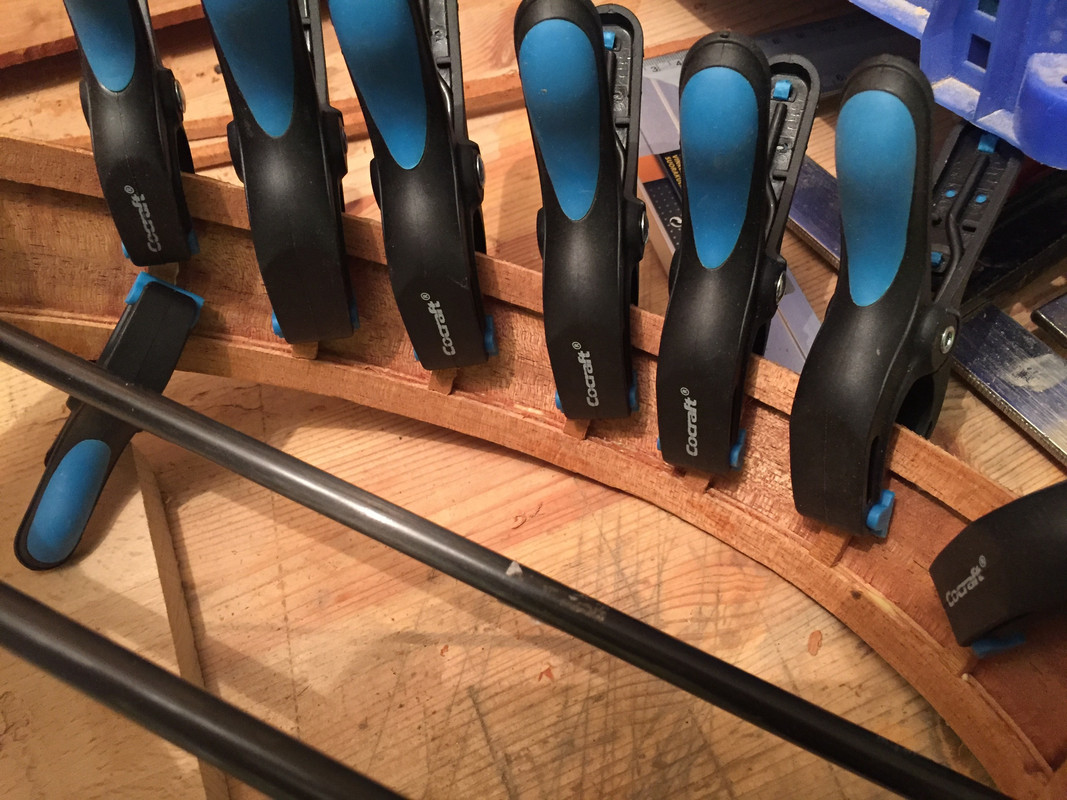 Last step was to sand the rim again in the trough until both sides were shaped to the profile: 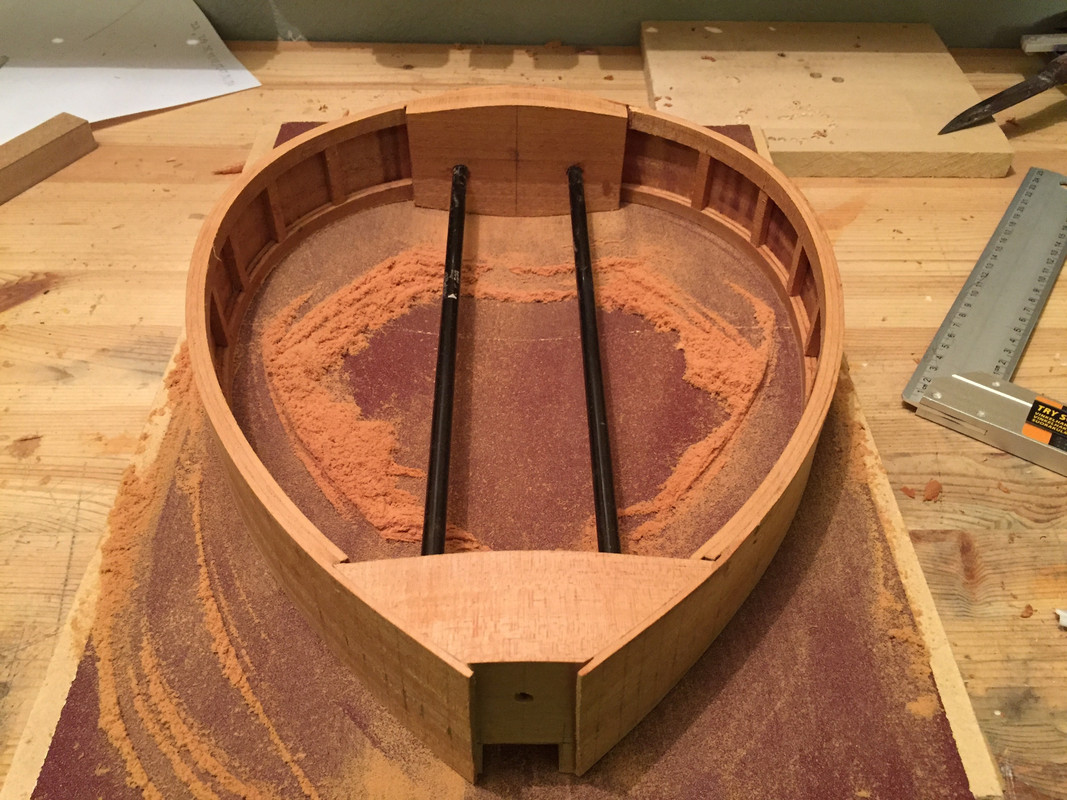 |
|
|
|
Post by lars on Sept 12, 2017 6:11:25 GMT
Thanks, hat was surely a comprehensive answer! And a good design! Sorry, didn't mean to make your brain explode :-)
|
|