francis
C.O.G. 
Posts: 2,483  My main instrument is: Whatever I'm building...
|
Post by francis on Apr 5, 2016 18:22:31 GMT
Superb build detail Rosie. It just keeps on getting better  |
|
|
|
Post by RosieTGC on Apr 17, 2016 19:29:20 GMT
Hi everyone, here is the latest update on this build. So now that the back and the tantilons are ready, the next thing is the Ebony sides and here they are bookmatched and thicknessed down to size. A rather nice bit of sap running through it which should complement the back nicely. 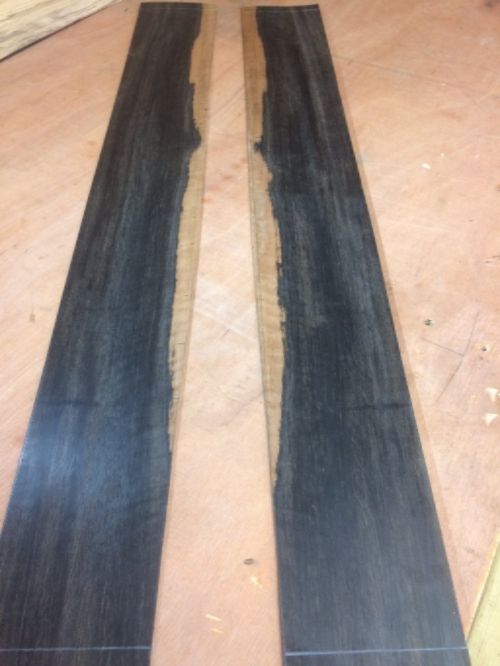 Before bending the sides they are shot either side with a plane down to the corresponding radiuses so they fit perfectly on the the back and soundboard. The sides were initially bent in the Fox Bender, but due to the density of the wood a lot of spring back occurred, even with leaving it for a number of days in the bender to set. Because I don't use a mould the sides need to be perfectly shaped before attachment, so the majority of the bending was done by hand on the hot iron. I'm sorry I don't have any pictures of this process (there was a lot of concentration needed here!) but here is one side once it was fully bent being trimmed down to side before attachment. 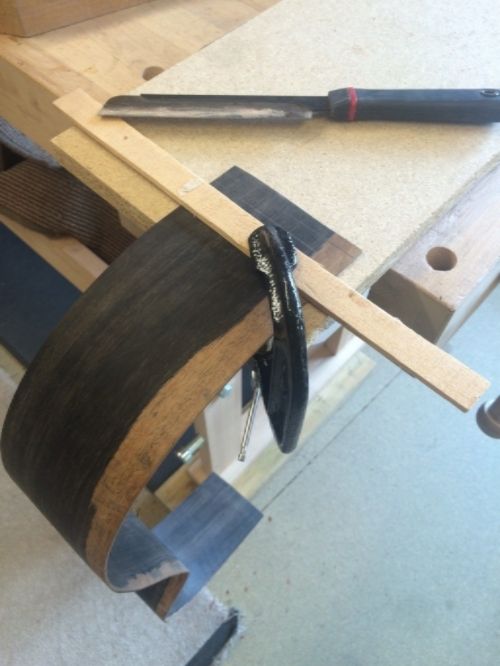 Once bent they are attached to the back starting with a few tantilons in the waist position to set the side correctly. Then they are glued on to the top and bottom blocks on both sides. 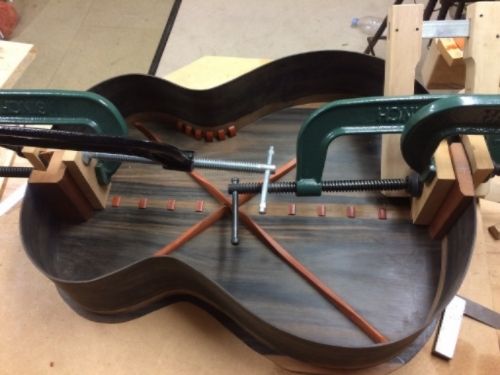 Then I cut the side soundport out: 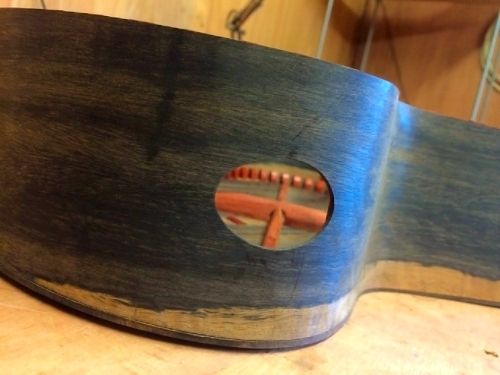 Then I stick all the tantilons all along the bottom and top, and the side struts are glued in place. Finally we have something that looks suspiciously guitar-like! 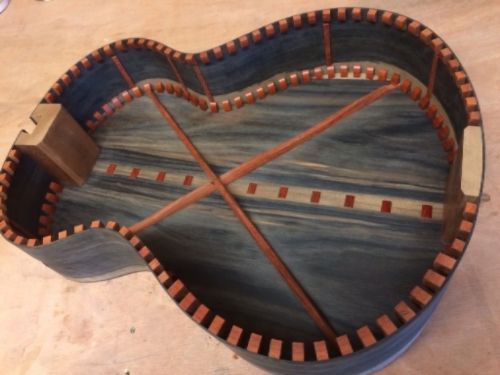 In other news the fingerboard makes its debut appearance. Here are the fret positions being scored in with a scalpel. My friend was throwing away this magnifying glass, which I promptly procured, and it is a most helpful tool to get a really close look at the ruler to obtain the most accurate measurements. I probably look quite a funny sight when I'm doing this - very Sherlock Homes... 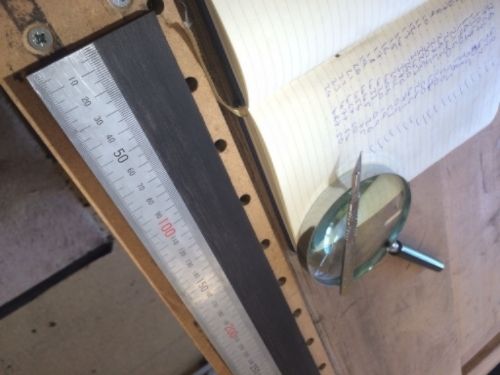 Thanks for checking in! Will be back soon  |
|
andrewjw
C.O.G. 
Posts: 4,876  Mini-Profile Background: {"image":"","color":""}
|
Post by andrewjw on Apr 17, 2016 19:34:24 GMT
Your tantilons are tantalising...  An inspirational build thread....different , visually stunning and beautiful work!  |
|
|
|
Post by RosieTGC on May 3, 2016 14:07:05 GMT
Hi everyone - here's a little update on the build: The fretboard has been slotted with a fretsaw, cut out and bound in Ebony with a white strip between for a bit of contrast. The inlay squares have also been cut and those inlay squares that still need to go in will follow a similar black/white theme running throughout the guitar (I was about to attempt a more thorough written explanation of these, but thought best to just wait for a finished picture!) 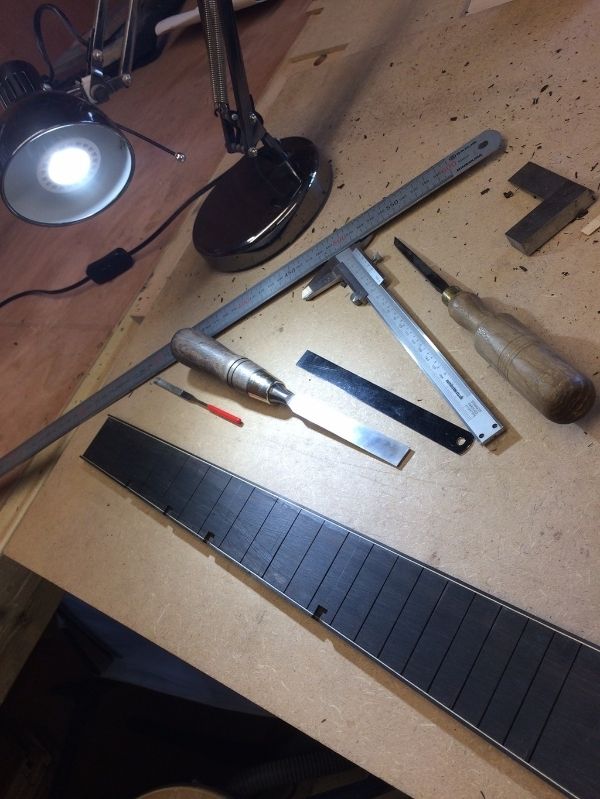 Back to the body - the top is attached using home-made spool clamps. Before this process, the body has been sanded in the radius dish so the tantilons have the correct radius angle and the they have also been carved in the appropriate areas to fit the bracing snugly. The top is also brought pretty close to flush with the sides so the spool clamps get a good purchase over the tantilons. 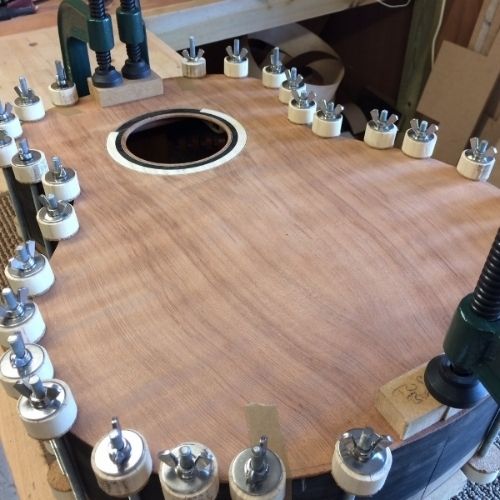 You need to be very efficient during this process, as you only have a certain amount of time to get glue applied and the clamps down before the glue starts drying. It also takes a bit of time to get round the body with all those clamps, so I preset them all in a neat line next to the job to the correct widths so it gets done as quick as possible. You then take a deep breath and just have to get stuck in! So once dried they can come off and here we have the body (apologies there is still some sticky tape on these pictures which is used to hold the block clamp cauls in place when the top goes on. 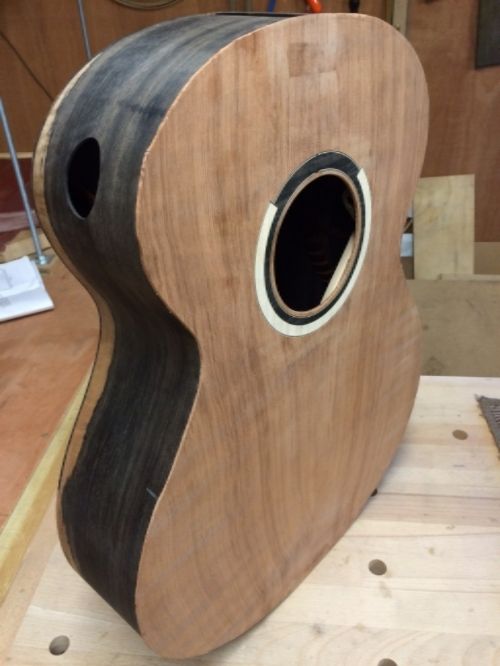 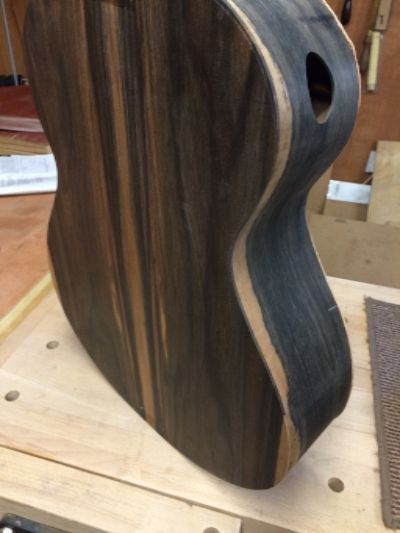 So now the remaining little bit of overhang on the top needs to be brought flush with the sides and then we can start to move on to the end flash, final sanding of the sides and then the binding. Back soon - thanks very much for checking in!  |
|
Martin
Administrator

Posts: 11,994  Mini-Profile Background: {"image":"http://mandocello.org/lytebox/images/adirondack.jpg","color":""}
Mini-Profile Name Color: 0a530b
Mini-Profile Text Color: 4f3517
|
Post by Martin on May 3, 2016 14:29:45 GMT
Beautiful work! I love the attention to detail, your selection of woods and excellent photographs. I'm also really enjoying your explanations as the build progresses  |
|
|
|
Post by yorkie on May 3, 2016 15:22:09 GMT
That looks like a lot of fun, Rosie. Very impressive work, with extremely interesting soundboard brace architecture. If you didn't mind sharing, it would be great to hear the theory and thought process for your bracing.  |
|
|
|
Post by earthbalm on May 3, 2016 16:45:04 GMT
Very much looking forward to seeing how the fretboard looks when complete. The body woods are looking awesome now.
|
|
ocarolan
Global Moderator
 CURMUDGEONLY OLD GIT (leader - to join, just ask!)
Posts: 35,724  Mini-Profile Background: {"image":"","color":"c0cfe1"}
Mini-Profile Name Color: 182a3f
Mini-Profile Text Color: 733a1c
|
Post by ocarolan on May 3, 2016 17:12:45 GMT
This looks more gorgeous with every post!
Keith
|
|
leoroberts
C.O.G. 

Posts: 26,145  My main instrument is: probably needing new strings
|
Post by leoroberts on May 3, 2016 17:53:59 GMT
I love the look of this guitar. One of the joys of this forum is watching the builds by different luthiers, with their own theories, explanations and understandings all ultimately ending up in the production of an instrument that is essentially recognisable as a guitar. Yet all so different...
|
|
|
|
Post by RosieTGC on May 3, 2016 19:19:09 GMT
That looks like a lot of fun, Rosie. Very impressive work, with extremely interesting soundboard brace architecture. If you didn't mind sharing, it would be great to hear the theory and thought process for your bracing.  Hi yorkie, thanks so much for your comment. Yes of course - I think I covered a good chunk of the bracing theory in a previous post that I wrote on this thread, which can be found on page 3, posted 29 March. Hopefully that explains most of it, but please do let me know if there is anything else you want to know! |
|
|
|
Post by RosieTGC on May 3, 2016 19:43:05 GMT
On a slightly separate note for those interested, I've just finished reading a fantastic book called "Guitar Makers: The endurance of artisanal values in North America" by Kathryn Dudley. It was published a few years ago now, but I found out about it through the European Guitar Builders website. It has some great interviews with lots of North Amercian makers, and covers loads of interesting topics about material scarcity, how the artisan guitar market developed over there and how some of them got their breaks along the way. Really interesting read for those interested in making, but also I think for those also just interested in handmade guitars in general. It's available from the usual online shops so just thought I'd pass on the info as I enjoyed it so much.
|
|
|
|
Post by yorkie on May 4, 2016 4:37:53 GMT
That looks like a lot of fun, Rosie. Very impressive work, with extremely interesting soundboard brace architecture. If you didn't mind sharing, it would be great to hear the theory and thought process for your bracing.  Hi yorkie , thanks so much for your comment. Yes of course - I think I covered a good chunk of the bracing theory in a previous post that I wrote on this thread, which can be found on page 3, posted 29 March. Hopefully that explains most of it, but please do let me know if there is anything else you want to know! Hi Rosie, its tempting to geek out and talk about mass, stiffness, energy transfer etc, but I'm fascinated in the route taken in coming to the engineering decisions. i guess from your earlier post you're building experiencially making changes in subsequent builds to perfect your approach? |
|
|
|
Post by RosieTGC on May 4, 2016 13:43:34 GMT
Hi Rosie, its tempting to geek out and talk about mass, stiffness, energy transfer etc, but I'm fascinated in the route taken in coming to the engineering decisions. i guess from your earlier post you're building experiencially making changes in subsequent builds to perfect your approach? Hi yorkie, Yes I do love a geek out discussion about all this stuff too and can spend quite a bit of time talking about each brace, but tend to find people start to glaze over a bit when I start getting really into it! But yes in essence I am trying to apply my knowledge of physics, materials, acoustics and energy transfer to the structure of the soundboard. But also keeping in mind that the soundboard has to deal with the tension from the strings - this invites more complex consideration too. As with any maker I imagine, the more you trial things the more you find out what works and what could be improved upon to suit what you are trying to achieve - so I believe what I have done here is an improvement on the last layout, but I will most likely find something to alter/change for the next one, depending on the results. Hope that answers your question a bit! |
|
|
|
Post by yorkie on May 4, 2016 17:47:31 GMT
Hi yorkie , Yes I do love a geek out discussion about all this stuff too and can spend quite a bit of time talking about each brace, but tend to find people start to glaze over a bit when I start getting really into it! But yes in essence I am trying to apply my knowledge of physics, materials, acoustics and energy transfer to the structure of the soundboard. But also keeping in mind that the soundboard has to deal with the tension from the strings - this invites more complex consideration too. As with any maker I imagine, the more you trial things the more you find out what works and what could be improved upon to suit what you are trying to achieve - so I believe what I have done here is an improvement on the last layout, but I will most likely find something to alter/change for the next one, depending on the results. Hope that answers your question a bit! Thanks Rosie. I'd love to say I follow the same approach, but I've never built the same thing twice, so the lessons from previous builds only apply in a broad sense. looking forward to seeing the progress with this build and thanks for taking the time to share it.  |
|
leoroberts
C.O.G. 

Posts: 26,145  My main instrument is: probably needing new strings
|
Post by leoroberts on May 5, 2016 8:14:09 GMT
As with any maker I imagine, the more you trial things the more you find out what works and what could be improved upon to suit what you are trying to achieve - so I believe what I have done here is an improvement on the last layout, but I will most likely find something to alter/change for the next one, depending on the results. Hope that answers your question a bit! I'm amazed luthiers ever actually sell any guitars on the basis that you are all so honest that 'the next one will be better' - of course, if we all waited for the next one, you'd all give up cos you never actually sold any guitars  |
|