|
|
Post by keithambridge on Feb 15, 2019 22:00:19 GMT
I've just returned from a holiday in NZ and I've really become fond of this style of building!
Anyway, what a lovely job you've done Pete. Congratulations!
|
|
|
|
Post by keithambridge on Feb 15, 2019 21:49:28 GMT
Dovetail, they're not that hard to do and very satisfying.
|
|
|
|
Post by keithambridge on Dec 1, 2018 15:34:36 GMT
|
|
|
|
Post by keithambridge on Nov 24, 2018 15:15:01 GMT
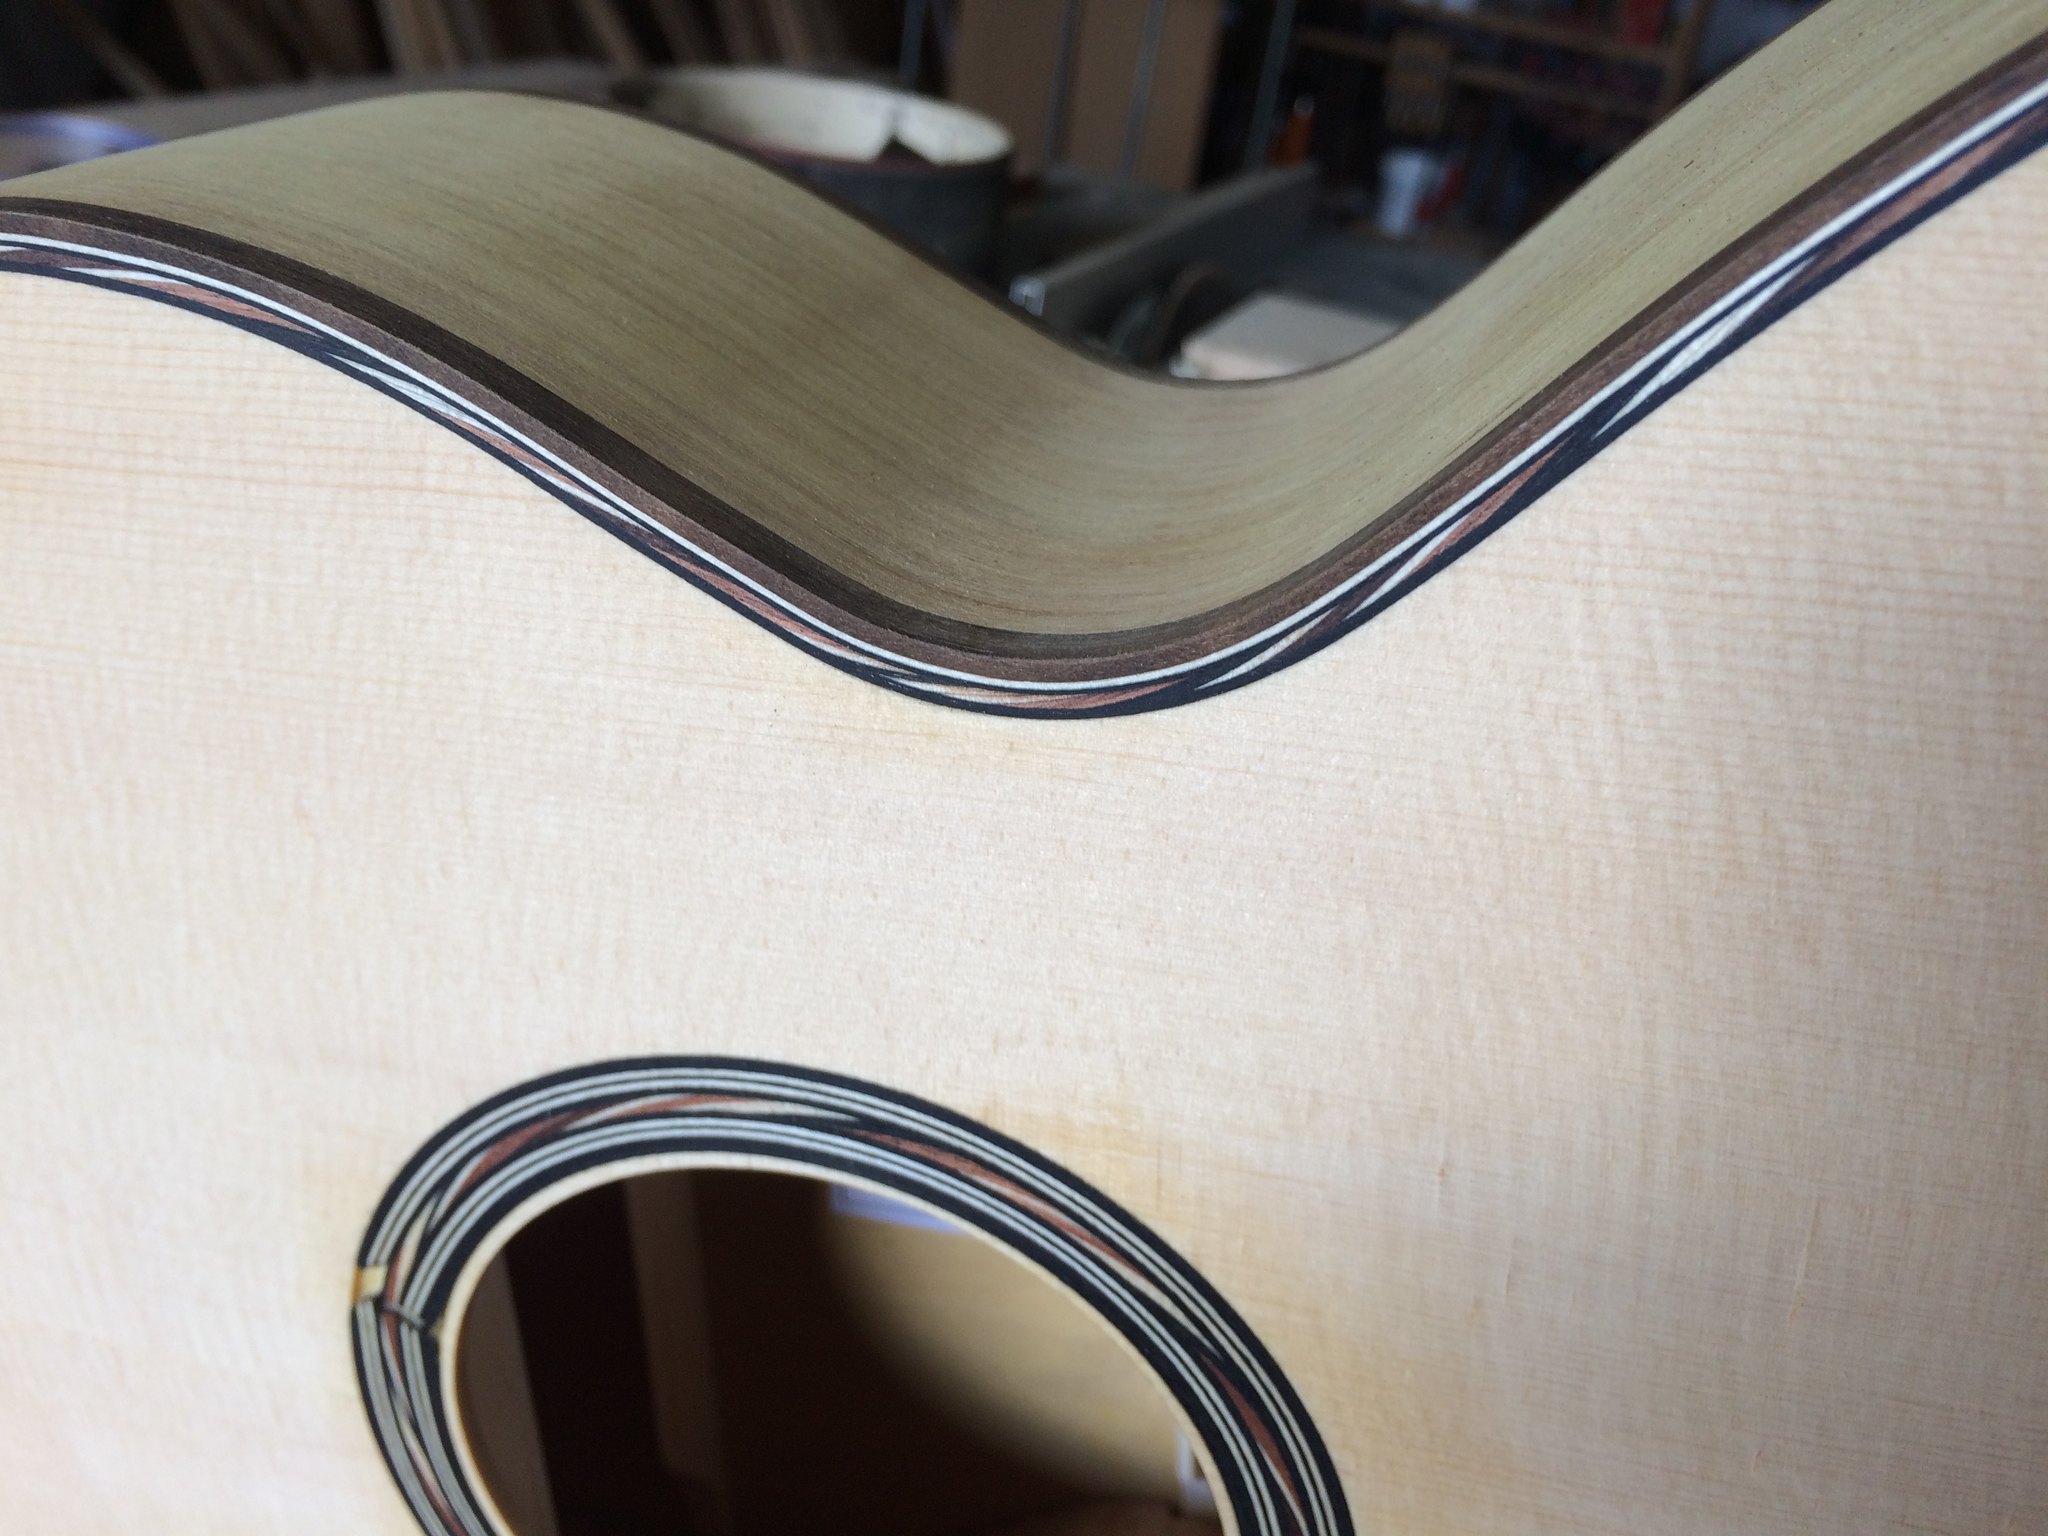
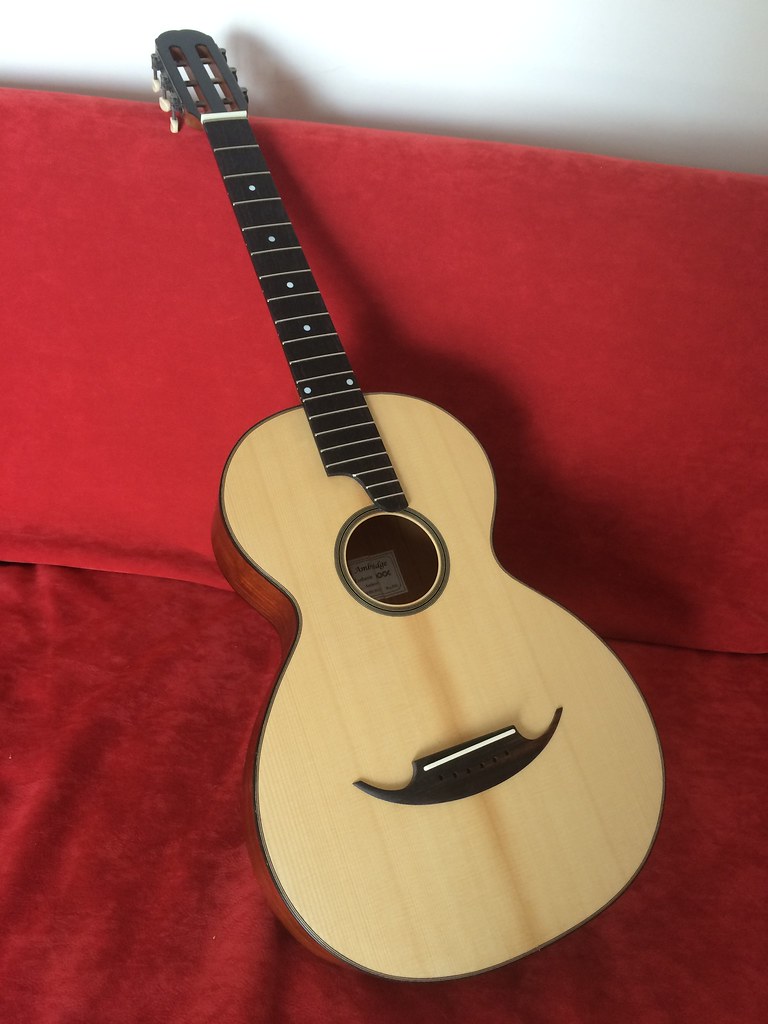
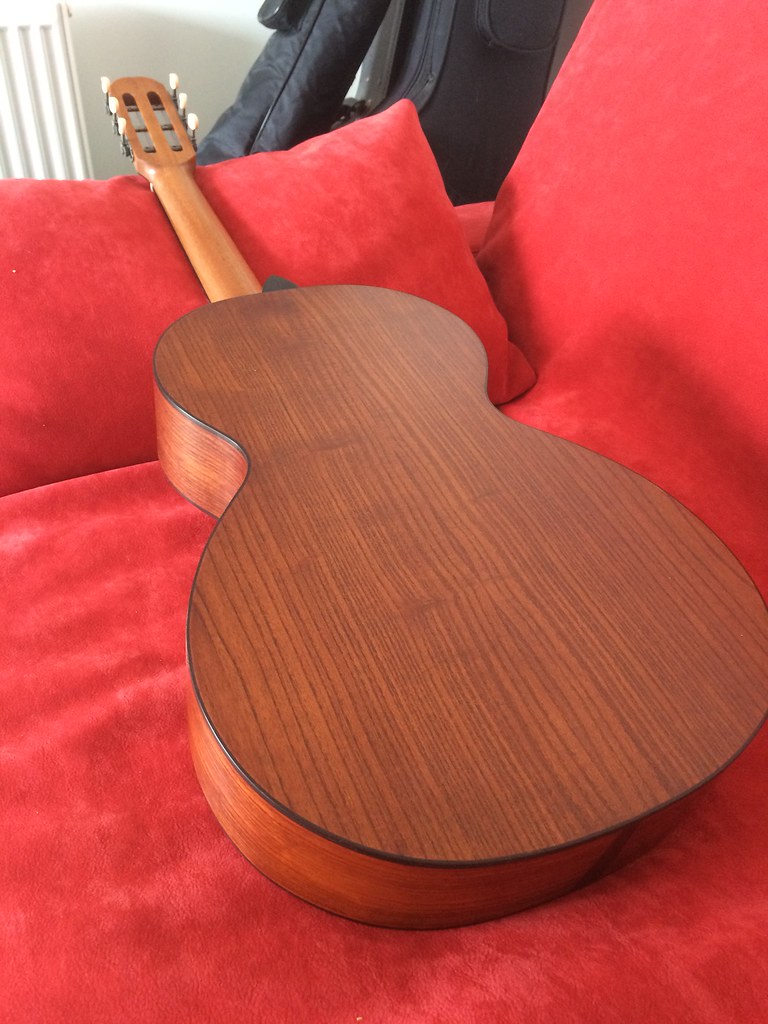
So, the binding was fun! It's the most ambitious binding I've done to date, made all my own purflings etc. I was beginning to regret this when I started. Pablo Raquena makes it look so easy on his you tube video! There was glue everywhere and what a mess! 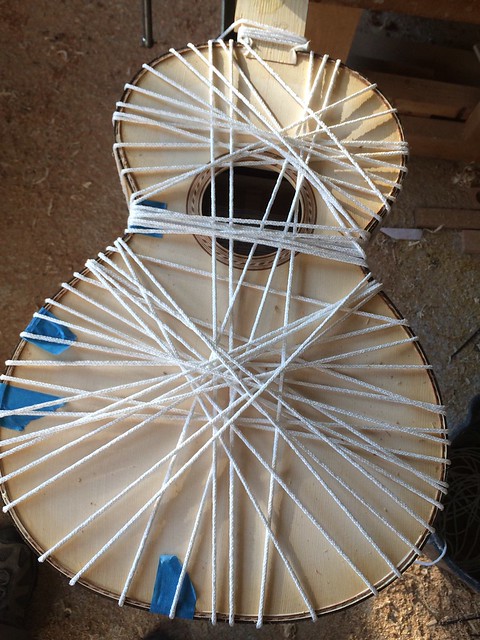 Apartian twins Apartian twins by keith ambridge, on Flickr However, when I cleaned it all up this morning, I couldn't have been more pleased  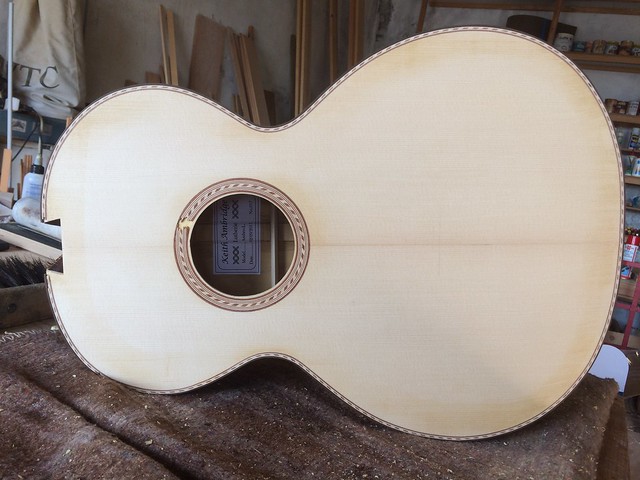 Apartian twins Apartian twins by keith ambridge, on Flickr 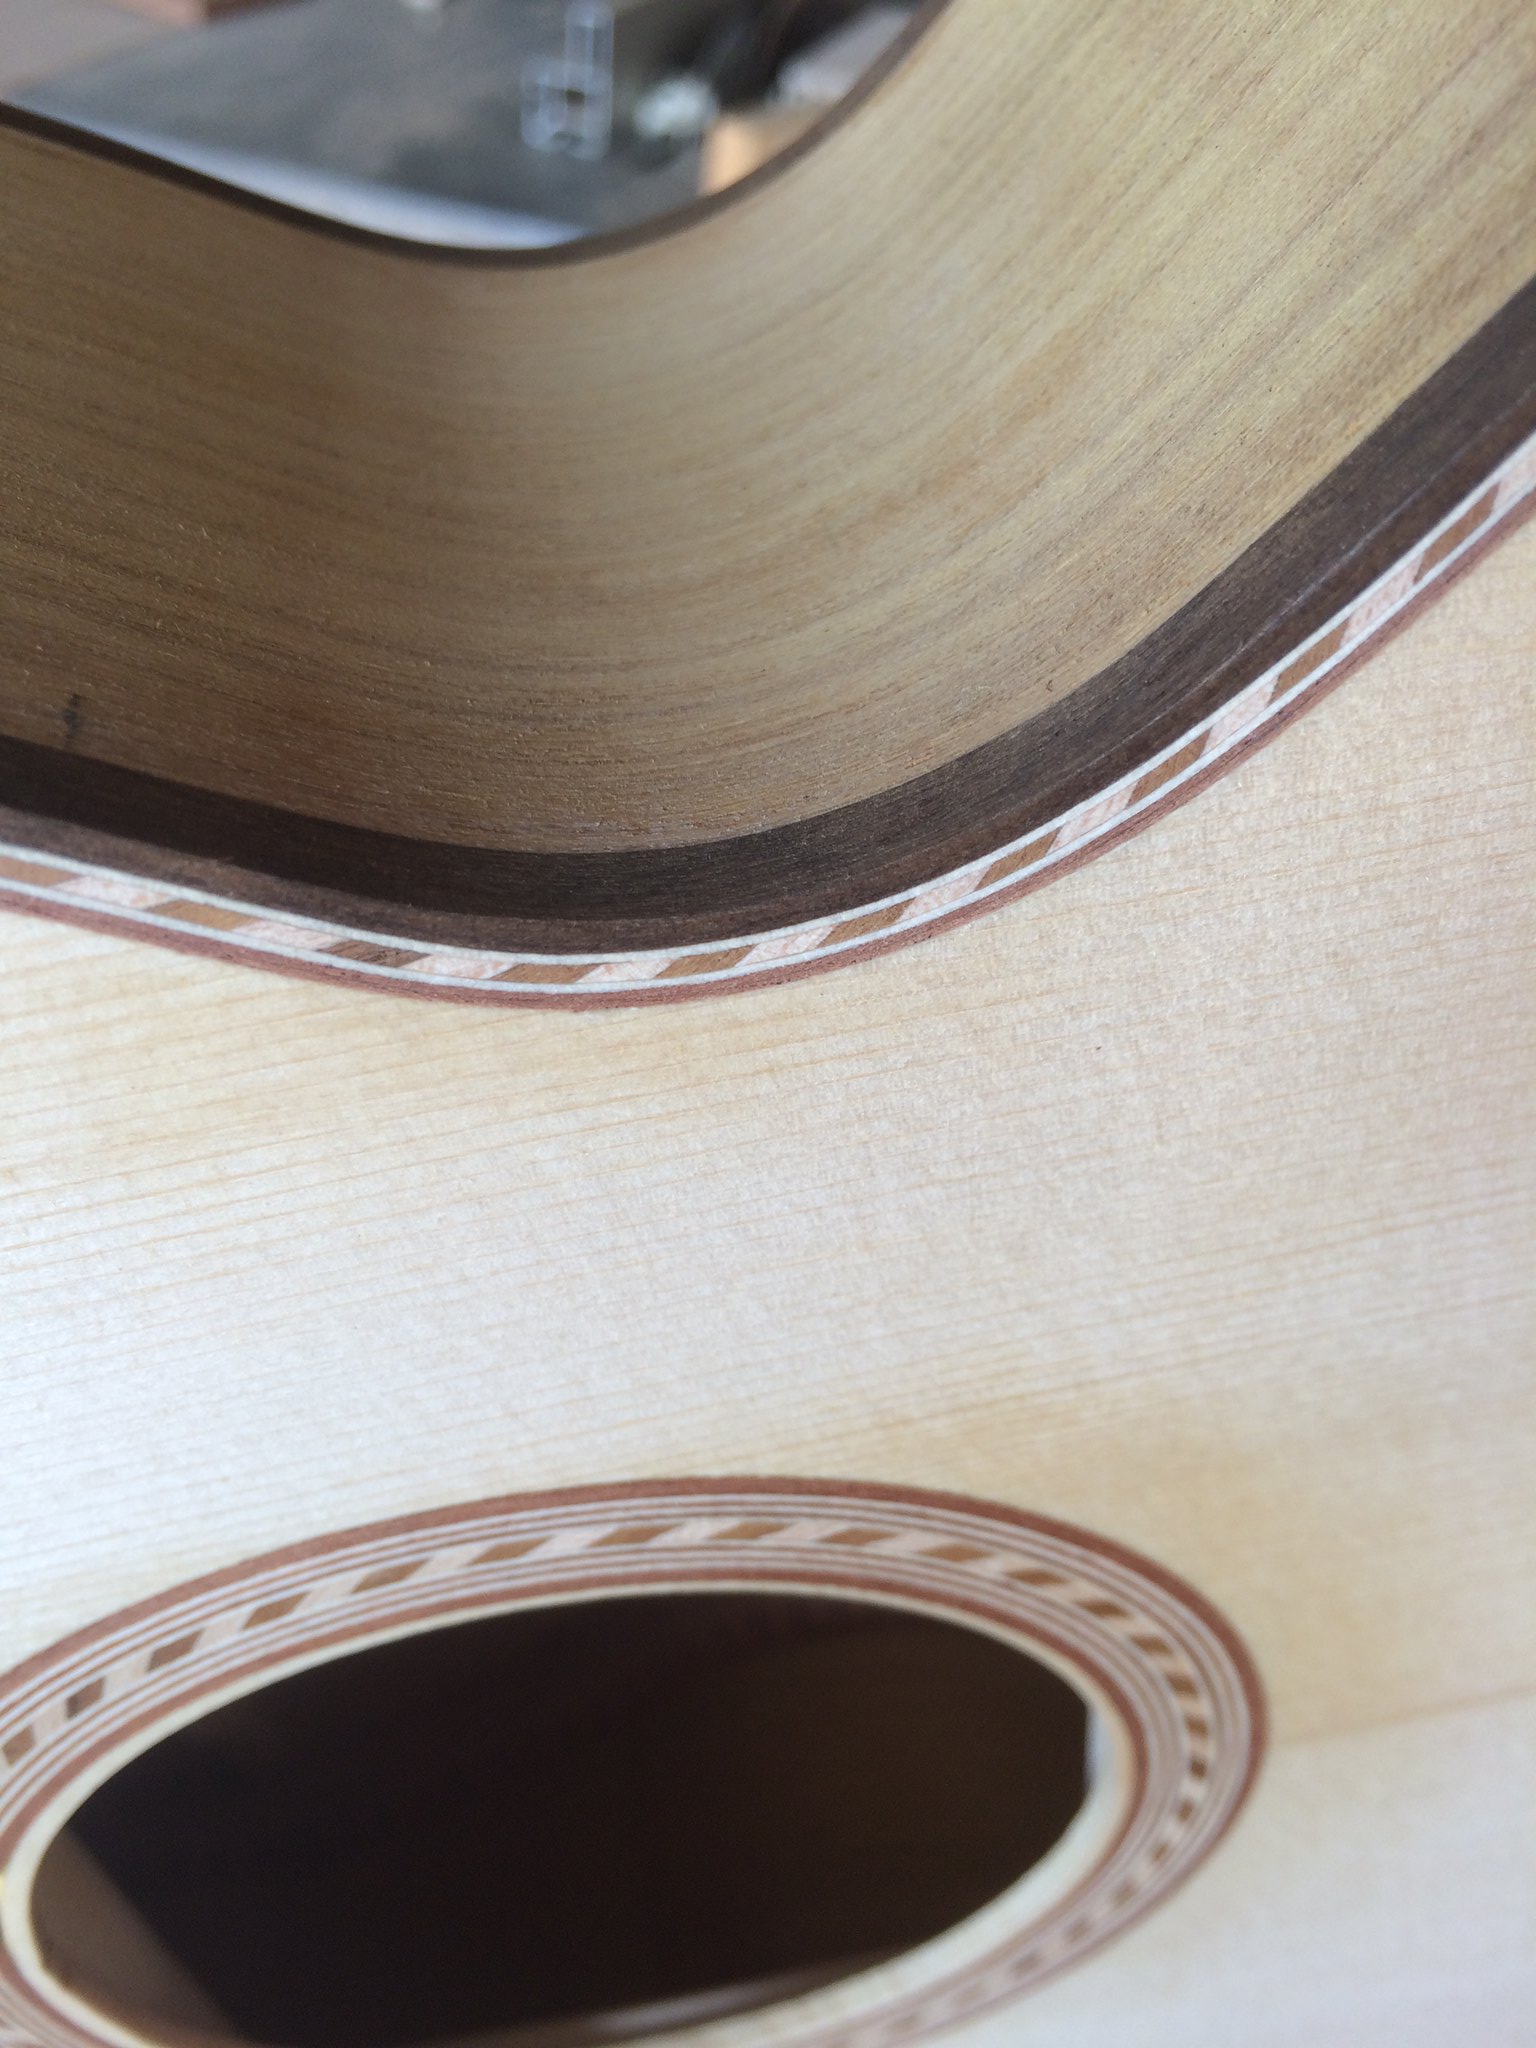 Apartian twins Apartian twins by keith ambridge, on Flickr |
|
|
|
Post by keithambridge on Nov 22, 2018 15:26:23 GMT
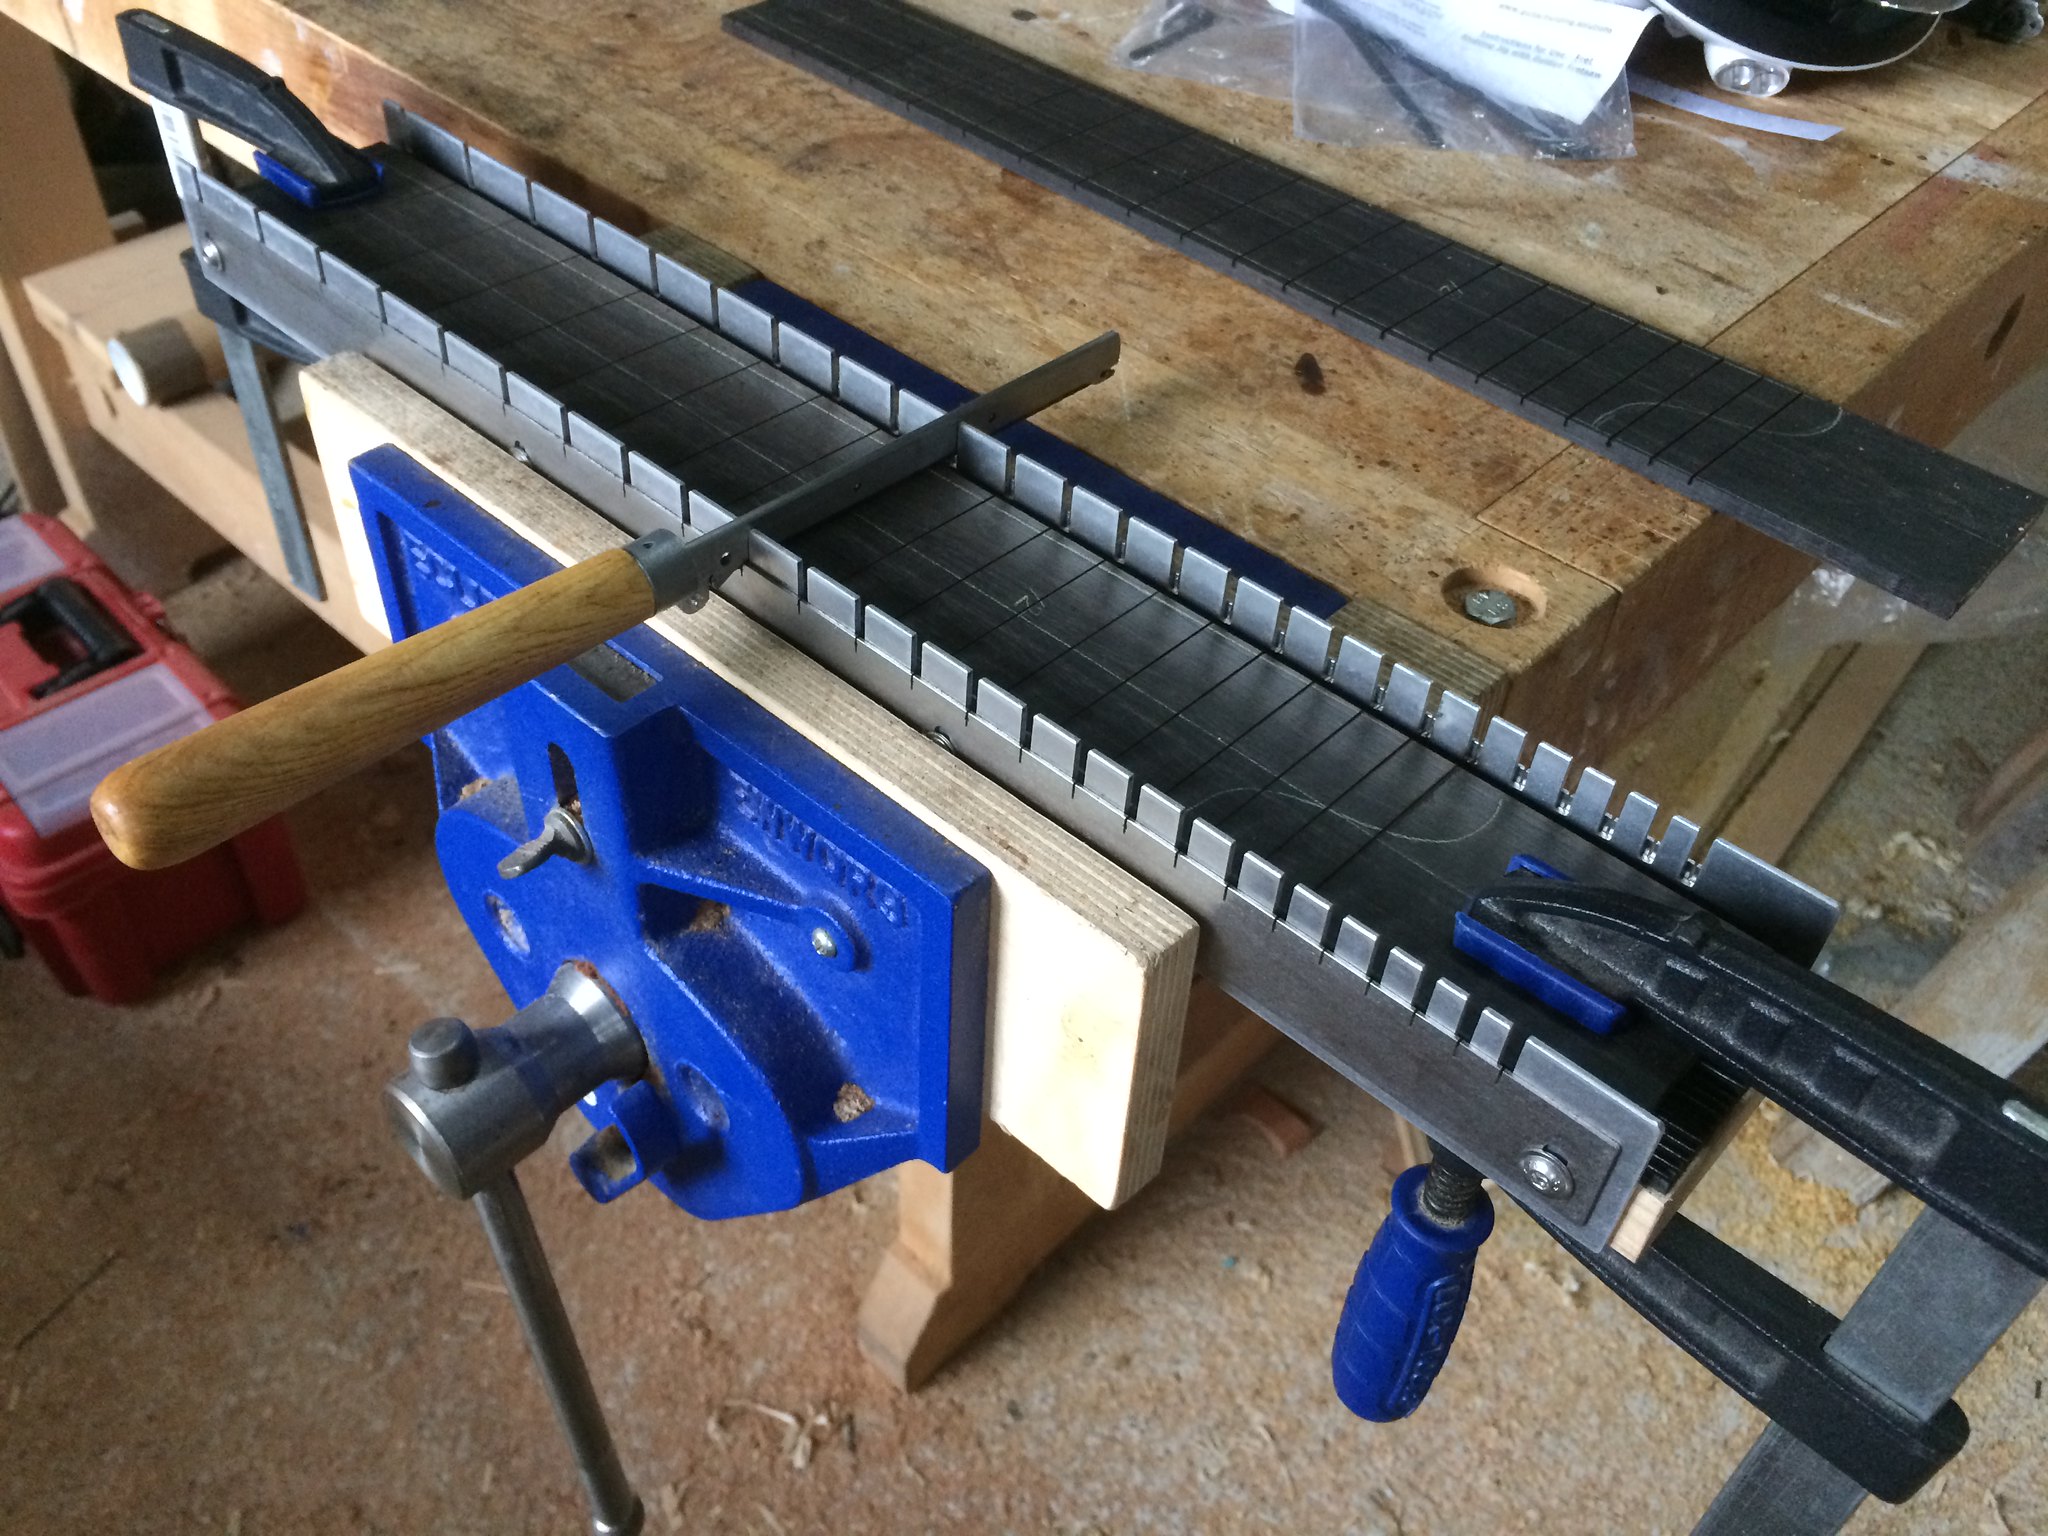
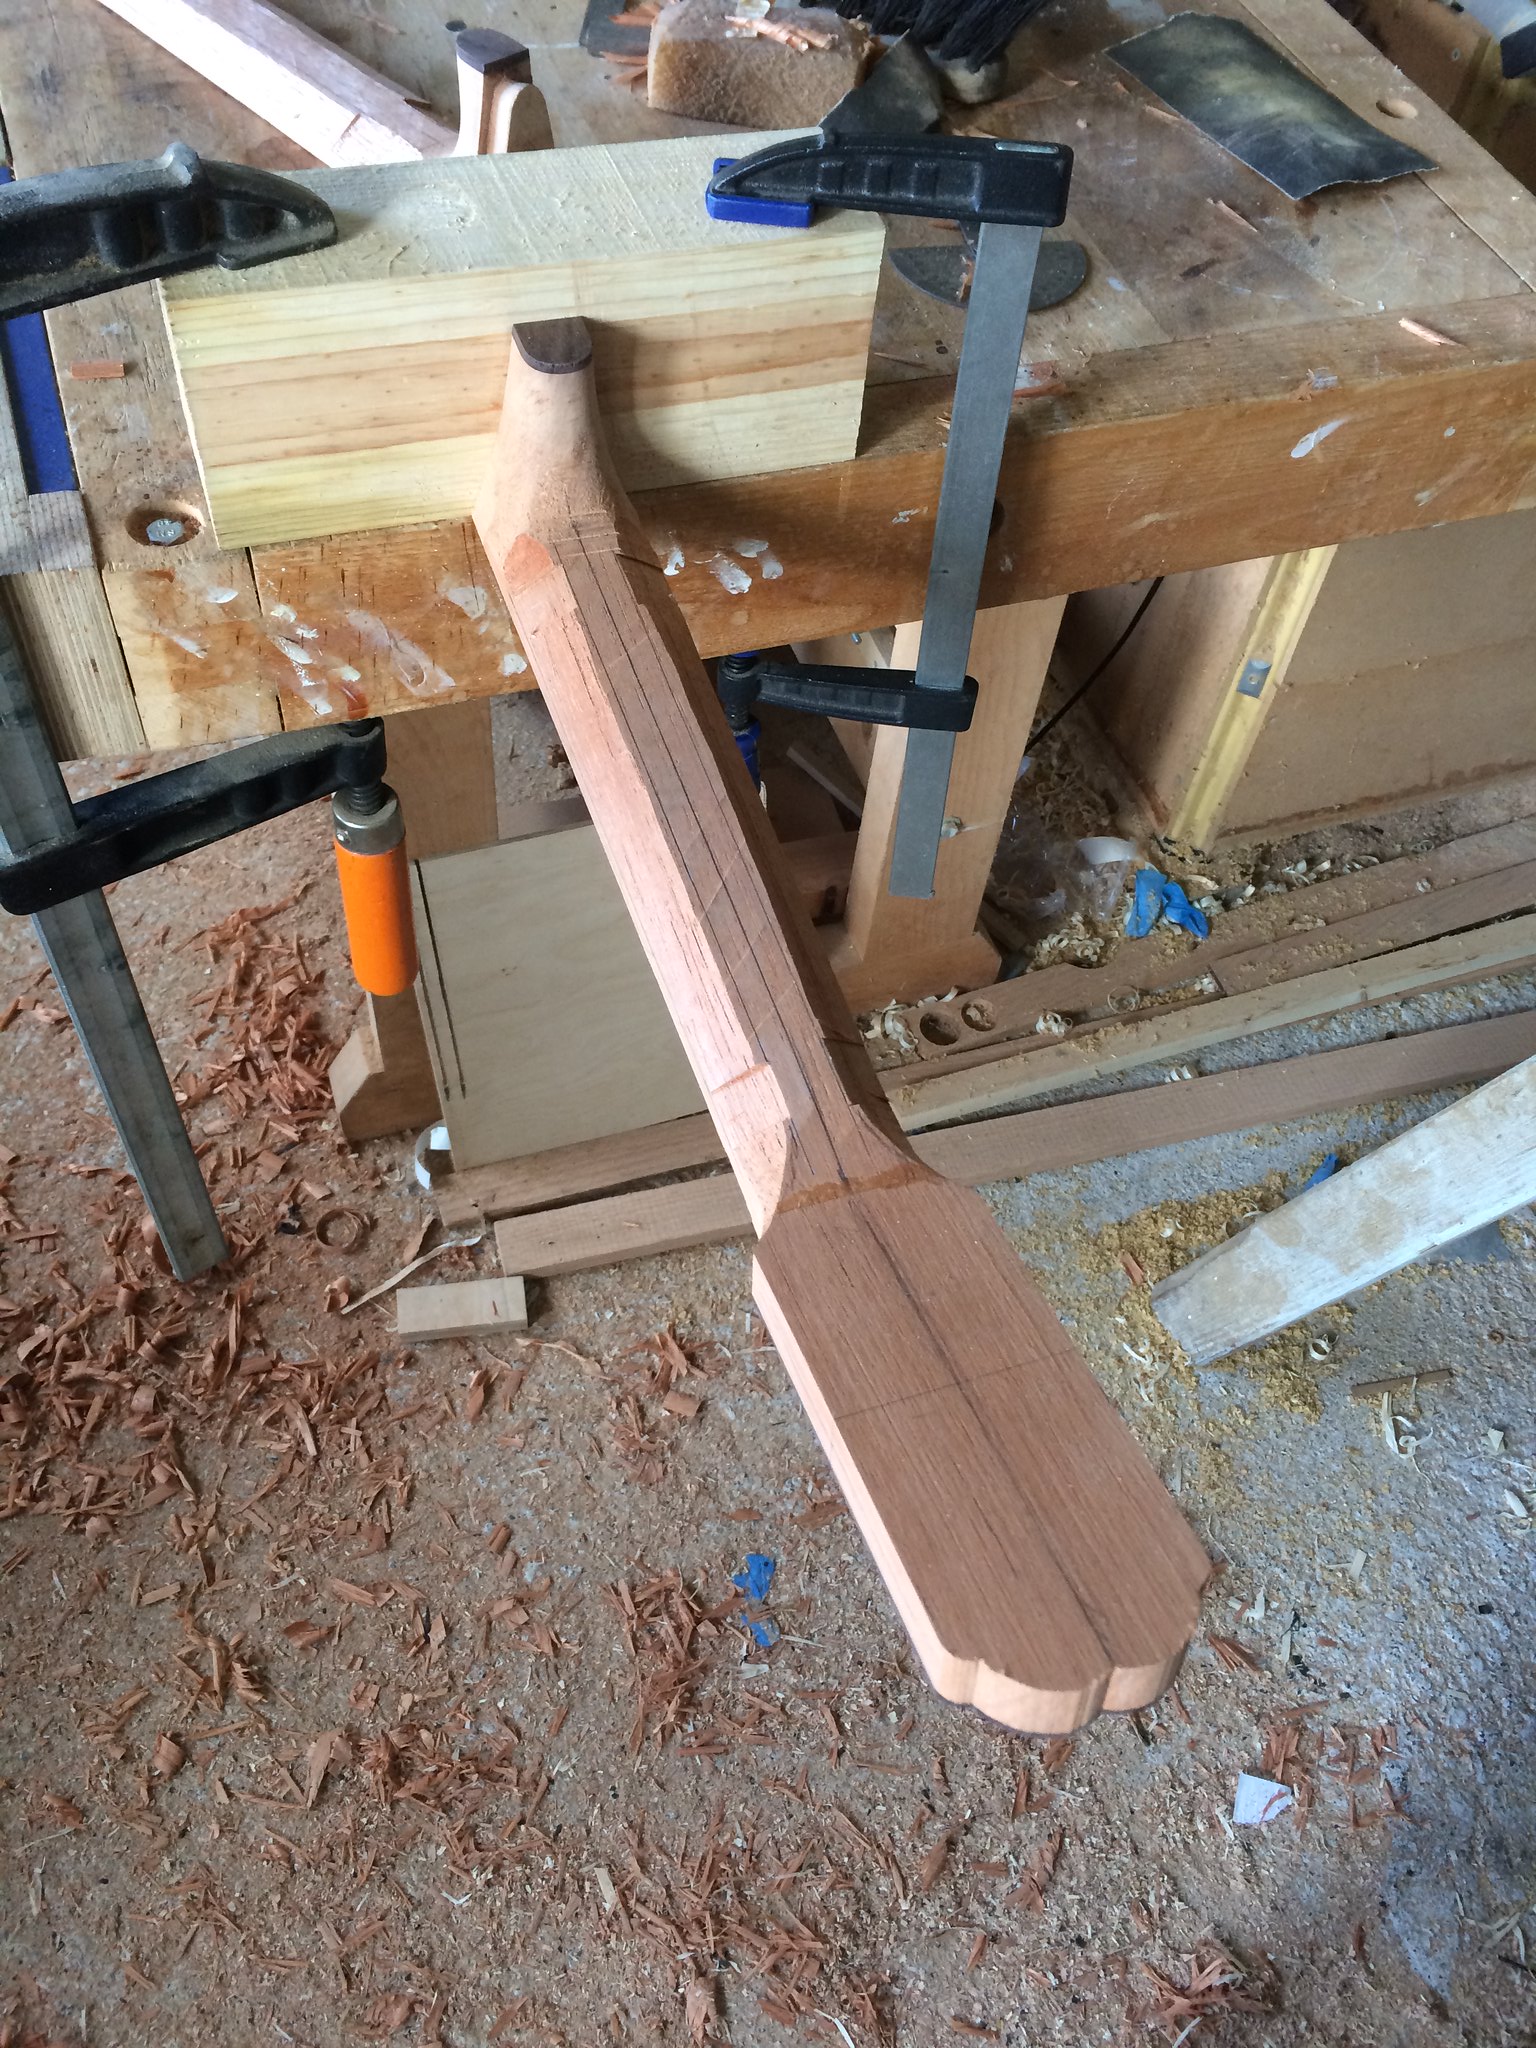
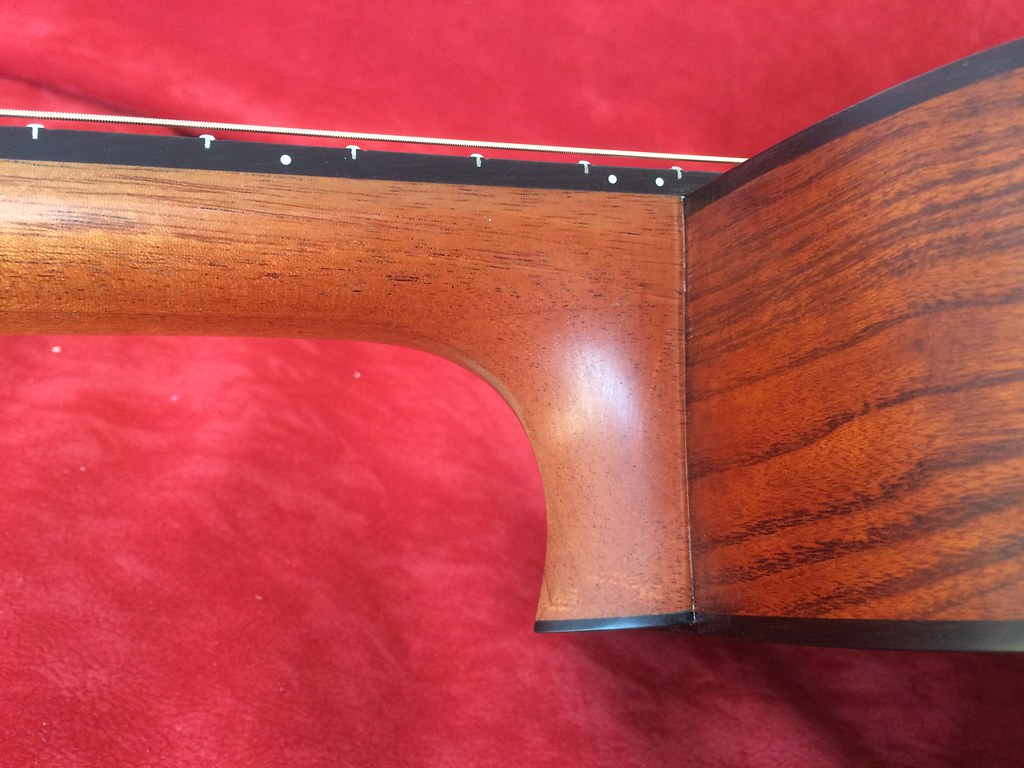
A bit more action today. Now that the back bindings are fitted I decided to fit the neck so I had something to clamp it to the bench when I do the front binding. I'm going to use the "big ball of string" method for this! Anyway, the neck. I built myself a neck dovetail jig a couple of months ago and other than testing on some blocks of pine this is it's first time in action. I was nervous but all went well! The mortice jig 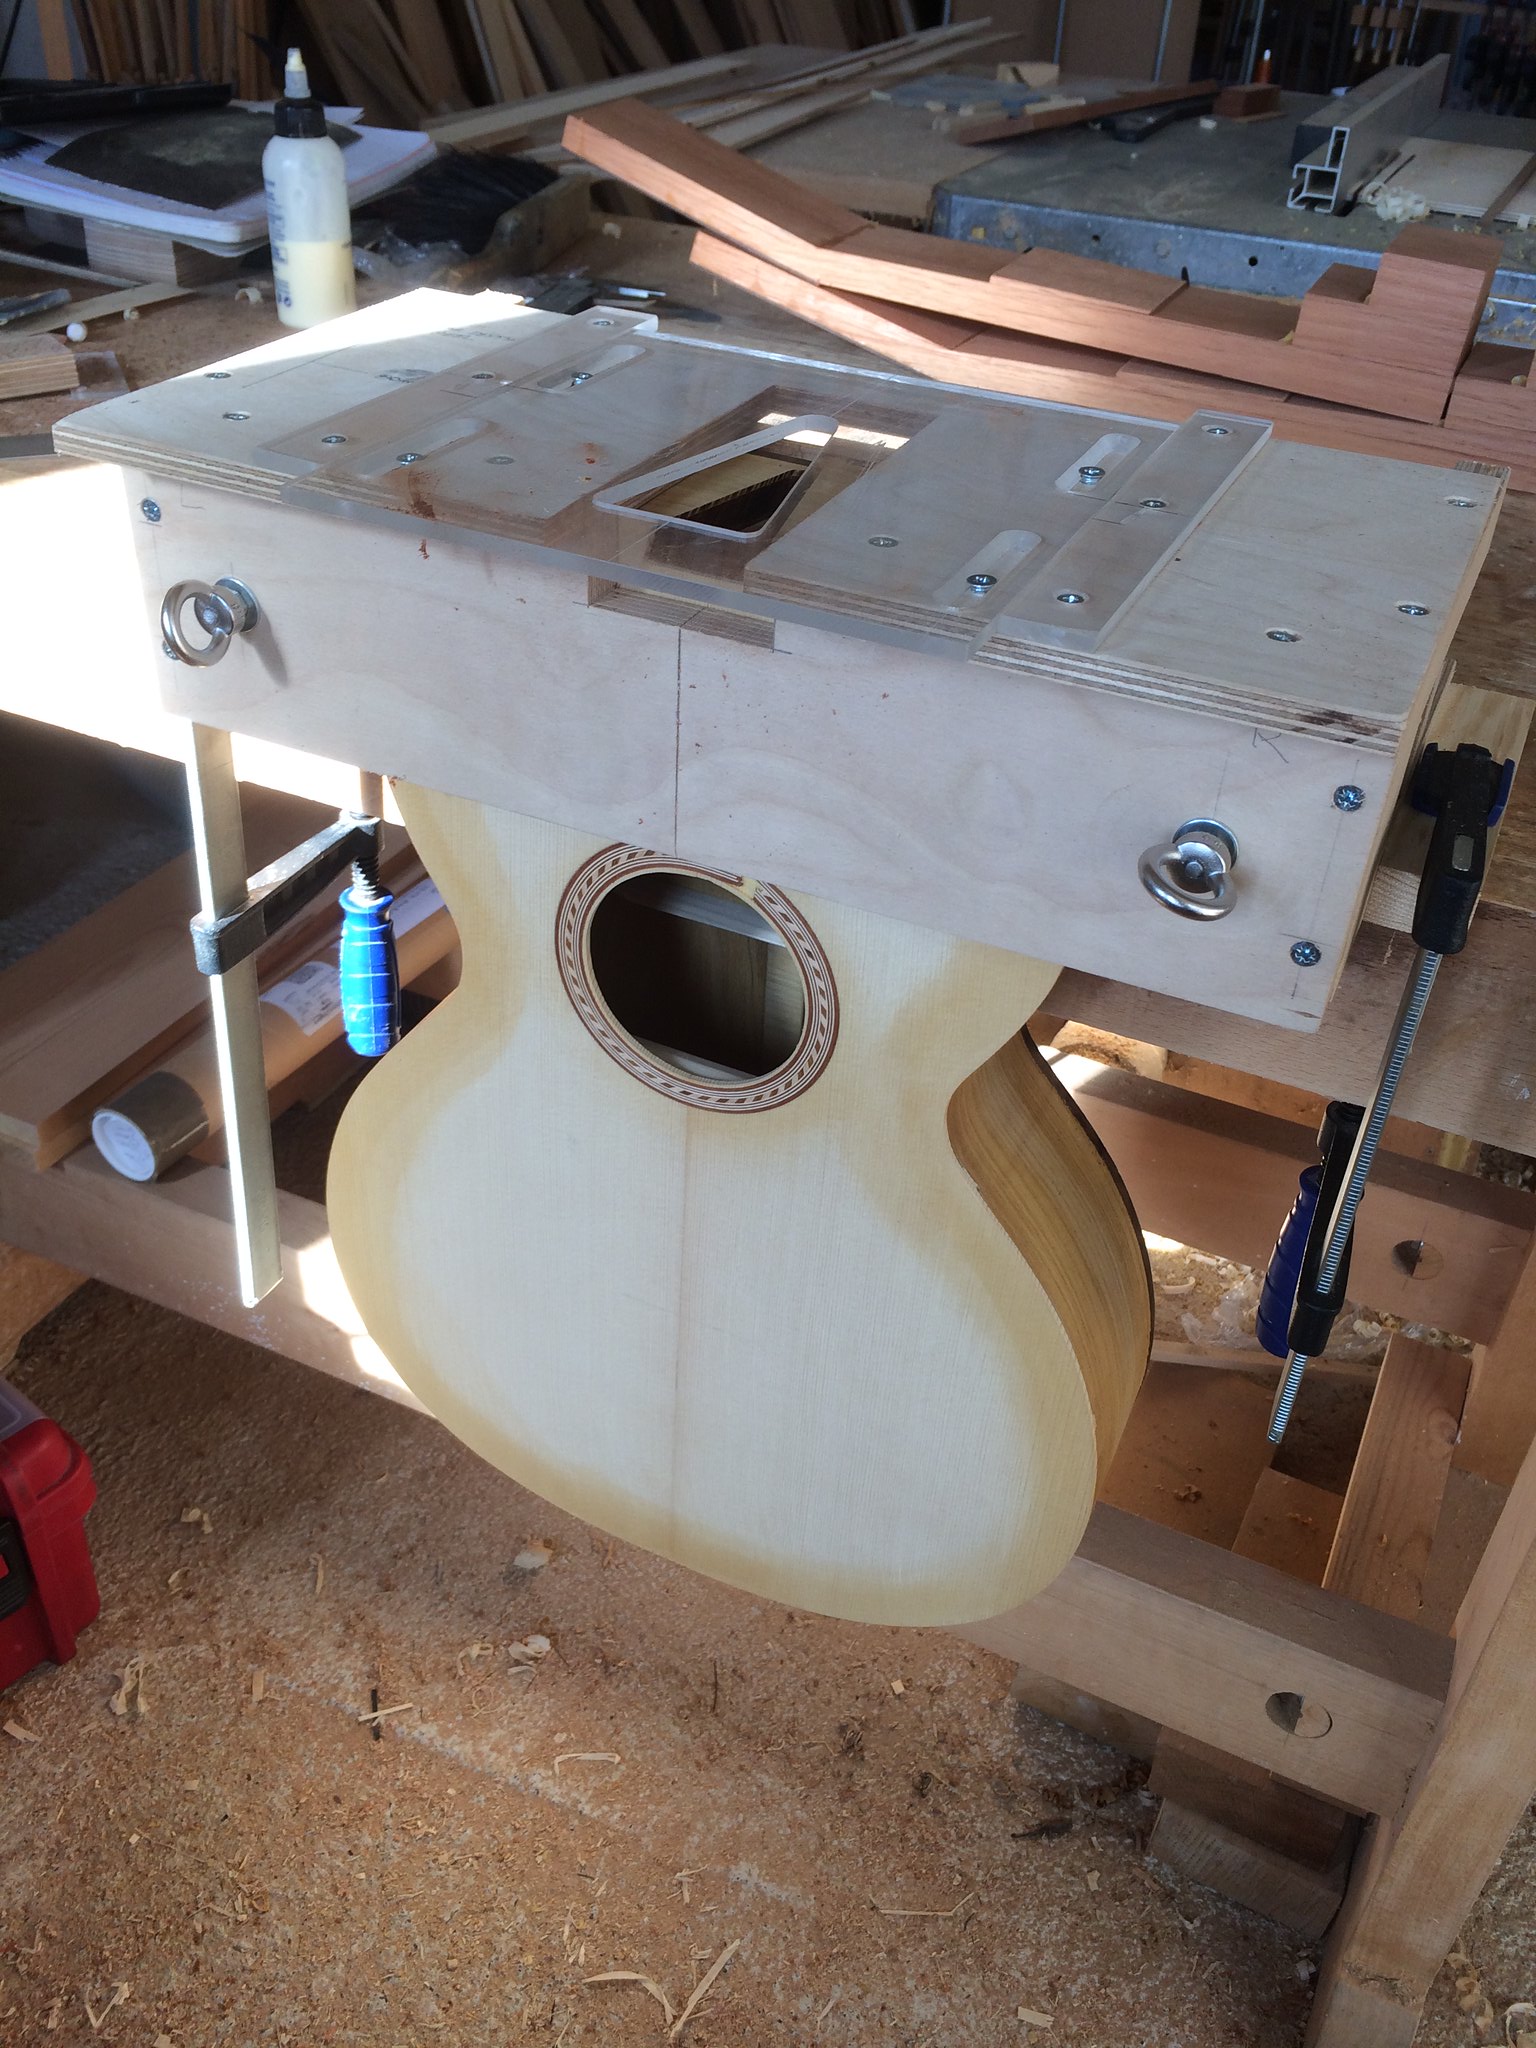 Apartian twins Apartian twins by keith ambridge, on Flickr 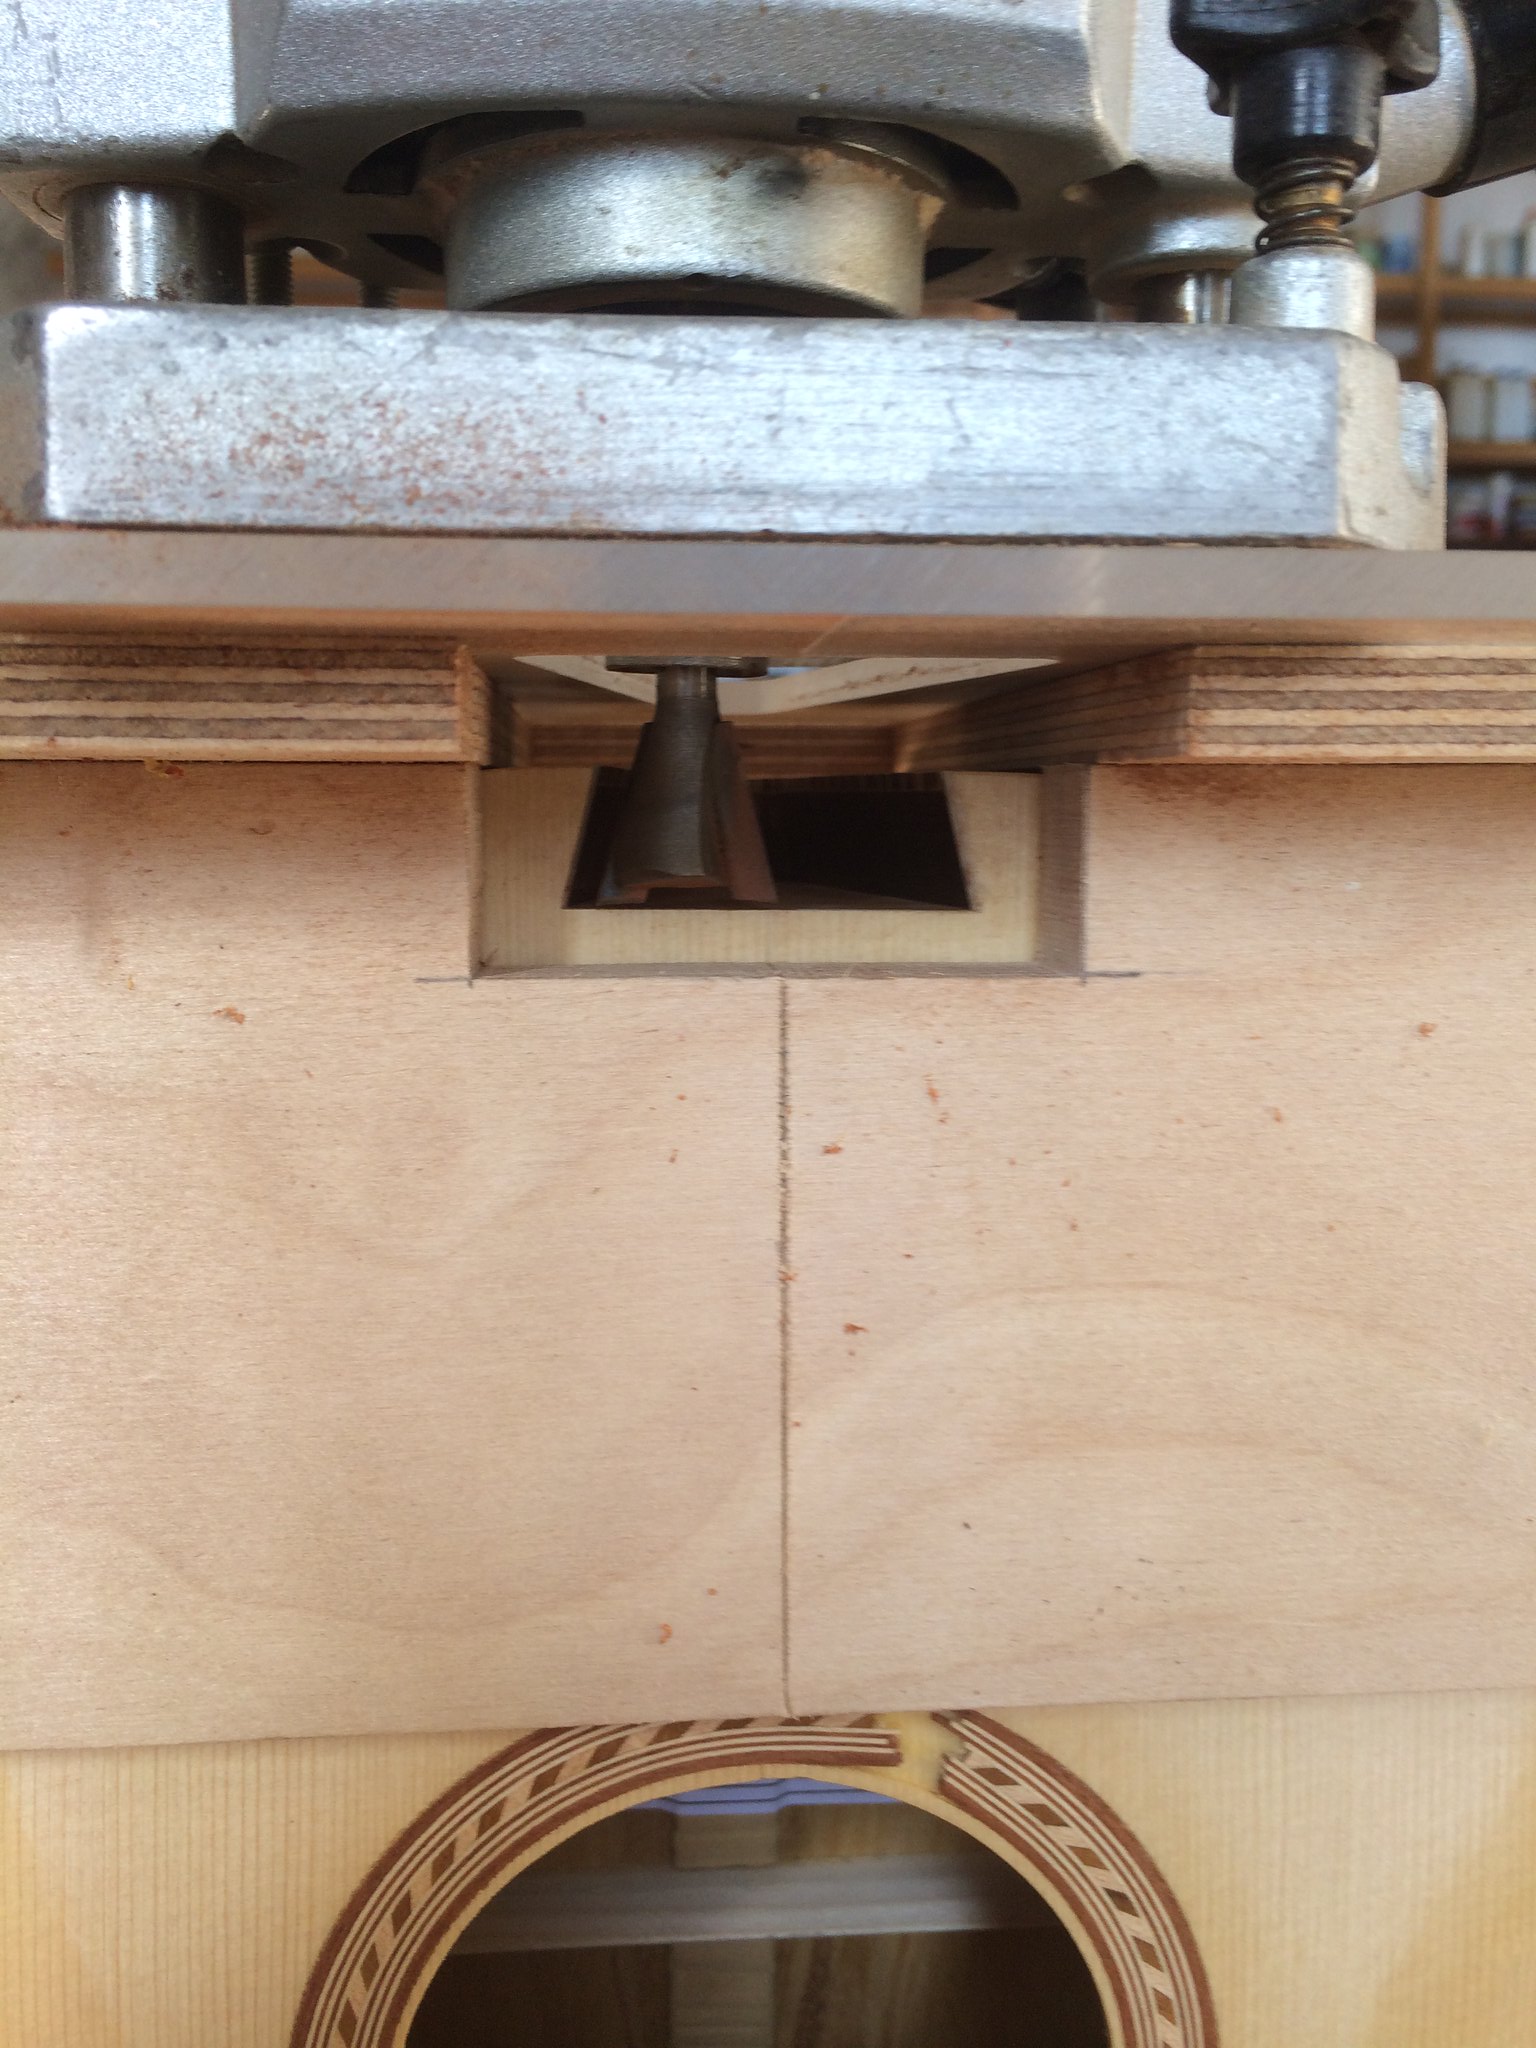 Apartian twins Apartian twins by keith ambridge, on Flickr 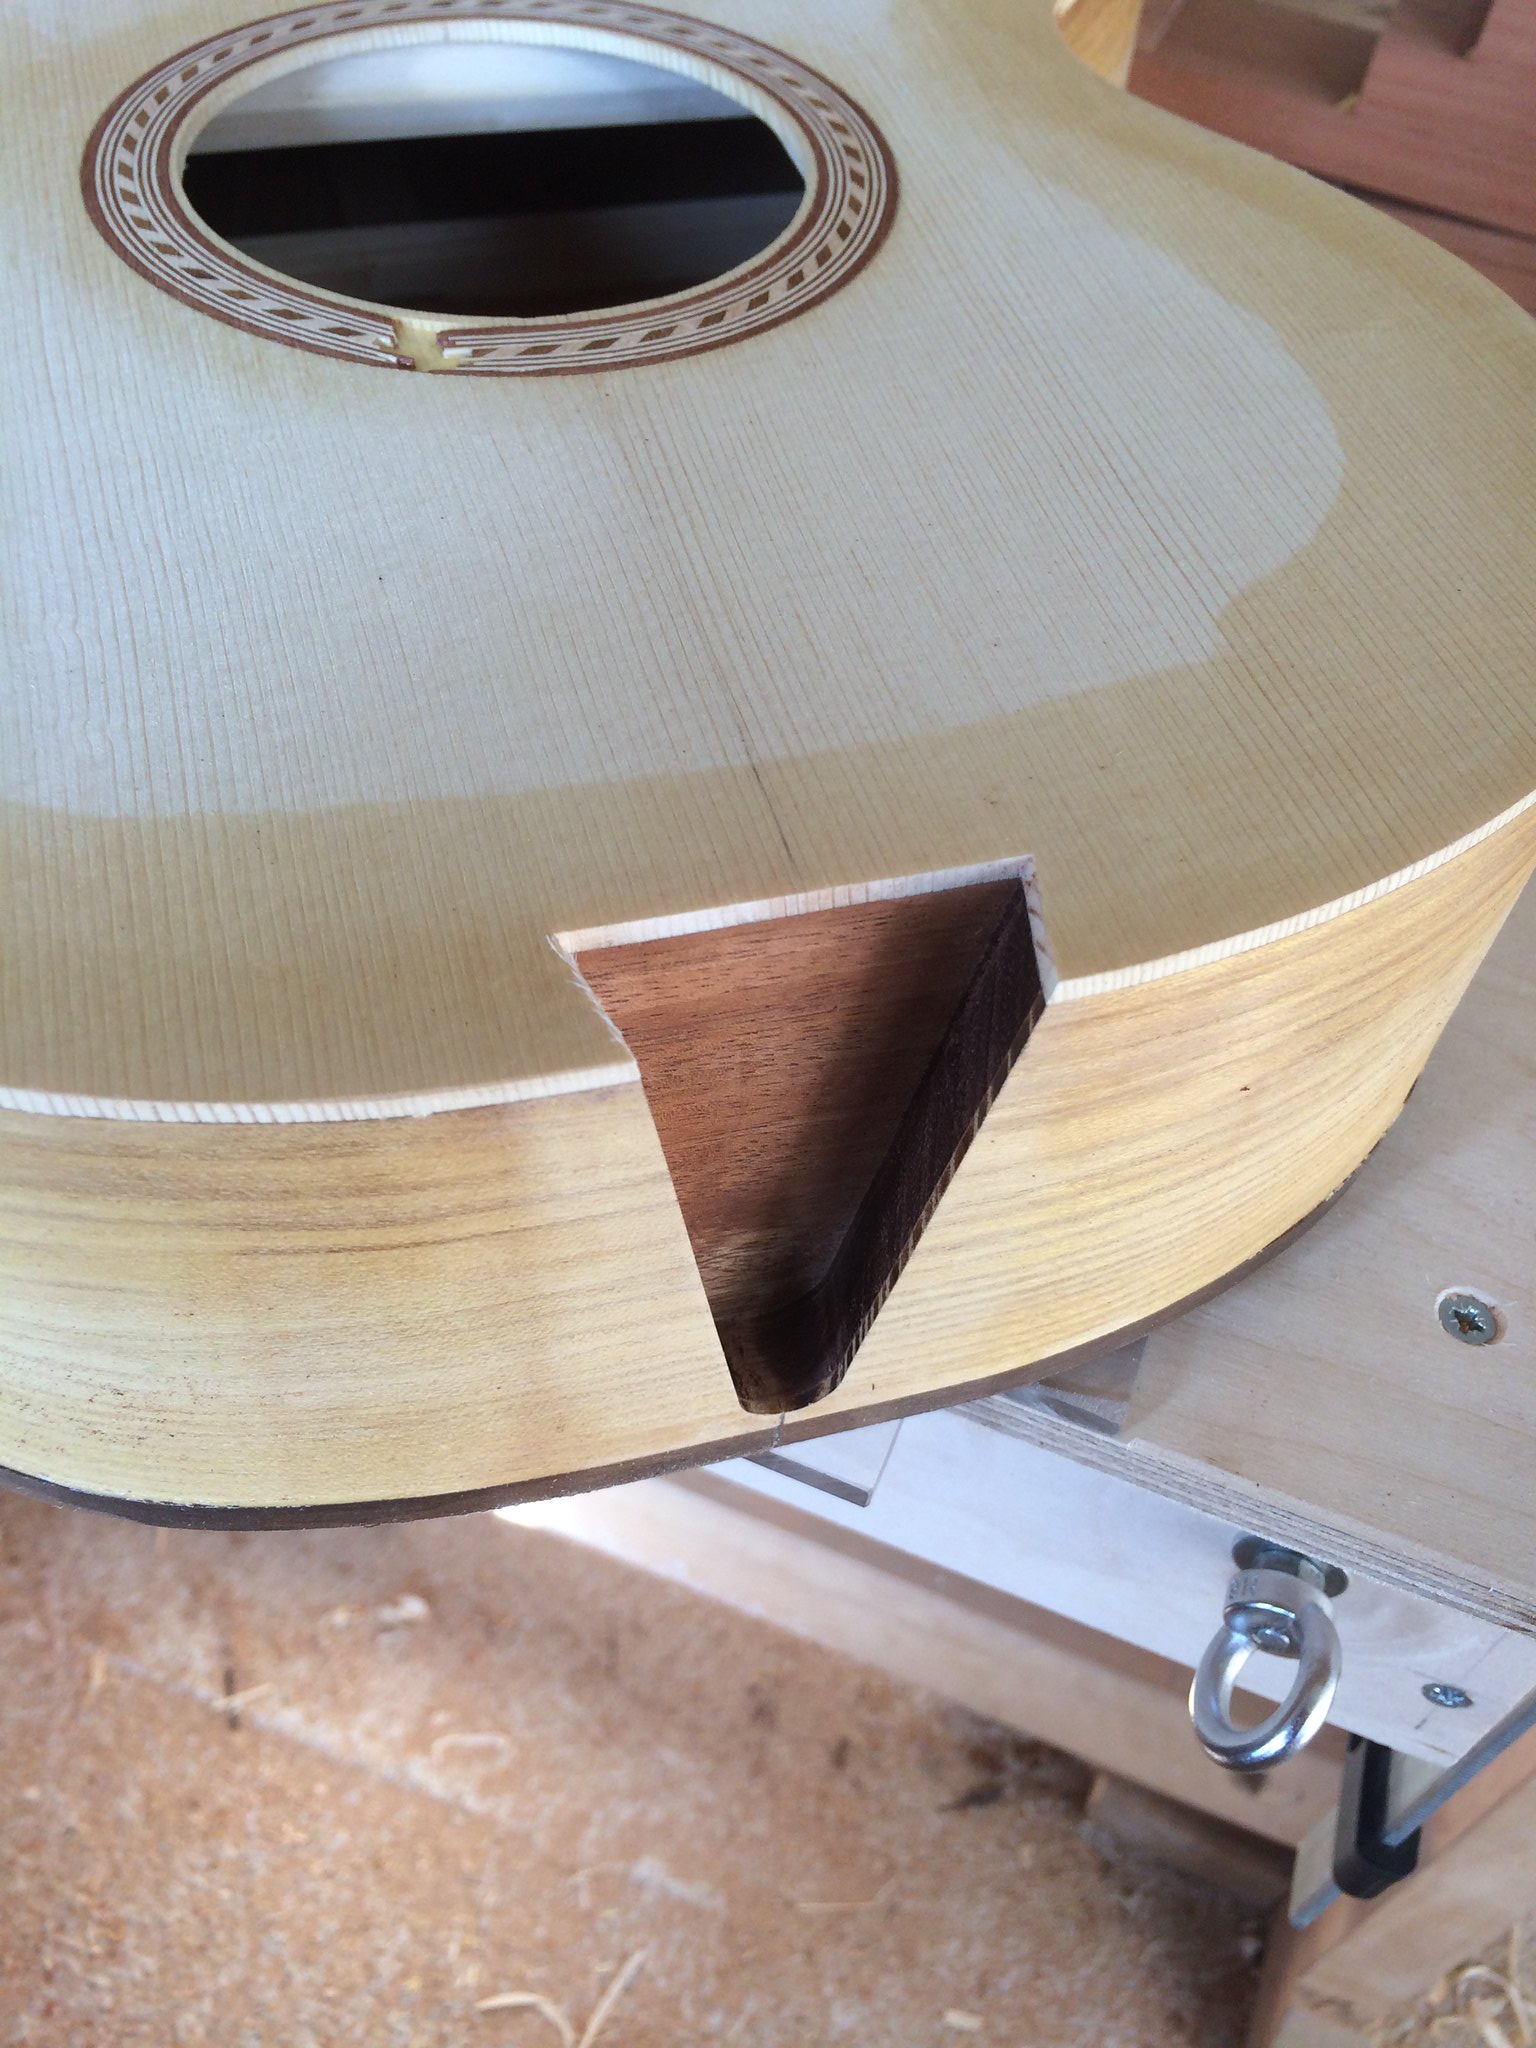 Apartian twins Apartian twins by keith ambridge, on Flickr The tennon jig 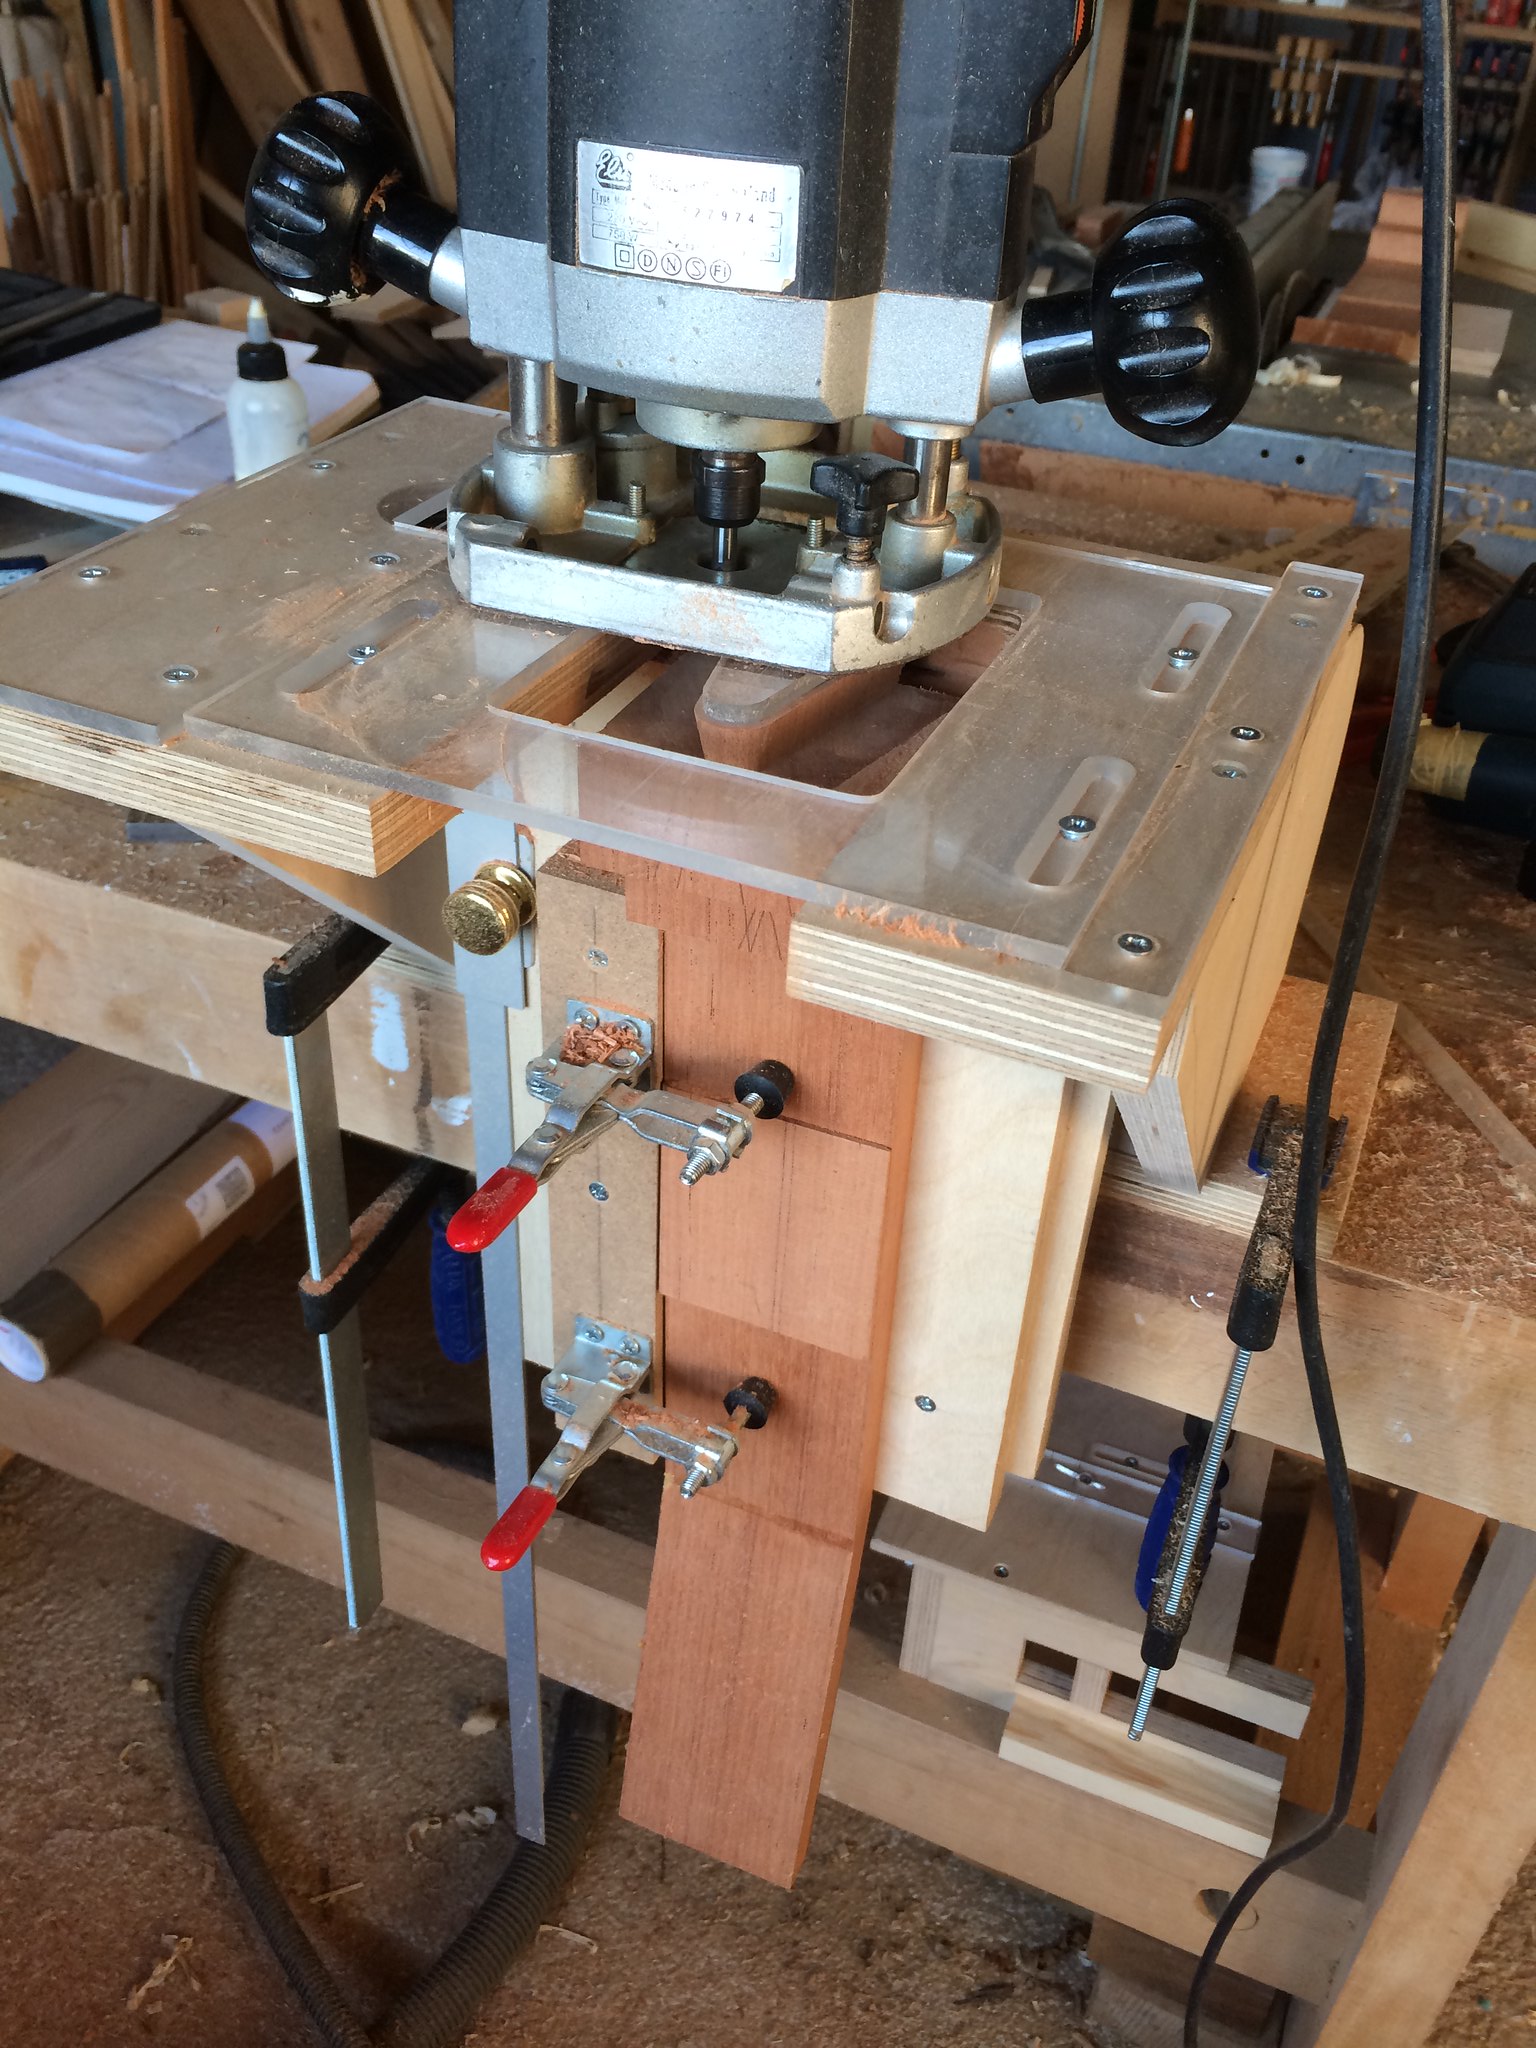 Apartian twins Apartian twins by keith ambridge, on Flickr The test neck joint 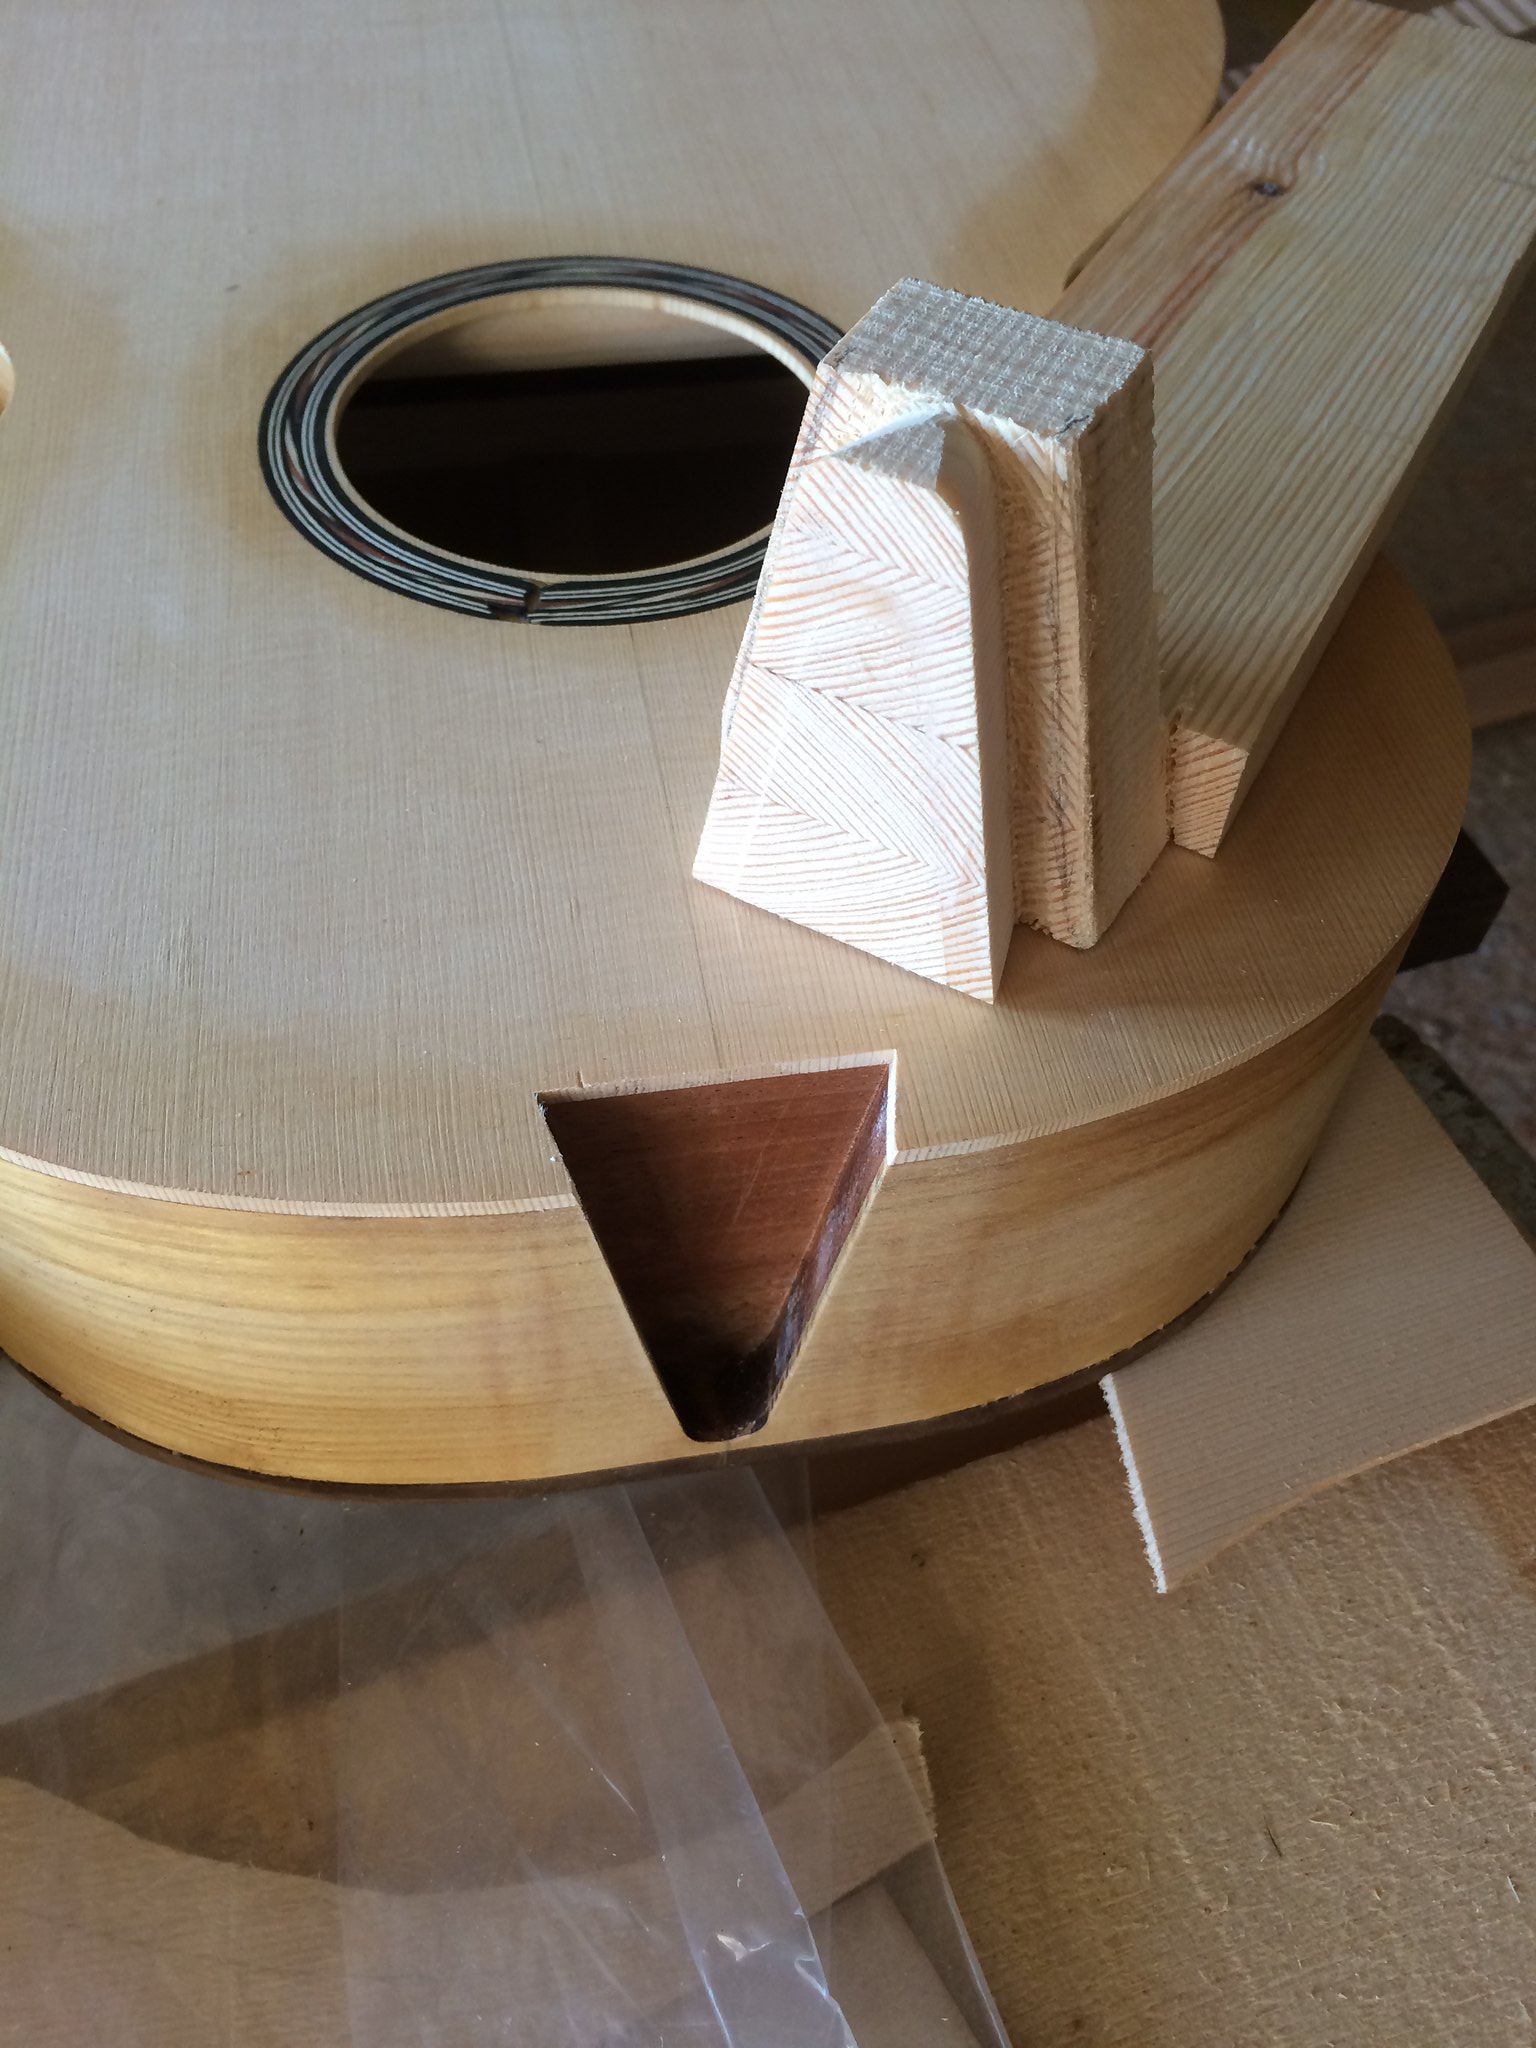 Apartian twins Apartian twins by keith ambridge, on Flickr and the real thing  Apartian twins Apartian twins by keith ambridge, on Flickr Ready for some handwork for a snug fit. I think if I had square shoulders rather than slope, I could have got a bang on fit straight off the router! All in all, very happy with todays efforts! |
|
|
|
Post by keithambridge on Nov 21, 2018 16:44:33 GMT
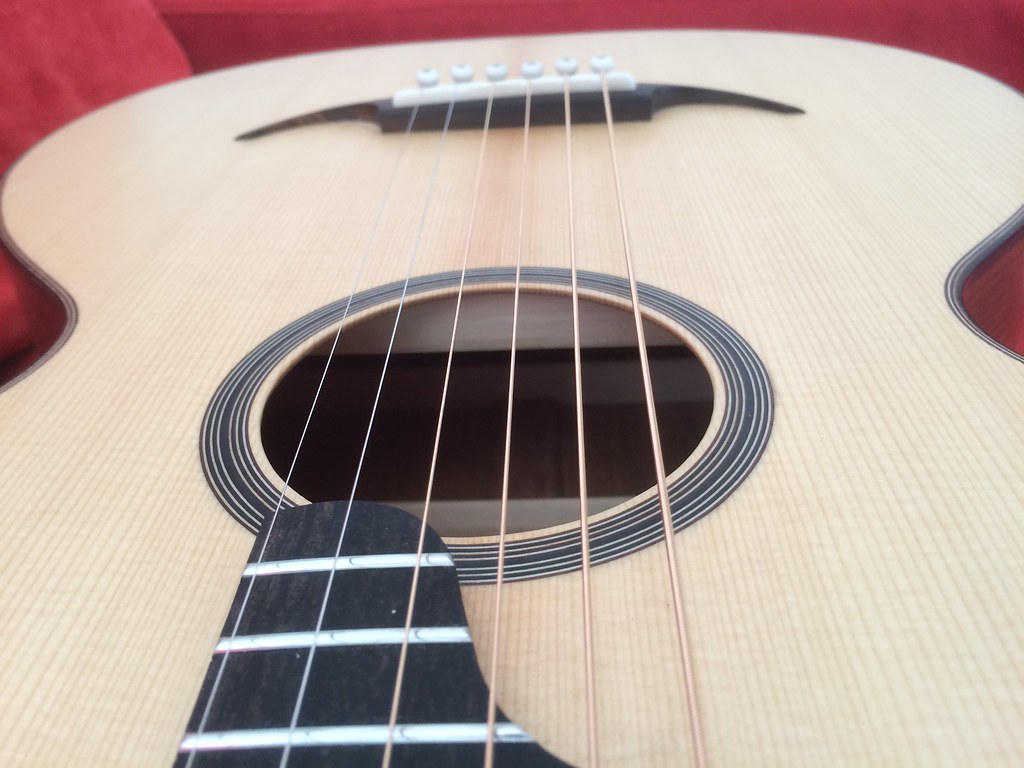
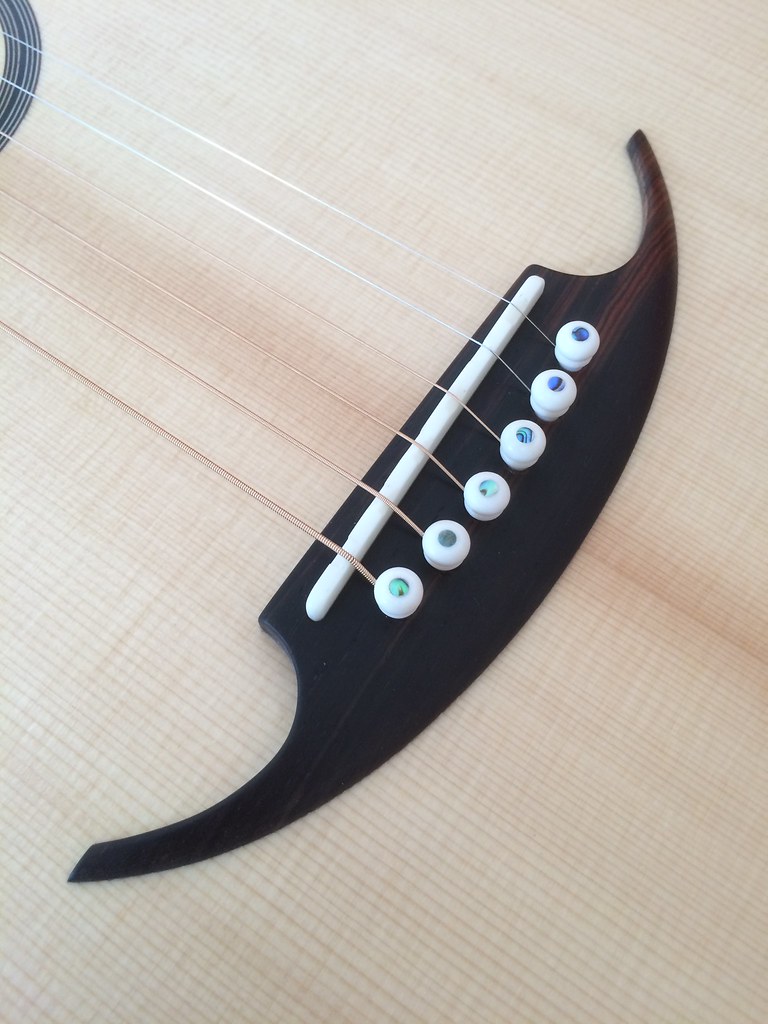
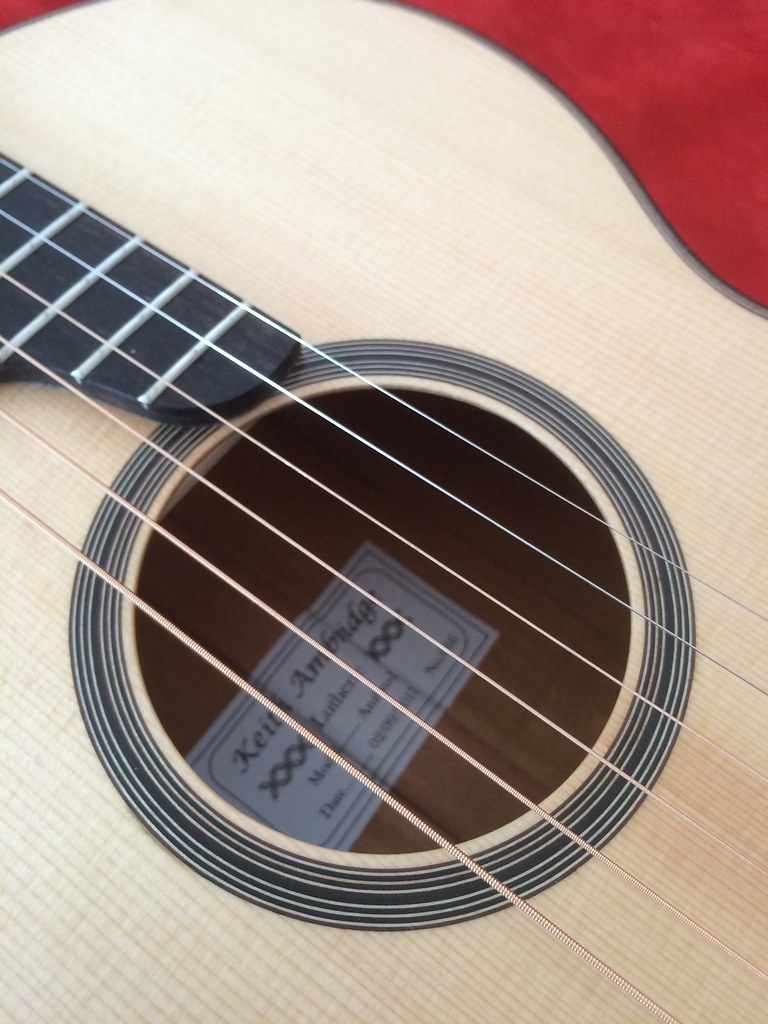
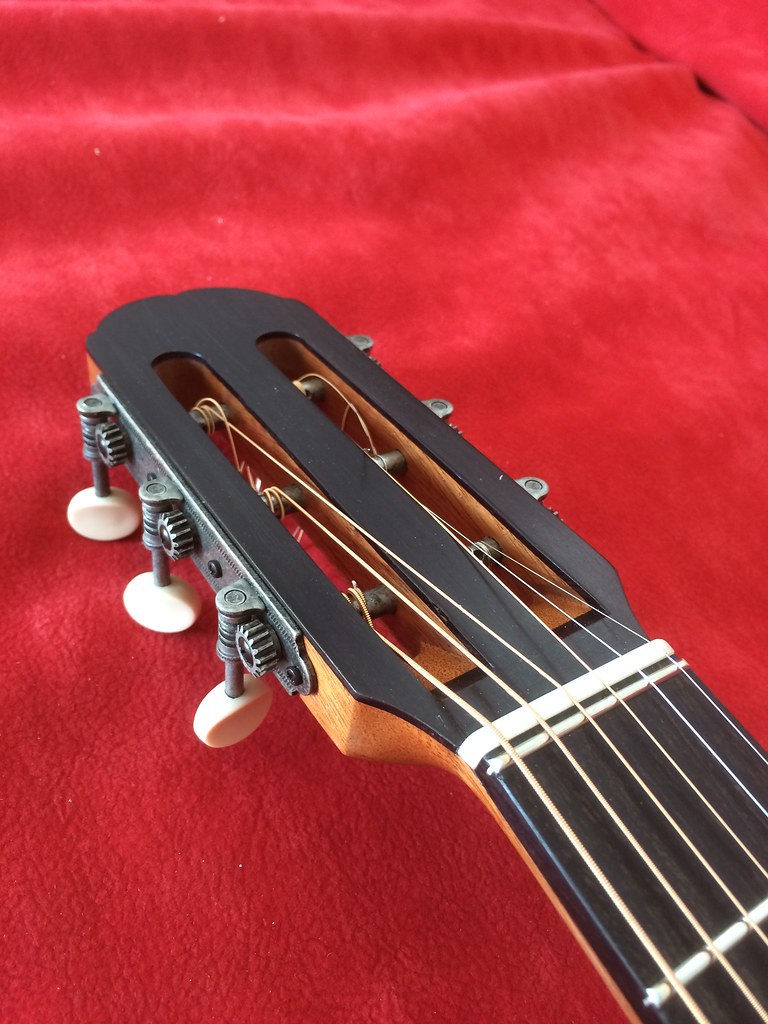
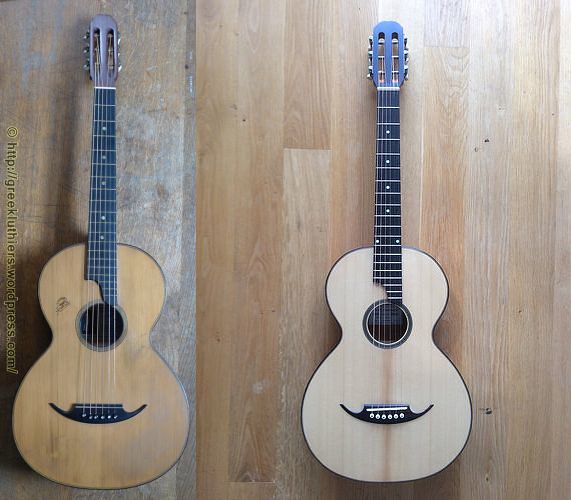
Hi all, It's been a little over a year since my last build. That was my "Gregory Apartian" copy, a 1940's Greek made parlor guitar particularly suited to Rembetika music. I've had a lot of encouraging (not electrical) feedback about that guitar so I decided to make another pair of them to see if they will sell! I'm making a pair because I figure "think once, do twice" saves time! I'm at the body binding stage at the moment. I haven't really done much neck yet except gluing up the blank and the moustache bridges still need carving. Hopefully the photos will feature some of the time saving tools and jigs we all love, and some ways of getting around problems! Anyway, a few pictures to be going on with Not identical twins! 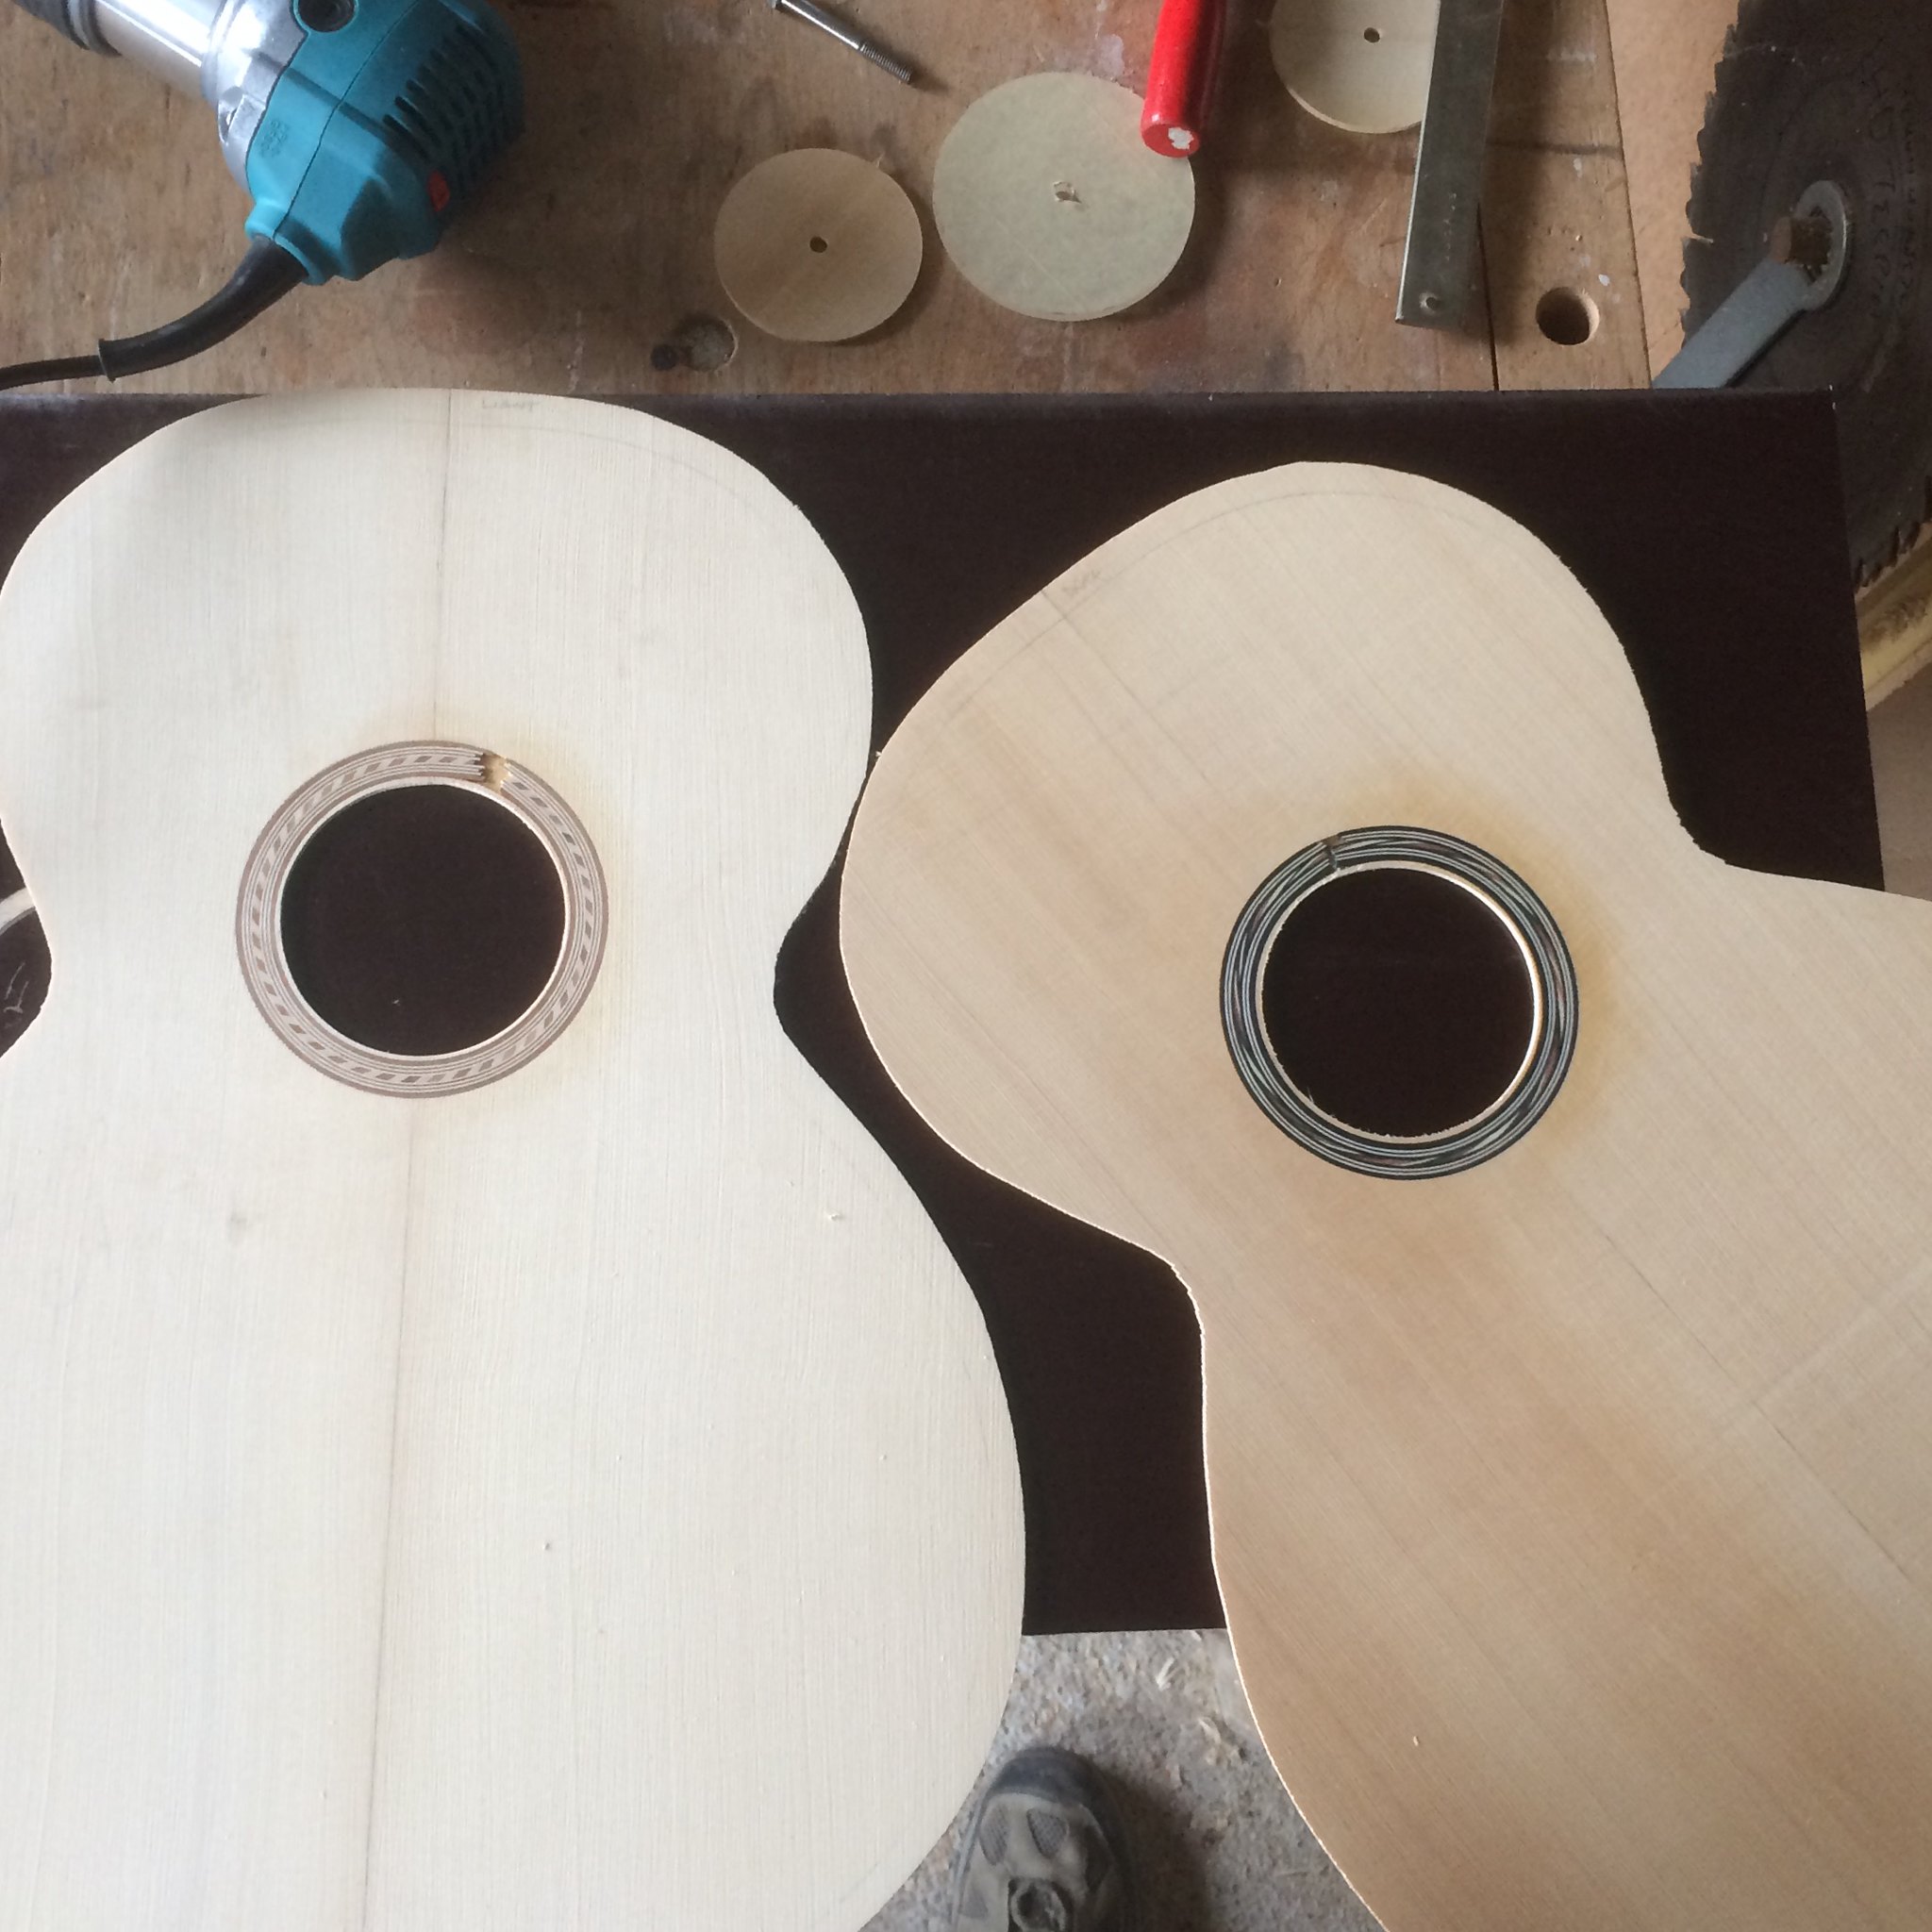 Apartian twins Apartian twins by keith ambridge, on Flickr 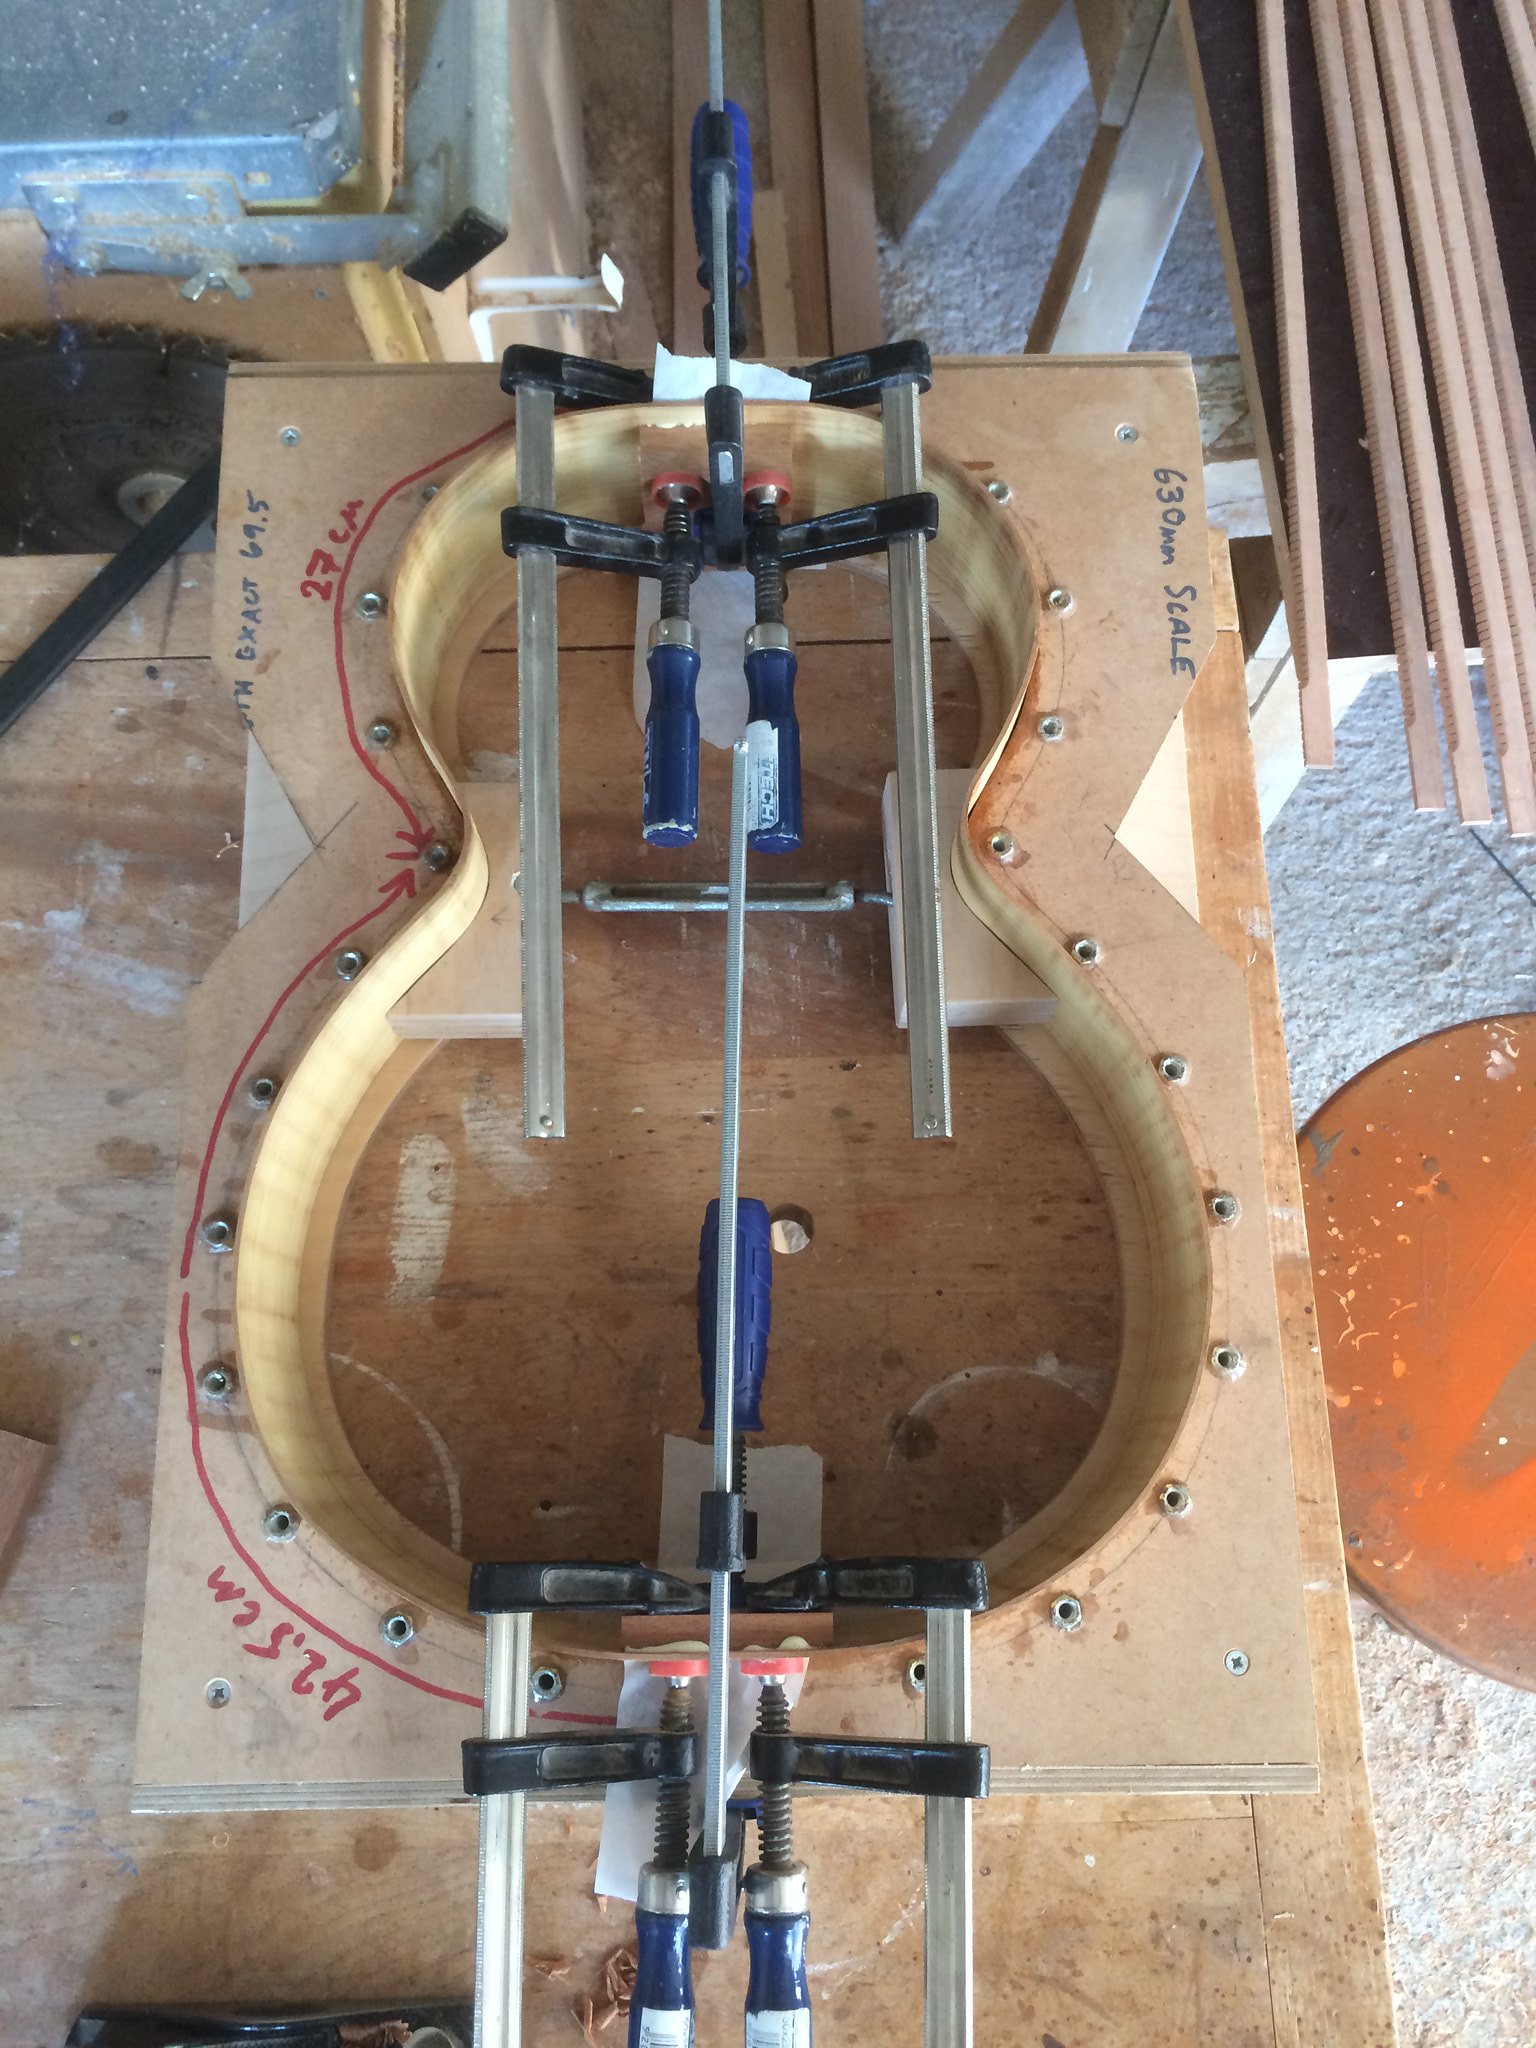 Apartian twins Apartian twins by keith ambridge, on Flickr Reverse kerf linings 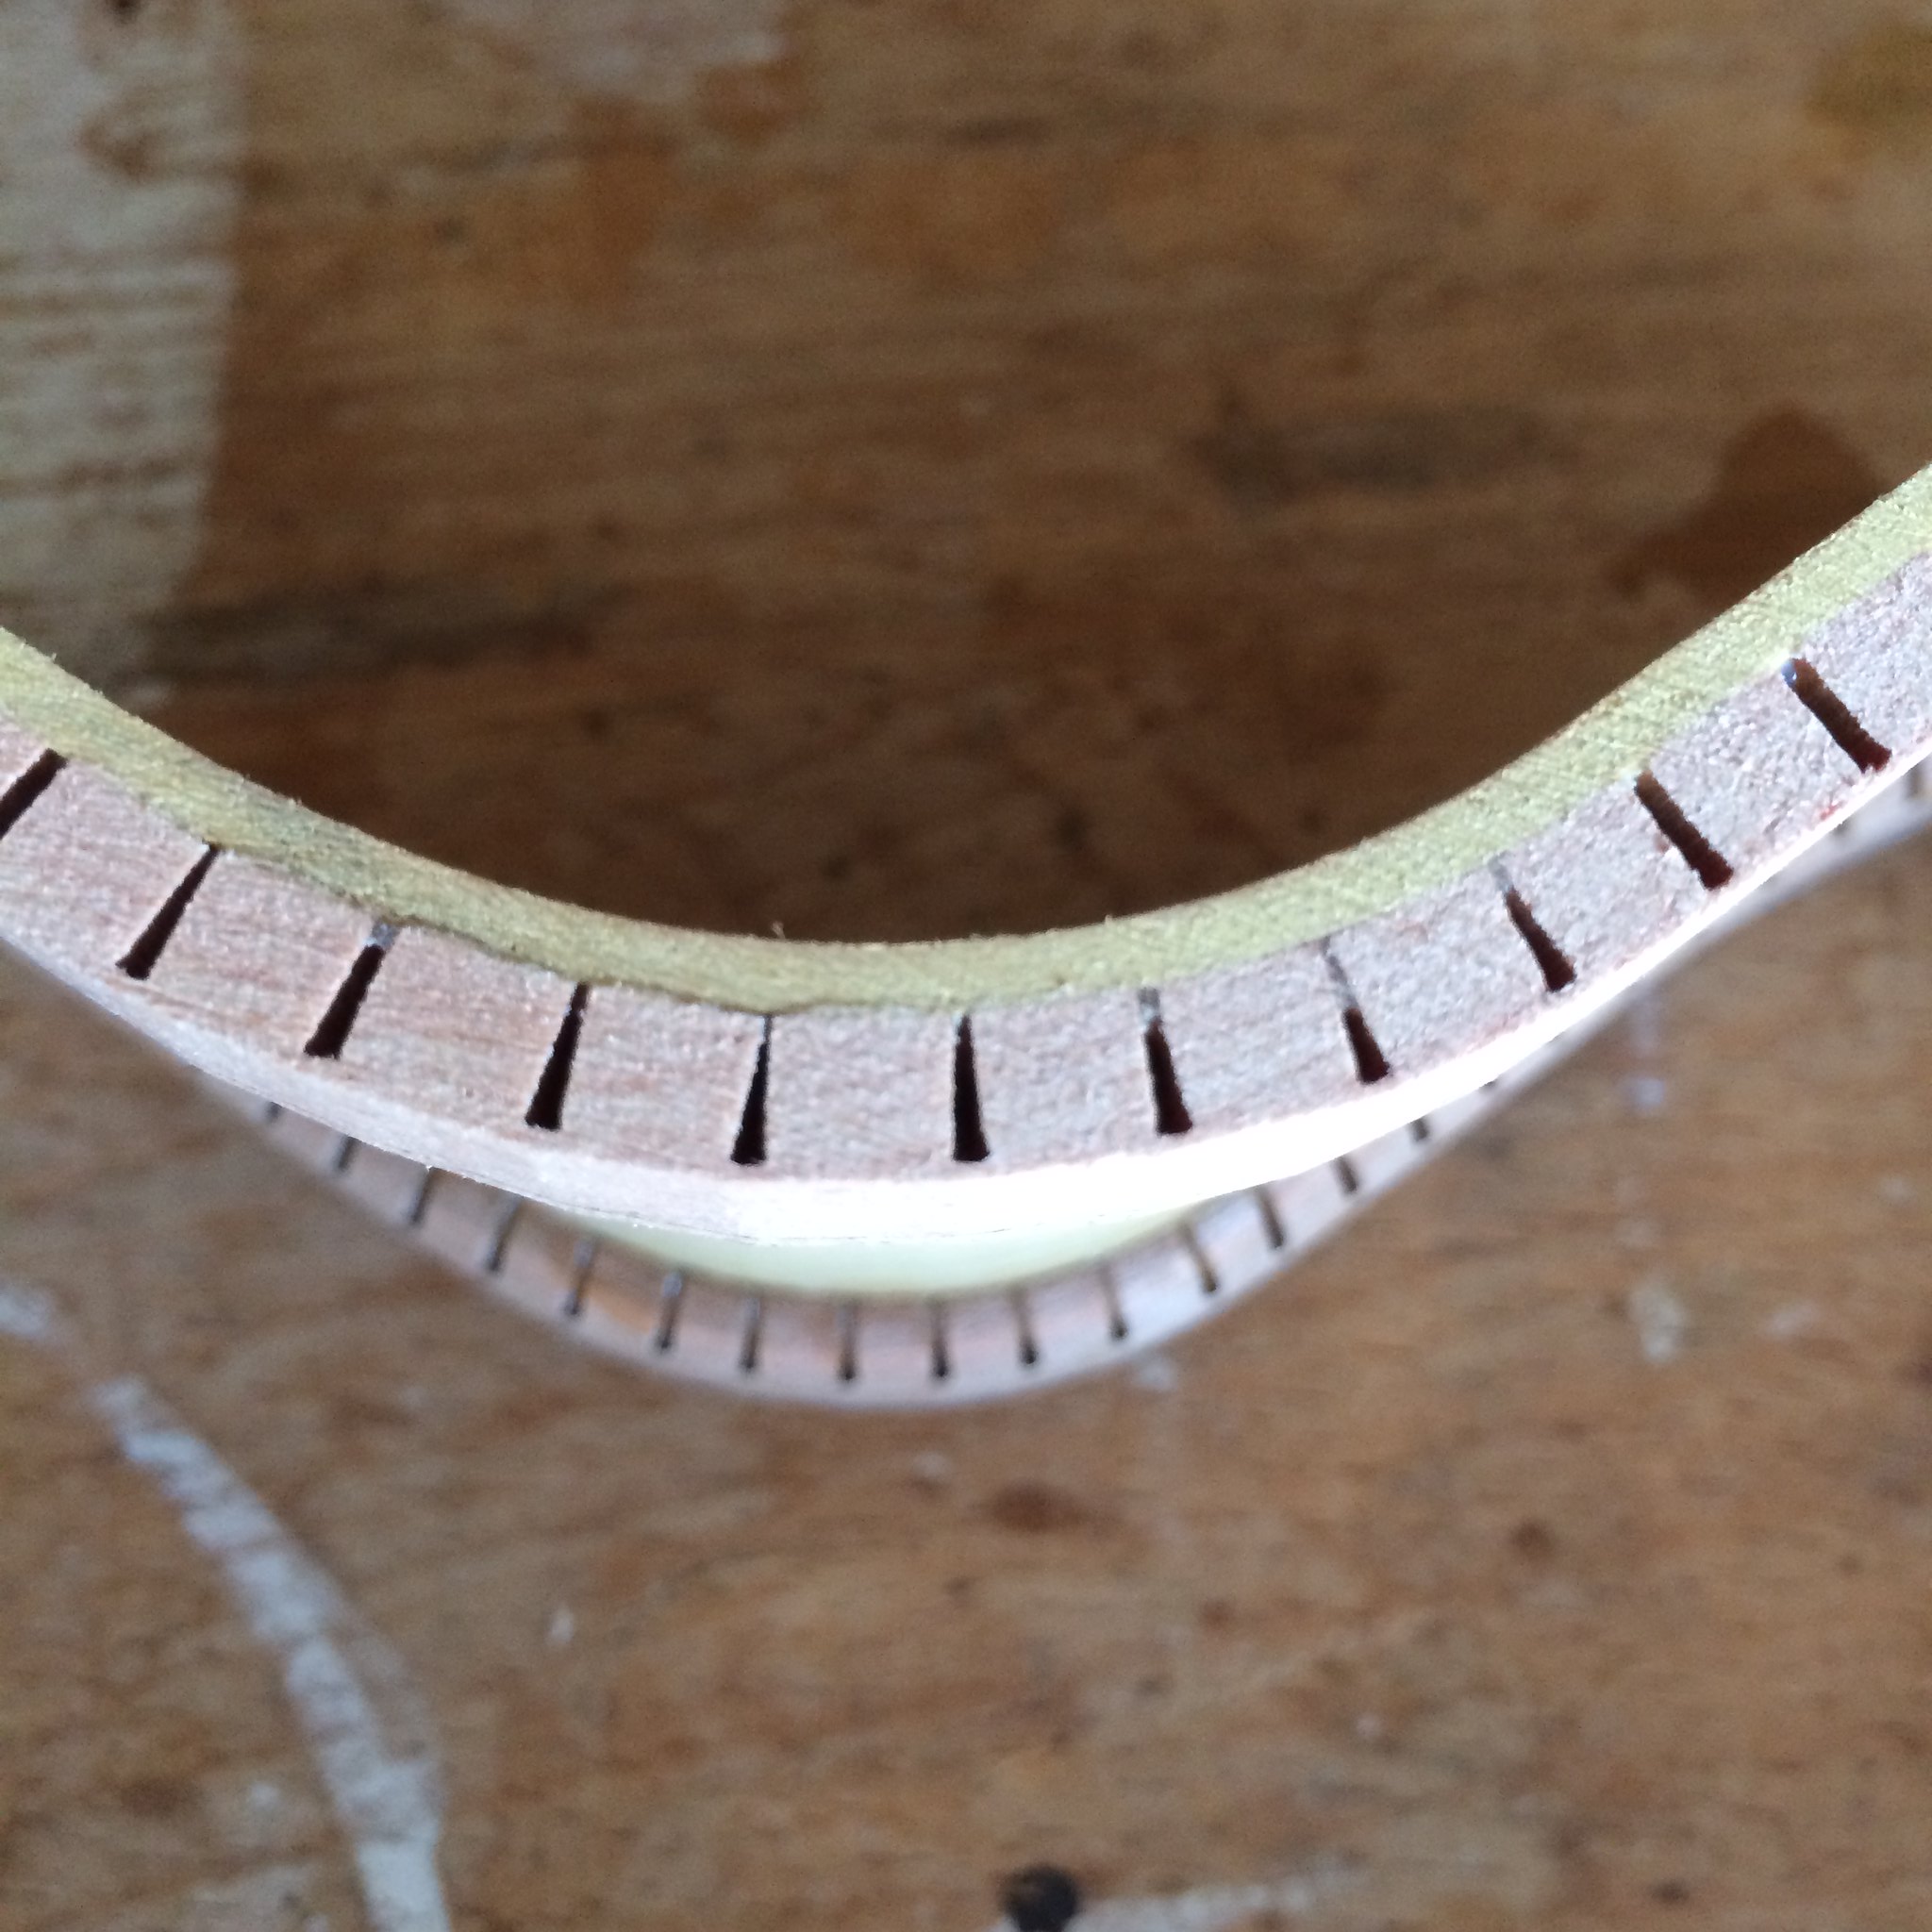 Apartian twins Apartian twins by keith ambridge, on Flickr Go bar deck  Apartian twins Apartian twins by keith ambridge, on Flickr Mulberry backs and sides 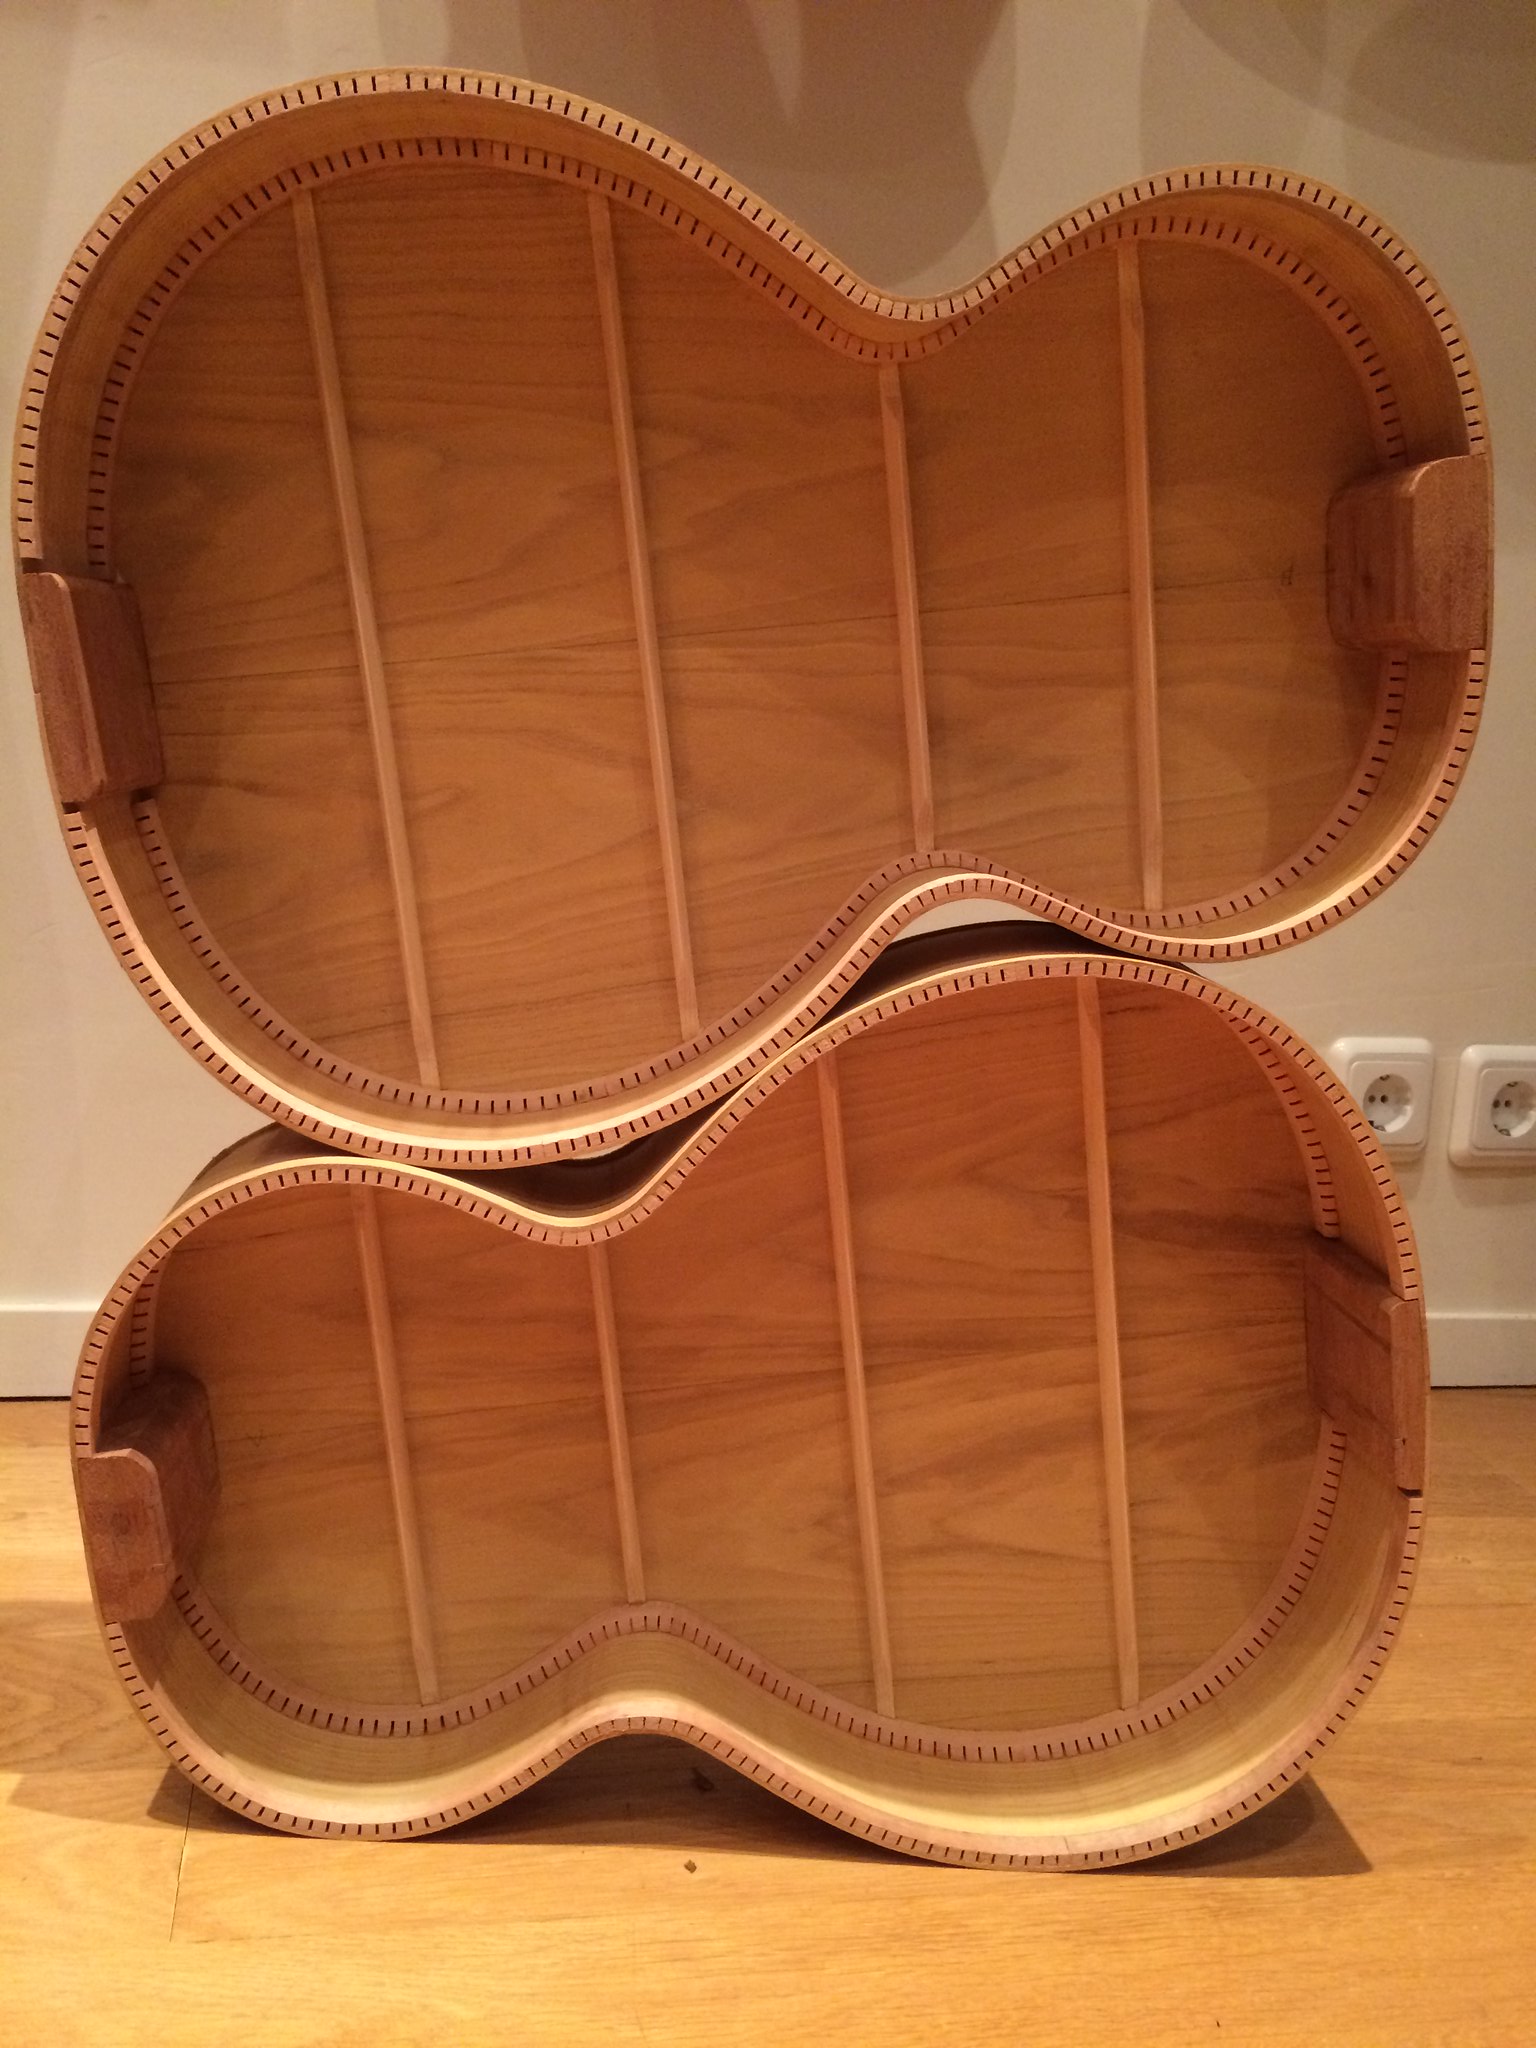 Apartian twins Apartian twins by keith ambridge, on Flickr Closing the box 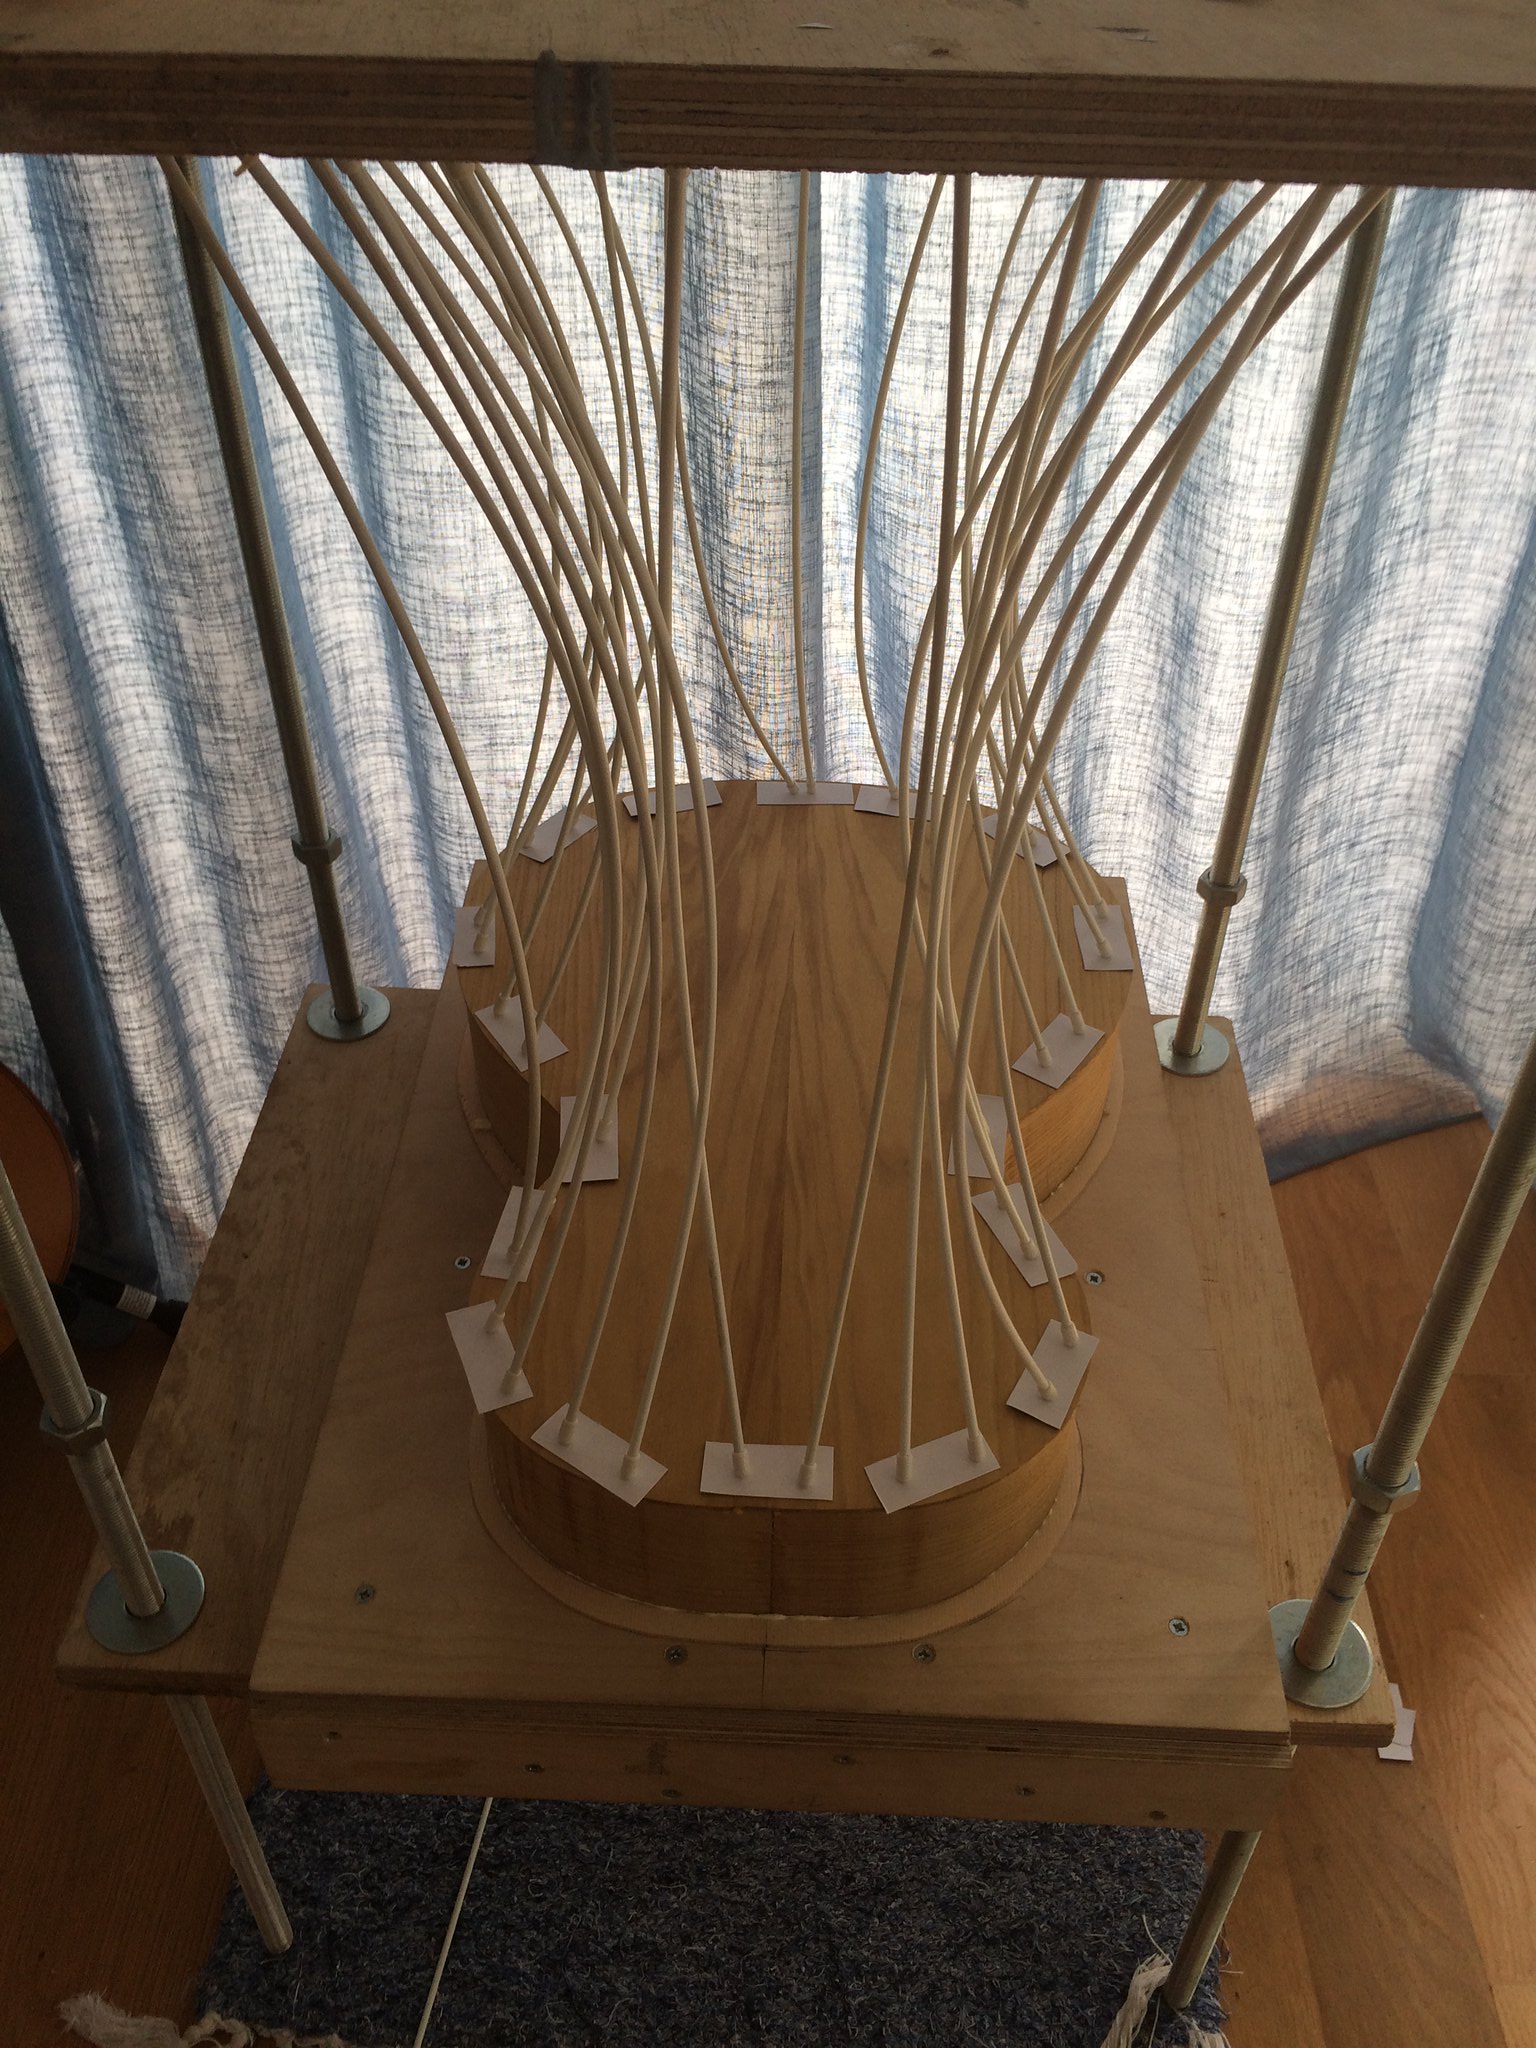 Apartian twins Apartian twins by keith ambridge, on Flickr 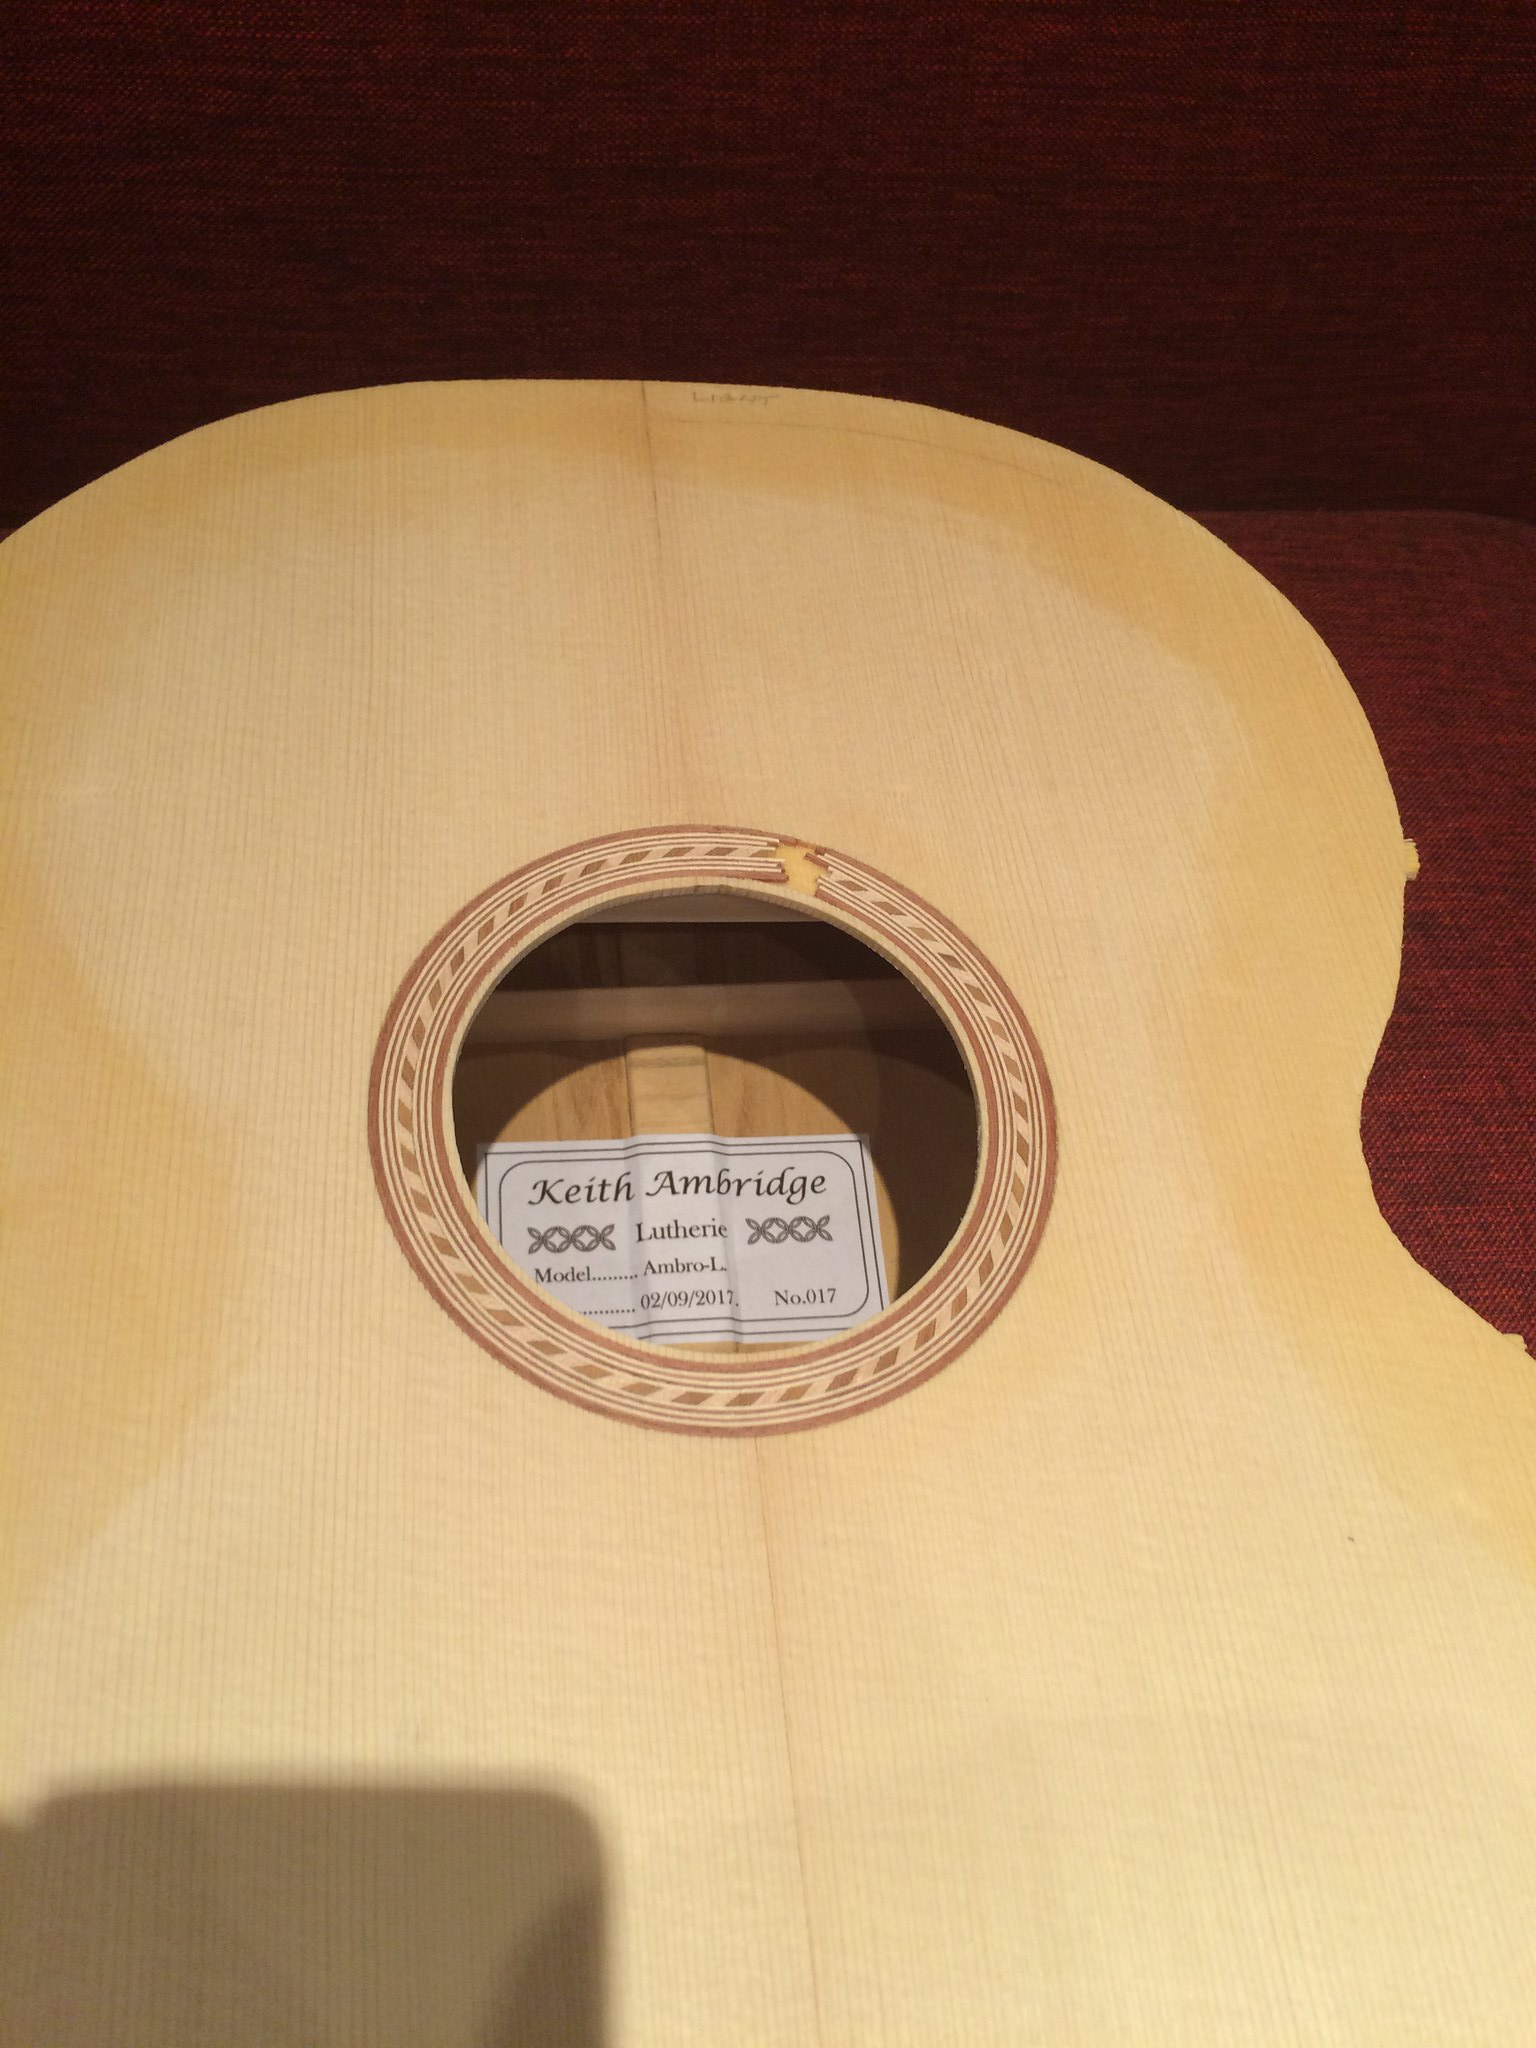 Apartian twins Apartian twins by keith ambridge, on Flickr This is where I'm at today! 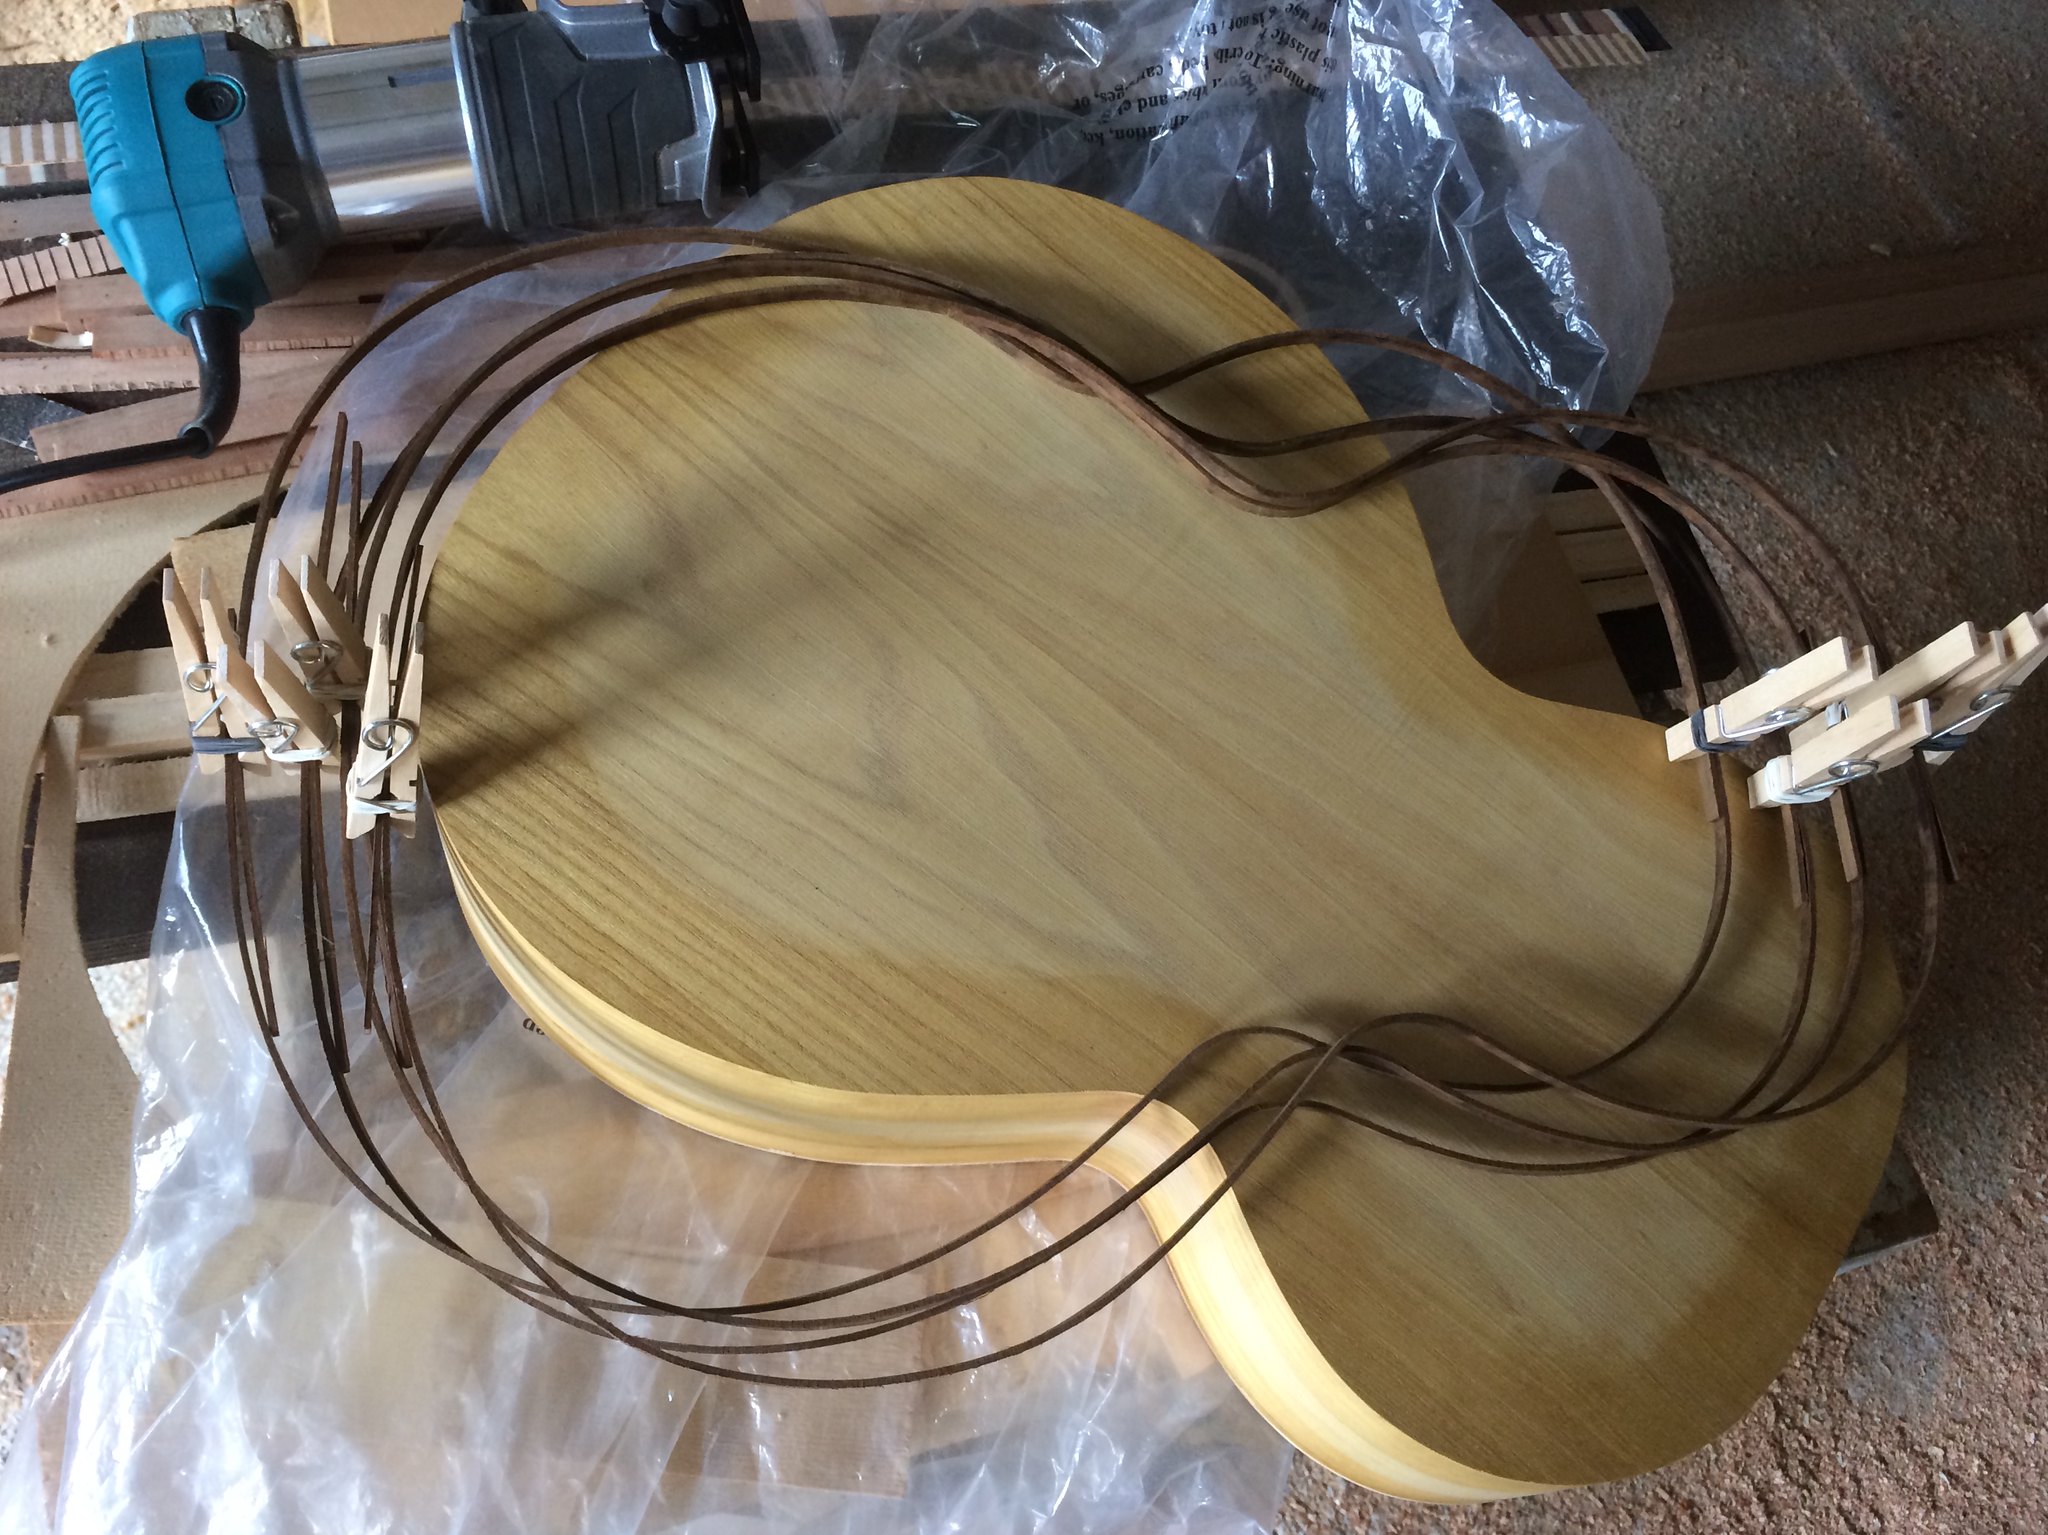 Apartian twins Apartian twins by keith ambridge, on Flickr |
|
|
|
Post by keithambridge on Nov 21, 2018 16:13:01 GMT
Welcome aboard Oli, it's always good to see another Luthier join the gang!
|
|
|
|
Post by keithambridge on Sept 22, 2018 11:26:54 GMT
Good luck with this Pete, I shall be keenly following this thread!
Keith.
|
|
|
|
Post by keithambridge on May 24, 2018 13:03:33 GMT
Francis,
that curved palm sander looks like a very useful piece of kit. Please tell where one can be found!
|
|
|
|
Post by keithambridge on Oct 5, 2017 15:45:52 GMT
|
|
|
|
Post by keithambridge on Sept 28, 2017 11:58:24 GMT
It's my soon to be patented compensation reminder (+,-)!
|
|
|
|
Post by keithambridge on Sept 25, 2017 16:58:19 GMT
Having nearly completed my latest project I thought there might be some use for a "Tools" thread. Luthiers have always had to re design the wheel to get where they are going and I think it could be very useful (or knowing this forum "amusing") to share some ideas! My first offering is the bridge clamp I used to stick the awkward moustache bridge on the Gregory Apartian Guitar. First I located the bridge with a couple of bits of coctail stick through the ends of the saddle slot and then drilled out the two E string pin holes. The clamp consists of two 4mm bolts fed up through the E string holes, two nylon washers (to protect the bridge) two Plexiglass "wings" and two kitchen drawer knobs with 4mm inserts. The wings are threaded and have a 5mm bolt with protective plastic cap on each. I think the pictures will explain the rest! 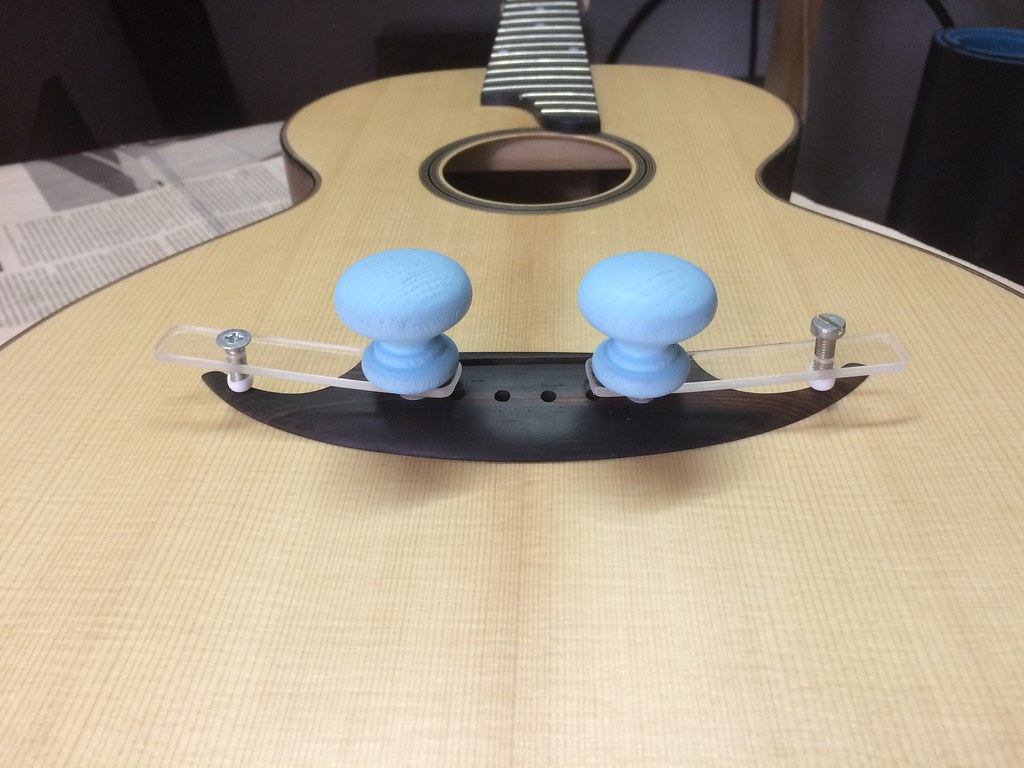 Untitled Untitled by keith ambridge, on Flickr 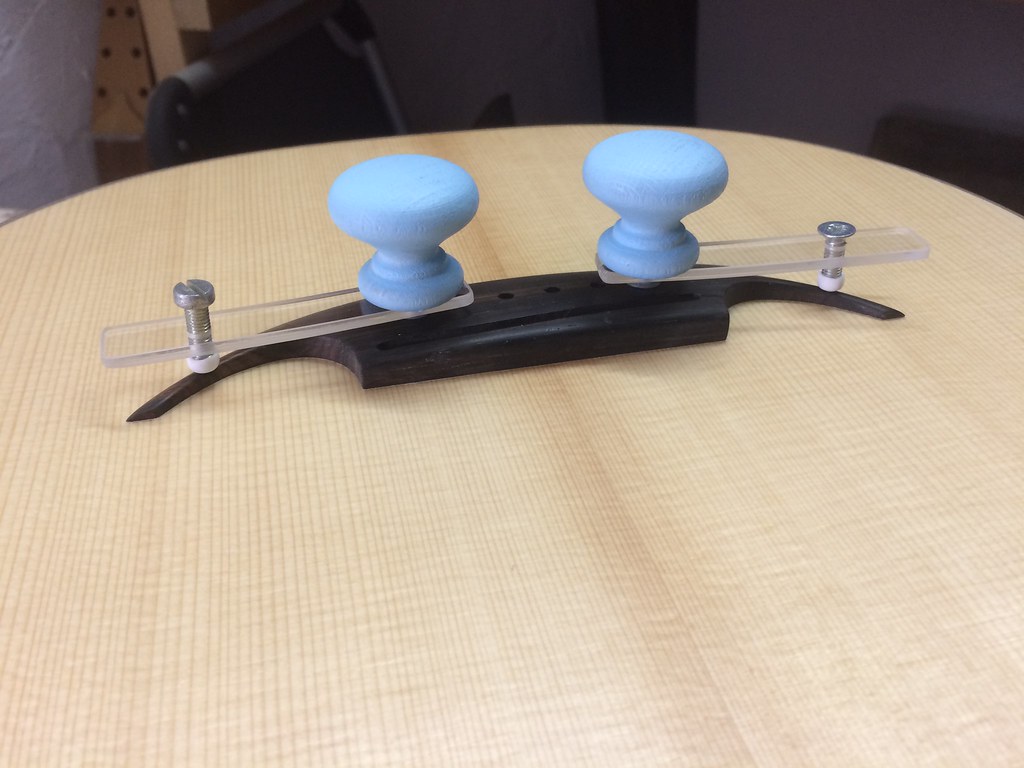 Untitled Untitled by keith ambridge, on Flickr I got very good even squeeze out of glue and access around the bridge made cleanup easy! |
|
|
|
Post by keithambridge on Sept 24, 2017 14:22:23 GMT
Very nice looking instrument. Will we hear a recording in time? Please. Thank you and certainly, I'll just need to find someone that can play it!!! |
|
|
|
Post by keithambridge on Sept 24, 2017 13:12:12 GMT
|
|
|
|
Post by keithambridge on Sept 15, 2017 7:45:20 GMT
I was a bit stressed about masking the bridge, mainly about tearing the grain out when removing the waste tape. But, with another great tip from the master it was a doddle. Just a drop of white spirit on a very fine brush following the tapes release line!  Untitled Untitled by keith ambridge, on Flickr  Untitled Untitled by keith ambridge, on Flickr Another smile for the day! |
|